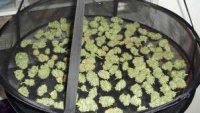
420's Sherlock Holmes' FFOF Soil, Bakerstreet C.R.E.A.M. Cheese Autoflower, Grow Journal 2019

August 25 2019 - Update

Images:


IMG_20190825_201153.jpg

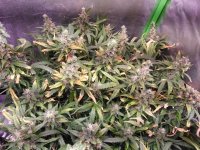
Bakerstreet #1 - Hanna Hemp - Looks healthy so far - budlets are exposed to light and air - limited pruning.


IMG_20190825_201215.jpg

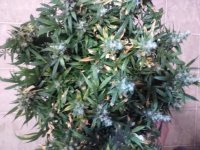
Bakerstreet #2 - Henna Hemp - Looks healthy so far - budlets are exposed to light and air - heavy pruning


IMG_20190825_222524.jpg

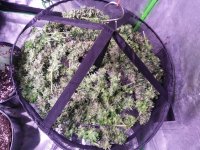
C.R.E.A.M. #1 - Cowgirl Hemp - Looks healthy so far - budlets are exposed to light and air - only 8 primary colas.


IMG_20190825_222513.jpg

Cheese #1 - Gouda Hemp - Looks healthy so far - buds are exposed to light and air - only 16 top colas.


Environment #1 - Autoflower Veg/Flower:

I am tracking the RH, canopy temperature and VPD with the Inkbird IBS-TH1.

Environment # 1 is mutually exclusive from Environment # 2.

The exhaust fan is running 24-0 to prevent a rise in temperature & RH, and to prevent smells in the house.

I do not want to turn off the exhaust fan because it will smell up the house.

The humidifier is turned off.

The dehumidifier is turned off.

The three X6 lights are running 1 cycle of "20 hours lights-on and 4 hours lights-off".

Two of the X6 lights are 30 cm (12") above the canopy centered over the 2 flowering plants.

The third X6 light is turned off.

The three X6 lights give off 2°C (4°F) of heat each.

CO2 is refreshed frequently because the exhaust fan and the oscillating fan are always on.

*** The room temperature is running around 26°C (79°F) and RH 43%.

*** The environment humidity is running steady around RH 50% with lights-on.
*** The environment humidity peaks up to RH 65% with lights-off.

*** The environment temperature is running steady around 29°C (85°F) with lights-on.
*** The environment temperature dips down to 22°C (72°F) with lights-off.

*** VPD is running steady about 1.66 - Danger Zone: Over / Under Transpiration - lights-on.
*** VPD is peaking at about 0.65 - LowTranspiration: Propagation/ Early Veg - lights-off.

*** With the exhaust fan on 24-0, it keeps pulling air in from the room.

*** To change the VPD in the tent, I have change the environment parameters in the room.

*** To decrease VPD for lights-on ... I need to either raise the room RH by 5% or decrease the room temp by 2°C (4°F) .


*** The VPD Values I am Using For This Grow (Version 1)


Environment #2 - Photoperiod Flower:

I will start tracking RH, canopy temperature and VPD again when Environment #1 is dialed-in.

Environment # 2 is mutually exclusive from Environment # 1.

The exhaust fan is running 24-0 to prevent a rise in temperature, RH and to prevent smells in the house.

Environment # 2 does not have a humidifier.

Environment # 2 does not have a dehumidifier.

The Mars Hydro TSL 2000W light is running 1 cycle of uninterrupted "12 hours lights-on and 12 hours lights-off".

The Mars Hydro TSL 2000W light is 30 cm (12") above the canopy centered over all plants.

The Mars Hydro TSL 2000W light does not give off a lot of heat.

CO2 is refreshed frequently because the exhaust fan and the oscillating fan are always on.

*** The VPD Values I am Using For This Grow (Version 1)


Growth Stage:

2 Bakerstreets: Day 7/ Week 13 ... Day 91 ... week 5 flower.

*** They got their pistels on August 05, 2019.
*** They are due for the final bloom flush/feed(CGRSFS, BPSS, CS, BTTE) on September 01, 2019.
*** They should be ready to harvest between September 16, 2019 and September 23, 2019.

*** Photoperiod Stages: 5 days Germination, 1 week seedling, 2-8 weeks veg, 6-12 weeks flower, 4-12 weeks cure
*** Allow 1 day to 3 days of dark before switching to 12-12
*** Pistels show up about 14 days (2 weeks) after switching to 12-12


1 C.R.E.A.M.: Day 7/ Week 12 ... Day 84 ... late flower.
1 Cheese: Day 7/ Week 12 ... Day 84 ... late flower.

*** They are in the final 2 weeks ... Flush, Full-On Bloom Nutes, Stem Split, Three Days Dark, Harvest!
*** They should be ready to harvest between August 18, 2019 and August 25, 2019.
*** I need to check the pistels and trichomes to verify the harvest date.

*** Autoflower Stages: 5 days Germination, 1 week seedling, 3 weeks veg, 3 weeks pre-flower, 3-6 weeks flower, 4-12 weeks cure
*** Pistels show up about 35 days (5 weeks) after Germination
*** Flowering takes about 42 days to 56 days (6 weeks to 8 weeks) after pistels show up


Watering and Feeding:


Bakerstreets' Regular Flush/Feed:

*** Next regular feed ... 6 litres (1.6 gallons) - pH 6.3 water - around August 26, 2019.
*** Expecting about 1% of run-off. Stop watering right at run-off.


C.R.E.A.M.'s Bloom Feed:

pH: 6.62
ppm: 1272

4 litres (1.0 gallon) - Full Dose - Week 12 - CGRSFS, CS, BPSS, BTTE


Cheese's Bloom Feed:

pH: 6.62
ppm: 1272

8 litres (2.0 gallons) - Full Dose - Week 12 - CGRSFS, CS, BPSS, BTTE


C.R.E.A.M.'s Bloom Feed & Cheese's Bloom Feed:

*** Next bloom feed ... 6 litres (1.6 gallons) - Full Dose - Week 12 - CGRSFS, CS, BPSS, BTTE around August 28, 2019 .
*** Expecting about 1% of run-off. Stop watering right at run-off.


*** I will do a regular feed(CGRSFS, RME)/feed(CGRSFS, BPSS, CS, BTTE)/water cycle for all regular weeks.
*** I will do full-on bloom feeds(CGRSFS, BPSS, CS, BTTE) for the last two weeks prior to harvest.


*** For details on my feeding schedule refer to here: The Different Feeds I need For This Grow (Version 5)


Activities:

My priority is to expose the growth nodes to light and air because they are going to become colas.


Notes:

The priority has to be to expose the growth nodes/buds to light & air, and to keep the canopy even and flat.

I am going to let the plants grow naturally now and stop tucking the stems into the ScrOG. For details on this decision, please refer here: How long to Veg Photoperiods? - Version 2

I am confident the new Mars Hydro TSL 2000W light is pentrating into the plant, so a lot of pruning is not a good idea.


The Bakerstreets are now getting some height and the budlets are filling out.

I did not prune Bakerstreet #1, it has an even canopy and I am interested in how it will develop.

I did prune Bakerstreet #2 heavily to expose the budlets to light and air and I am interested in how it will develop.


The colas at the ends of the C.R.E.A.M.'s & Cheese's quadline lines are much bigger than the side colas.

The C.R.E.A.M.'s pistels/trichomes & Cheese's pistels/trichomes indicate they are not ready for harvest yet.


With the environment #1 exhaust fan on 24-0, it keeps pulling air in from the room.

To change the VPD in the tent, I have change the environment parameters in the room.

To decrease VPD for lights-on ... I need to either raise the room RH by 5% or decrease the room temp by 2°C (4°F) .


*** I am looking forward to starting my LUX analysis soon.


Lessons Learned:

Cannabis Cultivation: The Light Spectrum and Ways to Raise THC Levels

By RoyalQueenSeeds

Creating an ideal environment for cannabis plants is only achievable by understanding the principles of nature - the light spectrum is a factor that cannot be ignored.

Most cannabis growers have multiple objectives in mind when planning an indoor grow. Drafting scenarios to achieve higher yields, increase THC levels, or simply to improve the overall health of a plant is an integral part of their hobby. This element of strategic planning involves the challenge to link knowledge of different scientific fields and to match those findings to a technical solution that helps to achieve predefined goals. Besides dedication and passion, it is the willingness to learn that differentiates good growers from future experts – so let us try to grow the royal way and learn what it takes to cultivate cannabis of exceptional quality. Today, we are looking at fundamentals of physics, and learn how the light spectrum affects the growth of a cannabis plant.

0_GraphiEN.png


WHAT IS THE LIGHT SPECTRUM?
The sun emits energy in the form of solar radiation including gamma rays, x-rays, ultraviolet light, visible light, and even radio waves. Life on Earth is only possible because the ozone layer blocks this radiation, and reflects most of it back into space. This filtering process only allows wave lengths between 300nm and 1100nm to reach our plants and an even smaller portion of this light is visible to us. It is often referred to as the light spectrum, color spectrum or visible spectrum, and ranges from 380nm to about 750nm.

180-280nm - UVC: Extremely harmful and luckily almost completely absorbed by the ozone layer

280-315nm – UVB: Cause of sunburn and suspected to increase THC levels (!)

315-400nm – UVA: Not absorbed by the atmosphere, commonly known as black light

380-750nm – The visible light spectrum: Bands of wave lengths represent visible colours

700nm-1mm – Infrared light: Not visible above 750nm but noticeable as heat on our skin


0_Inner-Red.jpg


HOW THE LIGHT SPECTRUM AFFECTS GROWTH

Every organism living on Earth needs information what is going on around them to react to environmental changes, and ideally, get a slight advantage over other members of their species regarding natural selection and evolution. Interestingly, cannabis plants receive a lot of their information from the light they’re exposed to, and almost instantly react to different bands of wave lengths - a complex topic to fill books with, but let us focus on the basics first.

1. Vegetative Stage – “Blue” light for healthy leaves (range: 400-500nm; ideal: 460nm)

During the vegetative stage it is recommended to aim for as many leaves as possible, and to make sure plants stay rather compact, don’t stretch too much, and develop strong stems. Indoor growers tend to use metal halide bulbs, compact fluorescent lamps (CFL’s), or T5/T8 lighting fixtures with a blue band of light for the first few weeks to achieve these goals. When cannabis grows in nature, the high angle of the sun in spring and summer allows more “blue” wave lengths to penetrate through the atmosphere, a signal for cannabis plants to grow strong, large and healthy leaves.

2. Flowering Period – “Red” light for giant buds (range: 620-780nm; ideal: 660nm)

When cannabis plants enter the flowering period, highest yields can be achieved by exposing them to a light spectrum that contains lots of “red” wave lengths to promote budding. The rate of photosynthesis peaks when plants are subjected to “red” wave lengths of 660nm although latest NASA findings suggest that even “green” wave lengths, which are not associated as a major factor in photosynthesis, can also have an impact on how plants grow. Seeing a cannabis plant as simple photosynthesis factory is consequently a little hasty. But for now, choosing a lighting solution with a high degree of “red” in its spectrum remains the best way for growers to imitate the shallow angle of the sun in late summer and autumn.


0_Inner-Mountains.jpg


INCREASING THC LEVELS WITH UVB LIGHT – MYTH OR REALITY?

Have you ever wondered why potent cannabis strains often originate from landraces that naturally grow in high altitude regions? There are experts who suspect ultraviolet light, especially a high exposure to UVB wave lengths (280-315nm), to be responsible for an increased THC production. The theory is based on the fact that a high elevation means lesser atmosphere between cannabis plants and the sun, leading to a higher exposure to UV rays. These ultraviolet wave lenghts knowingly damage our skin, and the human body reacts by producing melanin as protection – a cannabis plant assumingly does something similar – it produces more resin and THC as a form of natural sunscreen. It is too early to say if we are dealing with a theory or a cost-effective method to grow better cannabis but the concept seems plausible enough for hands-on experiments. UVB bulbs for reptiles only cost a few bucks; perhaps we should give it a try.


ToDo:

Learn more about ... When Is the Right Time to Harvest Cannabis Plants?

Learn more about pests and nutrient deficiencies.
 
August 26 2019 - Update
Images:


IMG_20190826_203836.jpg

Bakerstreet #1 - Hanna Hemp - Looks healthy so far - budlets are exposed to light and air - limited pruning.


IMG_20190826_203850.jpg

Bakerstreet #2 - Henna Hemp - Looks healthy so far - budlets are exposed to light and air - heavy pruning


IMG_20190825_222513.jpg

C.R.E.A.M. #1 - Cowgirl Hemp - Looks healthy so far - budlets are exposed to light and air - only 8 primary colas.


IMG_20190825_222524.jpg

Cheese #1 - Gouda Hemp - Looks healthy so far - buds are exposed to light and air - only 16 top colas.


Environment #1 - Autoflower Veg/Flower:

I am tracking the RH, canopy temperature and VPD with the Inkbird IBS-TH1.

Environment # 1 is mutually exclusive from Environment # 2.

The exhaust fan is running 24-0 to prevent a rise in temperature & RH, and to prevent smells in the house.

I do not want to turn off the exhaust fan because it will smell up the house.

The humidifier is turned off.

The dehumidifier is turned off.

The three X6 lights are running 1 cycle of "20 hours lights-on and 4 hours lights-off".

Two of the X6 lights are 30 cm (12") above the canopy centered over the 2 flowering plants.

The third X6 light is turned off.

The three X6 lights give off 2°C (4°F) of heat each.

CO2 is refreshed frequently because the exhaust fan and the oscillating fan are always on.

*** The room temperature is running around 25°C (77°F) and RH 50%.

*** The environment humidity is running steady around RH 45% with lights-on.
*** The environment humidity peaks up to RH 60% with lights-off.

*** The environment temperature is running steady around 29°C (85°F) with lights-on.
*** The environment temperature dips down to 22°C (72°F) with lights-off.

*** VPD is running steady about 1.76 - Danger Zone: Over / Under Transpiration - lights-on.
*** VPD is peaking at about 0.75 - LowTranspiration: Propagation/ Early Veg - lights-off.

*** With the exhaust fan on 24-0, it keeps pulling air in from the room.

*** To change the VPD in the tent, I have change the environment parameters in the room.

*** To decrease VPD for lights-on ... I need to either raise the room RH by 5% or decrease the room temp by 2°C (4°F) .


*** The VPD Values I am Using For This Grow (Version 1)


Environment #2 - Photoperiod Flower:

I will start tracking RH, canopy temperature and VPD again when the second Inkbird IBS-TH1 gets here August 28, 2019.

Environment # 2 is mutually exclusive from Environment # 1.

The exhaust fan is running 24-0 to prevent a rise in temperature, RH and to prevent smells in the house.

Environment # 2 does not have a humidifier.

Environment # 2 does not have a dehumidifier.

The Mars Hydro TSL 2000W light is running 1 cycle of uninterrupted "12 hours lights-on and 12 hours lights-off".

The Mars Hydro TSL 2000W light is 30 cm (12") above the canopy centered over all plants.

The Mars Hydro TSL 2000W light does not give off a lot of heat.

CO2 is refreshed frequently because the exhaust fan and the oscillating fan are always on.

*** The VPD Values I am Using For This Grow (Version 1)


Growth Stage:

2 Bakerstreets: Day 1/ Week 14 ... Day 92 ... week 6 flower.

*** They got their pistels on August 05, 2019.
*** They are due for the final bloom flush/feed(CGRSFS, BPSS, CS, BTTE) on September 01, 2019.
*** They should be ready to harvest between September 16, 2019 and September 23, 2019.

*** Photoperiod Stages: 5 days Germination, 1 week seedling, 2-8 weeks veg, 6-12 weeks flower, 4-12 weeks cure
*** Allow 1 day to 3 days of dark before switching to 12-12
*** Pistels show up about 14 days (2 weeks) after switching to 12-12


1 C.R.E.A.M.: Day 1/ Week 13 ... Day 85 ... late flower.
1 Cheese: Day 1/ Week 13 ... Day 85 ... late flower.

*** They are in the final 2 weeks ... Flush, Full-On Bloom Nutes, Stem Split, Three Days Dark, Harvest!
*** They should be ready to harvest between August 18, 2019 and August 25, 2019.
*** I need to check the pistels and trichomes to verify the harvest date.

*** Autoflower Stages: 5 days Germination, 1 week seedling, 3 weeks veg, 3 weeks pre-flower, 3-6 weeks flower, 4-12 weeks cure
*** Pistels show up about 35 days (5 weeks) after Germination
*** Flowering takes about 42 days to 56 days (6 weeks to 8 weeks) after pistels show up


Watering and Feeding:


Bakerstreets' Regular Feed:

pH: 6.32
ppm: 412

4 litres (1.0 gallon) - pH 6.3 water


Bakerstreets' Regular Feed:

*** Next regular feed ... 6 litres (1.6 gallons) - Full Dose - Week 10 - CGRSFS, RME around August 29, 2019.
*** Expecting about 1% of run-off. Stop watering right at run-off.


C.R.E.A.M.'s Bloom Feed & Cheese's Bloom Feed:

*** Next bloom feed ... 6 litres (1.6 gallons) - Full Dose - Week 12 - CGRSFS, CS, BPSS, BTTE around August 28, 2019 .
*** Expecting about 1% of run-off. Stop watering right at run-off.


*** I will do a regular feed(CGRSFS, RME)/feed(CGRSFS, BPSS, CS, BTTE)/water cycle for all regular weeks.
*** I will do full-on bloom feeds(CGRSFS, BPSS, CS, BTTE) for the last two weeks prior to harvest.


*** For details on my feeding schedule refer to here: The Different Feeds I need For This Grow (Version 5)


Activities:

My priority is to expose the growth nodes to light and air because they are going to become colas.


Notes:

The priority has to be to expose the growth nodes/buds to light & air, and to keep the canopy even and flat.

I am going to let the plants grow naturally now and stop tucking the stems into the ScrOG. For details on this decision, please refer here: How long to Veg Photoperiods? - Version 2

I am confident the new Mars Hydro TSL 2000W light is pentrating into the plant, so a lot of pruning is not a good idea.


The Bakerstreets are now getting some height and the budlets are filling out.

I did not prune Bakerstreet #1, it has an even canopy and I am interested in how it will develop.

*** Bakerstreet #1 could use a light strategic pruning tomorrow ... be gentle with the budlets!

I did prune Bakerstreet #2 heavily to expose the budlets to light and air and I am interested in how it will develop.

*** When I pruned Bakerstreet #2 in week 5 ... I was very rough and careless. I had a lot of broken trichomes all over my hands and I am noticing they are not growing back.


The colas at the ends of the C.R.E.A.M.'s & Cheese's quadline lines are much bigger than the side colas.

*** I really want to focus this grow on topping and primary colas!

The C.R.E.A.M.'s pistels/trichomes & Cheese's pistels/trichomes indicate they are not ready for harvest yet.


With the environment #1 exhaust fan on 24-0, it keeps pulling air in from the room.

To change the VPD in the tent, I have change the environment parameters in the room.

To decrease VPD for lights-on ... I need to either raise the room RH by 5% or decrease the room temp by 2°C (4°F) .


*** I am looking forward to starting my LUX analysis soon.


Lessons Learned:

How To Fix Broken And Bent Cannabis Stems

By RoyalQueenSeeds

Although broken, bent, and detached stems might seem like devastating problems, they can be easily fixed using simple methods. By using tape to re-attach or tighten stems, and by using support structures to upright bent stems, disaster can be swiftly evaded. Ignoring these problems, however, could lead to an unhealthy plant and a smaller yield.

Broken, bent, or detached stems are common growing problems, especially for first-time growers. They have the potential to seriously endanger your grow and limit your final yield. However, with care and attention, these issues can be fixed quite easily. Even branches that have completely snapped off the plant can be saved by using a few simple methods.

0_Inner Broken Stems_1.jpg


WHAT CAUSES BROKEN OR BENT STEMS?

Stems can be damaged by something as simple as moving plants carelessly. This can especially be a problem with plants that are more rigid and upright. Moreover, damage from wind or excess airflow can similarly damage branches and stems.

Stems and branches can also be broken or bent from the utilisation of growing techniques like low-stress and high-stress training methods. Techniques that bend or otherwise stress branches inherently have the potential to lead to stem complications. Even if branches don’t split or break completely, the damage caused by bending them too much can harm plant vigour and production.

It is important to treat broken or otherwise damaged stems quickly. Open wounds can lead to infections in the plant, similar to humans. These kinds of breaks and open wounds will not only lead to a lower yield, but have the potential to kill the plant altogether.

WHAT KIND OF DAMAGE TYPICALLY HAPPENS TO STEMS?

The three most common types of stem damage are broken or split stems, bent or folded stems, and detached stems.

BROKEN STEMS

When training rigid plants, or when training during the flowering phase, plants are at an added risk for broken stems. If left untreated, the branches of these stems will stop growing. These stems can be easily fixed with the tape method or with a support structure. Plants have a natural healing mechanism that will allow them to mend themselves. However, if you act quick enough, you may not even notice a reduction in the plant’s production on these branches.

BENT/FOLDED STEMS

This is the most common type of stem damage that occurs. When branches are bent or stressed too much by training techniques, permanent damage can occur. Bent or folded stems are unable to support themselves. Bends or folds can make it more difficult for branches to receive water and nutrients from the plant. These stems will continue to grow, but at a slower pace than the rest of the plant. This is not just because they are bent, but because their bending makes them hang lower, potentially blocking their exposure to light.

DETACHED STEMS

Branches that have completely snapped off and detached themselves from the plant can be one of the most stressful problems to deal with. Luckily, these detached stems can be healed and mended with the same techniques used for other kinds of stem damage. They simply require more care and attention than bent or broken stems. However, if the detached stem is small, or located towards the bottom of the plant, it may be best to simply toss it away and cut your losses.

0_fix-cannabis-stems.jpg


HOW CAN YOU FIX BROKEN OR DETACHED STEMS?
The most common method of fixing broken stems is to use the tape method. Both duct tape and scotch tape can be used to help plants heal. Which kind you use will depend on the extent of the damage and the weight of the branch being mended.

Follow these steps to fix your broken stems:

  1. Prepare a piece of tape about 10cm in length (you may need more for larger stems/branches).
  2. Wrap the tape around the broken stem, making sure it fully covers its original base.
  3. Ensure that the stem and its base are packed together tightly to allow mending.
  4. Leave the tape on for between 2–4 weeks.
  5. Check healing progress every day.
Tip: Be sure to wrap the tape around the branch as tightly as possible. Packing everything together will greatly assist the healing process. When removing the tape, take care so as to not damage the stem again. Sometimes the stem may still be fragile or may not have fully healed. In these situations, it is easy to retear the stem unintentionally.

0_stems-cannabis-fix-.jpg


HOW TO FIX BENT STEMS

Bent stems can be fixed with support structures. Follow these steps to fix a bent stem:

  1. Place a thin bit of wood or plastic in the soil, directing it upwards toward the bent stem.
  2. Attach the stem to the support structure with a piece of duct tape.
  3. Leave the support structure in place until the stem is able to stand upright on its own.
  4. Remove the tape and support structure carefully.
Similarly to fixing broken or detached stems, be very careful when removing the tape. Bent stems can be easily damaged again if not careful.

0_cannabis-stems-fix_1.jpg


HOW CAN YOU PROTECT YOUR PLANTS FROM STEM DAMAGE?
The main way to protect your plants from stem damage is to be careful when handling them, especially when moving your plants, or when utilising training techniques that stress stems or branches. When training your plants and bending your branches, be careful not to overdo it. Plants with rigid stems and structures are especially susceptible to damage. Although it can be easily fixed, it is best to take proper care so as to avoid an issue in the first place.

It is advisable to take proper precautions to protect your plants from excessive wind or airflow damage. Moving air can provide numerous benefits for cannabis plants, including making the stems stronger. However, too much of it can cause significant structural damage, affecting health and yield in kind. In strong enough winds, plants can be toppled over or completely uprooted.

Reinforcing and protecting plants against the wind is simple and inexpensive. It is usually inadvisable to rigidly secure cannabis as this will completely prevent motion. It is much better to keep your plants next to some form of windbreaker. Rows of hedges or trees can act as natural defences. Meanwhile, fences and walls can act as man-made barriers. Bamboo matting, shade cloth, and plastic film can also make for suitable windbreakers. Some growers also prefer to use mesh fences that surround the plants. These fences can then be layered with cloth or plastic to ensure they act as effective barriers.


ToDo:

Learn more about ... When Is the Right Time to Harvest Cannabis Plants?

Learn more about pests and nutrient deficiencies.
 
Hi SQ, what a super journal you have here! I see what you're saying about the bakerstreet resembling my strawberry cough. I hope my SC gets big buds like yours. Garden looks wonderful.

Thanks for the kudos @stoneotter ... as a Canadian ... I'm pretty proud of those Bakerstreets!

I did manage to bust a bunch of the trichomes on the one plant while I was pruning late last week ... so I'll be a lot more careful when I defoliate the other Bakerstreet in the next few days!

I have added Strawberry Cough to my wish list ... it looks great!

0_strawberry-cough-bulk-seeds.jpg


It's a Cheese x Blueberry cross ... I like both those strains ... it's gonna be nice!
 
August 27 2019 - Update

Images:


IMG_20190827_204258.jpg

Bakerstreet #1 - Hanna Hemp - Looks healthy so far - budlets are exposed to light and air - limited pruning.


IMG_20190827_204316.jpg

Bakerstreet #2 - Henna Hemp - Looks healthy so far - budlets are exposed to light and air - heavy pruning


IMG_20190827_213004.jpg

C.R.E.A.M. #1 - Cowgirl Hemp - Looks healthy so far - budlets are exposed to light and air.


IMG_20190827_213022.jpg

Cheese #1 - Gouda Hemp - Looks healthy so far - buds are exposed to light and air.


Environment #1 - Autoflower Veg/Flower:

I am tracking the RH, canopy temperature and VPD with the Inkbird IBS-TH1.

Environment # 1 is mutually exclusive from Environment # 2.

The exhaust fan is running 24-0 to prevent a rise in temperature & RH, and to prevent smells in the house.

I do not want to turn off the exhaust fan because it will smell up the house.

The humidifier is turned off.

The dehumidifier is turned off.

The three X6 lights are running 1 cycle of "20 hours lights-on and 4 hours lights-off".

Two of the X6 lights are 30 cm (12") above the canopy centered over the 2 flowering plants.

The third X6 light is turned off.

The three X6 lights give off 2°C (4°F) of heat each.

CO2 is refreshed frequently because the exhaust fan and the oscillating fan are always on.

*** The room temperature is running around 25°C (77°F) and RH 50%.

*** The environment humidity is running steady around RH 45% with lights-on.
*** The environment humidity peaks up to RH 60% with lights-off.

*** The environment temperature is running steady around 29°C (85°F) with lights-on.
*** The environment temperature dips down to 22°C (72°F) with lights-off.

*** VPD is running steady about 1.76 - Danger Zone: Over / Under Transpiration - lights-on.
*** VPD is peaking at about 0.75 - LowTranspiration: Propagation/ Early Veg - lights-off.

*** With the exhaust fan on 24-0, it keeps pulling air in from the room.

*** To change the VPD in the tent, I have change the environment parameters in the room.

*** To decrease VPD for lights-on ... I need to either raise the room RH by 5% or decrease the room temp by 2°C (4°F) .


*** The VPD Values I am Using For This Grow (Version 1)


Environment #2 - Photoperiod Flower:

I will start tracking RH, canopy temperature and VPD again soon.

Environment # 2 is mutually exclusive from Environment # 1.

The exhaust fan is running 24-0 to prevent a rise in temperature, RH and to prevent smells in the house.

Environment # 2 does not have a humidifier.

Environment # 2 does not have a dehumidifier.

The Mars Hydro TSL 2000W light is running 1 cycle of uninterrupted "12 hours lights-on and 12 hours lights-off".

The Mars Hydro TSL 2000W light is 30 cm (12") above the canopy centered over all plants.

The Mars Hydro TSL 2000W light does not give off a lot of heat.

CO2 is refreshed frequently because the exhaust fan and the oscillating fan are always on.

*** The VPD Values I am Using For This Grow (Version 1)


Growth Stage:

2 Bakerstreets: Day 2/ Week 14 ... Day 93 ... week 6 flower.

*** They got their pistels on August 05, 2019.
*** They are due for the final bloom flush/feed(CGRSFS, BPSS, CS, BTTE) on September 01, 2019.
*** They should be ready to harvest between September 16, 2019 and September 23, 2019.

*** Photoperiod Stages: 5 days Germination, 1 week seedling, 2-8 weeks veg, 6-12 weeks flower, 4-12 weeks cure
*** Allow 1 day to 3 days of dark before switching to 12-12
*** Pistels show up about 14 days (2 weeks) after switching to 12-12


1 C.R.E.A.M.: Day 2/ Week 13 ... Day 86 ... late flower.
1 Cheese: Day 2/ Week 13 ... Day 86 ... late flower.

*** They are in the final 2 weeks ... Flush, Full-On Bloom Nutes, Stem Split, Three Days Dark, Harvest!
*** They should be ready to harvest between August 18, 2019 and August 25, 2019.
*** I need to check the pistels and trichomes to verify the harvest date.

*** Autoflower Stages: 5 days Germination, 1 week seedling, 3 weeks veg, 3 weeks pre-flower, 3-6 weeks flower, 4-12 weeks cure
*** Pistels show up about 35 days (5 weeks) after Germination
*** Flowering takes about 42 days to 56 days (6 weeks to 8 weeks) after pistels show up


Watering and Feeding:


Bakerstreets' Regular Feed:

*** Next regular feed ... 6 litres (1.6 gallons) - Full Dose - Week 10 - CGRSFS, RME around August 29, 2019.
*** Expecting about 1% of run-off. Stop watering right at run-off.


C.R.E.A.M.'s Bloom Feed & Cheese's Bloom Feed:

*** Next bloom feed ... 6 litres (1.6 gallons) - Full Dose - Week 12 - CGRSFS, CS, BPSS, BTTE around August 28, 2019 .
*** Expecting about 1% of run-off. Stop watering right at run-off.


*** I will do a regular feed(CGRSFS, RME)/feed(CGRSFS, BPSS, CS, BTTE)/water cycle for all regular weeks.
*** I will do full-on bloom feeds(CGRSFS, BPSS, CS, BTTE) for the last two weeks prior to harvest.


*** For details on my feeding schedule refer to here: The Different Feeds I need For This Grow (Version 5)


Activities:

My priority is to expose the growth nodes to light and air because they are going to become colas.


Notes:

The priority has to be to expose the growth nodes/buds to light & air, and to keep the canopy even and flat.

I am going to let the plants grow naturally now and stop tucking the stems into the ScrOG. For details on this decision, please refer here: How long to Veg Photoperiods? - Version 2

I am confident the new Mars Hydro TSL 2000W light is pentrating into the plant, so a lot of pruning is not a good idea.


The Bakerstreets are now getting some height and the budlets are filling out.

I did not prune Bakerstreet #1, it has an even canopy and I am interested in how it will develop.

*** Bakerstreet #1 could use a light strategic pruning tomorrow ... be gentle with the budlets!

I did prune Bakerstreet #2 heavily to expose the budlets to light and air and I am interested in how it will develop.

*** When I pruned Bakerstreet #2 in week 5 ... I was very rough and careless. I had a lot of broken trichomes all over my hands and I am noticing they are not growing back.


The colas at the ends of the C.R.E.A.M.'s & Cheese's quadline lines are much bigger than the side colas.

*** I really want to focus this grow on topping and primary colas!

The C.R.E.A.M.'s pistels/trichomes & Cheese's pistels/trichomes indicate they are not ready for harvest yet.


With the environment #1 exhaust fan on 24-0, it keeps pulling air in from the room.

To change the VPD in the tent, I have change the environment parameters in the room.

To decrease VPD for lights-on ... I need to either raise the room RH by 5% or decrease the room temp by 2°C (4°F) .


*** I am looking forward to starting my LUX analysis soon.


Lessons Learned:

No lessons learned today because I need to do a lot of gardening.


ToDo:

Learn more about ... When Is the Right Time to Harvest Cannabis Plants?

Learn more about pests and nutrient deficiencies.
 

Attachments

  • IMG_20190827_213004.jpg
    IMG_20190827_213004.jpg
    1.1 MB · Views: 66
August 28 2019 - Update

Happy Harvest Day!!!

0_250px-Maler_der_Grabkammer_des_Sennudem_001.png

Images:


IMG_20190828_205320.jpg

Bakerstreet #1 - Hanna Hemp - Looks healthy so far - budlets are exposed to light and air - limited pruning.


IMG_20190828_205332.jpg

Bakerstreet #2 - Henna Hemp - Looks healthy so far - budlets are exposed to light and air - heavy pruning


IMG_20190828_211305.jpg

C.R.E.A.M. #1 - Cowgirl Hemp - Looks healthy so far - 460.4 grams (16.24 ounces) - dry weight- stems on.


IMG_20190828_211243.jpg

Cheese #1 - Gouda Hemp - Looks healthy so far - 628.7 grams (22.18 ounces) - dry weight - stems on.


Environment #1 - Autoflower Veg/Flower:

I am tracking the RH, canopy temperature and VPD with the Inkbird IBS-TH1.

*** I need to get this environment dialed-in for veg growth again.

Environment # 1 is mutually exclusive from Environment # 2.

The exhaust fan is running 24-0 to prevent a rise in temperature & RH, and to prevent smells in the house.

I do not want to turn off the exhaust fan because it will smell up the house.

The humidifier is turned off.

The dehumidifier is turned off.

The three X6 lights are running 1 cycle of "20 hours lights-on and 4 hours lights-off".

One of the X6 lights are 45 cm (18") above the canopy centered over the vegging plants.

The other two X6 lights are turned off.

The three X6 lights give off 2°C (4°F) of heat each.

CO2 is refreshed frequently because the exhaust fan and the oscillating fan are always on.


*** The room temperature is running around 25°C (77°F) and RH 50%.

*** The environment humidity is running steady around RH 45% with lights-on.
*** The environment humidity peaks up to RH 60% with lights-off.

*** The environment temperature is running steady around 29°C (85°F) with lights-on.
*** The environment temperature dips down to 22°C (72°F) with lights-off.

*** VPD is running steady about 1.76 - Danger Zone: Over / Under Transpiration - lights-on.
*** VPD is peaking at about 0.75 - LowTranspiration: Propagation/ Early Veg - lights-off.

*** With the exhaust fan on 24-0, it keeps pulling air in from the room.

*** To change the VPD in the tent, I have change the environment parameters in the room.

*** To decrease VPD for lights-on ... I need to either raise the room RH by 5% or decrease the room temp by 2°C (4°F) .


*** The VPD Values I am Using For This Grow (Version 1)


Environment #2 - Photoperiod Flower:

I will start tracking RH, canopy temperature and VPD again when I get Environment #1 dialed-in.

Environment # 2 is mutually exclusive from Environment # 1.

The exhaust fan is running 24-0 to prevent a rise in temperature, RH and to prevent smells in the house.

Environment # 2 does not have a humidifier.

Environment # 2 does not have a dehumidifier.

The Mars Hydro TSL 2000W light is running 1 cycle of uninterrupted "12 hours lights-on and 12 hours lights-off".

The Mars Hydro TSL 2000W light is 30 cm (12") above the canopy centered over all plants.

The Mars Hydro TSL 2000W light does not give off a lot of heat.

CO2 is refreshed frequently because the exhaust fan and the oscillating fan are always on.

*** The VPD Values I am Using For This Grow (Version 1)


Growth Stage:

2 Bakerstreets: Day 3/ Week 14 ... Day 94 ... Day 23/Week 4 flower.

*** The Bakerstreets are in week 4 of the flowering stage, they have likely stopped growing altogether and are now spending all their energy on growing buds.

*** They got their pistels on August 05, 2019.
*** I learned that most credible seed banks present "weeks to flower" as weeks from first getting pistels, ... and not as weeks from flipping to 12-12.
*** They should be ready to harvest between September 30, 2019 and October 07, 2019.
*** They are overdue for the regular flush/feed(CGRSFS, BPSS, CS, BTTE) on August 18, 2019.
*** They are due for the final bloom flush/feed(CGRSFS, BPSS, CS, BTTE) on September 16, 2019.

*** Photoperiod Stages: 5 days Germination, 1 week seedling, 2-8 weeks veg, 6-12 weeks flower, 4-12 weeks cure
*** Allow 1 day to 3 days of dark before switching to 12-12
*** Pistels show up about 14 days (2 weeks) after switching to 12-12


1 C.R.E.A.M.: Day 3/ Week 13 ... Day 87 ... late flower.
1 Cheese: Day 3/ Week 13 ... Day 87 ... late flower.

*** They got their pistels on July 09, 2019 ... Day 37.
*** They should be ready to harvest between August 18, 2019 and August 25, 2019.
*** They have been harvested on Day 87 ... Flush, Full-On Bloom Nutes, Stem Split, Three Days Dark (skipped), Harvest!
*** Harvest: Cut, Wet Trim, Wash , Hang Dry, Paper Bag Dry & Jar Dry, Final Cure


*** Autoflower Stages: 5 days Germination, 1 week seedling, 3 weeks veg, 3 weeks pre-flower, 3-6 weeks flower, 4-12 weeks cure
*** Pistels show up about 35 days (5 weeks) after Germination
*** Flowering takes about 42 days to 56 days (6 weeks to 8 weeks) after pistels show up


Watering and Feeding:


Bakerstreets' Regular Feed:

*** Next regular flush ... 120 litres (30 gallons) - pH 6.3 water - around August 29, 2019.
*** Next regular feed ... 6 litres (1.6 gallons) - Full Dose - Week 10 - CGRSFS, RME around August 29, 2019.
*** Expecting about 1% of run-off. Stop watering right at run-off.


*** I will do a regular feed(CGRSFS, RME)/feed(CGRSFS, BPSS, CS, BTTE)/water cycle for all regular weeks.
*** I will do full-on bloom feeds(CGRSFS, BPSS, CS, BTTE) for the last two weeks prior to harvest.


*** For details on my feeding schedule refer to here: The Different Feeds I need For This Grow (Version 5)


Activities:

My priority is to expose the growth nodes to light and air because they are going to become colas.

I harvested the C.R.E.A.M. & Cheese today.


Harvesting:

*** This is what I did ... I read it as a recipe tutorial ... it is based on my research in the Lessons Learned section below.

*** Harvest Phase: Goal is to cut down plant to begin drying.

Cut individual stems off the plant.

Use fingers to clip off any small "larf" buds ... if you want to see what they are like.
Hold the stem upside down and perform a "Wet Trim" by removing large fan leaves and any old sugar leaves without trichomes.
Do not remove sugar leaves, since they are the buffer to protect the flowers.

Wash Option1 - Sterilize buds very gently for 5 seconds to 30 seconds in 10:1 3% H2O2 and 20 litres (5 gallons) water at 25°C (78°F) . Used in commercial kitchens or if mold is present.
Rinse once very gently for 5 seconds in 20 litres (5 gallons) water at 15°C (60°F) .
Rinse once very gently for 5 seconds in 20 litres (5 gallons) water at 20°C (68°F) .
Spin the branch gently between your palms to throw off any excess water drops.

IMG_20190828_175012.jpg
The plants were not very dirty.​

Wash Option 2 using lemon juice and baking soda may have been debunked. I need to open what I found for discussion.

Hang to drip dry in mesh drying rack for about 12 hours using a small fan to gently circulate air.
Room temperature is ideal at 21°C (70°F) and RH 50%.
The fan can blow across the buds as long as the buds do not move.
This takes around 12 hours.


IMG_20190828_194335.jpg

I can see how topping only one quadrant caused quite an imbalance in symmetry.
Topping like this is useful if you want an oval shape to your plant.
I used a fork during Stem-Splitting because it was convenient.


*** C.R.E.A.M. #1 - Cowgirl Hemp - 460.4 grams (16.24 ounces) - dry weight stems on.
*** Cheese #1 - Gouda Hemp - 628.7 grams (22.18 ounces) - dry weight stems on.


*** Tomorrow, I will put half the buds into paper bags, and the other half into glass mason jars.

*** I will also put some of the buds into the fridge, and the other half into a climate controlled room.

*** I will see which drying method is faster and which produces better quality buds.


Notes:

The priority has to be to expose the growth nodes/buds to light & air, and to keep the canopy even and flat.


I am going to let the Bakerstreet plants grow naturally now and stop tucking the stems into the ScrOG. For details on this decision, please refer here: How long to Veg Photoperiods? - Version 2

I am confident the new Mars Hydro TSL 2000W light is pentrating into the Bakerstreet plants, so a lot of pruning is not a good idea.

I did not prune Bakerstreet #1, it has an even canopy and I am interested in how it will develop.

*** Bakerstreet #1 could use a light strategic pruning tomorrow ... be gentle with the budlets!

I did prune Bakerstreet #2 heavily to expose the budlets to light and air and I am interested in how it will develop.

*** When I pruned Bakerstreet #2 ... I was very rough and careless. I had a lot of broken trichomes all over my hands and I am noticing they are growing back slowly.


The colas at the ends of the C.R.E.A.M.'s & Cheese's quadline lines are much bigger than the side colas.


*** I took weights, and the C.R.E.A.M. primary colas are about twice as heavy as the C.R.E.A.M. side colas!

C.R.E.A.M.:


Primary Colas: 20.5 g, 25.6 g, 36.7 g, 34.2 g
Side Colas: 17.5 g, 11.2 g, 10.7 g, 15.9 g, 10.4 g, 7.2 g, 14.6 g, 9.5 g ...

Primary Colas: 117.0 g total - Dry weight - Stems on
Side Colas: 343.4 g total - Dry weight - Stems on

Yield: 460.4 grams (16.24 ounces) - dry weight stems on.


Cheese:

Primary Colas: 220.9 g total - Dry weight - Stems on
Side Colas: 385.2 g total - Dry weight - Stems on
Larf Buds: 26.6 g total - Dry weight - Stems on


Yield: 628.7 grams (22.18 ounces) - dry weight stems on.

*** At this point, I really want to focus on topping and growing primary colas!


With the environment #1 exhaust fan on 24-0, it keeps pulling air in from the room.

To change the VPD in the tent, I have change the environment parameters in the room.

To decrease VPD for lights-on ... I need to either raise the room RH by 5% or decrease the room temp by 2°C (4°F) .


*** I am looking forward to starting my LUX analysis soon.


Lessons Learned:

Research on Harvesting, Drying and Curing (Paper Bags and Jars):

Mostly By @Furcifer:

Low and Slow or (Lotus Cure) :

Theory:

Curing starts the moment a plant is cut.
Osmosis continues without being replenished with fresh hydration.
Osmosis has to cease to stop the curing process.
Cold slows osmosis down, thereby retaining more of the natural flavors and natural colors.
To simplify the curing process, it is divided into a drying phase and a final cure phase.
The drying phase is the lowering of the RH% to a desired level.
The final cure phase is to fine tune and stabilize the RH% at a desired level for storage.
I have cold cured all the way to 64%, 62%, 57%, 55% RH.
72% range and then traditional burp method to 62% seems to produce the best results.

Process:

*** Harvest Phase: Goal is to cut down plant to begin drying.
Harvest and trim fan and large leaves from plants.
Do not remove sugar leaves, since they are the buffer to protect the flowers.
Wash Option1 - Sterilize buds very gently for 5 seconds to 30 seconds in 10:1 3% H2O2 and 20 litres (5 gallons) water at 25°C (78°F) . Used in commercial kitchens or if mold is present.
Wash Option 2 - Wash buds very gently for 5 seconds (up to 30 seconds if dirty) using 30 ml (2 tbsp) lemon juice, 30 ml (2 tbsp) baking soda and 20 litres (5 gallons) water at 25°C (78°F). An oldie but goodie version.
Wash option 2 - Has been debunked now.
Rinse once very gently for 5 seconds in 20 litres (5 gallons) water at 15°C (60°F) .
Rinse once very gently for 5 seconds in 20 litres (5 gallons) water at 20°C (68°F) .
Spin the branch gently between your palms to throw off any excess water drops.
Hang to drip dry for a few hours using a small fan to gently circulate air.
The fan can blow across the buds as long as the buds do not move.
This takes around 4 hours.

Remove buds from stalks and put in canning jars (paper bags).
Fill jars (paper bags) loosely 1/2 to 2/3 full.
Cover open end of jar with nylon screen and screw on cap ring (fold paper bag closed and clip to secure).
This keeps the buds from falling out during rolling or gentle shaking of jars (paper bags).
Place in the crisper of a frost free refrigerator.
This takes around 3 to 5 weeks.

*** Drying Phase: Goal is to slowly get jar (bag) RH to between 64% and 72%
Week 1 through 5.
Everyday roll or gently shake jars (paper bags).
This increases surface area and prevents sticking together.
After 7 days, take a jar (paper bag) out and let it come up to room temp 20°C (68°F) to 25°C (76°F) and room RH below 60%.
Gently pry nuggets apart on the stem, and then put buds on drying screen for about an hour.
While buds are drying, remove moisture form jars and wipe outside of jars/rings/humidity sensor with isopropyl alcohol.
Place a humidity sensor in jar (paper bag) and seal.
Place in dark.
Wait one hour.
If jar (bag) RH is not between 64% and 72% then replace screen on jar (replace clip on bag) and return to crisper.
The jar (bag) RH will rise as moisture moves from the buds to the surrounding air (buds are drying).
Repeat this process and check jar (bag) RH% weekly.

*** Final Cure Phase: Goal is to fine tune and stabilize the jar (bag) RH at a desired level for storage, 62% for example .
Once jar (bag) RH% is between 64% and 72% then every day:
Set room temp 20°C (68°F) to 25°C (76°F) and room RH at 62%.
Gently shake or roll jar (paper bag) before opening.
Let jars (paper bags) come up to room temp 20°C (68°F) to 25°C (76°F) and room RH at 62%.
Place a humidity sensor in jar (paper bag).
Leave until humidity sensor in jar (paper bag) reads 62%.
Reseal jar (replace clip on bag).
Place in dark.
Return to crisper.
The jar (bag) RH will rise as moisture moves from the buds to the surrounding air (buds are drying).
Repeat process until test jar (paper bag) humidity sensor reads 62%.

Storage:
Move buds from paper bags into jars now.
Everyday for one week: Burp and seal jars, verify RH is stable at 62%.
After I week: Burp and seal jars for 1 month.
After 1 month: Smoke, vape and enjoy.

Sealed unopened jars can be placed in a frost free fridge, checked every week, and burped every 4 months.


ToDo:

Learn more about ... When Is the Right Time to Harvest Cannabis Plants?

Learn more about pests and nutrient deficiencies
 

Attachments

  • IMG_20190828_141130.jpg
    IMG_20190828_141130.jpg
    535.3 KB · Views: 67
  • IMG_20190828_163542.jpg
    IMG_20190828_163542.jpg
    280.2 KB · Views: 73
Congrats SQl. That's impressive. Good harvest. I will be referencing your journals for my future grows. Good job, my friend. Grow Brother Grow.
 
August 29 2019 - Update

Images:


IMG_20190830_010343.jpg

Bakerstreet #1 - Hanna Hemp - Looks healthy so far - budlets are exposed to light and air - limited pruning.


IMG_20190830_010355.jpg

Bakerstreet #2 - Henna Hemp - Looks healthy so far - budlets are exposed to light and air - heavy pruning


IMG_20190828_211305.jpg

C.R.E.A.M. #1 - Cowgirl Hemp - Looks healthy so far - 460.4 grams (16.24 ounces) - dry weight- stems on.


IMG_20190828_211243.jpg

Cheese #1 - Gouda Hemp - Looks healthy so far - 628.7 grams (22.18 ounces) - dry weight - stems on.


Environment #1 - Autoflower Veg/Flower:

I am tracking the RH, canopy temperature and VPD with the Inkbird IBS-TH1.

Environment # 1 is mutually exclusive from Environment # 2.

The exhaust fan is running 24-0 to prevent a rise in temperature & RH, and to prevent smells in the house.

I do not want to turn off the exhaust fan because it will smell up the house.

The humidifier is turned off.

The dehumidifier is turned off.

One X6 light is running 1 cycle of "20 hours lights-on and 4 hours lights-off".

The one X6 light is 45 cm (18") above the canopy centered over the vegging plants.

An X6 light gives off 2°C (4°F) of heat.

CO2 is refreshed frequently because the exhaust fan and the oscillating fan are always on.


*** The room temperature is running around 20°C (68°F) and RH 50%.

*** The environment humidity is running steady around RH 52.5% with lights-on.
*** The environment humidity peaks up to RH 55% with lights-off.

*** The environment temperature is running steady around 23°C (73°F) with lights-on.
*** The environment temperature dips down to 20°C (68°F) with lights-off.

*** VPD is running steady about 1.02 - Healthy Transpiration: Late Veg/ Early Flower - lights-on.
*** VPD is peaking at about 0.77 - Low Transpiration: Propagation/ Early Veg - lights-off.

*** With the exhaust fan on 24-0, it keeps pulling air in from the room.

*** To change the VPD in the tent, I have change the environment parameters in the room.

*** To decrease VPD for lights-on ... I need to either raise the room RH by 5% or decrease the room temp by 2°C (4°F) .


*** The VPD Values I am Using For This Grow (Version 1)


Environment #2 - Photoperiod Flower:

I will start tracking RH, canopy temperature and VPD again when I get Environment #1 dialed-in.

Environment # 2 is mutually exclusive from Environment # 1.

The exhaust fan is running 24-0 to prevent a rise in temperature, RH and to prevent smells in the house.

Environment # 2 does not have a humidifier.

Environment # 2 does not have a dehumidifier.

The Mars Hydro TSL 2000W light is running 1 cycle of uninterrupted "12 hours lights-on and 12 hours lights-off".

The Mars Hydro TSL 2000W light is 30 cm (12") above the canopy centered over all plants.

The Mars Hydro TSL 2000W light does not give off a lot of heat.

CO2 is refreshed frequently because the exhaust fan and the oscillating fan are always on.

*** The VPD Values I am Using For This Grow (Version 1)


Growth Stage:

2 Bakerstreets: Day 4/ Week 14 ... Day 95 ... Day 24/Week 4 flower.

*** The Bakerstreets are in week 4 of the flowering stage, they have likely stopped growing altogether and are now spending all their energy on growing buds.

*** They got their pistels on August 05, 2019.
*** I learned that most credible seed banks present "weeks to flower" as weeks from first getting pistels, ... and not as weeks from flipping to 12-12.
*** They should be ready to harvest between September 30, 2019 and October 07, 2019.
*** They are overdue for the regular flush/feed(CGRSFS, BPSS, CS, BTTE) on August 18, 2019.
*** They are due for the final bloom flush/feed(CGRSFS, BPSS, CS, BTTE) on September 16, 2019.

*** Photoperiod Stages: 5 days Germination, 1 week seedling, 2-8 weeks veg, 6-12 weeks flower, 4-12 weeks cure
*** Allow 1 day to 3 days of dark before switching to 12-12
*** Pistels show up about 14 days (2 weeks) after switching to 12-12


1 C.R.E.A.M.: Day 4/ Week 13 ... Day 88 ... harvest.
1 Cheese: Day 3/ Week 13 ... Day 87 ... harvest.

*** They got their pistels on July 09, 2019 ... Day 37.
*** They were harvested August 28, 2019 ... Flush, Full-On Bloom Nutes, Stem Split, Three Days Dark (skipped), Harvest!
*** Harvest: Cut, Wet Trim, Wash, Initial Dry, Fine-Tune Dry, Final Cure


*** Autoflower Stages: 5 days Germination, 1 week seedling, 3 weeks veg, 3 weeks pre-flower, 3-6 weeks flower, 4-12 weeks cure
*** Pistels show up about 35 days (5 weeks) after Germination
*** Flowering takes about 42 days to 56 days (6 weeks to 8 weeks) after pistels show up


Watering and Feeding:


Bakerstreets' Regular Feed:

*** Next regular flush ... 120 litres (30 gallons) - pH 6.3 water - around August 30, 2019.
*** Next regular feed ... 6 litres (1.6 gallons) - Full Dose - Week 08 - CGRSFS, RME around August 30, 2019.
*** Expecting about 1% of run-off. Stop watering right at run-off.


*** I will do a regular feed(CGRSFS, RME)/feed(CGRSFS, BPSS, CS, BTTE)/water cycle for all regular weeks.
*** I will do full-on bloom feeds(CGRSFS, BPSS, CS, BTTE) for the last two weeks prior to harvest.


*** For details on my feeding schedule refer to here: The Different Feeds I need For This Grow (Version 5)


Activities:

My priority is to expose the growth nodes to light and air because they are going to become colas.


Harvesting:

*** This is what I did ... I read it as a recipe tutorial ... it is based on my research in the Lessons Learned section below.

*** Harvest Phase: Goal is to cut down plant to begin drying.

Cut individual stems off the plant.

Use fingers to clip off any small "larf" buds ... if you want to see what they are like.
Hold the stem upside down and perform a "Wet Trim" by removing large fan leaves and any old sugar leaves without trichomes.
Do not remove sugar leaves, since they are the buffer to protect the flowers.

*** C.R.E.A.M. #1 - Cowgirl Hemp - 460.4 grams (16.24 ounces) - dry weight stems on.
*** Cheese #1 - Gouda Hemp - 628.7 grams (22.18 ounces) - dry weight stems on.

Wash Option1 - Sterilize buds very gently for 5 seconds to 30 seconds in 10:1 3% H2O2 and 20 litres (5 gallons) water at 25°C (78°F) . Used in commercial kitchens or if mold is present.
Rinse once very gently for 5 seconds in 20 litres (5 gallons) water at 15°C (60°F) .
Rinse once very gently for 5 seconds in 20 litres (5 gallons) water at 20°C (68°F) .
Spin the branch gently between your palms to throw off any excess water drops.

IMG_20190828_175012.jpg
The plants were not very dirty.​

Wash Option 2 using lemon juice and baking soda may have been debunked. I need to open what I found for discussion.


IMG_20190828_194335.jpg

I can see how topping only one quadrant caused quite an imbalance in symmetry.
Topping like this is useful if you want an oval shape to your plant.
I used a fork during Stem-Splitting because it was convenient.

*** Initial Dry Phase: Goal is to begin drying and get to the state where the outside of the buds are dry.
Hang, in tent with stems-on, to drip dry in mesh drying rack for about 24 hours using a small fan to gently circulate air.
Tent temperature is 23°C (73°F) and RH 52.5% which is near ideal at 20°C (68°F) and RH 50%.
The fan can blow across the buds as long as the buds do not move.
This takes around 24 hours.


Notes:

The priority has to be to expose the growth nodes/buds to light & air, and to keep the canopy even and flat.


I am going to let the Bakerstreet plants grow naturally now and stop tucking the stems into the ScrOG. For details on this decision, please refer here: How long to Veg Photoperiods? - Version 2

I am confident the new Mars Hydro TSL 2000W light is pentrating into the Bakerstreet plants, so a lot of pruning is not a good idea.

I did not prune Bakerstreet #1, it has an even canopy and I am interested in how it will develop.

*** Bakerstreet #1 could use a light strategic pruning tomorrow ... be gentle with the budlets!

I did prune Bakerstreet #2 heavily to expose the budlets to light and air and I am interested in how it will develop.

*** When I pruned Bakerstreet #2 ... I was very rough and careless. I had a lot of broken trichomes all over my hands and I am noticing they are growing back slowly.


The colas at the ends of the C.R.E.A.M.'s & Cheese's quadline lines are much bigger than the side colas. However, the side colas produce a significant amount of bud when trained properly.

When harvesting cannabis, the smell is very strong ... especially after washing!!!

It is important for me to keep the strong smelling harvested plants contained inside a tent with exhaust fans continuously running.


With the environment #1 exhaust fan on 24-0, it keeps pulling air in from the room.

To change the VPD in the tent, I have change the environment parameters in the room.

To decrease VPD for lights-on ... I need to either raise the room RH by 5% or decrease the room temp by 2°C (4°F) .


*** I am looking forward to starting my LUX analysis soon.


Lessons Learned:

*** I will update this initial research once I go through the entire process one time.

Research on Harvesting, Drying and Curing (Paper Bags and Jars):

Mostly By @Furcifer:

Low and Slow or (Lotus Cure) :

Theory:

Curing starts the moment a plant is cut.
Osmosis continues without being replenished with fresh hydration.
Osmosis has to cease to stop the curing process.
Cold slows osmosis down, thereby retaining more of the natural flavors and natural colors.
To simplify the curing process, it is divided into a drying phase and a final cure phase.
The drying phase is the lowering of the RH% to a desired level.
The final cure phase is to fine tune and stabilize the RH% at a desired level for storage.
I have cold cured all the way to 64%, 62%, 57%, 55% RH.
72% range and then traditional burp method to 62% seems to produce the best results.

Process:

*** Harvest Phase: Goal is to cut down plant to begin drying.
Harvest and trim fan and large leaves from plants.
Do not remove sugar leaves, since they are the buffer to protect the flowers.
Wash Option1 - Sterilize buds very gently for 5 seconds to 30 seconds in 10:1 3% H2O2 and 20 litres (5 gallons) water at 25°C (78°F) . Used in commercial kitchens or if mold is present.
Wash Option 2 - Wash buds very gently for 5 seconds (up to 30 seconds if dirty) using 30 ml (2 tbsp) lemon juice, 30 ml (2 tbsp) baking soda and 20 litres (5 gallons) water at 25°C (78°F). An oldie but goodie version.
Wash option 2 - Has been debunked now.
Rinse once very gently for 5 seconds in 20 litres (5 gallons) water at 15°C (60°F) .
Rinse once very gently for 5 seconds in 20 litres (5 gallons) water at 20°C (68°F) .
Spin the branch gently between your palms to throw off any excess water drops.
Hang to drip dry for a few hours using a small fan to gently circulate air.
The fan can blow across the buds as long as the buds do not move.
This takes around 4 hours.

Remove buds from stalks and put in canning jars (paper bags).
Fill jars (paper bags) loosely 1/2 to 2/3 full.
Cover open end of jar with nylon screen and screw on cap ring (fold paper bag closed and clip to secure).
This keeps the buds from falling out during rolling or gentle shaking of jars (paper bags).
Place in the crisper of a frost free refrigerator.
This takes around 3 to 5 weeks.

*** Drying Phase: Goal is to slowly get jar (bag) RH to between 64% and 72%
Week 1 through 5.
Everyday roll or gently shake jars (paper bags).
This increases surface area and prevents sticking together.
After 7 days, take a jar (paper bag) out and let it come up to room temp 20°C (68°F) to 25°C (76°F) and room RH below 60%.
Gently pry nuggets apart on the stem, and then put buds on drying screen for about an hour.
While buds are drying, remove moisture form jars and wipe outside of jars/rings/humidity sensor with isopropyl alcohol.
Place a humidity sensor in jar (paper bag) and seal.
Place in dark.
Wait one hour.
If jar (bag) RH is not between 64% and 72% then replace screen on jar (replace clip on bag) and return to crisper.
The jar (bag) RH will rise as moisture moves from the buds to the surrounding air (buds are drying).
Repeat this process and check jar (bag) RH% weekly.

*** Final Cure Phase: Goal is to fine tune and stabilize the jar (bag) RH at a desired level for storage, 62% for example .
Once jar (bag) RH% is between 64% and 72% then every day:
Set room temp 20°C (68°F) to 25°C (76°F) and room RH at 62%.
Gently shake or roll jar (paper bag) before opening.
Let jars (paper bags) come up to room temp 20°C (68°F) to 25°C (76°F) and room RH at 62%.
Place a humidity sensor in jar (paper bag).
Leave until humidity sensor in jar (paper bag) reads 62%.
Reseal jar (replace clip on bag).
Place in dark.
Return to crisper.
The jar (bag) RH will rise as moisture moves from the buds to the surrounding air (buds are drying).
Repeat process until test jar (paper bag) humidity sensor reads 62%.

Storage:
Move buds from paper bags into jars now.
Everyday for one week: Burp and seal jars, verify RH is stable at 62%.
After I week: Burp and seal jars for 1 month.
After 1 month: Smoke, vape and enjoy.
Sealed unopened jars can be placed in a frost free fridge, checked every week, and burped every 4 months.


ToDo:

Learn more about ... When Is the Right Time to Harvest Cannabis Plants?

Learn more about pests and nutrient deficiencies
 
August 30 2019 - Update

Images:


IMG_20190830_222611.jpg

Bakerstreet #1 - Hanna Hemp - Looks healthy so far - budlets are exposed to light and air - limited pruning.


IMG_20190830_222640.jpg

Bakerstreet #2 - Henna Hemp - Looks healthy so far - budlets are exposed to light and air - heavy pruning


IMG_20190828_211305.jpg

C.R.E.A.M. #1 - Cowgirl Hemp - Looks healthy so far - 460.4 grams (16.24 ounces) - dry weight- stems on.


IMG_20190828_211243.jpg

Cheese #1 - Gouda Hemp - Looks healthy so far - 628.7 grams (22.18 ounces) - dry weight - stems on.


Environment #1 - Autoflower Veg/Flower:

I am tracking the RH, canopy temperature and VPD with the Inkbird IBS-TH1.

Environment # 1 is mutually exclusive from Environment # 2.

The exhaust fan is running 24-0 to prevent a rise in temperature & RH, and to prevent smells in the house.

I do not want to turn off the exhaust fan because it will smell up the house.

The humidifier is turned off.

The dehumidifier is turned off.

One X6 light is running 1 cycle of "20 hours lights-on and 4 hours lights-off".

The one X6 light is 45 cm (18") above the canopy centered over the vegging plants.

An X6 light gives off 2°C (4°F) of heat.

CO2 is refreshed frequently because the exhaust fan and the oscillating fan are always on.


*** The room temperature is running around 20°C (68°F) and RH 50%.

*** The environment humidity is running steady around RH 52.5% with lights-on.
*** The environment humidity peaks up to RH 55% with lights-off.

*** The environment temperature is running steady around 23°C (73°F) with lights-on.
*** The environment temperature dips down to 20°C (68°F) with lights-off.

*** VPD is running steady about 1.02 - Healthy Transpiration: Late Veg/ Early Flower - lights-on.
*** VPD is peaking at about 0.77 - Low Transpiration: Propagation/ Early Veg - lights-off.

*** With the exhaust fan on 24-0, it keeps pulling air in from the room.

*** To change the VPD in the tent, I have change the environment parameters in the room.

*** To decrease VPD for lights-on ... I need to either raise the room RH by 5% or decrease the room temp by 2°C (4°F) .


*** The VPD Values I am Using For This Grow (Version 1)


Environment #2 - Photoperiod Flower:

I will start tracking RH, canopy temperature and VPD again when I get Environment #1 dialed-in.

Environment # 2 is mutually exclusive from Environment # 1.

The exhaust fan is running 24-0 to prevent a rise in temperature, RH and to prevent smells in the house.

Environment # 2 does not have a humidifier.

Environment # 2 does not have a dehumidifier.

The Mars Hydro TSL 2000W light is running 1 cycle of uninterrupted "12 hours lights-on and 12 hours lights-off".

The Mars Hydro TSL 2000W light is 30 cm (12") above the canopy centered over all plants.

The Mars Hydro TSL 2000W light does not give off a lot of heat.

CO2 is refreshed frequently because the exhaust fan and the oscillating fan are always on.

*** The VPD Values I am Using For This Grow (Version 1)


Growth Stage:

2 Bakerstreets: Day 5/ Week 14 ... Day 96 ... Day 25/Week 4 flower.

*** The Bakerstreets are in week 4 of the flowering stage, they have likely stopped growing altogether and are now spending all their energy on growing buds.

*** They got their pistels on August 05, 2019.
*** I learned that most credible seed banks present "weeks to flower" as weeks from first getting pistels, ... and not as weeks from flipping to 12-12.
*** They should be ready to harvest between September 30, 2019 and October 07, 2019.
*** They are overdue for the regular flush/feed(CGRSFS, BPSS, CS, BTTE) on August 18, 2019.
*** They are due for the final bloom flush/feed(CGRSFS, BPSS, CS, BTTE) on September 16, 2019.

*** Photoperiod Stages: 5 days Germination, 1 week seedling, 2-8 weeks veg, 6-12 weeks flower, 4-12 weeks cure
*** Allow 1 day to 3 days of dark before switching to 12-12
*** Pistels show up about 14 days (2 weeks) after switching to 12-12


1 C.R.E.A.M.: Day 5/ Week 13 ... Day 89 ... harvest.
1 Cheese: Day 5/ Week 13 ... Day 89 ... harvest.

*** They got their pistels on July 09, 2019 ... Day 37.
*** They were harvested August 28, 2019 ... Flush, Full-On Bloom Nutes, Stem Split, Three Days Dark (skipped), Harvest!
*** Harvest: Cut, Wet Trim, Wash, Initial Dry, Fine-Tune Dry, Final Cure


*** Autoflower Stages: 5 days Germination, 1 week seedling, 3 weeks veg, 3 weeks pre-flower, 3-6 weeks flower, 4-12 weeks cure
*** Pistels show up about 35 days (5 weeks) after Germination
*** Flowering takes about 42 days to 56 days (6 weeks to 8 weeks) after pistels show up


Watering and Feeding:


Bakerstreets' Regular Feed:

*** Next regular flush ... 120 litres (30 gallons) - pH 6.3 water - around August 31, 2019.
*** Next regular feed ... 6 litres (1.6 gallons) - Full Dose - Week 08 - CGRSFS, RME around August 31, 2019.
*** Expecting about 1% of run-off. Stop watering right at run-off.


*** I will do a regular feed(CGRSFS, RME)/feed(CGRSFS, BPSS, CS, BTTE)/water cycle for all regular weeks.
*** I will do full-on bloom feeds(CGRSFS, BPSS, CS, BTTE) for the last two weeks prior to harvest.


*** For details on my feeding schedule refer to here: The Different Feeds I need For This Grow (Version 5)


Activities:

My priority is to expose the growth nodes to light and air because they are going to become colas.


Harvesting:

*** This is what I did ... I read it as a recipe tutorial ... it is based on my research in the Lessons Learned section below.

*** Harvest Phase: Goal is to cut down plant to begin drying.

Cut individual stems off the plant.

Use fingers to clip off any small "larf" buds ... if you want to see what they are like.
Hold the stem upside down and perform a "Wet Trim" by removing large fan leaves and any old sugar leaves without trichomes.
Do not remove sugar leaves, since they are the buffer to protect the flowers.

*** C.R.E.A.M. #1 - Cowgirl Hemp - 460.4 grams (16.24 ounces) - dry weight stems on.
*** Cheese #1 - Gouda Hemp - 628.7 grams (22.18 ounces) - dry weight stems on.

Wash Phase - Goal is to clean and sterilize buds.
Wash Option1 - Sterilize buds very gently for 5 seconds to 30 seconds in 10:1 3% H2O2 and 20 litres (5 gallons) water at 25°C (78°F) . Used in commercial kitchens or if mold is present.
Rinse once very gently for 5 seconds in 20 litres (5 gallons) water at 15°C (60°F) .
Rinse once very gently for 5 seconds in 20 litres (5 gallons) water at 20°C (68°F) .
Spin the branch gently between your palms to throw off any excess water drops.

IMG_20190828_175012.jpg
The plants were not very dirty.​

Wash Option 2 using lemon juice and baking soda may have been debunked. I need to open what I found for discussion.

IMG_20190828_194335.jpg

I can see how topping only one quadrant caused quite an imbalance in symmetry.
Topping like this is useful if you want an oval shape to your plant.
I used a fork during Stem-Splitting because it was convenient.​


*** Initial Dry Phase - Stems-On: Goal is to begin drying and get to the state where the outside of the buds are dry.

IMG_20190828_211305.jpg
Hang, in tent with stems-on, to drip dry in mesh drying rack for about 24 hours using a small fan to gently circulate air.
Tent temperature is 23°C (73°F) and RH 52.5% which is near ideal at 20°C (68°F) and RH 50%.
The fan can blow across the buds as long as the buds do not move.
This takes around 24 hours.

*** Initial Dry Phase - Stems-Off: Goal is to continue drying and get to the state where the outside of the buds are dry.

0_buds-on-drying-rack.jpg
Remove buds from stems.
Hang, in tent with stems-off, to dry in mesh drying rack for about 24 hours using a small fan to gently circulate air.
Tent temperature is 23°C (73°F) and RH 52.5% which is near ideal at 20°C (68°F) and RH 50%.
The fan can blow across the buds as long as the buds do not move.
This takes around 24 hours.

*** In the future, I will make sure I dedicate an entire tent to one week of initial drying. I will make sure the temperature is very low, and the light is off.

*** I will also make sure I have fridge space, or a tent with an air conditioner to do a proper lotus cure.


Notes:

The priority has to be to expose the growth nodes/buds to light & air, and to keep the canopy even and flat.


I am going to let the Bakerstreet plants grow naturally now and stop tucking the stems into the ScrOG. For details on this decision, please refer here: How long to Veg Photoperiods? - Version 2

I am confident the new Mars Hydro TSL 2000W light is pentrating into the Bakerstreet plants, so a lot of pruning is not a good idea.

I did not prune Bakerstreet #1, it has an even canopy and I am interested in how it will develop.

*** Bakerstreet #1 could use a light strategic pruning tomorrow ... be gentle with the budlets!

I did prune Bakerstreet #2 heavily to expose the budlets to light and air and I am interested in how it will develop.

*** When I pruned Bakerstreet #2 ... I was very rough and careless. I had a lot of broken trichomes all over my hands and I am noticing they are growing back slowly.

The colas at the ends of the C.R.E.A.M.'s & Cheese's quadline lines are much bigger than the side colas. However, the side colas produce a significant amount of bud when trained properly.

When harvesting cannabis, the smell is very strong ... especially after washing!!!

It is important for me to keep the strong smelling harvested plants contained inside a tent with exhaust fans continuously running.


With the environment #1 exhaust fan on 24-0, it keeps pulling air in from the room.

To change the VPD in the tent, I have change the environment parameters in the room.

To decrease VPD for lights-on ... I need to either raise the room RH by 5% or decrease the room temp by 2°C (4°F) .


*** I am looking forward to starting my LUX analysis soon.


Lessons Learned:

*** I will update this initial research once I go through the entire process one time.

Research on Harvesting, Drying and Curing (Paper Bags and Jars):

Mostly By @Furcifer:

Low and Slow or (Lotus Cure) :

Theory:

Curing starts the moment a plant is cut.
Osmosis continues without being replenished with fresh hydration.
Osmosis has to cease to stop the curing process.
Cold slows osmosis down, thereby retaining more of the natural flavors and natural colors.
To simplify the curing process, it is divided into a drying phase and a final cure phase.
The drying phase is the lowering of the RH% to a desired level.
The final cure phase is to fine tune and stabilize the RH% at a desired level for storage.
I have cold cured all the way to 64%, 62%, 57%, 55% RH.
72% range and then traditional burp method to 62% seems to produce the best results.

Process:

*** Harvest Phase: Goal is to cut down plant to begin drying.
Harvest and trim fan and large leaves from plants.
Do not remove sugar leaves, since they are the buffer to protect the flowers.
Wash Option1 - Sterilize buds very gently for 5 seconds to 30 seconds in 10:1 3% H2O2 and 20 litres (5 gallons) water at 25°C (78°F) . Used in commercial kitchens or if mold is present.
Wash Option 2 - Wash buds very gently for 5 seconds (up to 30 seconds if dirty) using 30 ml (2 tbsp) lemon juice, 30 ml (2 tbsp) baking soda and 20 litres (5 gallons) water at 25°C (78°F). An oldie but goodie version.
Wash option 2 - Has been debunked now.
Rinse once very gently for 5 seconds in 20 litres (5 gallons) water at 15°C (60°F) .
Rinse once very gently for 5 seconds in 20 litres (5 gallons) water at 20°C (68°F) .
Spin the branch gently between your palms to throw off any excess water drops.
Hang to drip dry for a few hours using a small fan to gently circulate air.
The fan can blow across the buds as long as the buds do not move.
This takes around 4 hours.

Remove buds from stalks and put in canning jars (paper bags).
Fill jars (paper bags) loosely 1/2 to 2/3 full.
Cover open end of jar with nylon screen and screw on cap ring (fold paper bag closed and clip to secure).
This keeps the buds from falling out during rolling or gentle shaking of jars (paper bags).
Place in the crisper of a frost free refrigerator.
This takes around 3 to 5 weeks.

*** Drying Phase: Goal is to slowly get jar (bag) RH to between 64% and 72%
Week 1 through 5.
Everyday roll or gently shake jars (paper bags).
This increases surface area and prevents sticking together.
After 7 days, take a jar (paper bag) out and let it come up to room temp 20°C (68°F) to 25°C (76°F) and room RH below 60%.
Gently pry nuggets apart on the stem, and then put buds on drying screen for about an hour.
While buds are drying, remove moisture form jars and wipe outside of jars/rings/humidity sensor with isopropyl alcohol.
Place a humidity sensor in jar (paper bag) and seal.
Place in dark.
Wait one hour.
If jar (bag) RH is not between 64% and 72% then replace screen on jar (replace clip on bag) and return to crisper.
The jar (bag) RH will rise as moisture moves from the buds to the surrounding air (buds are drying).
Repeat this process and check jar (bag) RH% weekly.

*** Final Cure Phase: Goal is to fine tune and stabilize the jar (bag) RH at a desired level for storage, 62% for example .
Once jar (bag) RH% is between 64% and 72% then every day:
Set room temp 20°C (68°F) to 25°C (76°F) and room RH at 62%.
Gently shake or roll jar (paper bag) before opening.
Let jars (paper bags) come up to room temp 20°C (68°F) to 25°C (76°F) and room RH at 62%.
Place a humidity sensor in jar (paper bag).
Leave until humidity sensor in jar (paper bag) reads 62%.
Reseal jar (replace clip on bag).
Place in dark.
Return to crisper.
The jar (bag) RH will rise as moisture moves from the buds to the surrounding air (buds are drying).
Repeat process until test jar (paper bag) humidity sensor reads 62%.

Storage:
Move buds from paper bags into jars now.
Everyday for one week: Burp and seal jars, verify RH is stable at 62%.
After I week: Burp and seal jars for 1 month.
After 1 month: Smoke, vape and enjoy.
Sealed unopened jars can be placed in a frost free fridge, checked every week, and burped every 4 months.


ToDo:

Learn more about ... When Is the Right Time to Harvest Cannabis Plants?

Learn more about pests and nutrient deficiencies
 
August 31 2019 - Update

Images:


IMG_20190901_001851.jpg

Bakerstreet #1 - Hanna Hemp - Looks healthy so far - budlets are exposed to light and air - limited pruning.


IMG_20190901_001940.jpg

Bakerstreet #2 - Henna Hemp - Looks healthy so far - budlets are exposed to light and air - heavy pruning


0_buds-curing-humidipak-sm.jpg

C.R.E.A.M. #1 - Cowgirl Hemp - Looks healthy so far - Intermediate Drying - Jars.


0_buds-curing-humidipak-sm.jpg

Cheese #1 - Gouda Hemp - Looks healthy so far- Intermediate Drying - Jars.


Environment #1 - Autoflower Veg/Flower:

I am tracking the RH, canopy temperature and VPD with the Inkbird IBS-TH1.

Environment # 1 is mutually exclusive from Environment # 2.

The exhaust fan is running 24-0 to prevent a rise in temperature & RH, and to prevent smells in the house.

I do not want to turn off the exhaust fan because it will smell up the house.

The humidifier is turned off.

The dehumidifier is turned off.

Two X6 lights are running 1 cycle of "20 hours lights-on and 4 hours lights-off".

The two X6 lights are 45 cm (18") above the canopy centered over the vegging plants.

An X6 light gives off 2°C (4°F) of heat.

CO2 is refreshed frequently because the exhaust fan and the oscillating fan are always on.


*** The room temperature is running around 20°C (68°F) and RH 50%.

*** The environment humidity is running steady around RH 42.5% with lights-on.
*** The environment humidity peaks up to RH 55% with lights-off.

*** The environment temperature is running steady around 28°C (82°F) with lights-on.
*** The environment temperature dips down to 20°C (68°F) with lights-off.

*** VPD is running steady about 1.75 - Danger Zone: Over/Under Transpiration - lights-on.
*** VPD is peaking at about 0.77 - Low Transpiration: Propagation/ Early Veg - lights-off.


*** On hot days with two X6 lights on, the VPD enters the Danger Zone.

*** With the exhaust fan on 24-0, it keeps pulling air in from the room.

*** To change the VPD in the tent, I have change the environment parameters in the room.

*** To decrease VPD for lights-on ... I need to either raise the room RH by 5% or decrease the room temp by 2°C (4°F) .


*** The VPD Values I am Using For This Grow (Version 1)


Environment #2 - Photoperiod Flower:

I will start tracking RH, canopy temperature and VPD again when I get Environment #1 dialed-in.

Environment # 2 is mutually exclusive from Environment # 1.

The exhaust fan is running 24-0 to prevent a rise in temperature, RH and to prevent smells in the house.

Environment # 2 does not have a humidifier.

Environment # 2 does not have a dehumidifier.

The Mars Hydro TSL 2000W light is running 1 cycle of uninterrupted "12 hours lights-on and 12 hours lights-off".

The Mars Hydro TSL 2000W light is 30 cm (12") above the canopy centered over all plants.

The Mars Hydro TSL 2000W light does not give off a lot of heat.

CO2 is refreshed frequently because the exhaust fan and the oscillating fan are always on.

*** The VPD Values I am Using For This Grow (Version 1)


Growth Stage:

2 Bakerstreets: Day 6/ Week 14 ... Day 97 ... Day 26/Week 4 flower.

*** The Bakerstreets are in week 4 of the flowering stage, they have likely stopped growing altogether and are now spending all their energy on growing buds.

*** They got their pistels on August 05, 2019.
*** Most credible seed banks present "weeks to flower" as weeks from first getting pistels.
*** They should be ready to harvest between September 30, 2019 and October 07, 2019.
*** They are due for the final bloom flush/feed(CGRSFS, BPSS, CS, BTTE) on September 16, 2019.

*** Photoperiod Stages: 5 days Germination, 1 week seedling, 2-8 weeks veg, 6-12 weeks flower, 4-12 weeks cure
*** Allow 1 day to 3 days of dark before switching to 12-12
*** Pistels show up about 14 days (2 weeks) after switching to 12-12


1 C.R.E.A.M.: Day 6/ Week 13 ... Day 90 ... harvest.
1 Cheese: Day 6/ Week 13 ... Day 90 ... harvest.

*** They got their pistels on July 09, 2019 ... Day 37.
*** They were harvested August 28, 2019 ... Flush, Full-On Bloom Nutes, Stem Split, Three Days Dark (skipped), Harvest!
*** Harvest: Cut, Wet Trim, Wash, Initial Dry, Intermediate Dry, Fine-Tune Dry


*** Autoflower Stages: 5 days Germination, 1 week seedling, 3 weeks veg, 3 weeks pre-flower, 3-6 weeks flower, 4-12 weeks cure
*** Pistels show up about 35 days (5 weeks) after Germination
*** Flowering takes about 42 days to 56 days (6 weeks to 8 weeks) after pistels show up


Watering and Feeding:


Bakerstreets' Regular Feed:

pH: 6.56
ppm: 1652

4.5 litres (1.2 gallons) - Full Dose - Week 08 - CGRSFS, RME


Bakerstreets' Regular Feed:

*** Next regular feed ... 6 litres (1.6 gallons) - Full Dose - Week 09 - CGRSFS, RME around September 04, 2019.
*** Expecting about 1% of run-off. Stop watering right at run-off.


*** I will do a regular feed(CGRSFS, RME)/feed(CGRSFS, BPSS, CS, BTTE)/water cycle for all regular weeks.
*** I will do full-on bloom feeds(CGRSFS, BPSS, CS, BTTE) for the last two weeks prior to harvest.


*** For details on my feeding schedule refer to here: The Different Feeds I need For This Grow (Version 5)


Activities:

My priority is to expose the growth nodes to light and air because they are going to become colas.


Harvesting:

*** This is what I did ... I read it as a recipe tutorial ... it is based on my research in the Lessons Learned section below.


*** Harvest Phase: Goal is to cut down plant to begin drying.


Cut individual stems off the plant.

Use fingers to clip off any small "larf" buds ... if you want to see what they are like.
Hold the stem upside down and perform a "Wet Trim" by removing large fan leaves and any old sugar leaves without trichomes.
Do not remove sugar leaves, since they are the buffer to protect the flowers.

C.R.E.A.M. #1 - Cowgirl Hemp - 460.4 grams (16.24 ounces) - dry weight stems on.
Cheese #1 - Gouda Hemp - 628.7 grams (22.18 ounces) - dry weight stems on.


*** Wash Phase - Goal is to clean and sterilize buds.

Wash Option1 - Sterilize buds very gently for 5 seconds to 30 seconds in 10:1 3% H2O2 and 20 litres (5 gallons) water at 25°C (78°F) . Used in commercial kitchens or if mold is present.
Rinse once very gently for 5 seconds in 20 litres (5 gallons) water at 15°C (60°F) .
Rinse once very gently for 5 seconds in 20 litres (5 gallons) water at 20°C (68°F) .
Spin the branch gently between your palms to throw off any excess water drops.

IMG_20190828_175012.jpg
The plants were not very dirty.​

Wash Option 2 using lemon juice and baking soda may have been debunked. I need to open what I found for discussion.


IMG_20190828_194335.jpg

I see how topping only one quadrant caused quite an imbalance in symmetry.
Topping like this is useful if you want an oval shape to your plant.
I used a fork during Stem-Splitting because it was convenient.​


*** Initial Drying Phase - Stems-On: Goal is to begin drip drying after washing.

IMG_20190828_211305.jpg

Hang, in tent with stems-on, to drip dry in mesh drying rack for about 24 hours using a small fan to gently circulate air.
Tent temperature is 23°C (73°F) and RH 52.5% which is near ideal at 20°C (68°F) and RH 50%.
The fan can blow across the buds as long as the buds do not move.
This takes around 24 hours.


*** Initial Drying Phase - Stems-Off: Goal is to get to the state where the outside of the buds are dry.

0_buds-on-drying-rack.jpg

Remove buds from stems.
Hang, in tent with stems-off, to dry in mesh drying rack for about 24 hours using a small fan to gently circulate air.
Tent temperature is 23°C (73°F) and RH 52.5% which is near ideal at 20°C (68°F) and RH 50%.
The fan can blow across the buds as long as the buds do not move.
This takes around 24 hours.


*** Intermediate Drying Phase: Goal is to slowly get jar (bag) RH to between 64% and 72%.

Put buds into jars (paper bags) at room temp 20°C (68°F) to 25°C (76°F) and room RH below 60%.
Place a humidity sensor in jar (paper bag) and seal.
Place in dark.
The jar (bag) RH will rise as moisture moves from the buds to the surrounding air (buds are drying).

Every 12 hours:
  • Roll or gently shake jars (paper bags) [This increases surface area and prevents sticking together.]
  • If jar (bag) RH is NOT between 64% and 72% then:
  • ... Take lids off of jars.
  • ... Wait one hour.
  • ... Place lids back on jars.
If jar (bag) RH is between 64% and 72% then we can begin the Fine-Tune Drying Phase.


*** In the future, it would be nice to dedicate an entire tent to Initial Drying.

*** In the future, it would be nice to have fridge space to do a proper Lotus Cure.


Notes:

The priority has to be to expose the growth nodes/buds to light & air, and to keep the canopy even and flat.


I am going to let the Bakerstreet plants grow naturally now and stop tucking the stems into the ScrOG. For details on this decision, please refer here: How long to Veg Photoperiods? - Version 2

I am confident the new Mars Hydro TSL 2000W light is pentrating into the Bakerstreet plants, so a lot of pruning is not a good idea.

I pruned Bakerstreet #1, to expose the budlets to light and air. I also lollipopped under the canopy.

I pruned Bakerstreet #2, to expose the budlets to light and air. I also lollipopped under the canopy.

*** Bakerstreet #2 is growing much better than Bakerstreet #1 ... implying a heavy defoliation is healthy.


The colas at the ends of the C.R.E.A.M.'s & Cheese's quadline lines are much bigger than the side colas. However, the side colas produce a significant amount of bud when trained properly.

When harvesting cannabis, the smell is very strong ... especially after washing!!!

It is important for me to keep the harvested, strong smelling, plants contained inside a tent with exhaust fans running continuously.


With the environment #1 exhaust fan on 24-0, it keeps pulling air in from the room.

To change the VPD in the tent, I have change the environment parameters in the room.

To decrease VPD for lights-on ... I need to either raise the room RH by 5% or decrease the room temp by 2°C (4°F) .


*** I am looking forward to starting my LUX analysis soon.


Lessons Learned:

No lessons learned today because I need to do a lot of gardening.


ToDo:

Learn more about ... When Is the Right Time to Harvest Cannabis Plants?

Learn more about pests and nutrient deficiencies
 
Congrats on the harvest SQL! Looks like some good meds.

Thanks @MrSauga ... I have doing my best to bloom and then harvest these first two plants.

I was really caught off guard in terms of grow space, tent environment, checking trichomes, and then trimming and drying ...

... all the while trying to manage the strong terpene smells!!!

I'll need to pop by soon and check on things in your neck of the woods :)

ttyl
 
Congrats SQl. That's impressive. Good harvest. I will be referencing your journals for my future grows. Good job, my friend. Grow Brother Grow.

Thanks @oopssteptinit ... I was hoping you would pop by.

As I said to @MrSauga ... it has been quite a challenge going through this process for the first time.

I am definitely going to spend the rest of today trying to plan out my next harvest and what I am going to do with the tents in the next few months so I can manage things better!

Alright ... ttyl
 
My Plans For Future Indoor Grows

Currently:


The 3'x3'x6' Veg Tent:


Green Poison XL # 1: ..... September 19, 2019 (8 weeks after germination).
Dark Devil # 2: ................ September 23, 2019 (8½ weeks after germination).
Killer Kush #1: ................. September 30, 2019 (9½ weeks after germination).
Dark Devil # 3: ................ October 07, 2019 (8½ weeks after germination).

I'm not sure these dates are correct because a lot of autoflowers can take 10 weeks.

It is a major pain to harvest without a cool dark place with an exhaust fan ... like an empty tent!


The 2'x4'x5' Bloom Tent:

Bakerstreets: ..................... September 30, 2019 to October 07, 2019 (8 to 9 weeks flower)
Cream Caramel CBD: ........ October 15, 2019 (8 weeks flower)
Red Mandarin F1 Fast: ...... October 07, 2019 to October 15, 2019 (7 to 8 weeks flower)

So, October 15, 2019 seems like a good date to harvest the 2'x4'x5' Veg tent.

Then ... Cut ... Wash ... Hang Dry for 1 week in a cool dark tent.


After October 22, 2019:


*** I will be growing photoperiods.
*** I will be growing in coco.
*** I will want all the veg, bloom and harvest times to coincide.
*** I will want to try SOGs using clones to grow main colas.
*** I will want to try 12-12 from seed to top and grow main colas.
*** I will want to minimize veg time and decrease time-to-harvest.
*** I will want to pheno hunt for good mothers.

*** I will start cloning from mothers September 15, 2019.


The 2'x4'x5' Veg Tent:


*** Leave the TSL 2000W light in the veg tent.

The 3'x3'x6' Bloom Tent:

*** Leave the two X6 lights in the bloom tent.
 
September 01 2019 - Update

Images:


IMG_20190901_001851.jpg

Bakerstreet #1 - Hanna Hemp - Looks healthy so far - budlets are exposed to light and air - limited pruning.


IMG_20190901_001940.jpg

Bakerstreet #2 - Henna Hemp - Looks healthy so far - budlets are exposed to light and air - heavy pruning


IMG_20190903_111708.jpg

C.R.E.A.M. #1 - Cowgirl Hemp - Looks healthy so far - Intermediate Drying - Jars.


IMG_20190903_111752.jpg

Cheese #1 - Gouda Hemp - Looks healthy so far- Intermediate Drying - Jars.


Environment #1 - Autoflower Veg/Flower:

I am tracking the RH, canopy temperature and VPD with the Inkbird IBS-TH1.

Environment # 1 is mutually exclusive from Environment # 2.

The exhaust fan is running 24-0 to prevent a rise in temperature & RH, and to prevent smells in the house.

I do not want to turn off the exhaust fan because it will smell up the house.

The humidifier is turned off.

The dehumidifier is turned off.

Two X6 lights are running 1 cycle of "20 hours lights-on and 4 hours lights-off".

The two X6 lights are 45 cm (18") above the canopy centered over the vegging plants.

An X6 light gives off 2°C (4°F) of heat.

CO2 is refreshed frequently because the exhaust fan and the oscillating fan are always on.


*** The room temperature is running around 20°C (68°F) and RH 50%.

*** The environment humidity is running steady around RH 52.5% with lights-on.
*** The environment humidity peaks up to RH 65% with lights-off.

*** The environment temperature is running steady around 28°C (82°F) with lights-on.
*** The environment temperature dips down to 22°C (68°F) with lights-off.

*** VPD is running steady about 1.36 - High Transpiration: Late Veg/Early Flower - lights-on.
*** VPD is peaking at about 0.62 - Low Transpiration: Propagation/ Early Veg - lights-off.


*** On hot days with two X6 lights on, the VPD enters the Danger Zone.

*** With the exhaust fan on 24-0, it keeps pulling air in from the room.

*** To change the VPD in the tent, I have change the environment parameters in the room.

*** To decrease VPD for lights-on ... I need to either raise the room RH by 5% or decrease the room temp by 2°C (4°F) .


*** The VPD Values I am Using For This Grow (Version 1)


Environment #2 - Photoperiod Flower:

I will start tracking RH, canopy temperature and VPD again when I get Environment #1 dialed-in.

Environment # 2 is mutually exclusive from Environment # 1.

The exhaust fan is running 24-0 to prevent a rise in temperature, RH and to prevent smells in the house.

Environment # 2 does not have a humidifier.

Environment # 2 does not have a dehumidifier.

The Mars Hydro TSL 2000W light is running 1 cycle of uninterrupted "12 hours lights-on and 12 hours lights-off".

The Mars Hydro TSL 2000W light is 30 cm (12") above the canopy centered over all plants.

The Mars Hydro TSL 2000W light does not give off a lot of heat.

CO2 is refreshed frequently because the exhaust fan and the oscillating fan are always on.

*** The VPD Values I am Using For This Grow (Version 1)


Growth Stage:

2 Bakerstreets: Day 7/ Week 14 ... Day 98 ... Day 27/Week 4 flower.

*** The Bakerstreets are in week 4 of the flowering stage, they have likely stopped growing altogether and are now spending all their energy on growing buds.

*** They got their pistels on August 05, 2019.
*** Most credible seed banks present "weeks to flower" as weeks from first getting pistels.
*** They are due for the final bloom flush/feed(CGRSFS, BPSS, CS, BTTE) on September 16, 2019.
*** They should be ready to harvest between September 30, 2019 and October 07, 2019.


*** Photoperiod Stages: 5 days Germination, 1 week seedling, 2-8 weeks veg, 6-12 weeks flower, 4-12 weeks cure
*** Allow 1 day to 3 days of dark before switching to 12-12
*** Pistels show up about 14 days (2 weeks) after switching to 12-12


1 C.R.E.A.M.: Day 7/ Week 13 ... Day 91 ... harvest.
1 Cheese: Day 7/ Week 13 ... Day 91 ... harvest.

*** They got their pistels on July 09, 2019 ... Day 37.
*** They were harvested August 28, 2019 ... Flush, Full-On Bloom Nutes, Stem Split, Three Days Dark (skipped), Harvest!
*** Harvest: Cut, Wet Trim, Wash, Initial Dry, Intermediate Dry, Fine-Tune Dry


*** Autoflower Stages: 5 days Germination, 1 week seedling, 3 weeks veg, 3 weeks pre-flower, 3-6 weeks flower, 4-12 weeks cure
*** Pistels show up about 35 days (5 weeks) after Germination
*** Flowering takes about 42 days to 56 days (6 weeks to 8 weeks) after pistels show up


Watering and Feeding:


Bakerstreets' Regular Feed:

*** Next regular feed ... 6 litres (1.6 gallons) - Full Dose - Week 09 - CGRSFS, RME around September 04, 2019.
*** Expecting about 1% of run-off. Stop watering right at run-off.


*** I will do a regular feed(CGRSFS, RME)/feed(CGRSFS, BPSS, CS, BTTE)/water cycle for all regular weeks.
*** I will do full-on bloom feeds(CGRSFS, BPSS, CS, BTTE) for the last two weeks prior to harvest.


*** For details on my feeding schedule refer to here: The Different Feeds I need For This Grow (Version 5)


Activities:

My priority is to expose the growth nodes to light and air because they are going to become colas.


Harvesting:

*** This is what I did ... I read it as a recipe tutorial.


*** Harvest Phase: Goal is to cut down plant to begin drying.


Cut individual stems off the plant.

Use fingers to clip off any small "larf" buds ... if you want to see what they are like.
Hold the stem upside down and perform a "Wet Trim" by removing large fan leaves and any old sugar leaves without trichomes.
Do not remove fresh sugar leaves, since they are the buffer to protect the flowers.

C.R.E.A.M. #1 - Cowgirl Hemp - 460.4 grams (16.24 ounces) - dry weight stems on.
Cheese #1 - Gouda Hemp - 628.7 grams (22.18 ounces) - dry weight stems on.


*** Wash Phase - Goal is to clean and sterilize buds.

Wash Option1 - Sterilize buds very gently for 5 seconds to 30 seconds in 10:1 3% H2O2 and 20 litres (5 gallons) water at 25°C (78°F) . Used in commercial kitchens or if mold is present.
Rinse once very gently for 5 seconds in 20 litres (5 gallons) water at 15°C (60°F) .
Rinse once very gently for 5 seconds in 20 litres (5 gallons) water at 20°C (68°F) .
Spin the branch gently between your palms to throw off any excess water drops.

IMG_20190828_175012.jpg
The plants were not very dirty.​

Wash Option 2 - using lemon juice and baking soda may have been debunked.


IMG_20190828_194335.jpg


I see how topping only one quadrant causes quite an imbalance in symmetry.
Topping like this is useful if you want an oval shape to your plant.
I used a fork during Stem-Splitting because it was convenient.​


*** Initial Drying Phase - Stems-On: Goal is to begin drip drying after washing.

IMG_20190828_211305.jpg

Hang, in tent with stems-on, to drip dry in mesh drying rack for about 24 hours using a small fan to gently circulate air.
Tent temperature is 23°C (73°F) and RH 52.5% which is near ideal ... 20°C (68°F) and RH 50%.
The fan can blow across the buds as long as the buds do not move.
This takes around 24 hours.


*** Initial Drying Phase - Stems-Off: Goal is to get to the state where the outside of the buds are dry.

0_buds-on-drying-rack.jpg
Remove buds from stems.
Hang, in tent with stems-off, to dry in mesh drying rack for about 24 hours using a small fan to gently circulate air.
Tent temperature is 23°C (73°F) and RH 52.5% which is near ideal ... 20°C (68°F) and RH 50%.
The fan can blow across the buds as long as the buds do not move.
This takes around 24 hours.

*** Intermediate Drying Phase: Goal is to slowly get jar (bag) RH to between 64% and 72%.

Put buds into jars (paper bags) at room temp 20°C (68°F) to 25°C (76°F) and room RH below 60%.
Place a humidity sensor in jar (paper bag) and seal.
Place in dark.
The jar (bag) RH will rise as moisture moves from the buds to the surrounding air (buds are drying).

Every 12 hours:
  • Roll or gently shake jars (paper bags) [This increases surface area and prevents sticking together.]
  • If jar (bag) RH is NOT between 64% and 72% then:
  • ... Take lids off of jars.
  • ... Wait one hour.
  • ... Place lids back on jars.
If jar (bag) RH is between 64% and 72% then we can begin the Fine-Tune Drying Phase.


*** In the future, it would be nice to dedicate an entire tent to Initial Drying.

*** In the future, it would be nice to have fridge space to do a proper Lotus Cure.


Notes:

The priority has to be to expose the growth nodes/buds to light & air, and to keep the canopy even and flat.


I am going to let the Bakerstreet plants grow naturally now and stop tucking the stems into the ScrOG. For details on this decision, please refer here: How long to Veg Photoperiods? - Version 2

I am confident the new Mars Hydro TSL 2000W light is pentrating into the Bakerstreet plants, so a lot of pruning is not a good idea.

*** Bakerstreet #2 is growing much better than Bakerstreet #1 ... implying a heavy defoliation is healthy.


The colas at the ends of the C.R.E.A.M.'s & Cheese's quadline lines are much bigger than the side colas. However, the side colas produce a significant amount of bud when trained properly.

When harvesting cannabis, the smell is very strong ... especially after washing!!!

*** It is important for me to keep the harvested, strong smelling, plants contained inside a tent with exhaust fans running continuously.


With the environment #1 exhaust fan on 24-0, it keeps pulling air in from the room.

To change the VPD in the tent, I have change the environment parameters in the room.

To decrease VPD for lights-on ... I need to either raise the room RH by 5% or decrease the room temp by 2°C (4°F) .


*** I am looking forward to starting my LUX analysis soon.


Lessons Learned:

No lessons learned today because I need to do a lot of gardening.


ToDo:

Learn more about ... When Is the Right Time to Harvest Cannabis Plants?

Learn more about pests and nutrient deficiencies
 
September 02 2019 - Update

Images:


IMG_20190903_005211.jpg

Bakerstreet #1 - Hanna Hemp - Looks healthy so far - budlets are exposed to light and air - heavy pruning.


IMG_20190903_005233.jpg

Bakerstreet #2 - Henna Hemp - Looks healthy so far - budlets are exposed to light and air - heavy pruning


IMG_20190903_111708.jpg

C.R.E.A.M. #1 - Cowgirl Hemp - Looks healthy so far - Intermediate Drying - Jars.


IMG_20190903_111752.jpg

Cheese #1 - Gouda Hemp - Looks healthy so far- Intermediate Drying - Jars.


Environment #1 - Autoflower Veg/Flower:

I am tracking the RH, canopy temperature and VPD with the Inkbird IBS-TH1.

Environment # 1 is mutually exclusive from Environment # 2.

The exhaust fan is running 24-0 to prevent a rise in temperature & RH, and to prevent smells in the house.

I do not want to turn off the exhaust fan because it will smell up the house.

The humidifier is turned off.

The dehumidifier is turned off.

Two X6 lights are running 1 cycle of "20 hours lights-on and 4 hours lights-off".

The two X6 lights are 45 cm (18") above the canopy centered over the vegging plants.

An X6 light gives off 2°C (4°F) of heat.

CO2 is refreshed frequently because the exhaust fan and the oscillating fan are always on.


*** The room temperature is running around 20°C (68°F) and RH 50%.

*** The environment humidity is running steady around RH 52.5% with lights-on.
*** The environment humidity peaks up to RH 65% with lights-off.

*** The environment temperature is running steady around 28°C (82°F) with lights-on.
*** The environment temperature dips down to 22°C (68°F) with lights-off.

*** VPD is running steady about 1.36 - High Transpiration: Late Veg/Early Flower - lights-on.
*** VPD is peaking at about 0.62 - Low Transpiration: Propagation/ Early Veg - lights-off.


*** On hot days, with two X6 lights on, the VPD enters the Danger Zone.

*** With the exhaust fan on 24-0, it keeps pulling air in from the room.

*** To change the VPD in the tent, I have change the environment parameters in the room.

*** To decrease VPD for lights-on ... I need to either raise the room RH by 5% or decrease the room temp by 2°C (4°F) .


*** The VPD Values I am Using For This Grow (Version 1)


Environment #2 - Photoperiod Flower:

I will start tracking RH, canopy temperature and VPD again when I get Environment #1 dialed-in.

Environment # 2 is mutually exclusive from Environment # 1.

The exhaust fan is running 24-0 to prevent a rise in temperature, RH and to prevent smells in the house.

Environment # 2 does not have a humidifier.

Environment # 2 does not have a dehumidifier.

The Mars Hydro TSL 2000W light is running 1 cycle of uninterrupted "12 hours lights-on and 12 hours lights-off".

The Mars Hydro TSL 2000W light is 30 cm (12") above the canopy centered over all plants.

The Mars Hydro TSL 2000W light does not give off a lot of heat.

CO2 is refreshed frequently because the exhaust fan and the oscillating fan are always on.

*** The VPD Values I am Using For This Grow (Version 1)


Growth Stage:

2 Bakerstreets: Day 1/ Week 14 ... Day 99 ... Day 28/Week 4 flower.

*** The Bakerstreets are in week 4 of the flowering stage, they have likely stopped growing altogether and are now spending all their energy on growing buds.

*** They got their pistels on August 05, 2019.
*** Most credible seed banks present "weeks to flower" as weeks from first getting pistels.
*** They are due for the final bloom flush/feed(CGRSFS, BPSS, CS, BTTE) on September 16, 2019.
*** They should be ready to harvest between September 30, 2019 and October 07, 2019.


*** Photoperiod Stages: 5 days Germination, 1 week seedling, 2-8 weeks veg, 6-12 weeks flower, 4-12 weeks cure
*** Allow 1 day to 3 days of dark before switching to 12-12
*** Pistels show up about 14 days (2 weeks) after switching to 12-12


1 C.R.E.A.M.: Day 1 Week 14 ... Day 92 ... harvest.
1 Cheese: Day 1/ Week 14 ... Day 92 ... harvest.

*** They got their pistels on July 09, 2019 ... Day 37.
*** They were harvested August 28, 2019 ... Flush, Full-On Bloom Nutes, Stem Split, Three Days Dark (skipped), Harvest!
*** Harvest: Cut, Wet Trim, Wash, Initial Dry, Intermediate Dry, Fine-Tune Dry


*** Autoflower Stages: 5 days Germination, 1 week seedling, 3 weeks veg, 3 weeks pre-flower, 3-6 weeks flower, 4-12 weeks cure
*** Pistels show up about 35 days (5 weeks) after Germination
*** Flowering takes about 42 days to 56 days (6 weeks to 8 weeks) after pistels show up


Watering and Feeding:


Bakerstreets' Regular Feed:

*** Next regular feed ... 6 litres (1.6 gallons) - Full Dose - Week 09 - CGRSFS, RME around September 04, 2019.
*** Expecting about 1% of run-off. Stop watering right at run-off.


*** I will do a regular feed(CGRSFS, RME)/feed(CGRSFS, BPSS, CS, BTTE)/water cycle for all regular weeks.
*** I will do full-on bloom feeds(CGRSFS, BPSS, CS, BTTE) for the last two weeks prior to harvest.


Activities:

My priority is to expose the growth nodes to light and air because they are going to become colas.


Harvesting:

*** This is what I did ... I read it as a recipe tutorial.


*** Harvest Phase: Goal is to cut down plant to begin drying.


Cut individual stems off the plant.

Use fingers to clip off any small "larf" buds ... if you want to see what they are like.
Hold the stem upside down and perform a "Wet Trim" by removing large fan leaves and any old sugar leaves without trichomes.
Do not remove fresh sugar leaves, since they are the buffer to protect the flowers.

C.R.E.A.M. #1 - Cowgirl Hemp - 460.4 grams (16.24 ounces) - dry weight stems on.
Cheese #1 - Gouda Hemp - 628.7 grams (22.18 ounces) - dry weight stems on.


*** Wash Phase - Goal is to clean and sterilize buds.

Wash Option1 - Sterilize buds very gently for 5 seconds to 30 seconds in 10:1 3% H2O2 and 20 litres (5 gallons) water at 25°C (78°F) . Used in commercial kitchens or if mold is present.
Rinse once very gently for 5 seconds in 20 litres (5 gallons) water at 15°C (60°F) .
Rinse once very gently for 5 seconds in 20 litres (5 gallons) water at 20°C (68°F) .
Spin the branch gently between your palms to throw off any excess water drops.

IMG_20190828_175012.jpg
The plants were not very dirty.​

Wash Option 2 - using lemon juice and baking soda may have been debunked.


IMG_20190828_194335.jpg

I see how topping only one quadrant causes quite an imbalance in symmetry.
Topping like this is useful if you want an oval shape to your plant.
I used a fork during Stem-Splitting because it was convenient.​


*** Initial Drying Phase - Stems-On: Goal is to begin drip drying after washing.

IMG_20190828_211305.jpg

Hang, in tent with stems-on, to drip dry in mesh drying rack for about 24 hours using a small fan to gently circulate air.
Tent temperature is 23°C (73°F) and RH 52.5% which is near ideal ... 20°C (68°F) and RH 50%.
The fan can blow across the buds as long as the buds do not move.
This takes around 24 hours.


*** Initial Drying Phase - Stems-Off: Goal is to get to the state where the outside of the buds are dry.

0_buds-on-drying-rack.jpg
Remove buds from stems.
Hang, in tent with stems-off, to dry in mesh drying rack for about 24 hours using a small fan to gently circulate air.
Tent temperature is 23°C (73°F) and RH 52.5% which is near ideal ... 20°C (68°F) and RH 50%.
The fan can blow across the buds as long as the buds do not move.
This takes around 24 hours.

*** Intermediate Drying Phase: Goal is to slowly get jar (bag) RH to between 64% and 72%.

Put buds into jars (paper bags) at room temp 20°C (68°F) to 25°C (76°F) and room RH below 60%.
Place a humidity sensor in jar (paper bag) and seal.
Place in dark.
The jar (bag) RH will rise as moisture moves from the buds to the surrounding air (buds are drying).

Every 12 hours:
  • Roll or gently shake jars (paper bags) [This increases surface area and prevents sticking together.]
  • If jar (bag) RH is NOT between 64% and 72% then:
  • ... Take lids off of jars.
  • ... Wait one hour.
  • ... Place lids back on jars.
If jar (bag) RH is between 64% and 72% then we can begin the Fine-Tune Drying Phase.


*** It smells a bit like hay or damp grass right now.

*** I am concerned that the light and high temperature in the tent, during the initial drying phase, has seriously degraded the quality of the cannabis.

*** In the future, it would be nice to dedicate an entire tent to Initial Drying.

*** In the future, it would be nice to have fridge space to do a proper Lotus Cure.


Notes:

The priority has to be to expose the growth nodes/buds to light & air, and to keep the canopy even and flat.


I took down the ScrOG because it is definitely NOT my growing style.

The tent was filthy, so I wiped it all down and cleaned it with Clorox.

Unfortunately, I broke a lot of branches and needed to cut them off ... which is going to seriously decrease the yield.

I am going to try to separate the remaining stems so they have space to grow properly.

I am realizing how important it is to ... have enough space in the tent for each plant ... and to train each plant in such a way that there is enough space between stems for the colas to grow properly.

Bakerstreet #2 is growing much better than Bakerstreet #1 ... implying a heavy defoliation is healthy.


The colas at the ends of the C.R.E.A.M.'s & Cheese's quadline lines are much bigger than the side colas. However, the side colas produce a significant amount of bud when trained properly.

When harvesting cannabis, the smell is very strong ... especially after washing!!!

It is important for me to keep the newly harvested, strong smelling plants, contained inside a tent with exhaust fans running continuously.


With the environment #1 exhaust fan on 24-0, it keeps pulling air in from the room.

To change the VPD in the tent, I have change the environment parameters in the room.

To decrease VPD for lights-on ... I need to either raise the room RH by 5% or decrease the room temp by 2°C (4°F) .


*** I am looking forward to starting my LUX analysis soon.


Lessons Learned:

No lessons learned today because I need to do a lot of gardening.


ToDo:

Learn more about ... The Art of Curing Your Cannabis Crop

Learn more about pests and nutrient deficiencies
 
My Notes For Seed Germination - Soil Grows


SEED - 24 Hour Water Soak:

FF Cal-Mag .................................................... 1 ml/litre
FF Super Sonic Plant Tonic .......................... 1 ml/litre
pH 6.4-6.6

*** Tap root should appear if seeds are voracious.
*** If tap root does not appear then scrape the pointed tip of the seed to weaken the seed husk.


SEED - Paper Towel:

FF Cal-Mag .................................................... 1 ml/litre
FF Super Sonic Plant Tonic .......................... 1 ml/litre
AN B-52 .......................................................... 2 ml/litre
AN Voodoo Juice ........................................... 2 ml/litre
Liquid Stim-Root ........................................... 1 drop on tap root
Great White Mycorrhizae ............................. sprinkle on tap root
pH 6.4-6.6

*** Pointy tip of seed with tap root must point up.
*** Stand paper towel up ... do not lay flat.


SEED - Jiffy Pellets/Root Riot Cubes/Rockwool:

FF Cal-Mag .................................................... 1 ml/litre
FF Super Sonic Plant Tonic .......................... 1 ml/litre
AN B-52 .......................................................... 2 ml/litre
AN Voodoo Juice ........................................... 2 ml/litre
Liquid Stim-Root ........................................... 1 drop on tap root
Great White Mycorrhizae ............................. sprinkle on tap root
pH 6.4-6.6

0_marijuana-seeds-positioning-in-soil.gif

*** Soak the cubes or pellets in the solution and shake out so damp and not wet.
*** Do NOT squeeze rockwool cubes because the fibers will break.
*** Gently place seed into hole ... the pointy tip of seed with tap root must point up.
*** This mix will get the rooting started quickly and produce strong hairy roots.
*** I transplant into a 1 litre pot as soon as the tap root comes out the bottom of the cube.
 
My Notes For Seed Germination - Coco Grows


SEED - 24 Hour Water Soak:

AN pH Perfect Sensi Coco Grow A ............. 1 ml/litre
AN pH Perfect Sensi Coco Grow B ............. 1 ml/litre
pH 5.5-5.8

*** Tap root should appear if seeds are voracious.
*** If tap root does not appear then scrape the pointed tip of the seed to weaken the seed husk.


SEED - Paper Towel:

AN pH Perfect Sensi Coco Grow A ............. 1 ml/litre
AN pH Perfect Sensi Coco Grow B ............. 1 ml/litre
AN B-52 .......................................................... 2 ml/litre
AN Voodoo Juice ........................................... 2 ml/litre
Liquid Stim-Root ........................................... 1 drop on tap root
Great White Mycorrhizae ............................. sprinkle on tap root
pH 5.5-5.8

*** Pointy tip of seed with tap root must point up.
*** Stand paper towel up ... do NOT lay flat.


SEED - Jiffy Pellets/Root Riot Cubes/Rockwool:

AN pH Perfect Sensi Coco Grow A ............. 1 ml/litre
AN pH Perfect Sensi Coco Grow B ............. 1 ml/litre
AN B-52 .......................................................... 2 ml/litre
AN Voodoo Juice ........................................... 2 ml/litre
Liquid Stim-Root ........................................... 1 drop on tap root
Great White Mycorrhizae ............................. sprinkle on tap root
pH 5.5-5.8

0_marijuana-seeds-positioning-in-soil.gif

*** Soak the cubes or pellets in the solution and shake out so damp and not wet.
*** Do NOT squeeze rockwool cubes because the fibers will break.
*** Gently place seed into hole ... the pointy tip of seed with tap root must point up.
*** This mix will get the rooting started quickly and produce strong hairy roots.
*** I transplant into a 1 litre pot as soon as the tap root comes out the bottom of the cube.
 
September 03 2019 - Update

Images:


IMG_20190903_214356.jpg

Bakerstreet #1 - Hanna Hemp - Looks healthy so far - buds are exposed to light and air - heavy pruning.


IMG_20190903_214419.jpg

Bakerstreet #2 - Henna Hemp - Looks healthy so far - buds are exposed to light and air - heavy pruning


IMG_20190903_111708.jpg

C.R.E.A.M. #1 - Cowgirl Hemp - Looks healthy so far - Intermediate Drying - Jars and Mesh Drying Rack.


IMG_20190903_111752.jpg

Cheese #1 - Gouda Hemp - Looks healthy so far- Intermediate Drying - Jars and Mesh Drying Rack.


Environment #1 - Autoflower Veg/Flower:

I am tracking the RH, canopy temperature and VPD with the Inkbird IBS-TH1.

Environment # 1 is mutually exclusive from Environment # 2.

The exhaust fan is running nearly 24-0 to prevent a rise in temperature & RH, and to prevent smells in the house.

I do not want to turn off the exhaust fan because it will smell up the house.

The humidifier is turned off.

The dehumidifier is turned off.

Two X6 lights are running 1 cycle of "20 hours lights-on and 4 hours lights-off".

The two X6 lights are 45 cm (18") above the canopy centered over the vegging plants.

An X6 light gives off 2°C (4°F) of heat.

CO2 is refreshed frequently because the exhaust fan and the oscillating fan are always on.


*** The room temperature is running around 20°C (68°F) and RH 50%.

*** The environment humidity is running steady around RH 52.5% with lights-on.
*** The environment humidity peaks up to RH 65% with lights-off.

*** The environment temperature is running steady around 28°C (82°F) with lights-on.
*** The environment temperature dips down to 22°C (68°F) with lights-off.

*** VPD is running steady about 1.36 - High Transpiration: Late Veg/Early Flower - lights-on.
*** VPD is peaking at about 0.62 - Low Transpiration: Propagation/ Early Veg - lights-off.


*** On hot days, with two X6 lights on, the VPD enters the Danger Zone.

*** With the exhaust fan on 24-0, it keeps pulling air in from the room.

*** To change the VPD in the tent, I have change the environment parameters in the room.

*** To decrease VPD for lights-on:

****** Raise the room RH by 5%.
****** Decrease the room temp by 2°C (4°F) .
****** Don't let the temperature drop when the lights turn off.


*** I wired up the Inkbird ITC-308 again with the following settings:

****** Ts: 27°C (81°F)
****** Cd: 1°C (2°F)
****** Hd: 1°C (2°F)

****** The exhaust fan is plugged into the Cooling socket.
****** The space heater is plugged into the Heating socket.

****** When the temperature rises above 28°C (83°F) , the exhaust fan turns on.

****** When the temperature drops below 26°C (79°F) , the space heater turns on.

*** Let's see how this plays out.

*** The VPD Values I am Using For This Grow (Version 1)


Environment #2 - Photoperiod Flower:

I will start tracking RH, canopy temperature and VPD again when I get another Inkbird IBS-TH1.

Environment # 2 is mutually exclusive from Environment # 1.

The exhaust fan is running 24-0 to prevent a rise in temperature, RH and to prevent smells in the house.

Environment # 2 does not have a humidifier.

Environment # 2 does not have a dehumidifier.

The Mars Hydro TSL 2000W light is running 1 cycle of uninterrupted "12 hours lights-on and 12 hours lights-off".

The Mars Hydro TSL 2000W light is 30 cm (12") above the canopy centered over all plants.

The Mars Hydro TSL 2000W light does not give off a lot of heat.

CO2 is refreshed frequently because the exhaust fan and the oscillating fan are always on.

*** The VPD Values I am Using For This Grow (Version 1)


Growth Stage:

2 Bakerstreets: Day 2/ Week 15 ... Day 100 ... Day 29/Week 5 flower.

*** The Bakerstreets are in week 5 of the flowering stage, they have stopped growing altogether and are now spending all their energy on growing buds.

*** They got their pistels on August 05, 2019.
*** Most credible seed banks present "weeks to flower" as weeks from first getting pistels.
*** They are due for the final bloom flush/feed(CGRSFS, BPSS, CS, BTTE) on September 16, 2019.
*** They should be ready to harvest between September 30, 2019 and October 07, 2019.


*** Photoperiod Stages: 5 days Germination, 1 week seedling, 2-8 weeks veg, 6-12 weeks flower, 4-12 weeks cure
*** Allow 1 day to 3 days of dark before switching to 12-12
*** Pistels show up about 14 days (2 weeks) after switching to 12-12


1 C.R.E.A.M.: Day 2 Week 14 ... Day 93 ... harvest.
1 Cheese: Day 2/ Week 14 ... Day 93 ... harvest.

*** They got their pistels on July 09, 2019 ... Day 37.
*** They were harvested August 28, 2019 ... Flush, Full-On Bloom Nutes, Stem Split, Three Days Dark (skipped), Harvest!
*** Harvest: Cut, Wet Trim, Wash, Initial Dry, Intermediate Dry, Fine-Tune Dry


*** Autoflower Stages: 5 days Germination, 1 week seedling, 3 weeks veg, 3 weeks pre-flower, 3-6 weeks flower, 4-12 weeks cure
*** Pistels show up about 35 days (5 weeks) after Germination
*** Flowering takes about 42 days to 56 days (6 weeks to 8 weeks) after pistels show up


Watering and Feeding:


Bakerstreets' Regular Feed:

*** Next regular feed ... 6 litres (1.6 gallons) - Full Dose - Week 09 - CGRSFS, BPSS, CS, BTTE) around September 04, 2019.
*** Expecting about 1% of run-off. Stop watering right at run-off.


*** I will do a regular feed(CGRSFS, RME)/feed(CGRSFS, BPSS, CS, BTTE)/water cycle for all regular weeks.
*** I will do full-on bloom feeds(CGRSFS, BPSS, CS, BTTE) for the last two weeks prior to harvest.


Activities:

My priority is to expose the growth nodes to light and air because they are going to become colas.


Harvesting:

*** This is what I did ... I read it as a recipe tutorial.


*** Harvest Phase: Goal is to cut down plant to begin drying.


Cut individual stems off the plant.

Use fingers to clip off any small "larf" buds ... if you want to see what they are like.
Hold the stem upside down and perform a "Wet Trim" by removing large fan leaves and any old sugar leaves without trichomes.
Do not remove fresh sugar leaves, since they are the buffer to protect the flowers.

C.R.E.A.M. #1 - Cowgirl Hemp - 460.4 grams (16.24 ounces) - dry weight stems on.
Cheese #1 - Gouda Hemp - 628.7 grams (22.18 ounces) - dry weight stems on.


*** Wash Phase - Goal is to clean and sterilize buds.

Wash Option1 - Sterilize buds very gently for 5 seconds to 30 seconds in 10:1 3% H2O2 and 20 litres (5 gallons) water at 25°C (78°F) . Used in commercial kitchens or if mold is present.
Rinse once very gently for 5 seconds in 20 litres (5 gallons) water at 15°C (60°F) .
Rinse once very gently for 5 seconds in 20 litres (5 gallons) water at 20°C (68°F) .
Spin the branch gently between your palms to throw off any excess water drops.

IMG_20190828_175012.jpg
The plants were not very dirty.​

Wash Option 2 - using lemon juice and baking soda may have been debunked.


IMG_20190828_194335.jpg

I see how topping only one quadrant causes quite an imbalance in symmetry.
Topping like this is useful if you want an oval shape to your plant.
I used a fork during Stem-Splitting because it was convenient.​


*** Initial Drying Phase - Stems-On: Goal is to begin drip drying after washing.

IMG_20190828_211305.jpg


Hang, in tent with stems-on, to drip dry in mesh drying rack for about 24 hours using a small fan to gently circulate air.
Tent temperature is 23°C (73°F) and RH 52.5% which is near ideal ... 20°C (68°F) and RH 50%.
The fan can blow across the buds as long as the buds do not move.
This takes around 24 hours.


*** Initial Drying Phase - Stems-Off: Goal is to get to the state where the outside of the buds are dry.

0_buds-on-drying-rack.jpg


Remove buds from stems.
Hang, in tent with stems-off, to dry in mesh drying rack for about 24 hours using a small fan to gently circulate air.
Tent temperature is 23°C (73°F) and RH 52.5% which is near ideal ... 20°C (68°F) and RH 50%.
The fan can blow across the buds as long as the buds do not move.
This takes around 24 hours.

*** Intermediate Drying Phase: Goal is to slowly get jar (bag) RH to between 64% and 72%.

Put buds into jars (paper bags) at room temp 20°C (68°F) to 25°C (76°F) and room RH below 60%.
Place a humidity sensor in jar (paper bag) and seal.
Place in dark.
The jar (bag) RH will rise as moisture moves from the buds to the surrounding air (buds are drying).

Every 12 hours:
  • Roll or gently shake jars (paper bags) [This increases surface area and prevents sticking together.]
  • If jar (bag) RH is NOT between 64% and 72% then:
  • ... Take lids off of jars.
  • ... Wait one hour.
  • ... Place lids back on jars.
If jar (bag) RH is between 64% and 72% then we can begin the Fine-Tune Drying Phase.


*** At 22:00 ... the jar's mini hygrometer was reading RH 99% and 23°C (73°F).
*** This means the buds are still really damp and they need to dry a lot more.
*** Hang, in tent with stems-off, to dry in mesh drying rack for about 24 hours using a small fan to gently circulate air.
*** Tent temperature is 23°C (73°F) and RH 52.5% which is near ideal ... 20°C (68°F) and RH 50%.

*** The buds still smell a bit like hay or damp grass right now.

*** I am concerned that the light and high temperature in the tent, during the initial drying phase, has seriously degraded the quality of the cannabis.


*** In the future, it would be nice to dedicate an entire tent to Initial Drying.

*** In the future, it would be nice to have fridge space to do a proper Lotus Cure.


Notes:

The priority has to be to expose the growth nodes/buds to light & air, and to keep the canopy even and flat.


I did a lot of LST and a bit of pruning on the Bakerstreets today to separate the remaining stems so they have space to bloom properly.

I am realizing how important it is to ... have enough space in the tent for each plant ... and to train each plant in such a way that there is enough space between stems for the colas to bloom properly.


The colas at the ends of the C.R.E.A.M.'s & Cheese's quadline lines are much bigger than the side colas. However, the side colas produce a significant amount of bud when trained properly.

When harvesting cannabis, the smell is very strong ... especially after washing!!!

It is important for me to keep the newly harvested, strong smelling plants, contained inside a tent with exhaust fans running continuously.


*** I am looking forward to starting my LUX analysis soon.


Lessons Learned:

No lessons learned today because I need to do a lot of gardening.


ToDo:

Learn more about ... The Art of Curing Your Cannabis Crop

Learn more about pests and nutrient deficiencies
 
September 04 2019 - Update

Images:


IMG_20190904_203756.jpg

Bakerstreet #1 - Hanna Hemp - Looks healthy so far - buds are exposed to light and air - heavy pruning.


IMG_20190904_203811.jpg

Bakerstreet #2 - Henna Hemp - Looks healthy so far - buds are exposed to light and air - heavy pruning


IMG_20190903_111708.jpg

C.R.E.A.M. #1 - Cowgirl Hemp - Looks healthy so far - Intermediate Drying - Jars and Mesh Drying Rack.


IMG_20190903_111752.jpg

Cheese #1 - Gouda Hemp - Looks healthy so far- Intermediate Drying - Jars and Mesh Drying Rack.


Ontario Electricity Rates
  • On-Peak. 13.2¢ per kWh. Weekdays: 11 a.m. – 5 p.m.
  • Mid-Peak. 9.4¢ per kWh. Weekdays: 7 a.m. – 11 a.m. | 5 p.m. – 7 p.m.
  • Off-Peak. 6.5¢ per kWh. Weekdays: 7 p.m. – 7 a.m.

Environment #1 - Autoflower Veg/Flower:

*** The goal is to dial-in VPD for the "Healthy Transpiration: Late Veg/Early Flower" range.


I am tracking the RH, canopy temperature and VPD with the Inkbird IBS-TH1.

Environment # 1 is mutually exclusive from Environment # 2.

The humidifier is turned off.

The dehumidifier is turned off.

Two X6 lights are running 1 cycle of "18 hours lights-on and 6 hours lights-off".

The two X6 lights are turned off from 11:00 to 17:00 ... On-Peak ... 13.4 ¢/kWh.

The two X6 lights are 38 cm (15") above the canopy centered over the vegging/flowering plants.

An X6 light pulls 300 W from that wall and gives off 2°C (4°F) of heat.

CO2 is refreshed frequently because the exhaust fan and the oscillating fan are always on.


*** The room temperature is running around 21°C (70°F) and RH 50% - daytime 15:00.
*** The room VPD is running about 0.96- Healthy Transpiration: Late Veg/Early Flower - daytime 15:00.

*** The environment humidity is running steady around RH 45.0% with lights-on.
*** The environment humidity is running steady around RH 60.0% with lights-off.

*** The environment temperature is running steady around 27°C (81°F) with lights-on.
*** The environment temperature is running steady around 26°C (79°F) with lights-off and heater-on.

*** VPD is running steady about 1.57- HighTranspiration: Mid/Late Flower - lights-on.
*** VPD is running steady about 0.96 - Healthy Transpiration: Late Veg/Early Flower - lights-off.


*** On hot days, with two X6 lights on, the VPD enters the Danger Zone (Over/Under Transpiration).

*** I wired up the Inkbird ITC-308 Temperature Controller with the following settings:

****** Ts: 27°C (81°F)
****** Cd: 1°C (2°F)
****** Hd: 1°C (2°F)

****** The exhaust fan is plugged into the Cooling socket.
****** The space heater is plugged into the Heating socket.

****** When the temperature rises above 28°C (83°F) , the exhaust fan turns on.
****** When the temperature drops below 26°C (79°F) , the space heater turns on.

*** This played out quite well and I was able to dial-in the VPD.


*** The real question is, ... do I really benefit from running a space heater during lights-out?
*** In nature, the temperature drops and the RH goes up at night.
*** In nature, the plant transpires less at night.

*** In the tent, without the space heater, the temperature drops to 20°C (68°F) and the RH rises to 70%.
*** In the tent, without the space heater, the VPD goes to 0.42 - Low Transpiration (Propagation/Early Veg Growth).
*** In the tent, without the space heater, the VPD is near the Danger Zone (Over/Under Transpiration).


*** The VPD Values I am Using For This Grow (Version 1)


Environment #2 - Photoperiod Flower:

*** The goal is to dial-in VPD for the "High Transpiration: Mid/Late Flower" range.


I am tracking the RH, canopy temperature and VPD with the Inkbird IBS-TH1.

Environment # 2 is mutually exclusive from Environment # 1.

The exhaust fan is running 24-0 to prevent a rise in temperature, RH and to prevent smells in the house.

Environment # 2 does not have a humidifier.

Environment # 2 does not have a dehumidifier.

The Mars Hydro TSL 2000W light is running 1 cycle of uninterrupted "6 hours lights-on and 18 hours lights-off".
The Mars Hydro TSL 2000W light is turned-on from 19:00 to 01:00 ... Off-Peak. 6.5¢ per kWh.

The Mars Hydro TSL 2000W light is 30 cm (12") above the canopy centered over all plants.

The Mars Hydro TSL 2000W light does not give off a lot of heat.

CO2 is refreshed frequently because the exhaust fan and the oscillating fan are always on.


*** The room temperature is running around 21°C (70°F) and RH 50% - daytime 15:00.
*** The room VPD is running about 0.96 - Healthy Transpiration: Late Veg/Early Flower - daytime 15:00.

*** The environment humidity is running steady around RH 62.5% with lights-on.
*** The environment humidity is running steady around RH 62.5% with lights-off.

*** The environment temperature is running steady around 23°C (74°F) with lights-on.
*** The environment temperature is running steady around 21°C (70°F) with lights-off.

*** VPD is running steady about 0.73 - Low Transpiration (Propagation/Early Veg Growth) - lights-on.
*** VPD is running steady about 0.65 - Low Transpiration (Propagation/Early Veg Growth) - lights-off.


*** Ideally for flowering we want:
  • Humidity levels need to be lowered to 40-50% (extremely important)
  • You can get away with 55% (anything over 60% is real bad)
  • It’s best to slightly lower temperatures in flowering
  • Temperatures with lights on: 20°C (68°F) to 26°C (79°F) ... (avoid high temperatures).

*** The humidity needs to be decreased to at least RH 55%.
*** The temperature is in range.


*** The VPD Values I am Using For This Grow (Version 1)


Growth Stage:

2 Bakerstreets: Day 3/ Week 15 ... Day 101 ... Day 30/Week 5 flower.

*** The Bakerstreets are in week 5 of the flowering stage, they have stopped growing altogether and are now spending all their energy on growing buds.

*** They got their pistels on August 05, 2019.
*** Most credible seed banks present "weeks to flower" as weeks from first getting pistels.
*** They should be ready to harvest between September 30, 2019 and October 07, 2019.


*** Photoperiod Stages: 5 days Germination, 1 week seedling, 2-8 weeks veg, 6-12 weeks flower, 4-12 weeks cure
*** Allow 1 day to 3 days of dark before switching to 12-12
*** Pistels show up about 14 days (2 weeks) after switching to 12-12


1 C.R.E.A.M.: Day 3 Week 14 ... Day 94 ... harvest.
1 Cheese: Day 3/ Week 14 ... Day 94 ... harvest.

*** They got their pistels on July 09, 2019 ... Day 37.
*** They were harvested August 28, 2019 ... Flush, Full-On Bloom Nutes, Stem Split, Three Days Dark (skipped), Harvest!
*** Harvest: Cut, Wet Trim, Wash, Initial Dry, Intermediate Dry, Fine-Tune Dry


*** Autoflower Stages: 5 days Germination, 1 week seedling, 3 weeks veg, 3 weeks pre-flower, 3-6 weeks flower, 4-12 weeks cure
*** Pistels show up about 35 days (5 weeks) after Germination
*** Flowering takes about 42 days to 56 days (6 weeks to 8 weeks) after pistels show up


Watering and Feeding:


Bakerstreets' Regular Flush:

pH: 6.3
ppm: 411

120 litres tap water.


Bakerstreets' Regular Feed:

pH: 6.73
ppm: 1403

6 litres (1.6 gallons) - Full Dose - Week 09 - CGRSFS, BPSS, CS, BTTE


Bakerstreets' Regular Feed:

*** Next regular feed ... 6 litres (1.6 gallons) - Full Dose - Week 10 - CGRSFS, BPSS, CS, BTTE - September 08, 2019.
*** Expecting about 1% of run-off. Stop watering right at run-off.


*** I will do a regular feed(CGRSFS, RME)/feed(CGRSFS, BPSS, CS, BTTE)/water cycle for all regular weeks.
*** I will do full-on bloom feeds(CGRSFS, BPSS, CS, BTTE) for the last two weeks prior to harvest.


Activities:

My priority is to expose the growth nodes to light and air because they are going to become colas.


Harvesting:

*** This is what I did ... I read it as a recipe tutorial.


*** Harvest Phase: Goal is to cut down plant to begin drying.


Cut individual stems off the plant.

Use fingers to clip off any small "larf" buds ... if you want to see what they are like.
Hold the stem upside down and perform a "Wet Trim" by removing large fan leaves and any old sugar leaves without trichomes.
Do not remove fresh sugar leaves, since they are the buffer to protect the flowers.

C.R.E.A.M. #1 - Cowgirl Hemp - 460.4 grams (16.24 ounces) - dry weight stems on.
Cheese #1 - Gouda Hemp - 628.7 grams (22.18 ounces) - dry weight stems on.


*** Wash Phase - Goal is to clean and sterilize buds.

Wash Option1 - Sterilize buds very gently for 5 seconds to 30 seconds in 10:1 3% H2O2 and 20 litres (5 gallons) water at 25°C (78°F) . Used in commercial kitchens or if mold is present.
Rinse once very gently for 5 seconds in 20 litres (5 gallons) water at 15°C (60°F) .
Rinse once very gently for 5 seconds in 20 litres (5 gallons) water at 20°C (68°F) .
Spin the branch gently between your palms to throw off any excess water drops.

IMG_20190828_175012.jpg
The plants were not very dirty.

Wash Option 2 - using lemon juice and baking soda may have been debunked.


IMG_20190828_194335.jpg

I see how topping only one quadrant causes quite an imbalance in symmetry.
Topping like this is useful if you want an oval shape to your plant.
I used a fork during Stem-Splitting because it was convenient.


*** Initial Drying Phase - Stems-On: Goal is to begin drip drying after washing.

IMG_20190828_211305.jpg


Hang, in tent with stems-on, to drip dry in mesh drying rack for about 24 hours using a small fan to gently circulate air.
Tent temperature is 23°C (73°F) and RH 52.5% which is near ideal ... 20°C (68°F) and RH 50%.
The fan can blow across the buds as long as the buds do not move.
This takes around 24 hours.


*** Initial Drying Phase - Stems-Off: Goal is to get to the state where the outside of the buds are dry.

0_buds-on-drying-rack.jpg


Remove buds from stems.
Hang, in tent with stems-off, to dry in mesh drying rack for about 24 hours using a small fan to gently circulate air.
Tent temperature is 23°C (73°F) and RH 52.5% which is near ideal ... 20°C (68°F) and RH 50%.
The fan can blow across the buds as long as the buds do not move.
This takes around 24 hours.


*** Intermediate Drying Phase: Goal is to slowly get jar (bag) RH to between 64% and 72%.

Put buds into jars (paper bags) at room temp 20°C (68°F) to 25°C (76°F) and room RH below 60%.
Place a humidity sensor in jar (paper bag) and seal.
Place in dark.
The jar (bag) RH will rise as moisture moves from the buds to the surrounding air (buds are drying).

Every 12 hours:
  • Roll or gently shake jars (paper bags) [This increases surface area and prevents sticking together.]
  • If jar (bag) RH is NOT between 64% and 72% then:
  • ... Take lids off of jars.
  • ... Wait one hour.
  • ... Place lids back on jars.
If jar (bag) RH is between 64% and 72% then we can begin the Fine-Tune Drying Phase.


*** At 20:00 ... the jar's mini hygrometer was reading RH 86% and 23°C (73°F).
*** This means the buds are still really damp and they need to dry a lot more.
*** Hang, in tent with stems-off, to dry in mesh drying rack for about 24 hours using a small fan to gently circulate air.
*** Tent temperature is 21°C (70°F) and RH 62.5% which is near ideal ... 20°C (68°F) and RH 50%.


*** The buds still smell a bit like hay or damp grass right now.
*** I am concerned that the light and high temperature in the tent, during the initial drying phase, has seriously degraded the quality of the cannabis.


*** In the future, it would be nice to dedicate an entire tent to Initial Drying.

*** In the future, it would be nice to have fridge space to do a proper Lotus Cure.


Notes:

The priority has to be to expose the growth nodes/buds to light & air, and to keep the canopy even and flat.


I flushed and fed the Bakerstreets today, so I won't do a final flush in two weeks.

I am realizing how important it is to ... have enough space in the tent for each plant ... and to train each plant in such a way that there is enough space between stems for the colas to bloom properly.

I have lost at least 33% of the yield to the ScrOG fiasco!


The colas at the ends of the C.R.E.A.M.'s & Cheese's quadline lines are much bigger than the side colas. However, the side colas produce a significant amount of bud when trained properly.

When harvesting cannabis, the smell is very strong ... especially after washing!!!

It is important for me to keep the newly harvested, strong smelling plants, contained inside a tent with exhaust fans running continuously.


*** I am looking forward to starting my LUX analysis soon.


Lessons Learned:

No lessons learned today because I need to do a lot of gardening.


ToDo:

Learn more about ... The Art of Curing Your Cannabis Crop

Learn more about pests and nutrient deficiencies
 
Back
Top Bottom