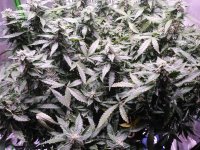
420's Sherlock Holmes' FFOF Soil, Bakerstreet C.R.E.A.M. Cheese Autoflower, Grow Journal 2019

Hey SQ! :ciao:
Things are trucking along well in there. Loads of fresh pistils pushing and your flowers are getting some shape in them. You must be getting excited now! :passitleft: You want to learn and you're taking everything in. I see great harvest coming for you my friend.

Hi @irie lion ... you were here right from the beginning ... and I'm grateful for all your help along the way.

Yes ... I am extremely excited!!!

I just did the final bloom flush ... and now it's full-on bloom nutes ... then I will split the stem ... and finally three days of dark ... then time to harvest and cure!!!
 
August 14 2019 - Update

Images:


IMG_20190814_172622.jpg

Bakerstreet #1 - Hanna Hemp - Looks healthy so far - budlets are exposed to light and air.


IMG_20190814_173340.jpg

Bakerstreet #2 - Henna Hemp - Looks healthy so far - budlets are exposed to light and air.


IMG_20190814_181137.jpg

C.R.E.A.M. #1 - Cowgirl Hemp - Looks healthy so far - buds are exposed to light and air.


IMG_20190814_205147.jpg

Cheese #1 - Gouda Hemp - Looks healthy so far - buds are exposed to light and air.


Growth Stage:

2 Bakerstreets: Day 3/ Week 12 ... Day 80 ... week 4 flower.

*** They got their pistels on August 05, 2019.
*** They were transplanted July 20, 2019 and due for the 4 week flush/feed(CGRSFS, RME) on August 18, 2019.
*** They should be ready to harvest between September 16, 2019 and September 23, 2019.

*** Photoperiod Stages: 5 days Germination, 1 week seedling, 2-8 weeks veg, 6-12 weeks flower, 4-12 weeks cure
*** Allow 1 day to 3 days of dark before switching to 12-12
*** Pistels show up about 14 days (2 weeks) after switching to 12-12


1 C.R.E.A.M.: Day 3/ Week 11 ... Day 73 ... late flower.
1 Cheese: Day 3/ Week 11 ... Day 73 ... late flower.

*** They are in the final 2 weeks ... Flush, Full-On Bloom Nutes, Stem Split, Three Days Dark, Harvest!
*** They should be ready to harvest between August 18, 2019 and August 25, 2019.
*** I need to check the pistels and trichomes to verify the harvest date.

*** Autoflower Stages: 5 days Germination, 1 week seedling, 3 weeks veg, 3 weeks pre-flower, 3-6 weeks flower, 4-12 weeks cure
*** Pistels show up about 35 days (5 weeks) after Germination
*** Flowering takes about 42 days to 56 days (6 weeks to 8 weeks) after pistels show up


Environment #1 - Autoflower Veg/Flower:

*** The Inkbird IBS-TH1 I ordered got here, so I will start tracking RH, canopy temperature and VPD again.

*** Environment # 1 is mutually exclusive from Environment # 2.

*** I am running the exhaust fan 24-0 to prevent a rise in RH and to prevent smells in the house.

*** The humidifier is set to 50% RH.

*** I may not need the Temperature Controller anymore.

*** The VPD Values I am Using For This Grow (Version 1)

CO2 is refreshed frequently when the exhaust fan turns on.

The light is running 4 cycles of "5 hours lights-on and 1 hours lights-off".

The 2 lights are 30 cm (12") above the canopy centered over the 2 plants.


Environment #2 - Photoperiod Flower:

*** I will start tracking RH, canopy temperature and VPD again when Environment #1 is dialed-in again.

*** Environment # 2 is mutually exclusive from Environment # 1.

*** Environment # 2 does not have a humidifier.

*** I am running the exhaust fan 24-0 to prevent a rise in RH and to prevent smells in the house.

*** The VPD Values I am Using For This Grow (Version 1)

CO2 is refreshed frequently when the exhaust fan turns on.

The 1 light is running 1 cycle of uninterrupted "12 hours lights-on and 12 hours lights-off".

Each light is 30 cm (12") above the canopy centered over each plant.


Watering and Feeding:


Bakerstreets' Feed:

*** Next regular flush ... about 120 litres of water around August 18, 2019 on a watering day.
*** Next regular feed ... about 6 litres (1.6 gallons) - Full Dose - Week 8 - CGRSFS , RME around August 15, 2019.
*** Expecting about 1% of run-off. Stop watering right at run-off.


C.R.E.A.M.'s Bloom Feed & Cheese's Bloom Feed:

*** Next bloom feed ... about 4 litres (1.1 gallons) - Full Dose - Week 10 - CGRSFS, BPSS, CS, BTTE on August 16, 2019 .
*** Expecting about 1% of run-off. Stop watering right at run-off.


*** I will do a regular feed(CGRSFS, RME)/feed(CGRSFS, BPSS, CS, BTTE)/water cycle for all regular weeks.
*** I will do full-on bloom feeds(CGRSFS, BPSS, CS, BTTE) for the last two weeks prior to harvest.


*** For details on my feeding schedule refer to here: The Different Feeds I need For This Grow (Version 5)


Activities:

My priority is to expose the growth nodes to light and air because they are going to become colas.

Refilled the humidifier with water.

*** Trying to get the Bakerstreets' growth nodes placed evenly in the ScrOG squares.

*** Trying to figure out a light defoliation for the Bakerstreets' fan leaves - tuck or prune?


Notes:

The priority has to be to expose the growth nodes/buds to light & air, and to keep the canopy even and flat.

*** I am going to let the plants grow naturally now and stop tucking the stems into the ScrOG. For details on this decision, please refer here: How long to Veg Photoperiods? - Version 2

*** The Bakerstreets got a bit more secondary node growth but nowhere near what I expected.

*** The Bakerstreets are now getting some height on their budlets, and the budlets are filling out.

I need to prune some of the Bakerstreets' fan leaves tomorrow.

*** I keep moving the one X6 light over each Bakerstreet plant to try and even out their growth. I am looking forward to the new light getting here tomorrow on August 15, 2019.

*** I clipped a sugar leaf off the C.R.E.A.M. & Cheese and looked at them under the microscope.

*** Many of the C.R.E.A.M. & Cheese trichomes are still clear. A few are cloudy. I am not sure how quickly they change so I will keep a close eye on them.

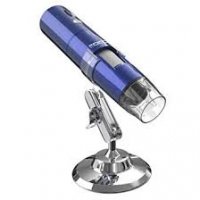
*** I am looking forward to getting the Wifi HD Microscope Camera tomorrow, so I can take some nice pictures of the colas and the trichomes.

*** I am looking forward to starting my LUX and VPD analysis soon.


Lessons Learned:

Best lighting for growing cannabis

by RoyalQueenSeeds

Lighting types, schedules, and electrical money-saving tricks—you will be amazed at how much you can use lighting to your advantage in the cannabis grow-op.

As you progress in your journey toward becoming a grandmaster grower, you will soon start identifying the limiting factors in achieving those glorious yields we all love to see in photos and videos.

Inarguably, lighting is one of the biggest and most immediately recognisable of such limiting factors. Within reason, the more light you give your plants, the more they will yield.

Other valuable aspects of growing include environmental conditions like CO₂ levels, maximum and minimum day/night temperature, and relative humidity range. Nutrition is also of equal importance. Feeding needs to be adjusted to what the plant is asking for based on its phase in the grow cycle. Some growers even go the extra mile and have classical music or biowaves playing to stimulate the stomata to squeeze in a little extra growth spurt. However, the jury’s out on whether this yields any noticeable results—but it can’t hurt!

Light is, in itself, just another type of “food” for plants. Keeping this in mind will allow you to better decide what is right for you. Just like an athlete has a specific dietary regime for his sport, so must you consider what is the ideal type of light for your growing conditions.

There is little point in blasting your cannabis plants with 2000W/m² if you are just getting started, or deciding on the latest and greatest LED fixture if you cannot dial in the right ambient temperatures. Plant height and spatial limitations also play very important roles depending on which type of lights you decide on.

In this article, we will give you rundown on what constitutes the “best” light for growing cannabis. There are many pros and cons to each, and a little information goes a long way.

0_Inner-Lightingn.jpg


A BRIEF HISTORY OF THE GROW LIGHT

In the beginning, there was light…from the sun! Then cannabis became illegal, and someone had the brilliant idea to bring a powerful street lamp indoors to simulate the sun and grow weed.

Not only did this work, but it also created a massive industry catering to indoor/greenhouse operations. This lighting technology is called high-intensity discharge, or HID. Typically, these lights come in one of two varieties, either sodium or metal halide. These lights are very strong, quite inefficient, and produce a substantial amount of heat. But if you manage to tame the heat, they get the job done fantastically well.

Primarily due to space constraints, some growers started experimenting with lower-powered and more efficient lights. More efficient means less electricity is lost to heat, and more of it transformed into actual light. For instance, CFLs—compact fluorescent lights—are quite efficient, small and compact, cheap, and readily found in any common hardware store or supermarket. Ideal for seedlings and clones, they underperform for flowering. This is due to the limited light spectrum they produce. On the other hand, you will be able to fit a few of them inside a covert, desktop PC micro-grow retrofit.

In recent years, we have witnessed the beginning of a new artificial agro-specific lighting era. Modern LED fixtures are superbly efficient, while at the same time producing a great PAR, which means photosynthetic active radiation. This is the measure of the quality and intensity of the light spectrum that the plants actually use for photosynthesis. This in and of itself does not necessarily mean LED is better than HID or CFL—it just means it fills a huge gap really well.

A special mention to plasma fixtures. While operating under the same principles of HIDs, they do have a better spectrum than sodium or metal halide bulbs.

0_Inner_6.jpg


LIGHTS ON, LIGHT OFF

Light schedule is something quite often overlooked. Some growers take years to realise they can further manipulate their plant’s behavior in their favour, with simple light schedule tricks.

The typical schedule will be something like 18 hours on and 6 hours off during the vegetative period, and a flat 12–12 for flowering.

But did you know you can do so much more? You can save significant amounts of electricity if you employ the gas lantern routine during the vegetative period, while maintaining a high level of performance.

Giving your cannabis plants 24 hours of darkness before switching to flowering is known to induce sexing substantially faster in many strains.

During flowering, if you progressively decrease the lights-on period, you will trigger the plant to speed up production. This can be done by setting your timer to turn off 10 minutes earlier each week until harvest. This will simulate the natural shortening of days as autumn sets in while saving you a little extra on electricity.

This technique is sometimes referred to as light deprivation or the diminishing light technique.

Some growers swear by a 10–10 flowering schedule. The theory is that you will trick the cannabis plant into shorter day cycles. You can fit 8.4 “short days” in each week. That means that a typical 9-week strain (63 days) can be ready in 7.5 weeks (52.3 days).

Even autoflowers can benefit from experimentation, so do not be shy to try it out for yourself.

0_Inner-Tall copy.jpg


SAVINGS, SAVINGS, AND EVEN MORE SAVINGS

Even if electricity were free, getting into a habit of saving electricity will not only be an environmentally conscientious thing to do, it will further improve your skills. Understanding and measuring your environment will save you time and money while improving the potential of your plants.

Investing in an automated exhaust system works wonders to save on heating. In the winter, exhaust fans will blow slower, thus conserving heat. Mid-summer, they can work full-power to keep things under control. Many modern inline–exhaust fans come already pre-built with heat sensors for this very purpose.

This can be done cheaper by manually using a quality variac transformer. These will slow your fans down while prolonging their life. Do not confuse variacs with typical dimmers, as these will create a noticeable hum and take a heavy toll on your gear.

If you use butane/propane heaters to warm up your house, slowing down the fans will not only help conserve heat, but will have a dramatic effect on the available CO₂, which will boost production potential considerably. Higher CO₂ levels also mean you can run the grow room at higher temperatures, so it is a win-win situation.

If using LEDs, you can lower the lights closer to the canopy without burning the leaves or buds. You’ll notice you will be using fewer nutrients and water while your girls flourish considerably better.

FINAL CONSIDERATIONS

There are dozens of little tricks to boost yields and save on productions costs. From training, stressing, environmental manipulation, and of course, lighting. But there are no silver bullets.

There is a reason experienced growers swear by one method over another, or one type of light over the next. Even the biggest commercial operations have radically different approaches.

Different genetics, different growing mediums, different growers—this is a never-ending debate. And thankfully so, as it keeps us on our toes and on top of our game in pursuit of top-quality buds.

Remember that what works for one person may be a complete flop for the next. Experiment slowly and gradually introduce the next features—never make rash decisions. This way, you will be able to judge what works and what doesn’t for your operation. Also, be sure to take notes and pictures so you can track your progress.

As you improve and create a deep relationship with your secret garden, you will certainly reap the rewards of the efforts you put into it.


ToDo:

Learn more about ... Cannabis Trichomes Importance.

Learn more about pests and nutrient deficiencies.
 
Mars Hydro Dimmable TSL 2000W
The new light I ordered arrived today and fits perfectly into the 2'x4'x5' tent.

A few initial concerns, ... the packing box was dented and the reflector was also dented a bit; but that's what the warranty is for.

Other than that, the light was easy to install and is putting out a bit more light than the two X6s I had ... and using half the power.

Overall, I am pleased and looking forward to watching the Bakerstreets bloom!


IMG_20190815_144341.jpg

Thanks again @SmokeSara!
 
Wow, thank you SQl2kGuy! :green_heart: Hope the plants love the light. :D
For the shipping problem, actually we have several feedback from clients on this, it happens more on the TSL-2000, because of its shape (not very easy to do the package), and the alumunum light case makes it easy to change shape since they are soft. :love: BTW, we have already changed the package in our factory. I hope the new package will help prevent this problem. :Namaste:
 
August 15 2019 - Update

Images:


IMG_20190815_182419.jpg

Bakerstreet #1 - Hanna Hemp - Looks healthy so far - budlets are exposed to light and air.


IMG_20190815_182439.jpg

Bakerstreet #2 - Henna Hemp - Looks healthy so far - budlets are exposed to light and air.


IMG_20190815_211317.jpg

C.R.E.A.M. #1 - Cowgirl Hemp - Looks healthy so far - buds are exposed to light and air.


IMG_20190815_211359.jpg

Cheese #1 - Gouda Hemp - Looks healthy so far - buds are exposed to light and air.


Growth Stage:

2 Bakerstreets: Day 4/ Week 12 ... Day 81 ... week 4 flower.

*** They got their pistels on August 05, 2019.
*** They were transplanted July 20, 2019 and due for the 4 week flush/feed(CGRSFS, RME) on August 23, 2019.
*** They should be ready to harvest between September 16, 2019 and September 23, 2019.

*** Photoperiod Stages: 5 days Germination, 1 week seedling, 2-8 weeks veg, 6-12 weeks flower, 4-12 weeks cure
*** Allow 1 day to 3 days of dark before switching to 12-12
*** Pistels show up about 14 days (2 weeks) after switching to 12-12


1 C.R.E.A.M.: Day 4/ Week 11 ... Day 74 ... late flower.
1 Cheese: Day 4/ Week 11 ... Day 74 ... late flower.

*** They are in the final 2 weeks ... Flush, Full-On Bloom Nutes, Stem Split, Three Days Dark, Harvest!
*** They should be ready to harvest between August 18, 2019 and August 25, 2019.
*** I need to check the pistels and trichomes to verify the harvest date.

*** Autoflower Stages: 5 days Germination, 1 week seedling, 3 weeks veg, 3 weeks pre-flower, 3-6 weeks flower, 4-12 weeks cure
*** Pistels show up about 35 days (5 weeks) after Germination
*** Flowering takes about 42 days to 56 days (6 weeks to 8 weeks) after pistels show up


Environment #1 - Autoflower Veg/Flower:

*** The Inkbird IBS-TH1 I ordered got here, so I will start tracking RH, canopy temperature and VPD again.

*** Environment # 1 is mutually exclusive from Environment # 2.

*** I am running the exhaust fan 24-0 to prevent a rise in RH and to prevent smells in the house.

*** The humidifier is set to 50% RH.

*** I may not need the Temperature Controller anymore.

*** The VPD Values I am Using For This Grow (Version 1)

CO2 is refreshed frequently when the exhaust fan turns on.

The light is running 4 cycles of "5 hours lights-on and 1 hours lights-off".

The 2 lights are 30 cm (12") above the canopy centered over the 2 plants.


Environment #2 - Photoperiod Flower:

*** I will start tracking RH, canopy temperature and VPD again when Environment #1 is dialed-in again.

*** Environment # 2 is mutually exclusive from Environment # 1.

*** Environment # 2 does not have a humidifier.

*** I am running the exhaust fan 24-0 to prevent a rise in RH and to prevent smells in the house.

*** The VPD Values I am Using For This Grow (Version 1)

CO2 is refreshed frequently when the exhaust fan turns on.

The 1 light is running 1 cycle of uninterrupted "12 hours lights-on and 12 hours lights-off".

Each light is 30 cm (12") above the canopy centered over each plant.


Watering and Feeding:


Bakerstreets' Feed:

pH: 6.63
ppm: 1768

6 litres (1.6 gallons) - Full Dose - Week 8 - CGRSFS , RME.

*** Next regular feed ... 6 litres (1.6 gallons) - Full Dose - Week 9 - CGRSFS , CS, BPSS, BTTE around August 19, 2019.
*** Next regular flush ... 120 litres of water around August 23, 2019 on a watering day.
*** Expecting about 1% of run-off. Stop watering right at run-off.


C.R.E.A.M.'s Bloom Feed & Cheese's Bloom Feed:

*** Next bloom feed ... 4 litres (1.1 gallons) - Full Dose - Week 10 - CGRSFS, CS, BPSS, BTTE around August 16, 2019 .
*** Expecting about 1% of run-off. Stop watering right at run-off.


*** I will do a regular feed(CGRSFS, RME)/feed(CGRSFS, BPSS, CS, BTTE)/water cycle for all regular weeks.
*** I will do full-on bloom feeds(CGRSFS, BPSS, CS, BTTE) for the last two weeks prior to harvest.


*** For details on my feeding schedule refer to here: The Different Feeds I need For This Grow (Version 5)


Activities:

My priority is to expose the growth nodes to light and air because they are going to become colas.

Refilled the humidifier with water.

*** Trying to get the Bakerstreets' growth nodes placed evenly in the ScrOG squares.

*** Trying to figure out a light defoliation for the Bakerstreets' fan leaves - tuck or prune?


Notes:

The priority has to be to expose the growth nodes/buds to light & air, and to keep the canopy even and flat.

*** I am going to let the plants grow naturally now and stop tucking the stems into the ScrOG. For details on this decision, please refer here: How long to Veg Photoperiods? - Version 2

*** The Bakerstreets got a bit more secondary node growth but nowhere near what I expected.

*** The Bakerstreets are now getting some height on their budlets, and the budlets are filling out.

I need to prune some of the Bakerstreets' fan leaves tomorrow.

*** The new light got here today on August 15, 2019.

*** The Wifi HD Microscope Camera got here today, so I can take some nice pictures of the colas and the trichomes.

*** I am looking forward to starting my LUX and VPD analysis soon.


Lessons Learned:

Cannabis Trichomes Importance

by RoyalQueenSeeds

Everything you need to know about what makes your green sticky icky. Trichomes are the frost on your buds and the resin from which all your favourite Hash, BHO, Shatter and Wax are made. We zoom in on the importance of trichomes to cannabis plants, ganja farmers, and both medicinal and recreational users.

WHAT ARE TRICHOMES?

The word trichome is derived from the Greek word “Tríchōma”, which translates as “growth of hair”. As they are microscopic, you really need to zoom in on the frosty blanket of resin, that coats high-grade cannabis buds to see the fields of trichomes, that resemble masses of stalks with tiny mushroom heads.

But be cautious, a big crowd of trichomes doesn’t guarantee the weed is “loud”. Merriam-Webster’s dictionary defines a trichome as “a filamentous outgrowth; especially: An epidermal hair structure on a plant”.

Botanical comparison of trichomes with hair can lead to confusion with the pistils, that are obviously visible to the naked eye as the hair-like strands protruding from calyxes of flowering female marijuana plants.

Cannabis trichomes deserve a more specific stoner-friendly definition, an explanation of their functions and overall importance.

We shall endeavour to bring you clarity. In our opinion, it’s best to consider trichomes as minuscule biological cannabinoid factories found predominantly on the flowers and sugar leaves of weed. Quite simply it’s the THC-rich trichomes, that get you high and the CBD-rich trichomes that make the best medicine.

The scientists have identified three categories of trichomes found on cannabis plants:

  1. Bulbous trichomes
  2. Capitate sessile trichomes
  3. Capitate-stalked trichomes
It’s number 3, the capitate-stalked variety, that’s of interest to weed lovers because they are the largest at 50-100µm wide and produce the oily medicinal/recreational goodies.

0_Artboard 1trichomes smaller.png

WHAT’S THE PURPOSE OF TRICHOMES?

In nature, it is believed, that trichomes facilitate quite a few essential to survival functions of the cannabis plant. The gooey surface coating of sticky resin provides a frontline defence against fungus, insects and hungry herbivores.

Some flies and certain fungi cannot penetrate the trichome barrier, while terpenes will foul the flavour of the lettuce for four-legged furry critters.

Furthermore, trichomes may also play a key role for cannabis growing in difficult climatic conditions. A layer of resin offers wild weed protection against damaging winds from the desert sirocco to the Siberian blizzard.

Trichomes even serve as organic sun block for marijuana plants, protecting them from the effects of UV rays from the sun. We shall explore the relationship between UV and trichomes a little further below.

0_NOT_READY-TRICHOMES.jpg


WHY ARE TRICHOMES IMPORTANT TO THE CANNABIS CULTIVATOR?

We absolutely cannot emphasise the importance of trichomes to the cannabis cultivator enough. It’s a fact, the resin really is everything.

Trichomes are the tiny factories dedicated to the manufacture of cannabinoids and terpenes. Potency, flavour and odour are inextricably linked to the process going on in the cells of the mini-mushroom heads.

Cannabinoids are the compounds like THC and CBD, that give marijuana its mind and body effects respectively. Terpenes are “unsaturated hydrocarbons” or flavour makers, that give bud from different strains differing scents and tastes.

Trichomes are the microscopic super structures, that house the essence of the psychoactive properties of cannabis. They can also assist a grower when it comes to judging the optimal time to harvest your weed crop.

By monitoring the change in colour of the resin heads, either with a camera or microscope, the grower can best evaluate the ripeness of flowering female plants. In early to middle flowering, resin heads will be mostly clear.

During the final phase of the bloom cycle, the grower will observe the transitioning of the clear mushroom heads to a milky white colour and eventually to amber.

Most seasoned growers will shoot for a blend of milky and amber trichomes as the precise moment to harvest. Sure, many other factors play a role when a grower is assessing the maturity of flowers, but we recommend you let the trichomes be your guide to preventing against harvesting too early or too late. Look out for those snow caps.

The relationship between trichomes and light is the key to understanding the immense importance of trichomes. UV light is what gives dank weed the X-factor.

Cannabis plants feed on light and when they receive the optimal spectrum they perform best. Old school outdoor cultivator’s anecdotes about HID cultivated indoor weed lacking sometimes in flavour and in potency have been confirmed by modern science.

Trichomes respond positively to UV rays and it is now believed, that UV light is required for the trichomes to produce certain terpenes and cannabinoids.

Modern LED lighting systems seem to be bridging the gap as they are specifically designed to emit the optimal spectrum of light for cannabis plants and they do it more efficiently than HID lights.

0_NOT-READY-AND-READY-TRICHOMES.jpg


FUN STUFF TO MAKE WITH TRICHOMES

At this point, you are probably already making the connection between trichomes and extracts and you’re absolutely right. OK, so we have confirmed, that a healthy coat of resin is responsible for the finer attributes of cannabis.

Trichomes are the building blocks of all kinds of wonderfully potent concentrates and hashish. Everything from the hand rubbed Charras of the Indian subcontinent to Colorado’s Charlotte’s Web CBD medicine comes from resin.

The method of extraction may vary from Moroccan sieving of plant material and then pressing, to butane gas derived hash oil, that can be whipped into “budder” on a low heat. The raw material is always trichomes and they can easily be separated from the green material.

Sometimes all too easily and not by intention, so remember to handle buds and colas with care, because resin heads are easily snapped off and dried bud can degrade rapidly if improperly stored. Concentrates have the additional huge benefit of an indefinite shelf life.

Trichomes are not everything when it comes to cannabis, but they definitely are the most important thing. The rise of dabbing amongst millennial stoners and the international legalisation of medicinal CBD products means trichomes have never been so important cannabis culture.

The Green Revolution is no longer tied to smoking sticky green. Knowledge of trichomes opens the doors to cannabis cuisine, awesome concentrates, tinctures, a plethora of medicines and new amazing discoveries yet to be made.


ToDo:

Learn more about ... The Cannabis Blooming Phase.

Learn more about pests and nutrient deficiencies.
 
MoKo WiFi USB Digital Microscope

0_microscope.jpg

Hey everyone ... I hope this thread proves to be educational for many new growers like myself.

What I am trying to do is to relate the photos of trichomes on a RoyalQueenSeeds tutorial to actual photos I took today using my microscope.


Here's the current scenario:

*** Post Date: August 16, 2019.
*** Medium: I am growing in FF Ocean Forest soil with 30% perlite.
*** Strain: Canuk Seeds Cheese.
*** Current Stage: Day 4/ Week 11 ... Day 74 ... late flower.
*** It got its pistels on Day 7/ Week 5 ... Day35 ... early pre-flower.
*** It is in the final 2 weeks of bloom.
*** Final bloom flush was on August August 13, 2019.
*** I am currently feeding full dose bloom nutes and watching the trichomes.
*** My current strategy timeline: Flush, Full-On Bloom Nutes, Stem Split, Three Days Dark, Harvest!


*** This was my very first time using the microscope to try and get photos.


*** My goal is to harvest when there are a mixture of cloudy trichomes and amber trichomes ... and even more amber trichomes to help with sleep.

*** I need to understand better what I am looking at here ... and if I need to take better pictures of the trichomes to make a decision, or if these pictures are good enough.

*** Do I need more magnification?

*** Do I need a better angle?

*** Do I look at the top of the bud?

*** Do I look at the sugar leaves?

*** Are these trichomes clear or cloudy?


Here are the pictures I took today that I need to understand better:


2019-08-16-131859.jpg
Photo 1


2019-08-16-131320.jpg

Photo 2


2019-08-16-131625.jpg

Photo 3


2019-08-16-132008.jpg

Photo 4


2019-08-16-132205.jpg

Photo 5


2019-08-16-132747.jpg

Photo 6


2019-08-16-133204.jpg

Photo 7
Thanks in advance!!!
 

Attachments

  • 0_microscope.jpg
    0_microscope.jpg
    16 KB · Views: 68
August 16 2019 - Update

Images:


IMG_20190816_145109.jpg

Bakerstreet #1 - Hanna Hemp - Looks healthy so far - budlets are exposed to light and air.


IMG_20190816_150147.jpg

Bakerstreet #2 - Henna Hemp - Looks healthy so far - budlets are exposed to light and air.


IMG_20190816_150530.jpg

C.R.E.A.M. #1 - Cowgirl Hemp - Looks healthy so far - buds are exposed to light and air.


IMG_20190816_150822.jpg

Cheese #1 - Gouda Hemp - Looks healthy so far - buds are exposed to light and air.


Environment #1 - Autoflower Veg/Flower:

*** The Inkbird IBS-TH1 I ordered got here, so I will start tracking RH, canopy temperature and VPD again.

*** Environment # 1 is mutually exclusive from Environment # 2.

*** I am running the exhaust fan 24-0 to prevent a rise in RH and to prevent smells in the house.

*** The humidifier is set to 50% RH.

*** I may not need the Temperature Controller anymore.

*** The VPD Values I am Using For This Grow (Version 1)

CO2 is refreshed frequently when the exhaust fan turns on.

The light is running 4 cycles of "5 hours lights-on and 1 hours lights-off".

The 2 lights are 30 cm (12") above the canopy centered over the 2 plants.


Environment #2 - Photoperiod Flower:

*** I will start tracking RH, canopy temperature and VPD again when Environment #1 is dialed-in again.

*** Environment # 2 is mutually exclusive from Environment # 1.

*** Environment # 2 does not have a humidifier.

*** I am running the exhaust fan 24-0 to prevent a rise in RH and to prevent smells in the house.

*** The VPD Values I am Using For This Grow (Version 1)

CO2 is refreshed frequently when the exhaust fan turns on.

The 1 light is running 1 cycle of uninterrupted "12 hours lights-on and 12 hours lights-off".

Each light is 30 cm (12") above the canopy centered over each plant.


Growth Stage:

2 Bakerstreets: Day 5/ Week 12 ... Day 82 ... week 4 flower.

*** They got their pistels on August 05, 2019.
*** They were transplanted July 20, 2019 and due for the 4 week flush/feed(CGRSFS, RME) on August 23, 2019.
*** They should be ready to harvest between September 16, 2019 and September 23, 2019.

*** Photoperiod Stages: 5 days Germination, 1 week seedling, 2-8 weeks veg, 6-12 weeks flower, 4-12 weeks cure
*** Allow 1 day to 3 days of dark before switching to 12-12
*** Pistels show up about 14 days (2 weeks) after switching to 12-12


1 C.R.E.A.M.: Day 5/ Week 11 ... Day 75 ... late flower.
1 Cheese: Day 5/ Week 11 ... Day 75 ... late flower.

*** They are in the final 2 weeks ... Flush, Full-On Bloom Nutes, Stem Split, Three Days Dark, Harvest!
*** They should be ready to harvest between August 18, 2019 and August 25, 2019.
*** I need to check the pistels and trichomes to verify the harvest date.

*** Autoflower Stages: 5 days Germination, 1 week seedling, 3 weeks veg, 3 weeks pre-flower, 3-6 weeks flower, 4-12 weeks cure
*** Pistels show up about 35 days (5 weeks) after Germination
*** Flowering takes about 42 days to 56 days (6 weeks to 8 weeks) after pistels show up


Watering and Feeding:


Bakerstreets' Regular Feed:

*** Next regular feed ... 6 litres (1.6 gallons) - Full Dose - Week 9 - CGRSFS , CS, BPSS, BTTE around August 19, 2019.
*** Next regular flush ... 120 litres of water around August 23, 2019 on a watering day.
*** Expecting about 1% of run-off. Stop watering right at run-off.


C.R.E.A.M.'s Bloom Feed & Cheese's Bloom Feed:

pH: 6.54
ppm: 1674

6 litres (1.6 gallons) - Full Dose - Week 10 - CGRSFS , CS, BPSS, BTTE.

*** Next bloom feed ... 5 litres (1.3 gallons) - Full Dose - Week 11 - CGRSFS, CS, BPSS, BTTE around August 19, 2019 .
*** Expecting about 1% of run-off. Stop watering right at run-off.


*** I will do a regular feed(CGRSFS, RME)/feed(CGRSFS, BPSS, CS, BTTE)/water cycle for all regular weeks.
*** I will do full-on bloom feeds(CGRSFS, BPSS, CS, BTTE) for the last two weeks prior to harvest.


*** For details on my feeding schedule refer to here: The Different Feeds I need For This Grow (Version 5)


Activities:

My priority is to expose the growth nodes to light and air because they are going to become colas.

Refilled the humidifier with water.

*** Trying to get the Bakerstreets' growth nodes to get some height.

*** I did a light selective defoliation for the Bakerstreets' fan leaves.


Notes:

The priority has to be to expose the growth nodes/buds to light & air, and to keep the canopy even and flat.

*** I am going to let the plants grow naturally now and stop tucking the stems into the ScrOG. For details on this decision, please refer here: How long to Veg Photoperiods? - Version 2

*** The Bakerstreets are now getting some height on their budlets, and the budlets are filling out.

*** I selectively pruned some of the Bakerstreets' fan leaves today. Only a few large leaves covering growth nodes. I am pretty sure the new light is pentrating into the plant, so a lot of pruning is not a good idea.

*** The Wifi HD Microscope Camera got here today, so I took some nice pictures of the colas and the trichomes. I then did a post asking for help so I can understand what I am looking at and if I need to take better pictures.

*** I am looking forward to starting my LUX and VPD analysis soon.


Lessons Learned:

The Cannabis Blooming Phase

by RoyalQueenSeeds

PART 1 / INTRO

The end is almost in sight, and in just another couple of months of blossoming we will be ready to get our sheers out of the cupboard. In order to get the very best out of each plant we need to tune all the possible factors and harmonise them with each other.

After all, it often the tiniest improvements that lead to the most enormous results. This issue I will look at each of the important factors in turn, as well as how you can quickly remedy a nutrient deficiency.

Blossoming is well and truly underway and after a couple of weeks white hairs start to sprout on various parts of the plant. The formation of the buds is now slowly but surely underway. As I have said before, do not forget to separate the male from the female plants. The males that develop will soon start to develop little balls that within about three weeks will be ready to burst and spread pollen all over the place, fertilising the hairy females. The first three weeks of the blossoming period is in actual fact a sort of growth period.

After setting your plants into bloom by putting the lighting on a 12 hours' light / 12 hours' dark time scheme, the plants will start to bloom (grow) explosively; they can very quickly double or triple in size. Especially if this is your first time growing it is a really wonderful sight to behold, watching that little sprog of a bush transforming into a strapping whopper with buds swelling bigger and bigger, whose THC-rich crystals begin to pile up in mounds. The specific odour of the plant develops more and more, leaving you barely able to wait to harvest some of those buds and get enjoying your first spliff of the new harvest.

PART 2 / GROWTH AND BLOOM FEED


0_Foto-2-Easy-BoostHQC_1.jpg


During the blooming period we will be switching over to using bloom feed and we can stash away any remaining growth nutrients until the next time, however little we have needed it to date.

If you have used well pre-fertilised soils, then you will easily have been able to go a few weeks without having had to use any liquid fertiliser. Naturally, your pregrowth period should not last too long, otherwise you will have to use growth nutrients. For this set-up we solely used Plagron nutrients; some brands use just a single bottle that you can use to make up both growth and bloom nutrient, while others make separate growth- and bloom-nutrients. Many growers also continue to give their plants growth nutrients into the first or second week of the blossoming period because this is a sort of transitional period and the plants still have a great thirst for nitrogen and other building blocks for their rapid development.

By doing this the plants will also end up somewhat bigger, given that the bloom feed stimulated the plants to switch their attention (and resources) more to bud formation than increasing their size. In this way, you can use your giving of nutrients to play around a bit with the eventual size of the plant. If you already have good-sized plants and would prefer that they remain a little compact due to constraints on the space you have available for them, then just give them bloom feed immediately.If your plants are on the small side and will not fill your space optimally at this rate and you want increase their size as much as possible, then you can continue to give them growth feed for a while longer to stimulate this.

Of course, these differences are not huge, but every little helps, and a few centimetres more here and there can make a nice difference. After three weeks' blossoming you will notice that the plants have reached their maximum size. The plants have stopped putting on any more height or girth and now they will be doing the real work of forming their buds. At this moment it is important to give them bloom feed, as the plants have a greater need of phosphorus and potassium.These are some of the most important building blocks for a good bud development.

This means it is a good ideas to also get your bottle of PK 13-14 out. PK 13-14 (I used Plagron's PK Plus) is a separate bloom feed used as a supplement to your regular bloom feed. As you might have surmised from the name, it contains extra phosphorus and potassium that your plant really needs to be able to reward you with big, fat buds.There are two ways of administering PK 13-14. You can start with small doses from the first week and then slowly build up the dose each week. So start with 0.25 ml / per litre in the first week and by the third week aim to be giving 0.75 ml / per litre.

How much you need to give is usually written on the side of the bottle too. The second way is to wait until the fourth week of bloom has begun, because it is this moment at which the most bud development begins, and then go straight to giving them 1.5 ml/per litre immediately and continue with this until the end of blooming.In short, using PK 13-14 makes for harder and denser buds by supplying the plant with a wealth of building materials.

Do not forget too that at this stage you must tailor your nutrient-giving to the needs of the plant. This has now developed very different nutritional requirements to when she needed lots of feeding for her strong development during the preceding three weeks. If you continue to give them as much nutrient as you have been doing, you run the risk of over-fertilising very quickly.If you had been giving them nutrients every day in the first few weeks, then maybe they only need them every other day now. It is something to pay attention to.

Every plant blooms in its own way, so some varieties have a very rapid increase in bud size between the third and fifth week of blooming, while other varieties put their real weight on as measured in grams in the last weeks. This means that you just have to look carefully at your plants (and listen to them) to know what their nutritional needs are at any PARTicular moment.I mention this because many beginner growers start off well and think that they have everything running smoothly, when after a few weeks the needs of the plant changes and the grower sticks to her old pattern, which can then result in him only managing a feeble harvest.

PART 3 / FEEDING THE LEAVES


0_Foto-3-StringHQ.jpg

The plants bloom enthusiastically and are fed with Algal Bloom. Every week they are sprayed with Phytamin Leaf Feed, and as a bloom stimulator, Plagron's Repro Forte is applied, which serves to ensure that more sugars are transported from the leaves to the buds.

Every two weeks enzymes are also given. These enzymes clean your medium by removing dead roots and reduce the salt accumulation that has occurred from the application of nutrients.

Seed plants have the tendency to grow in height earlier than clones. So by now they will be considerably larger and for that reason I strongly recommend if you have limited head room in your grow space that you 'top' or bend your plants. You bend a plant by pulling down the crown bud with string fixing it bent under slight tension. By doing this you get the same effect as topping (removing the top of the plant) but with the advantage of you getting to keep the crown bud.

The lowest- situated side branches will develop better and the plant will develop more buds, on a wider girth. Grow spaces that are lower than 1.5 metres in height will need their plants topping or bending earlier, or else given a much shorter growth period. Better too little food than too much, but if you should experience a severe nutrient deficiency that you cannot solve by recommencing with the bloom feed, then the quickest way of solving the problem is by applying leaf feed.

You make up some nutrient mix as you normally would and spray your plants with the solution. Plants can also take up nutrients via their leaves, and the advantage of doing it this way is that you do not change the pH of your medium. Spraying your plants is best done just before you turn off the lamps and / or just before you switch them on. The problem that presents itself when you get a large deficiency to deal with is that when you give the plants a nutrient solution (via the medium) you have to wait until the plants are thirsty again. There is no point in giving them a feed solution every day if the plants can't actually take up what they need. You're forced to wait a while, certainly longer than you would wish, before you can adjust the deficiency properly.

By combining watering with the application of leaf nutrient, then the plant gets what it needs immediately via the leaves. Generally, you will notice the improvement the very next day. You will observe that the yellow spots on the leaves will have regained some of their colour again. By continuing to give feed water and leaf nutrients, the plants will soon once again be a ravishing shade of green. Another advantage of leaf feeding is that you can safely experiment to find out what kind of deficiency your plants have. Many growers are stricken by doubts as to whether they are dealing with an under-fertilisation or an excess.

By simply spraying the leaves with a feed solution you can very quickly observe if there is a positive or negative reaction from the plant and from that deduce what the problem is. Something that is always handy to have around is a set of bottles filled with individual nutrients such as nitrogen, phosphorus and potassium. With these you will be more easily able to experiment with your nutrient problem. Suppose you have a nitrogen deficiency and are forced to use a general nutrient solution to correct it; you are also giving the plant the elements that it does not need too.

Adopt the simple expedient of keeping a separate bottle with only nitrogen in it. Adding this will raise your plants nitrogen levels without influencing the other fertiliser components. This bottle system is especially useful for outdoor growers who are in the process of raising large plants in pots and needing to apply large volumes of nitrogen. PARTicularly during heat waves it is handy to spray your plants with a nitrogen solution, or simply increase the percentage of nitrogen in your general feed water. Obviously, the same process can be used for phosphorus and potassium deficiencies.

PART 4 / VENTILATION


0_Foto-4-VentilationHQ.jpg


In order to achieve a good bloom there must be sufficient carbon dioxide for the plants. They need CO2 for a vigorous growth and bloom during the daylight hours.

The more CO2 in the air the faster your plants can develop and the greater their tolerance for high temperatures. How you have your grow space set up is very important.

An optimal space is one in which all along one side, at the very bottom, holes have been bored to allow air in, while on the other side there is a vacuum extractor - placed as high up as possible. This set up offers an optimal air circulation from one side of the space to the other side. The CO2- rich air that enters flows over the plants, is used by them, then the CO2-depleted air is sucked out, drawing fresh air back in via the bottom-most holes. If growing in larger spaces and you are using a fan or air blower of some sort, this can be placed at the top of the space if you are also using an air- sock.

The air blower works in exactly the opposite way to a vacuum pump: rather than sucking air out, it blows air in. This is unnecessary when growing in small spaces, which have sufficient air renewal with a pump. An Air-Sock is a long sock made from textile, between 3-5 metres in length. If you just use an air blower then you are usually getting cold air pumped into one side of your space , which means the climate on this side is not at its optimal temperature. Nor is the CO2 spread evenly over the plants. The Sock works as follows: you fasten it on top of your air blower and fasten this to the ceiling.

Once the blower is switched on then the Air-Sock is filled with incoming air, which then enters the space 3 to 5 metres into your space. After that the CO2-rich air is evenly spread throughout the space, and the effect of this is that all your plants can better enjoy the fresh air, plus the cold outside air is given time to warm up, so the climate remains nearer to optimal. It is simple but effective. Having too little ventilation produces weaker growth and blooming, the plants can not develop well, and yellowing of the leaves can occur.

A rotating fan is another important piece of grow space equipment. This does not only ensure that you have good air circulation in your space which mixes the warm and cool layers of air together, but your plants also like a nice breeze. Thanks to the breeze your plants will develop nice thick stems, and they will mature into slightly smaller and more compact adults, and as you know by now, a thick stem determines to a large extent the eventual yield your plant will be able to produce. By and large, the plants with the thickest stems will also be the biggest yielders.

PART 5 / BUD FORMATION


0_Foto-5-Focus-on-BudsHQC.jpg


The most important weeks of the blossoming period are from the third to the fifth week of bloom for the majority of plants.

Given that now most plants will be devoting most of their energy to developing their buds, during these coming weeks they are going to increase very rapidly in size. So now is the time when you really have to make sure everything runs as smoothly as possible.


The beginning of the third week is also the last chance you have to spray your plants with an organic pesticide. The buds are not yet hard and compact. It can be a good idea to spray them now preventatively, rather than wait until the fifth week and find that your buds are now crawling with bugs, by which stage it is not advisable to spray. There's not much more to do than simply giving nutrients during this stage besides of course enjoying the sight of these gorgeous buds gradually appearing. More and more white hairs are being produced and slowly but surely separate small buds grow into each other to create one huge bud.


ToDo:

Learn more about ... How To Use Cannabis Nutrients.

Learn more about pests and nutrient deficiencies.
 
August 17 2019 - Update

Images:


IMG_20190817_174024.jpg

Bakerstreet #1 - Hanna Hemp - Looks healthy so far - budlets are exposed to light and air.


IMG_20190817_174055.jpg

Bakerstreet #2 - Henna Hemp - Looks healthy so far - budlets are exposed to light and air.


IMG_20190817_175839.jpg

C.R.E.A.M. #1 - Cowgirl Hemp - Looks healthy so far - buds are exposed to light and air.


IMG_20190817_180143.jpg

Cheese #1 - Gouda Hemp - Looks healthy so far - buds are exposed to light and air.


Environment #1 - Autoflower Veg/Flower:

*** The Inkbird IBS-TH1 I ordered got here, so I will start tracking RH, canopy temperature and VPD again.

*** Environment # 1 is mutually exclusive from Environment # 2.

*** I am running the exhaust fan 24-0 to prevent a rise in RH and to prevent smells in the house.

*** The humidifier is set to 50% RH.

*** I may not need the Temperature Controller anymore.

*** The VPD Values I am Using For This Grow (Version 1)

CO2 is refreshed frequently when the exhaust fan turns on.

The light is running 4 cycles of "5 hours lights-on and 1 hours lights-off".

The 2 lights are 30 cm (12") above the canopy centered over the 2 plants.


Environment #2 - Photoperiod Flower:

*** I will start tracking RH, canopy temperature and VPD again when Environment #1 is dialed-in again.

*** Environment # 2 is mutually exclusive from Environment # 1.

*** Environment # 2 does not have a humidifier.

*** I am running the exhaust fan 24-0 to prevent a rise in RH and to prevent smells in the house.

*** The VPD Values I am Using For This Grow (Version 1)

CO2 is refreshed frequently when the exhaust fan turns on.

The 1 light is running 1 cycle of uninterrupted "12 hours lights-on and 12 hours lights-off".

Each light is 30 cm (12") above the canopy centered over each plant.


Growth Stage:

2 Bakerstreets: Day 6/ Week 12 ... Day 83 ... week 4 flower.

*** They got their pistels on August 05, 2019.
*** They were transplanted July 20, 2019 and due for the 4 week flush/feed(CGRSFS, RME) on August 23, 2019.
*** They should be ready to harvest between September 16, 2019 and September 23, 2019.

*** Photoperiod Stages: 5 days Germination, 1 week seedling, 2-8 weeks veg, 6-12 weeks flower, 4-12 weeks cure
*** Allow 1 day to 3 days of dark before switching to 12-12
*** Pistels show up about 14 days (2 weeks) after switching to 12-12


1 C.R.E.A.M.: Day 6/ Week 11 ... Day 76 ... late flower.
1 Cheese: Day 6/ Week 11 ... Day 76 ... late flower.

*** They are in the final 2 weeks ... Flush, Full-On Bloom Nutes, Stem Split, Three Days Dark, Harvest!
*** They should be ready to harvest between August 18, 2019 and August 25, 2019.
*** I need to check the pistels and trichomes to verify the harvest date.

*** Autoflower Stages: 5 days Germination, 1 week seedling, 3 weeks veg, 3 weeks pre-flower, 3-6 weeks flower, 4-12 weeks cure
*** Pistels show up about 35 days (5 weeks) after Germination
*** Flowering takes about 42 days to 56 days (6 weeks to 8 weeks) after pistels show up


Watering and Feeding:


Bakerstreets' Regular Feed:

*** Next regular feed ... 6 litres (1.6 gallons) - Full Dose - Week 9 - CGRSFS , CS, BPSS, BTTE around August 19, 2019.
*** Next regular flush ... 120 litres of water around August 23, 2019 on a watering day.
*** Expecting about 1% of run-off. Stop watering right at run-off.


C.R.E.A.M.'s Bloom Feed & Cheese's Bloom Feed:

*** Next bloom feed ... 5 litres (1.3 gallons) - Full Dose - Week 11 - CGRSFS, CS, BPSS, BTTE around August 19, 2019 .
*** Expecting about 1% of run-off. Stop watering right at run-off.


*** I will do a regular feed(CGRSFS, RME)/feed(CGRSFS, BPSS, CS, BTTE)/water cycle for all regular weeks.
*** I will do full-on bloom feeds(CGRSFS, BPSS, CS, BTTE) for the last two weeks prior to harvest.


*** For details on my feeding schedule refer to here: The Different Feeds I need For This Grow (Version 5)


Activities:

My priority is to expose the growth nodes to light and air because they are going to become colas.

The humidifier is turned off.


Notes:

The priority has to be to expose the growth nodes/buds to light & air, and to keep the canopy even and flat.

*** I am going to let the plants grow naturally now and stop tucking the stems into the ScrOG. For details on this decision, please refer here: How long to Veg Photoperiods? - Version 2

*** The Bakerstreets are now getting some height on their budlets, and the budlets are filling out.

*** I am pretty sure the new light is pentrating into the plant, so a lot of pruning is not a good idea.

*** I am looking forward to starting my LUX and VPD analysis soon.


Lessons Learned:

How To Use Cannabis Nutrients

by RoyalQueenSeeds

Cannabis growers often add a lot of nutrients to their mix. However, doing so can sometimes cause more bad than good. We take a look at how to feed cannabis plants without overdoing it.

All the chemical elements plants need to live and flourish are naturally present in water, soil, and air. It is natural to want to add extra nutrients, with increasingly better mixes and formulas to take the most out of every single plant. People are often ready to spend lots of money on the most advanced nutrients, yet this is no guarantee of great results - sometimes it can make things worse. What kind of nutrients do cannabis plants really need, and how much?

Cannabis plants need nitrogen, phosphorous and potassium to grow and thrive (N, P, K are the symbols for these elements). These elements are not standalone in the growing mix, and are usually combined in more complex molecules that plants are able to absorb. Organic fertilizers contain N, P, K under more complex and natural molecular forms than the equivalent mineral ones.

THREE STAGES, THREE DIETS

Just like with animals, each stage of a plant’s life requires slightly different nutrients. When growing in a good and rich soil, no additional nutrients are needed during the seedling stage of plant’s life. Just be sure pots are large enough to provide enough soil’s humidity and room for plant’s roots to grow freely.

When growing in artificial mediums that have no natural nutrients, root boosters and seedling nutrition can be used. Roots boosters contain enzymes, bacteria, and other compounds that encourage healthy root growth. Seedling nutrients contain a mix of the three main nutrients, usually in the correct percentage for sprouts. A similar nutritional effect would be obtained by feeding young plants with feed used during the vegetative stage, at one-quarter of the normal vegetative stage nutrient dose. Remember, unless it is a fertilizer specifically produced for cannabis, there is a good chance it will be too strong, and need reducing in dose.

During the vegetative growing phase, plants need high nitrogen and potassium levels, and a medium intake of phosphorous. As a general rule, the amount of phosphorous should be around half of nitrogen, while potassium levels can vary from one-third to half of nitrogen. In the flowering stage, nitrogen level must be drastically lowered, while increasing phosphorous and maintaining the same level of potassium used in vegetative stage. All commercial cannabis fertilizers are differentiated for grow and bloom phases according to these basic principles.

Switching to the proper nutrient mix when plants start flowering just means feeding them with a different NPK balance. Nitrogen, phosphorous, and potassium percentages are indicated on product labels with three numbers, along the lines of NPK 5-18-5 – with each number indicating the ratio of N, P and K respectively. The correct proportions of the three main elements are calculated by the manufacturer. Therefore, the grower just has to add water and stick to the right dosage.

In addition to the NPK variable mix, cannabis actually needs small quantities of secondary and micronutrients. Some of these are more important than others for plant’s health. Most are already present in a good soil mix, while others are often included in cannabis feed in addition to NPK. Specialist additives can also be bought, but this is only advisable for more experienced growers, as overfeeding can be detrimental.

0_Using-Nutrients.jpg


UNDER AND OVER FEEDING

When growing cannabis, it is always better to be cautious than overzealous. A plant growing with just a little added nutrition will develop better yields than a plant growing in over-fertilized soil. Add nutrients to water only every other watering, and if you are in doubt about the doses, just cut them in half. These are the most simple and valid rules for feeding a cannabis plant.

Nutrient deficiencies and overdoses can be detected by a change in the plant’s appearance and colour. Many overfeeding symptoms have similar aspects to those of nutrient deficiency. The most evident signs of a nutrient unbalance are drooping and yellowing leaves, irregular leave shape or dimensions, brown spots, burnt edges. Yellowing leaves only signal a problem in the vegetative and early flowering stages of the cannabis plant life - it is normal when happening towards the end of the flowering stage. Of you want more info on nutrient problems and what they look like, check out our blog showcasing signs of deficiency.

If you find that you are not capable of fixing a problem through a correction in nutrition, flush the soil with pure water at a neutral pH for a few days, then start again with the nutrient mix at half dose. Remove the top few centimetres of soil which are likely full of excessive nutrients. This will give you a “clean slate”, but is a drastic measure.

Remember: if you seriously underfed, or overfed your cannabis, chances are they have been irreparably damaged in some way. They will take time to recover, and even then, your harvest will be reduced. If you work with fast-growing autoflowering strains, nutrient mistakes can seriously compromise your yield.

ADDITIONAL CONSIDERATIONS

pH is critical for a correct nutrients uptake by your cannabis. All fertilizers modify water and grow medium pH to some degree (some more than others), usually lowering it. A wrong pH level locks out nutrients from plants, thus causing an underfeeding situation even if you are adding the correct nutrient mix to water. As such, always keep a close eye on the pH of your grow, and adjust it accordingly with solutions relevant to your grow (such as pH Up or Down, or natural alternatives in an organic grow).

Nutrients are often stored within the cannabis plant itself after uptake. This can result in in a bad chemical taste in the final product. Most of growers stop fertilizing days or even weeks before harvest, and flush their soil to force the plants to use up these excess nutrients, resulting in a smoother smoke.


ToDo:

Learn more about ... How and When to Flush Marijuana Plants.

Learn more about pests and nutrient deficiencies.
 

Attachments

  • IMG_20190817_180143.jpg
    IMG_20190817_180143.jpg
    994.9 KB · Views: 66
August 18 2019 - Update

Images:


IMG_20190818_185250.jpg

Bakerstreet #1 - Hanna Hemp - Looks healthy so far - budlets are exposed to light and air.


IMG_20190818_185311.jpg

Bakerstreet #2 - Henna Hemp - Looks healthy so far - budlets are exposed to light and air.


IMG_20190818_192834.jpg

C.R.E.A.M. #1 - Cowgirl Hemp - Looks healthy so far - buds are exposed to light and air.


IMG_20190818_192854.jpg

Cheese #1 - Gouda Hemp - Looks healthy so far - buds are exposed to light and air.


Environment #1 - Autoflower Veg/Flower:

*** The Inkbird IBS-TH1 I ordered got here, so I will start tracking RH, canopy temperature and VPD again.

*** Environment # 1 is mutually exclusive from Environment # 2.

*** I am running the exhaust fan 24-0 to prevent a rise in RH and to prevent smells in the house.

*** The humidifier is set to 50% RH.

*** I may not need the Temperature Controller anymore.

*** The VPD Values I am Using For This Grow (Version 1)

CO2 is refreshed frequently when the exhaust fan turns on.

The light is running 4 cycles of "5 hours lights-on and 1 hours lights-off".

The 2 lights are 30 cm (12") above the canopy centered over the 2 plants.


Environment #2 - Photoperiod Flower:

*** I will start tracking RH, canopy temperature and VPD again when Environment #1 is dialed-in again.

*** Environment # 2 is mutually exclusive from Environment # 1.

*** Environment # 2 does not have a humidifier.

*** I am running the exhaust fan 24-0 to prevent a rise in RH and to prevent smells in the house.

*** The VPD Values I am Using For This Grow (Version 1)

CO2 is refreshed frequently when the exhaust fan turns on.

The 1 light is running 1 cycle of uninterrupted "12 hours lights-on and 12 hours lights-off".

Each light is 30 cm (12") above the canopy centered over each plant.


Growth Stage:

2 Bakerstreets: Day 6/ Week 12 ... Day 83 ... week 4 flower.

*** They got their pistels on August 05, 2019.
*** They were transplanted July 20, 2019 and due for the 4 week flush/feed(CGRSFS, RME) on August 23, 2019.
*** They should be ready to harvest between September 16, 2019 and September 23, 2019.


*** Photoperiod Stages: 5 days Germination, 1 week seedling, 2-8 weeks veg, 6-12 weeks flower, 4-12 weeks cure
*** Allow 1 day to 3 days of dark before switching to 12-12
*** Pistels show up about 14 days (2 weeks) after switching to 12-12


1 C.R.E.A.M.: Day 6/ Week 11 ... Day 76 ... late flower.
1 Cheese: Day 6/ Week 11 ... Day 76 ... late flower.

*** They are in the final 2 weeks ... Flush, Full-On Bloom Nutes, Stem Split, Three Days Dark, Harvest!
*** They should be ready to harvest between August 18, 2019 and August 25, 2019.
*** I need to check the pistels and trichomes to verify the harvest date.


*** Autoflower Stages: 5 days Germination, 1 week seedling, 3 weeks veg, 3 weeks pre-flower, 3-6 weeks flower, 4-12 weeks cure
*** Pistels show up about 35 days (5 weeks) after Germination
*** Flowering takes about 42 days to 56 days (6 weeks to 8 weeks) after pistels show up


Watering and Feeding:


Bakerstreets' Regular Feed:

*** Next regular feed ... 6 litres (1.6 gallons) - Full Dose - Week 9 - CGRSFS , CS, BPSS, BTTE around August 19, 2019.
*** Next regular flush ... 120 litres of water around August 23, 2019 on a watering day.
*** Expecting about 1% of run-off. Stop watering right at run-off.


C.R.E.A.M.'s Bloom Feed:

pH: 6.45
ppm: 1641

2 litres (0.53 gallons) - Full Dose - Week 11 - CGRSFS, CS, BPSS, BTTE


Cheese's Bloom Feed:

pH: 6.45
ppm: 1641

4 litres (1.0 gallon) - Full Dose - Week 11 - CGRSFS, CS, BPSS, BTTE


C.R.E.A.M.'s Bloom Feed & Cheese's Bloom Feed:

*** Next bloom feed ... 6 litres (1.6 gallons) - Full Dose - Week 12 - CGRSFS, CS, BPSS, BTTE around August 21, 2019 .
*** Expecting about 1% of run-off. Stop watering right at run-off.


*** I will do a regular feed(CGRSFS, RME)/feed(CGRSFS, BPSS, CS, BTTE)/water cycle for all regular weeks.
*** I will do full-on bloom feeds(CGRSFS, BPSS, CS, BTTE) for the last two weeks prior to harvest.


*** For details on my feeding schedule refer to here: The Different Feeds I need For This Grow (Version 5)


Activities:

My priority is to expose the growth nodes to light and air because they are going to become colas.

The humidifier is turned off.


Notes:

The priority has to be to expose the growth nodes/buds to light & air, and to keep the canopy even and flat.

*** I am going to let the plants grow naturally now and stop tucking the stems into the ScrOG. For details on this decision, please refer here: How long to Veg Photoperiods? - Version 2

*** The Bakerstreets are now getting some height on their budlets, and the budlets are filling out.

*** I am pretty sure the new light is pentrating into the plant, so a lot of pruning is not a good idea.

*** I am looking forward to starting my LUX and VPD analysis soon.


Lessons Learned:

How to Increase Production of Ripe Trichomes on Cannabis

by Leafly

0_increasing-trichome-production-on-cannabis.jpg

For lovers of solventless cannabis extracts, most would agree that properly cleaned full melt hash is about as good as it gets. Sift of this quality looks like fine white sand, but upon closer review, little frothy orbs appear to look almost suspended in tiny cloud-like formations. Under a microscope, thousands of tiny trichome heads appear perfectly separated from their capitate stalks, picked like fresh berries in a basket. A very small pinch can be as aromatic as a cologne, hitting your nose with a barrage of aromas.

This quality of sift is the end product of a painstakingly orchestrated series of procedures that first began with an expertly grown crop of cannabis. Techniques used to grow cannabis at this level necessitate one central underlying principle: farming and preserving trichomes.


Trichomes Production: From Grow to Harvest and Beyond

0_uLzlyNuZRdGmLsxLmtPR_trichome-body-2.jpg

Trichome farming is more of a philosophy than a single practice. At its core, the concept can be dissolved down into two guiding principles: trichome proliferation and preservation. Together, they exist as a mantra for the production of the highest quality cannabis in the world. In every step of breeding, growing, harvesting, curing, extracting, and curing cannabis, trichome preservation and proliferation remain the two guiding forces for maximizing resin potential.

Trichome-Stacked Flowers Start with Genetics

0_12vknuD4SWCvUmGW09W4_trichome-farming-body.jpg


Achieving trichome-stacked flowers is a journey that begins first and foremost with proper genetics. Certain cannabis genotypes will yield higher concentrations of trichomes than others. Selective breeding and acquisition of genetics that express high desirable yield ranges is the only way to build a solid foundation for proper trichome production.

When breeding sinsemilla cannabis for resin production, finding a stable mother to take cuttings from is key. Through asexual propagation, that mother can then be cloned and you can use the clones to grow plants that produce high-trichome yields.


Grow Habitat and Trichome Production

After genetics, the next most important thing to consider when aiming to maximize resin production is the grow habitat. Although a certain genotype may be predisposed to heavy trichome production, unless given adequate growing conditions, their potency may be lacking.

Quantity of trichomes does not necessarily equate to cannabinoid and terpene production within the trichome head. These factors are greatly impacted by environmental influences that take place during a plant’s bloom cycle. Of the plethora of environmental factors that come into play when growing cannabis, variables such as light spectrum, nutrient uptake, watering cycles, temperature, humidity, and airflow will all have a considerable impact on resin formation and cannabinoid production.

Avoid Contact with Trichomes and Flowering Cannabis Buds

0_KK3qr6qtRBSX0TSRuf8D_trichome-farming-flower.jpg


Another very important consideration when farming trichomes is minimizing contact with the flowering buds. Trichomes are very sensitive and will burst on contact. Any physical interaction with cannabis flowers during the bloom phase will potentially compromise the integrity of the trichomes. If you must handle the colas, it’s very important to be as careful as possible. When harvesting, this same concept applies — any unnecessary agitation will cause a degradation in trichomes.


Heat and Trichome Production

0_vCVIVPACQUqX2k3pUoqx_trichome-farming-heat.jpg


Aside from physical interaction, heat is another major enemy to resin formation. When growing, keeping the temperatures as low as possible will help encourage production. It’s widely argued that in late stages of a cannabis plant’s bloom cycle, keeping temperatures low will trigger an increase in resin production. When harvesting, it’s also important to maintain a consistently cool temperature. Much progress can be lost if high levels of heat enters the equation at any stage in the growing, harvesting, and curing process.

An easy way to tell if heat if affecting your crop is to give them a good sniff. Disturbed trichome heads and those exposed to heat will give off pungent aromas. That delicious smell is nothing more than the degradation of trichomes as a result of heat and/or agitation of some kind.


Harvest Trichomes at the Right Time


0_a2gwYSzIRYe24bH7prTP_trichome-farming-trimming-harvesting (1).jpg


There are handfuls of folk remedies and popular anecdotes floating around on the internet for how to maximizing resin production. Ranging from light deprivation to plant mutilation (cutting or pricking your plants to stress them out), these tips and tricks range in efficacy. The most important thing to consider when exposing your plant to unusual conditions is to constantly check for signs that they are healthy.

In the final stages of a plant’s bloom cycle, a crucial factor when preserving trichomes is to harvest at the right time. With the help of an inexpensive magnifying glass, you can identify the color of a trichome’s glandular dome to help determine the perfect time to harvest. When trichomes are clear and translucent, they are not ready yet and are still producing valuable cannabinoids. As they begin to lose opacity and turn milky white, this is an indication that your plants are almost ready to go.

For maximum resin production and potency, harvesting when trichomes have moved from milky white to an amber hue is key. Like fruits, trichomes are at their peak of flavor just before they turn. As the color moves into a predominately amber shade, this should be a strong indicator that the trichomes have reached the apex of their development cycle.

In every step of the growing process, there are opportunities to make decisions in favor of resin production. For those looking for potent, trichome-stacked flowers, adopting some of these techniques aimed at trichome farming is essential. The preservation and proliferation of trichomes is contingent on the respect they are given during the growing and harvesting process. Adopting the philosophy of trichome preservation is essential to maximizing resin production, potency, and preservation. For hash makers, trichome farming is the only way to achieve superior quality. Without these practices, products like full melt hash simple couldn’t exist.


ToDo:

Learn more about ... How to Increase Production of Ripe Trichomes on Cannabis.

Learn more about pests and nutrient deficiencies.
 
August 19 2019 - Update

Images:


IMG_20190819_150512.jpg

Bakerstreet #1 - Hanna Hemp - Looks healthy so far - budlets are exposed to light and air.


IMG_20190819_150553.jpg

Bakerstreet #2 - Henna Hemp - Looks healthy so far - budlets are exposed to light and air.


IMG_20190819_201737.jpg

C.R.E.A.M. #1 - Cowgirl Hemp - Looks healthy so far - buds are exposed to light and air.


IMG_20190819_201755.jpg

Cheese #1 - Gouda Hemp - Looks healthy so far - buds are exposed to light and air.


Environment #1 - Autoflower Veg/Flower:

*** The Inkbird IBS-TH1 I ordered got here, so I will start tracking RH, canopy temperature and VPD again.

*** I was looking at the temperature and humidity graphs, and I noticed that the RH was going up to 70% when the lights went out and the temperature dropped down to 22°C (71°F) .

*** Environment # 1 is mutually exclusive from Environment # 2.

*** I am running the exhaust fan 24-0 to prevent a rise in RH and to prevent smells in the house.

*** The humidifier is turned off.

*** I decided to invest in a dehumidifier to see if I could stabilize the humidity in the tent.

*** I may not need the Temperature Controller anymore.


*** The VPD Values I am Using For This Grow (Version 1)

CO2 is refreshed frequently when the exhaust fan turns on.

The two X6 lights are running 4 cycles of "5 hours lights-on and 1 hours lights-off".

*** I may need to try one cycle of "20 hours lights-on and 4 hours lights-off" again to prevent humidity spikes.

The two X6 lights are 30 cm (12") above the canopy centered over the 2 plants.

The two X6 lights give off quite a bit of heat.

*** The temperature is running around 31°C (88°F) with the two X6 lights on and the dehumidifier on.

*** When the dehumidifier is set to "comfort", which should keep the RH between 45% and 55%, it actually kept the RH at 40%.

*** VPD was about 2.20 - Danger Zone: Over / Under Transpiration - lights-on.

*** I set the dehumidifier to "manual" ... RH 55% ... to see what happens.


Environment #2 - Photoperiod Flower:

*** I will start tracking RH, canopy temperature and VPD again when Environment #1 is dialed-in again.

*** Environment # 2 is mutually exclusive from Environment # 1.

*** Environment # 2 does not have a humidifier.

*** Environment # 2 does not have a dehumidifier.

*** I am running the exhaust fan 24-0 to prevent a rise in RH and to prevent smells in the house.

*** The VPD Values I am Using For This Grow (Version 1)

CO2 is refreshed frequently when the exhaust fan turns on.

The Mars Hydro TSL 2000W light is running 1 cycle of uninterrupted "12 hours lights-on and 12 hours lights-off".

The Mars Hydro TSL 2000W light is 30 cm (12") above the canopy centered over each plant.

The Mars Hydro TSL 2000W light does not give off a lot of heat.


Growth Stage:

2 Bakerstreets: Day 1/ Week 13 ... Day 85 ... week 5 flower.

*** They got their pistels on August 05, 2019.
*** They were transplanted July 20, 2019 and due for the 4 week flush/feed(CGRSFS, RME) on August 24, 2019.
*** They should be ready to harvest between September 16, 2019 and September 23, 2019.

*** Photoperiod Stages: 5 days Germination, 1 week seedling, 2-8 weeks veg, 6-12 weeks flower, 4-12 weeks cure
*** Allow 1 day to 3 days of dark before switching to 12-12
*** Pistels show up about 14 days (2 weeks) after switching to 12-12


1 C.R.E.A.M.: Day 1/ Week 12 ... Day 78 ... late flower.
1 Cheese: Day 1/ Week 12 ... Day 78 ... late flower.

*** They are in the final 2 weeks ... Flush, Full-On Bloom Nutes, Stem Split, Three Days Dark, Harvest!
*** They should be ready to harvest between August 18, 2019 and August 25, 2019.
*** I need to check the pistels and trichomes to verify the harvest date.

*** Autoflower Stages: 5 days Germination, 1 week seedling, 3 weeks veg, 3 weeks pre-flower, 3-6 weeks flower, 4-12 weeks cure
*** Pistels show up about 35 days (5 weeks) after Germination
*** Flowering takes about 42 days to 56 days (6 weeks to 8 weeks) after pistels show up


Watering and Feeding:


Bakerstreets' Regular Feed:

*** Next regular feed ... 6 litres (1.6 gallons) - Full Dose - Week 10 - CGRSFS , CS, BPSS, BTTE around August 20, 2019.
*** Next regular flush ... 120 litres of water around August 24, 2019 on a watering day.
*** Expecting about 1% of run-off. Stop watering right at run-off.


C.R.E.A.M.'s Bloom Feed & Cheese's Bloom Feed:

*** Next bloom feed ... 6 litres (1.6 gallons) - Full Dose - Week 12 - CGRSFS, CS, BPSS, BTTE around August 21, 2019 .
*** Expecting about 1% of run-off. Stop watering right at run-off.


*** I will do a regular feed(CGRSFS, RME)/feed(CGRSFS, BPSS, CS, BTTE)/water cycle for all regular weeks.
*** I will do full-on bloom feeds(CGRSFS, BPSS, CS, BTTE) for the last two weeks prior to harvest.


*** For details on my feeding schedule refer to here: The Different Feeds I need For This Grow (Version 5)


Activities:

My priority is to expose the growth nodes to light and air because they are going to become colas.

Got a new dehumidifier to try to dial-in VPD.


Notes:

The priority has to be to expose the growth nodes/buds to light & air, and to keep the canopy even and flat.

*** I am going to let the plants grow naturally now and stop tucking the stems into the ScrOG. For details on this decision, please refer here: How long to Veg Photoperiods? - Version 2

*** The Bakerstreets are now getting some height on their budlets, and the budlets are filling out.

*** I am pretty sure the new Mars Hydro TSL 2000W light is pentrating into the plant, so a lot of pruning is not a good idea.

*** I started looking at VPD again for Environment #1 and got a dehumidifier to see if that helps.

*** I am looking forward to starting my LUX analysis soon.


Lessons Learned:

What Are Trichomes and Why Do They Exist on Cannabis?

By Leafly

When it comes to cannabis, there is quite a bit more than what meets the naked eye. If you fancy the flower, at some point in time you have probably asked yourself about those tiny little crystals that always seems to cover the leaves and buds of your favorite strains. They tend to be shiny, sticky, and always carry the most amazing aromas. Upon looking closer, however, these blankets of frost appear to be large collections of what are known as trichomes.

The actual definition of trichome is “fine outgrowths or appendages on plants, algae, lichens, and certain protists.” Originating from the Greek word “Tríchōma,” meaning “growth of hair,” these tiny microscopic mushroom-looking protuberances look like something out of a science fiction novel. But they are actually the very factories that produce the hundreds of known cannabinoids, terpenes, and flavonoids that make our favorite cannabis strains potent, unique, and effective.

The Function of Trichomes on Cannabis


0_71GZHaXhSUuDxRy3P5Ch_2016_0706_TrichomeFarming_002_body.jpg


The production of trichomes can be observed in many species of plants throughout nature, taking on various physical forms as well as serving many different purposes. For example, trichomes found on some carnivorous plants aid in helping to catch prey.

In cannabis, trichomes function as a defense mechanism. When female cannabis plants begin to produce flowers in the wild, they often become vulnerable to various insects and animals as well as non-living environmental variables such as potentially harmful UV rays. Trichomes serve as a deterrent for animals because their bitter taste and strong aromas render cannabis flowers unpalatable. At the same time, they also serve a dual function in protecting their plants from damaging winds and even some varieties of fungal growth.

The Different Types of Trichomes on Cannabis


0_j5B7qHBvT9SaB0bzDasE_2016_0706_TrichomeFarming_005_body.jpg


Trichomes exist in many shapes and sizes, but there are three that appear most often on cannabis plants.

*** Bulbous trichomes are the smallest of the bunch, and they appear on the surface of the entire plant. Bulbous trichomes are as small as 10-15 micrometers, which is tiny enough to only be comprised of a handful of cells.

*** Capitate sessile trichomes are slightly larger and contain both a head and a stalk. These trichomes are quite a bit more abundant than their bulbous brethren, but cannot hold a candle to the bountifulness and size of the third trichome variety.

*** Capitate-stalked trichomes range from anywhere between 50-100 micrometers wide, meaning they’re much larger and can actually be seen by the naked eye. Their structure consists of a stalk comprised of epidermal and hypodermic cells that build up to a basal cell which attaches to a large gland head. This gland head, held together by a waxy cuticle layer, serves as the epicenter for cannabinoid and terpenoid synthesis.

All three types of trichomes produce cannabinoids, though it is the capitate-stalked trichomes that will appear in abundance in and around the calyxes of budding flowers, producing the highest concentration of essential oils due to their size.

Trichome Production and Lifecycle


0_oIop7hUVSMqEkbIHGPF3_terpene-trichome.jpg


Cannabinoid synthesis within the trichome begins as cannabis plants move into their bloom phase. As they begin to produce flowers, trichomes form along the outer surface of the above-ground plant vegetation and begin to transport vacuoles and plastids from their stalk into the gland head. At this point, cells within the gland head will begin to metabolize and form precursors for what will eventually become cannabinoids.

The rate and concentration at which a cannabis plant produces trichomes will be contingent on both genetics well as some environmental factors. Though plants containing higher concentrations of trichomes don’t always produce the highest concentration of cannabinoids and/or terpenes, variables such as UV light greatly affect cannabinoid and terpene synthesis within the trichome head. Typically, plants that receive a broader spectrum of light will produce higher concentrations of cannabinoids, though in many cases these reactions will be strain-specific.

A trichome’s lifecycle largely parallels that of the cannabis plant on which it resides, making it incredibly valuable for farmers to monitor. The life of a trichome can be analogous to a parabola, where the apex represents the point at which maturation exceeds and degradation begins. For the most part, trichomes will display maturation on this parabola by changing opacity from a clear translucent state to a cloudy white and, later on, amber hue.

This transition of color within a trichome head represents its peak ripeness and farmers typically use this as a sign to harvest, as it’s the point when the trichome has reached full maturation and will begin to degrade from this point forward. It is important to understand that not all strains of cannabis are the same and some trichomes will display maturation differently. Nevertheless, trichome coloration remains the standard for determining a harvest time for most strains.

Whether alive on a vine or harvested, trichomes are incredibly volatile and risk destruction and/or degradation at the hands of many catalysts, including but not limited to:


  • Physical contact or agitation
  • Heat
  • Light
  • Oxygen
  • Time
Not only do the trichomes themselves risk damage when exposed to these elements, but the essential oils within them risk degradation. There are ways to dramatically slow degradation of trichomes by carefully handling cannabis flowers both during propagation and post harvest. By limiting physical contact and agitation to the flowers themselves, trichomes may be preserved on the plant for longer periods of time. Proper trimming, drying, and curing techniques can help keep trichomes viable for longer, which in turn will preserve the cannabinoids and terpenoids contained within.

Those looking to extend the shelf life of trichomes beyond that of the plants they came from often resort to extraction techniques. An extraction in this context may be defined as the process of either mechanically or chemically removing trichomes from the plant itself. There are a myriad of methods and techniques for extracting trichomes from the plant material. These methods range from mechanical dry sifting practices that produce “kief,” to chemical extractions that utilize light hydrocarbons like butane or propane to create waxy full melt hash oils. If subjected to the right conditions, trichomes that have been separated and recollected by use of these methods can be stored indefinitely.


Cannabis trichomes truly do deserve a round of applause for their essential role in not only protecting a cannabis plant from the potential harms of the world, but also by providing a one-of-a-kind manufacturing facility for hundreds of known medicinally and therapeutically beneficial compounds exclusive to this amazing plant. Experienced cannabis farmers are no stranger to growing with the intention of preserving trichomes. With proper care and dedication, farming trichomes is and will remain the future of uncovering the vast mysteries of the medicinal and therapeutic qualities of cannabis.


ToDo:

Learn more about ... Cannabis Genotypes and Phenotypes: What Makes a Strain Unique?.

Learn more about pests and nutrient deficiencies.
 
Very informative journal update. :green_heart:

Thanks @SmokeSara ... sometimes I feel like a better researcher and journalist than I do a gardener :)

I feel like I am struggling a lot with this garden ... because I have only grown a garden once before a long time ago ... and then ... I was really mostly an assistant.

I am just extremely grateful that I was able to get that Mars Hydro TSL 2000W light based on @Teddy Edwards and @Old Salt pointing me in the right direction.

For the first few months I was focused on nutrients and medium ... but the more I read ... the more I find out just how critical lights are to indoor growing!

And now with the new light ... you can see from the pictures just how fast they recovered from a heavy defoliation and how fast they are continuing their stretch!!! With less electivcity and less heat.

I will definitely be buying another Mars Hydro TSL 2000W or a Mars Hydro TSW 2000W light in a few more months!!!

And if I figure out infra red ... then maybe even an SP 250!

Alright ... have a great week!!!

ttyl
I also feel like you are a journalist. :D Since everything you wrote is very detail and professional. :green_heart: And I feel so happy our lights doesn't let you down, we are trying our best to improve. The IR , we might add in our later shipments products. Trying to imporve them better and better, more suitable for the growing needs. :circle-of-love: And if you have any question or advices on lights in future, please do not hesitate to tell me as well. :green_heart:
 
August 20 2019 - Update

Images:


IMG_20190820_143358.jpg

Bakerstreet #1 - Hanna Hemp - Looks healthy so far - budlets are exposed to light and air.


IMG_20190820_143457.jpg

Bakerstreet #2 - Henna Hemp - Looks healthy so far - budlets are exposed to light and air.


IMG_20190820_160928.jpg

C.R.E.A.M. #1 - Cowgirl Hemp - Looks healthy so far - buds are exposed to light and air.


IMG_20190820_160944.jpg

Cheese #1 - Gouda Hemp - Looks healthy so far - buds are exposed to light and air.


Environment #1 - Autoflower Veg/Flower:

I am tracking the RH, canopy temperature and VPD with the Inkbird IBS-TH1.

Environment # 1 is mutually exclusive from Environment # 2.

The exhaust fan is running 24-0 to prevent a rise in temperature, RH and to prevent smells in the house.

The humidifier is turned off.

The dehumidifier is set to RH 55% to prevent RH spikes when the temperature drops.

The two X6 lights are running 4 cycles of "5 hours lights-on and 1 hours lights-off".

The two X6 lights are 30 cm (12") above the canopy centered over the 2 flowering plants.

The two X6 lights give off quite a bit of heat.

CO2 is refreshed frequently because the exhaust fan and the oscillating fan are always on.


*** The room temperature is running around 26°C (79°F) and RH 43%.

*** The environment humidity is running steady around RH 40% with lights-on.
*** The environment humidity peaks up to RH 55% with lights-off.

*** The environment temperature is running around 31°C (88°F) with lights-on.
*** The environment temperature dips down to 22°C (72°F) with lights-off.

*** VPD is running steady about 2.19 - Danger Zone: Over / Under Transpiration - lights-on.
*** VPD is running steady about 0.89 - Healthy Transpiration: Late Veg / Early Flower - lights-off.

*** I will try to control the RH to get the VPD dialed-in.


*** The VPD Values I am Using For This Grow (Version 1)


Environment #2 - Photoperiod Flower:

I will start tracking RH, canopy temperature and VPD again when Environment #1 is dialed-in.

Environment # 2 is mutually exclusive from Environment # 1.

The exhaust fan is running 24-0 to prevent a rise in temperature, RH and to prevent smells in the house.

Environment # 2 does not have a humidifier.

Environment # 2 does not have a dehumidifier.

The Mars Hydro TSL 2000W light is running 1 cycle of uninterrupted "12 hours lights-on and 12 hours lights-off".

The Mars Hydro TSL 2000W light is 30 cm (12") above the canopy centered over all plants.

The Mars Hydro TSL 2000W light does not give off a lot of heat.

CO2 is refreshed frequently because the exhaust fan and the oscillating fan are always on.

*** The VPD Values I am Using For This Grow (Version 1)


Growth Stage:

2 Bakerstreets: Day 2/ Week 13 ... Day 86 ... week 5 flower.

*** They got their pistels on August 05, 2019.
*** They were transplanted July 20, 2019 and due for the 4 week flush/feed(CGRSFS, RME) on August 25, 2019.
*** They should be ready to harvest between September 16, 2019 and September 23, 2019.

*** Photoperiod Stages: 5 days Germination, 1 week seedling, 2-8 weeks veg, 6-12 weeks flower, 4-12 weeks cure
*** Allow 1 day to 3 days of dark before switching to 12-12
*** Pistels show up about 14 days (2 weeks) after switching to 12-12


1 C.R.E.A.M.: Day 2/ Week 12 ... Day 79 ... late flower.
1 Cheese: Day 2/ Week 12 ... Day 79 ... late flower.

*** They are in the final 2 weeks ... Flush, Full-On Bloom Nutes, Stem Split, Three Days Dark, Harvest!
*** They should be ready to harvest between August 18, 2019 and August 25, 2019.
*** I need to check the pistels and trichomes to verify the harvest date.

*** Autoflower Stages: 5 days Germination, 1 week seedling, 3 weeks veg, 3 weeks pre-flower, 3-6 weeks flower, 4-12 weeks cure
*** Pistels show up about 35 days (5 weeks) after Germination
*** Flowering takes about 42 days to 56 days (6 weeks to 8 weeks) after pistels show up


Watering and Feeding:


Bakerstreets' Regular Feed:

pH: 6.70
ppm: 1575

6 litres (1.6 gallons) - Full Dose - Week 10 - CGRSFS , CS, BPSS, BTTE


Bakerstreets' Regular Flush/Feed:

*** Next regular flush ... 120 litres (31.7 gallons) - pH 6.3 water on August 25, 2019.
*** Next regular feed ... 6 litres (1.6 gallons) - Full Dose - Week 10 - CGRSFS , RME on August 25, 2019.
*** Expecting about 1% of run-off. Stop watering right at run-off.


C.R.E.A.M.'s Bloom Feed & Cheese's Bloom Feed:

*** Next bloom feed ... 6 litres (1.6 gallons) - Full Dose - Week 12 - CGRSFS, CS, BPSS, BTTE around August 21, 2019 .
*** Expecting about 1% of run-off. Stop watering right at run-off.


*** I will do a regular feed(CGRSFS, RME)/feed(CGRSFS, BPSS, CS, BTTE)/water cycle for all regular weeks.
*** I will do full-on bloom feeds(CGRSFS, BPSS, CS, BTTE) for the last two weeks prior to harvest.


*** For details on my feeding schedule refer to here: The Different Feeds I need For This Grow (Version 5)


Activities:

My priority is to expose the growth nodes to light and air because they are going to become colas.


Notes:

The priority has to be to expose the growth nodes/buds to light & air, and to keep the canopy even and flat.

I am going to let the plants grow naturally now and stop tucking the stems into the ScrOG. For details on this decision, please refer here: How long to Veg Photoperiods? - Version 2

The Bakerstreets are now getting some height and the budlets are filling out.

I am confident the new Mars Hydro TSL 2000W light is pentrating into the plant, so a lot of pruning is not a good idea.

The colas at the ends of the C.R.E.A.M.'s & Cheese's quadline lines are much bigger than the side colas.

I started looking at VPD again for Environment #1 and will work on RH to get it dialed-in.

I set the humidifier RH to 55%.

I set the dehumidifier RH to 60% to prevent spikes when the temperature drops.

Getting more room temperature air into the tent will help to bring the temperature down.

I increased the LUX over the C.R.E.A.M. & Cheese to about 60k.

*** I am looking forward to starting my LUX analysis soon.


Lessons Learned:

Cannabis Mould: Identification, Prevention, and Treatment

By RoyalQueenSeeds

It is important for every cannabis grower to recognise the signs of a potential mould infestation, and how to prevent it, so we have put together a quick and handy guide with the knowledge you need.

Mould and bud rot are a serious and common problem that many marijuana growers face every day. It can be very disheartening to check on your healthy crop, only to see the signs of mould setting in, potentially ruining everything. So here is how to spot, prevent and treat mould.

IDENTIFICATION

Of all of the types of moulds and infections out there that can attack your cannabis plant, it is Botrytis (bud rot) and Powdery Mildew that are the most common.

BOTRYTIS (BUD ROT):

Botrytis tends to set it at the base of the stem, making it often hard to detect. Usually, the first signs seen by the grower are when the small leaves of the kolas begin to wither, discolour, and dry out. Upon closer inspection, you may notice fluff growing amongst buds and bud sites, usually grey, blue-green, or white in colour. Depending on conditions, this will either cause the bud to dry out completely and crumble when touched (in low humidity), or turn into a decomposing sludge (in high humidity).

When Botrytis reaches advanced stages, you may notice little black specs appear in the mould. These are spores the mould is creating, ready to spread itself to other plants. They can be transported on the slightest breeze. Things are truly dire if you see this. Do not breath these spores in, or allow them anywhere near other plants.

Botrytis can also attack stems, leaves and entire young plants, but this is less common. Just make sure to check your plants regularly!


0_Inner-Bud-Rot.jpg


POWDERY MILDEW:

Powdery Mildew appears as a thin layer of white powdery mould on the leaves of your cannabis plant, before spreading across the entire plant. This inhibits photosynthesis, slowly causing your cannabis to die from lack of energy. Leaves will shrivel, turn yellow, before turning brown and dying. Although hard to spot, Powdery Mildew can sometimes be detected early as small bumps appearing on infected leaves. Like Botrytis, Powdery Mildew produces little black spores in its advanced stages, which can be carried by air movement to other plants.

Both of these diseases can occur indoors and outdoors, as well as infect multiple species of plants besides cannabis, making any plant infection within your grow area or household potentially dangerous to your crop.

Fortunately, both diseases need a very precise set of circumstances to be met before they will infect a plant. This brings us nicely to the next section: Prevention.


0_Inner-MoldLR.jpg


PREVENTION

Without a doubt, prevention is the best way to keep your cannabis safe. It is much easier to take some extra precautions and monitor the state of your growing environment than to try and actually cure an infection.

There are three conditions that need to be met for both Botrytis and Powdery Mildew to take hold. These are:

*** Cool temperatures
*** Stagnant air
*** Wet/humid conditions

So the best way to prevent both diseases is to ensure that no one condition ever persists for long, and certainly not all together.

These are all quite easy to prevent indoors. A cool temperature is anything under 20 degrees Celsius. Ensure you have a decent ventilation system set up to ensure constant air movement, and try to prevent overcrowding of plants that may inhibit air flow. You should also be able to control the humidity of a grow room using ventilation, keeping things in order.

Outdoors is a little trickier. A lack of breeze, cool nights and rain can all stack the odds against you and help mould set in. As such, it is important to choose your grow site with care, ensuring there is a good airflow. Some growers will erect tent-like structure over their bud if they know heavy rain is on the way, and even shake them after a rain spell to shake out any excess water that may be sitting on leaves and buds.

Trust us, when it comes to these diseases prevention is everything.


0_mould-cannabis-plants_1.jpg


TREATMENT

As mentioned, treating these diseases is very tough work, but if things have progressed this far, you will have little choice.

First and foremost, consider whether it is worth trying to save an infected plant. As hard as it may be, there is no way to completely cure an infected plant. All you can do is try and keep the disease at bay while healthy sections of the plant grow. However, in doing so, you risk contaminating the rest of the crop for a small amount of bud that is likely going to be sub-par. Treatments will only go so far, and for many, it is better to cut your loss and burn the infected.

Also, once an infection like this sets into a garden or grow room, it is extremely hard to get rid of permanently. Outdoors they will move from plant to plant, as well as reproduce in the soil as mycelia. Indoors, the spores will sit on walls, floors, and pretty much any surface until they are disturbed and moved. It means you run a real risk of infecting future crops as well.

BOTRYTIS:

The only real option is to use biological sprays like Serenade disease control spray. This can help treat a botrytis and keep it at bay until harvest, but it won’t get rid of it. Also, move infected plants into a warm room with an extremely low humidity to help prevent spread.

POWDERY MILDEW:

A bit more can be done with Powdery Mildew. Remove infected leaves and move the plant into a warm, low humidity area. Proceed to spray the plant with safe and specialised fungicides that target the mildew. This should hopefully keep the infection at bay.

It is worth bearing in mind, if you are forced to spray your cannabis with any fungicides, they are going to have an effect on the final bud quality – altering the taste, aroma and quality of smoke. Also, don’t forget that you will be consuming the bud, so do you really want it covered in fungicides or mould? Both can be potentially dangerous – especially if the fungicides are chemical based, or contain copper or sulphur (which many do).

When it comes to Powdery Mildew, there are a few natural gardener’s remedies you can try:

Either add two teaspoons of cider vinegar to 1L of water and spray your plants, or make a mixture of 60% milk and 40% water and spray your plants. Both work to kill Powdery Mildew, but how effective they are is debatable. If you want to avoid fungicides, they are certainly worth a go.


At the end of the day, you have to make your own choice. However, if you ask us, it is always better to remove and destroy infected plants and learn from the experience. It is all about prevention after all!


ToDo:

Learn more about ... How To Detect And Eradicate Sooty Mould From Your Weed.

Learn more about pests and nutrient deficiencies.
 
August 21 2019 - Update

Images:


IMG_20190821_150731.jpg

Bakerstreet #1 - Hanna Hemp - Looks healthy so far - budlets are exposed to light and air.


IMG_20190821_150742.jpg

Bakerstreet #2 - Henna Hemp - Looks healthy so far - budlets are exposed to light and air.


IMG_20190821_153020.jpg

C.R.E.A.M. #1 - Cowgirl Hemp - Looks healthy so far - buds are exposed to light and air.


IMG_20190821_153123.jpg

Cheese #1 - Gouda Hemp - Looks healthy so far - buds are exposed to light and air.


Environment #1 - Autoflower Veg/Flower:

I am tracking the RH, canopy temperature and VPD with the Inkbird IBS-TH1.

Environment # 1 is mutually exclusive from Environment # 2.

The exhaust fan is running 24-0 to prevent a rise in temperature, RH and to prevent smells in the house.

The humidifier is set to RH 50%.

The dehumidifier is set to RH 55% to prevent RH spikes when the temperature drops.

I am going to have to play with these numbers to get the environment dialed-in.

The two X6 lights are running 1 cycle of "20 hours lights-on and 4 hours lights-off".

The two X6 lights are 30 cm (12") above the canopy centered over the 2 flowering plants.

The two X6 lights give off quite a bit of heat.

CO2 is refreshed frequently because the exhaust fan and the oscillating fan are always on.


*** The room temperature is running around 26°C (79°F) and RH 43%.

*** The environment humidity is running steady around RH 45% with lights-on.
*** The environment humidity peaks up to RH 55% with lights-off.

*** The environment temperature is running steady around 31°C (88°F) with lights-on.
*** The environment temperature dips down to 26°C (79°F) with lights-off.

*** VPD is running steady about 1.88 - Danger Zone: Over / Under Transpiration - lights-on.
*** VPD is peaking at about 1.13 - Healthy Transpiration: Late Veg / Early Flower - lights-off.

*** I will try to control the RH to get the VPD dialed-in.

*** I will also flip the two X6 lights back to 1 cycle of "20 hours lights-on and 4 hours lights-off"

to simplify the environment variables.

*** The VPD Values I am Using For This Grow (Version 1)


Environment #2 - Photoperiod Flower:

I will start tracking RH, canopy temperature and VPD again when Environment #1 is dialed-in.

Environment # 2 is mutually exclusive from Environment # 1.

The exhaust fan is running 24-0 to prevent a rise in temperature, RH and to prevent smells in the house.

Environment # 2 does not have a humidifier.

Environment # 2 does not have a dehumidifier.

The Mars Hydro TSL 2000W light is running 1 cycle of uninterrupted "12 hours lights-on and 12 hours lights-off".

The Mars Hydro TSL 2000W light is 30 cm (12") above the canopy centered over all plants.

The Mars Hydro TSL 2000W light does not give off a lot of heat.

CO2 is refreshed frequently because the exhaust fan and the oscillating fan are always on.

*** The VPD Values I am Using For This Grow (Version 1)


Growth Stage:

2 Bakerstreets: Day 3/ Week 13 ... Day 87 ... week 5 flower.

*** They got their pistels on August 05, 2019.
*** They were transplanted July 20, 2019 and due for the 4 week flush/feed(CGRSFS, RME) on August 25, 2019.
*** They should be ready to harvest between September 16, 2019 and September 23, 2019.

*** Photoperiod Stages: 5 days Germination, 1 week seedling, 2-8 weeks veg, 6-12 weeks flower, 4-12 weeks cure
*** Allow 1 day to 3 days of dark before switching to 12-12
*** Pistels show up about 14 days (2 weeks) after switching to 12-12


1 C.R.E.A.M.: Day 3/ Week 12 ... Day 80 ... late flower.
1 Cheese: Day 3/ Week 12 ... Day 80 ... late flower.

*** They are in the final 2 weeks ... Flush, Full-On Bloom Nutes, Stem Split, Three Days Dark, Harvest!
*** They should be ready to harvest between August 18, 2019 and August 25, 2019.
*** I need to check the pistels and trichomes to verify the harvest date.

*** Autoflower Stages: 5 days Germination, 1 week seedling, 3 weeks veg, 3 weeks pre-flower, 3-6 weeks flower, 4-12 weeks cure
*** Pistels show up about 35 days (5 weeks) after Germination
*** Flowering takes about 42 days to 56 days (6 weeks to 8 weeks) after pistels show up


Watering and Feeding:


Bakerstreets' Extra Feed:

pH: 6.71
ppm: 1412

1.5 litres (0.40 gallons) - Full Dose - Week 12 - CGRSFS, CS, BPSS, BTTE

*** I gave them C.R.E.A.M.'s Bloom Feed leftovers & Cheese's Bloom Feed leftovers.


Bakerstreets' Regular Flush/Feed:

*** Next regular flush ... 120 litres (31.7 gallons) - pH 6.3 water on August 25, 2019.
*** Next regular feed ... 6 litres (1.6 gallons) - Full Dose - Week 10 - CGRSFS , RME on August 25, 2019.
*** Expecting about 1% of run-off. Stop watering right at run-off.


C.R.E.A.M.'s Bloom Feed:

pH: 6.71
ppm: 1412

4 litres (1.6 gallons) - Full Dose - Week 12 - CGRSFS, CS, BPSS, BTTE

Cheese's Bloom Feed:

pH: 6.71
ppm: 1412

5 litres (1.6 gallons) - Full Dose - Week 12 - CGRSFS, CS, BPSS, BTTE


C.R.E.A.M.'s Bloom Feed & Cheese's Bloom Feed:

*** Next bloom feed ... 6 litres (1.6 gallons) - Full Dose - Week 12 - CGRSFS, CS, BPSS, BTTE around August 24, 2019 .
*** Expecting about 1% of run-off. Stop watering right at run-off.


*** I will do a regular feed(CGRSFS, RME)/feed(CGRSFS, BPSS, CS, BTTE)/water cycle for all regular weeks.
*** I will do full-on bloom feeds(CGRSFS, BPSS, CS, BTTE) for the last two weeks prior to harvest.


*** For details on my feeding schedule refer to here: The Different Feeds I need For This Grow (Version 5)


Activities:

My priority is to expose the growth nodes to light and air because they are going to become colas.


Notes:

The priority has to be to expose the growth nodes/buds to light & air, and to keep the canopy even and flat.

I am going to let the plants grow naturally now and stop tucking the stems into the ScrOG. For details on this decision, please refer here: How long to Veg Photoperiods? - Version 2

The Bakerstreets are now getting some height and the budlets are filling out.

I am confident the new Mars Hydro TSL 2000W light is pentrating into the plant, so a lot of pruning is not a good idea.

*** The colas at the ends of the C.R.E.A.M.'s & Cheese's quadline lines are much bigger than the side colas.

I started looking at VPD again for Environment #1 and will work on RH to get it dialed-in.

I set the humidifier RH to 50%.

I set the dehumidifier RH to 55% to prevent spikes when the temperature drops.

I flipped the two X6 lights back to 1 cycle of "20 hours lights-on and 4 hours lights-off"
to simplify the environment variables.

Getting more room temperature air into the tent will help to bring the temperature down, but will also drive the RH down too.

I increased the LUX over the C.R.E.A.M. & Cheese to about 60k.

*** The tip of one cola on the C.R.E.A.M. had brown sugar leaves so I cut it off and looked at under the microscope.

*** I will look very closely at the C.R.E.A.M.'s trichomes & Cheese's trichomes on the calyxes tomorrow.

*** I am looking forward to starting my LUX analysis soon.


Lessons Learned:

How To Detect And Eradicate Sooty Mould From Your Weed

By RoyalQueenSeeds

Sooty mould does not attack the cannabis plant; it feeds off the poop from sap-sucking insects. If you have sooty mould, you have a severe bug infestation. Learn how to deal with it.

Soot is the name given to the black, flaky substance that forms when organic matter burns incompletely. If you’ve ever seen black smoke from a chimney, certain stains on old buildings, or that black buildup in a fireplace—all of these are soot.

So as you may have guessed, sooty mould is a form of fungal disease that manifests by covering plant leaves and stems with a dark brown-black mantle of nastiness. The spores of the species Ascomycota fungi quickly propagate, causing quite a detrimental effect to a crop.

As with all signs of distress, you should take countermeasures immediately.

Though not the most common of mould attacks, it is an obvious sign of bug infestation. Theoretically, if you find yourself in the presence of this disease, chances are you neglected to inspect and discover an underlying pest problem.

Luckily, this particular form of mould is relatively easy to contain and even eliminate.

0_Inner-Sooth-Mold.jpg


BUG INFESTATION CAUSES SOOTY MOULD
Bugs like aphids, whiteflies, mealybugs, leafhoppers, cochineals, and scale insects, among others, survive by munching on leaf sap. They bite and dig in, sucking out the plant’s juices. Like little vampires, they sink their teeth into the phloem, causing irreparable damage. The leaves will usually exhibit spots and stains, generally starting off silvery-white until necrosis sets in, turning the spots to yellow and eventually brown. Some insects may even inject toxins or viruses into the plant, causing systemic disease. More often than not, they reproduce and deposit their eggs right on the undersides of leaves—usually starting out on the larger fan leaves.

As bugs digest the sap, they will excrete honeydew. This is a very sticky, sugar-rich, golden-brown ooze that remains on the leaves. It is also the perfect food source for sooty mould spores. As the spores fly around in the air, they may get trapped in this insect goo. This insect excretion offers ideal conditions for apical elongation of the hyphae, meaning the mould starts spreading like wildfire in the presence of honeydew.

As the disease spreads, it covers the leaves with its dark cape. Leaves are unable to photosynthesise, so there is no energy production. While not attacking the plant directly, indirectly, your crop may suffer from stunted growth and a weakened immune system. If by chance any of the bugs did inject your plants with a virus, you may be in serious trouble. Not only could you lose a crop, but it will also make cloning unviable.

HOW TO TREAT AND ELIMINATE SOOTY MOULD

Sooty mould prefers indoor environments. The higher and stabler indoor temperatures make your secret garden the perfect haven for rapid and acute infestation. But as we have discussed before, sooty mould is secondary to an underlying bug problem.

The same thing goes for bugs. Because indoor environments are less variable than outdoor plantations, if you form the ideal conditions for a particular species of insects to reproduce at scale, they will happily accept the invitation. There are no natural predators, and space is confined.

Do your very best to inspect the plants thoroughly. A magnifying glass (better still, a 30x or 100x jeweller’s loupe) is your best friend, as many species of these honeydew-brewing organisms are almost invisible to the naked eye. Check the top, but especially the underside of the leaves for eggs. Follow the stems to the branch, and the main branches all the way down to the topsoil. The topsoil is also a favourite maternity ward for new eggs to hatch. Try your very best to find the evildoers, as the best thing to do is correctly identify which army of sap-sucking thugs you need to fend off.

You have two options, depending on how severe the problem is. One is a milder organic approach, and the other is to use harsh chemicals. First, you need to eradicate the insect attack, and then you can proceed to remove the sooty mould.


0_Inner-Riego.jpg


ORGANIC (NATURAL) VERSUS PESTICIDES

No one likes pesticides. They are mostly derived from crude oil, and while they may fix an immediate problem, they are hazardous to humans and nature in the long run. And if you are planning to smoke or consume your weed, you should do your very best to avoid using pesticides altogether. Even organic pesticides like neem oil may be harmful to humans.

Having said this, it’s essential to understand how to apply them. If done correctly, they should not pose any problem. If done incorrectly, they could present a severe health risk.

WHAT ARE THE NATURAL OPTIONS?

Organic (or natural) bug control options are varied. Some can be very effective but expensive, while others are quite cheap. They may not be ideal if handling an outbreak situation. Some pesticide options are species-dependent, meaning not all organic pesticides work on all insect species. If you do not have a zombie apocalypse-level infestation, it is highly recommended you try these first:

Extremely high doses of quick-release CO₂ are quite effective and leave zero residue behind. Unfortunately, it is costly to implement if you do not already own a high-quality CO₂ supplementation kit—not to mention the safety risk that comes with a CO₂-rich atmosphere.

Portable UV lights can do wonders, but the power rating needed to be effective may also be costly. UV-C (467nm wavelength) is almost 100% effective against fly pupae, whereas UV-A (387nm) is only effective at 40%. But generally, these lights cover a broad spectrum, and studies have shown these lights can significantly reduce bug populations, particularly aphids. UV is also hazardous to humans and plants if exposed for too long.

Neem oil is a classic foliar spray application against bugs. Particularly effective against leafhoppers, this all-natural remedy will leave a very foul taste and smell on your plants, so don’t think of spraying it on your buds—it will render them useless and even dangerous to smoke.

Beneficial insects, like ladybugs, certain wasps, and lacewings can be quite effective. The problem is, for the most part you need to know how to take care of them, or they will die within a few days. You need to create a habitat for them, meaning you need to house and feed them or the population will quickly diminish.

Spinosad products are derived from compounds found in the bacterial species Saccharopolyspora spinosa. They are considered safe and completely harmless to pets, children, and plants. They work wonders with leafhoppers, leaf miners, spider mites, mosquitos, fruit flies, and many others. Great as a prophylactic if you usually encounter pest problems.

Insecticidal soaps (containing saponins) are another naturally derived form of bug control against aphids, mealybugs, spider mites, whiteflies, and others. They work by melting away the bugs' exoskeleton. They are considered safe for humans, but deadly to beneficial bugs. Soaps tend to wash off relatively easy, so numerous applications may be required.

0_Inner-Leaf-Miner.jpg


I HAVE A ZOMBIE APOCALYPSE INFESTATION ON MY WEED!

If you have no choice but to drop a toxic bomb to control an insect outbreak, be sure to read the label and follow the instructions to the letter.

There are thousands of products readily available in most garden centres, targeting specific classes of insects. So it is essential to know what you are dealing with before buying.

It would be wise to apply as per instructions to one branch first and wait one or two days to check how the plant reacts. Some chemicals may trigger unwanted reactions, just like in humans. That is why the banning and recreation of petrochemical pesticides is such a vicious cycle. Authorities ban a substance, and the guys at the lab concoct the next-closest analogue that is unregulated.

If there is no apparent sign of plant stress due to the spraying, then go ahead and eliminate the honeydew dwellers that are causing you nightmares. If by any chance the sprayed leaves suffer apparent symptoms (burning, clawing, wilting), then you’ll know you have to try another product.


ToDo:

Learn more about ... Indoor Cannabis Growing: Relative Humidity and Temperatures.

Learn more about pests and nutrient deficiencies.
 
Looking good in there. Nice USB microscope - i really need to get myself one of those. :high-five:
 
August 22 2019 - Update

Images:


IMG_20190822_233756.jpg

Bakerstreet #1 - Hanna Hemp - Looks healthy so far - budlets are exposed to light and air.


IMG_20190822_233825.jpg

Bakerstreet #2 - Henna Hemp - Looks healthy so far - budlets are exposed to light and air.


IMG_20190822_235031.jpg

C.R.E.A.M. #1 - Cowgirl Hemp - Looks healthy so far - buds are exposed to light and air.


IMG_20190822_235045.jpg

Cheese #1 - Gouda Hemp - Looks healthy so far - buds are exposed to light and air.


Environment #1 - Autoflower Veg/Flower:

I am tracking the RH, canopy temperature and VPD with the Inkbird IBS-TH1.

Environment # 1 is mutually exclusive from Environment # 2.

The exhaust fan is running 24-0 to prevent a rise in temperature, RH and to prevent smells in the house.

The humidifier is set to RH 50%.

The dehumidifier is set to RH 55%.

The three X6 lights are running 4 cycles of "5 hours lights-on and 1 hours lights-off".

Two of the X6 lights are 30 cm (12") above the canopy centered over the 2 flowering plants.

The third X6 light is 45 cm (18") above the canopy centered over the vegging plants

The three X6 lights give off 2°C (4°F) of heat each.

CO2 is refreshed frequently because the exhaust fan and the oscillating fan are always on.


*** The room temperature is running around 26°C (79°F) and RH 43%.

*** The environment humidity is running steady around RH 45% with lights-on.
*** The environment humidity peaks up to RH 55% with lights-off.

*** The environment temperature is running steady around 31°C (88°F) with lights-on.
*** The environment temperature dips down to 26°C (79°F) with lights-off.

*** VPD is running steady about 1.88 - Danger Zone: Over / Under Transpiration - lights-on.
*** VPD is peaking at about 1.13 - Healthy Transpiration: Late Veg / Early Flower - lights-off.

*** I will try to control the RH to get the VPD dialed-in.


*** The VPD Values I am Using For This Grow (Version 1)


Environment #2 - Photoperiod Flower:

I will start tracking RH, canopy temperature and VPD again when Environment #1 is dialed-in.

Environment # 2 is mutually exclusive from Environment # 1.

The exhaust fan is running 24-0 to prevent a rise in temperature, RH and to prevent smells in the house.

Environment # 2 does not have a humidifier.

Environment # 2 does not have a dehumidifier.

The Mars Hydro TSL 2000W light is running 1 cycle of uninterrupted "12 hours lights-on and 12 hours lights-off".

The Mars Hydro TSL 2000W light is 30 cm (12") above the canopy centered over all plants.

The Mars Hydro TSL 2000W light does not give off a lot of heat.

CO2 is refreshed frequently because the exhaust fan and the oscillating fan are always on.

*** The VPD Values I am Using For This Grow (Version 1)


Growth Stage:

2 Bakerstreets: Day 4/ Week 13 ... Day 88 ... week 5 flower.

*** They got their pistels on August 05, 2019.
*** They were transplanted July 20, 2019 and due for the 4 week flush/feed(CGRSFS, RME) on August 25, 2019.
*** They should be ready to harvest between September 16, 2019 and September 23, 2019.

*** Photoperiod Stages: 5 days Germination, 1 week seedling, 2-8 weeks veg, 6-12 weeks flower, 4-12 weeks cure
*** Allow 1 day to 3 days of dark before switching to 12-12
*** Pistels show up about 14 days (2 weeks) after switching to 12-12


1 C.R.E.A.M.: Day 4/ Week 12 ... Day 81 ... late flower.
1 Cheese: Day 4/ Week 12 ... Day 81 ... late flower.

*** They are in the final 2 weeks ... Flush, Full-On Bloom Nutes, Stem Split, Three Days Dark, Harvest!
*** They should be ready to harvest between August 18, 2019 and August 25, 2019.
*** I need to check the pistels and trichomes to verify the harvest date.

*** Autoflower Stages: 5 days Germination, 1 week seedling, 3 weeks veg, 3 weeks pre-flower, 3-6 weeks flower, 4-12 weeks cure
*** Pistels show up about 35 days (5 weeks) after Germination
*** Flowering takes about 42 days to 56 days (6 weeks to 8 weeks) after pistels show up


Watering and Feeding:


Bakerstreets' Regular Flush/Feed:

*** Next regular flush ... 120 litres (31.7 gallons) - pH 6.3 water on August 25, 2019.
*** Next regular feed ... 6 litres (1.6 gallons) - Full Dose - Week 10 - CGRSFS , RME on August 25, 2019.
*** Expecting about 1% of run-off. Stop watering right at run-off.


C.R.E.A.M.'s Bloom Feed & Cheese's Bloom Feed:

*** Next bloom feed ... 6 litres (1.6 gallons) - Full Dose - Week 12 - CGRSFS, CS, BPSS, BTTE around August 24, 2019 .
*** Expecting about 1% of run-off. Stop watering right at run-off.


*** I will do a regular feed(CGRSFS, RME)/feed(CGRSFS, BPSS, CS, BTTE)/water cycle for all regular weeks.
*** I will do full-on bloom feeds(CGRSFS, BPSS, CS, BTTE) for the last two weeks prior to harvest.


*** For details on my feeding schedule refer to here: The Different Feeds I need For This Grow (Version 5)


Activities:

My priority is to expose the growth nodes to light and air because they are going to become colas.


Notes:

The priority has to be to expose the growth nodes/buds to light & air, and to keep the canopy even and flat.

I am going to let the plants grow naturally now and stop tucking the stems into the ScrOG. For details on this decision, please refer here: How long to Veg Photoperiods? - Version 2

I am confident the new Mars Hydro TSL 2000W light is pentrating into the plant, so a lot of pruning is not a good idea.

The Bakerstreets are now getting some height and the budlets are filling out.

I did not prune Bakerstreet #1, it has an even canopy and I am interested in how it will develop.

I did prune Bakerstreet #2 heavily to expose the budlets to light and air and I am interested in how it will develop.

*** The colas at the ends of the C.R.E.A.M.'s & Cheese's quadline lines are much bigger than the side colas.

I started looking at VPD again for Environment #1 and will work on RH to get it dialed-in.

I set the humidifier RH to 50%.

I set the dehumidifier RH to 55% to prevent spikes when the temperature drops.

Getting more room temperature air into the tent will help to bring the temperature down, but will also drive the RH down too.

I increased the LUX over the C.R.E.A.M. & Cheese to about 60k.

*** I will look very closely at the C.R.E.A.M.'s trichomes & Cheese's trichomes on the calyxes tomorrow.

*** I am looking forward to starting my LUX analysis soon.


Lessons Learned:

Vapor Pressure Deficit - The Hidden Force on your Plants

By Just4Growers

The Effect of Relative Humidity on Your Plants

RH can be easily measured using digital or analogue meters called "hygrometers." They are available for around $15 at your local indoor gardening store. But what do the readings mean for your plants?

Turns out-they mean a great deal! While many novice growers focus solely on keeping temperature in range, many take their eye off the ball as far as RH is concerned-perhaps because they don't fully understand what it is or how to manipulate it to their advantage.

Have you ever been to Florida in July? You'll know that it's not just the heat that's oppressive, it's the humidity! You feel constantly wet with sweat - the whole place feels like a sauna you can't escape from! (Sorry Floridians!)

RH has an ever more direct effect on plants. Plants need to "sweat" too - or rather, they need to transpire (release water vapor through their stomata) in order to grow.

The amount of water plants lose through transpiration is regulated, to a point, by opening and closing their stomata. However, as a general rule, the drier the air, the more plants will transpire.

Under Pressure

What is Vapor Pressure Deficit (VPD)?


Okay, so now that you have RH firmly implanted into your conceptual map, we move on to Vapor Pressure Deficit or VPD. As implied by the word "deficit" we're talking about the difference between two things. In this case, it's the difference between the theoretical pressure exerted by water vapor held in saturated air (100% RH at a given temperature) and the pressure exerted by the water vapor that is actually held in the air being measured at the same given temperature.

0_vapor_pressure_deficit_explained.gif


The VPD is currently regarded of how plants really 'feel' and react to the humidity in the growing environment. From a plant's perspective the VPD is the difference between the vapor pressure inside the leaf compared to the vapor pressure of the air. If we look at it with an RH hat on; the water in the leaf and the water and air mixture leaving the stomata is (more often than not) completely saturated -100% RH. If the air outside the leaf is less than 100% RH there is potential for water vapor to enter the air because gasses and liquids like to move from areas of high concentration (in this example the leaf) into areas of lower concentration (the air). So, in terms of growing plants, the VPD can be thought of as the shortage of vapor pressure in the air compared to within the leaf itself.

Another way of thinking about VPD is the atmospheric demand for water or the 'drying power' of the air. VPD is usually measured in pressure units, most commonly millibars or kilopascals, and is essentially a combination of temperature and relative humidity in a single value. VPD values run in the opposite way to RH vales, so when RH is high VPD is low. The higher the VPD value, the greater the potential the air has for sucking moisture out of the plant.
As mentioned above, VPD provides a more accurate picture of how plants feel their environment in relation to temperature and humidity which gives us growers a better platform for environmental control. The only problem with VPD is it's difficult to determine accurately because you need to know the leaf temperature. This is quite a complex issue as leaf temperature can vary from leaf to leaf depending on many factors such as if a leaf is in direct light, partial shade or full shade. The most practical approach that most environmental control companies use to assess VPD is to take measurements of air temperature within the crop canopy. For humidity control purposes it's not necessary to measure the actual leaf VPD to within strict guidelines, what we want is to gain insight into is how the current temperature and humidity surrounding the crop is affecting the plants. A well-positioned sensor measuring the air temperature and humidity close to, or just below, the crop canopy is adequate for providing a good indication of actual leaf conditions.

Managing Humidity

Managing the humidity in your indoor garden is essential to keep plants happy and transpiring at a healthy rate. Transpiration is very important for healthy plant growth because the evaporation of water vapor from the leaf into the air actively cools the leaf tissue. The temperature of a healthy transpiring leaf can be up to 2-6°C lower than a non-transpiring leaf, this may seem like a big temperature difference but to put it into perspective around 90% of a healthy plant's water uptake is transpired while only around 10% is used for growth. This shows just how important it is to try and control your plants environment to encourage healthy transpiration and therefore healthy growth.
So what should you aim to keep your humidity at? Many growers say a RH of 70% is good for vegetative growth and 50% is good for generative (fruiting /flowering) growth. This advice can be followed with some degree of success but it's not the whole story as it fails to take into account the air temperature.

The problem with running a high relative humidity when growing indoors it that fungal diseases can become an issue and carbon filters become less effective. It is commonly stated that above 60% RH the absorption efficiency drops and above 85% most carbon filters will stop working altogether. For this reason it is good practice to run your RH between 60-70% with the upper temperature limit depending on your crop's ideal VPD range, in the example it would be 64-79°F (18-26°C.)

Humidity's Effect on Plants

Plants cope with changing humidity by adjusting the stomata on the leaves. Stomata open wider as VPD decreases (high RH) and they begin to close as VPD increases (low RH). Stomata begin to close in response to low RH to prevent excessive water loss and eventually wilting but this closure also affects the rate of photosynthesis because CO2 is absorbed through the stomata openings. Consistently low RH will often cause very slow growth or even stunting. Humidity therefore indirectly affects the rate of photosynthesis so at higher humidity levels the stomata are open allowing CO2 to be absorbed.

When humidity gets too low plants will really struggle to grow. In response to high VPD plants will try to stop the excessive water loss from their leaves by trying to avoid light hitting the surface of the leaf. They do this by rolling the leaf inwards from the margins to form tube like structures in an attempt to expose less of the leaf surface to the light, as shown in the photo.

For most plants, growth tends to be improved at high RH but excessive humidity can also encourage some unfavorable growth attributes. Low VPD causes low transpiration which limits the transport of minerals, particularly calcium as it moves in the transpiration stream of the plant - the xylem. If VPD is very low (95-100% RH) and the plants are unable to transpire any water into the air, pressure within the plant starts to build up. When this is coupled with a wet root zone, which creates high root pressure, it combines to create excessive pressure within the plant which can lead to water being forced out of leaves at their edges in a process called guttation. Some plants have modified stomata at their leaf edges called hydathodes which are specially adapted to allow guttation to occur. Guttation can be spotted when the edges of leaves have small water droplets on, most evident in early morning or just after the lights have come on. If you see leaves that appear burnt at the edges or have white crystalline circular deposits at the edges it could be evidence that guttation has occurred.

Most growers are well aware that with high humidity comes and increased risk of fungal diseases. Water droplets can form on leaves when water vapor condenses out of the air as temperature drops, providing the perfect breeding ground for diseases like botrytis and powdery mildew. If humidity remains high it further promotes the growth of fungal diseases. The water droplet exuded through guttation also creates the perfect environment for fungal spores to germinate inviting disease to take hold.


ToDo:

Learn more about ... When Is the Right Time to Harvest Cannabis Plants?

Learn more about pests and nutrient deficiencies.
 
August 23 2019 - Update

Images:


IMG_20190823_202359.jpg

Bakerstreet #1 - Hanna Hemp - Looks healthy so far - budlets are exposed to light and air - limited pruning.


IMG_20190823_202413.jpg

Bakerstreet #2 - Henna Hemp - Looks healthy so far - budlets are exposed to light and air - heavy pruning.


IMG_20190823_220336.jpg

C.R.E.A.M. #1 - Cowgirl Hemp - Looks healthy so far - buds are exposed to light and air.


IMG_20190823_220401.jpg

Cheese #1 - Gouda Hemp - Looks healthy so far - buds are exposed to light and air.


Environment #1 - Autoflower Veg/Flower:

I am tracking the RH, canopy temperature and VPD with the Inkbird IBS-TH1.

Environment # 1 is mutually exclusive from Environment # 2.

The exhaust fan is running 24-0 to prevent a rise in temperature, RH and to prevent smells in the house.

I do not want to turn off the exhaust fan because it will smell up the house.

The humidifier is turned off.

The dehumidifier is turned off.

The three X6 lights are running 4 cycles of "5 hours lights-on and 1 hours lights-off".

Two of the X6 lights are 30 cm (12") above the canopy centered over the 2 flowering plants.

The third X6 light is turned off.

The three X6 lights give off 2°C (4°F) of heat each.

CO2 is refreshed frequently because the exhaust fan and the oscillating fan are always on.

*** The room temperature is running around 26°C (79°F) and RH 43%.

*** The environment humidity is running steady around RH 43% with lights-on.
*** The environment humidity peaks up to RH 55% with lights-off.

*** The environment temperature is running steady around 27°C (81°F) with lights-on.
*** The environment temperature dips down to 22°C (72°F) with lights-off.

*** VPD is running steady about 1.66 - Danger Zone: Over / Under Transpiration - lights-on.
*** VPD is peaking at about 0.89 - Healthy Transpiration: Late Veg / Early Flower - lights-off.

*** With the exhaust fan on 24-0, it keeps pulling air in from the room.


*** To change the VPD in the tent, I have change the environment parameters in the room.

*** To decrease VPD for lights-on ... I need to either raise the room RH by 5% or decrease the room temp by
2°C (4°F) .

*** The VPD Values I am Using For This Grow (Version 1)


Environment #2 - Photoperiod Flower:

I will start tracking RH, canopy temperature and VPD again when Environment #1 is dialed-in.

Environment # 2 is mutually exclusive from Environment # 1.

The exhaust fan is running 24-0 to prevent a rise in temperature, RH and to prevent smells in the house.

Environment # 2 does not have a humidifier.

Environment # 2 does not have a dehumidifier.

The Mars Hydro TSL 2000W light is running 1 cycle of uninterrupted "12 hours lights-on and 12 hours lights-off".

The Mars Hydro TSL 2000W light is 30 cm (12") above the canopy centered over all plants.

The Mars Hydro TSL 2000W light does not give off a lot of heat.

CO2 is refreshed frequently because the exhaust fan and the oscillating fan are always on.

*** The VPD Values I am Using For This Grow (Version 1)


Growth Stage:

2 Bakerstreets: Day 5/ Week 13 ... Day 89 ... week 5 flower.

*** They got their pistels on August 05, 2019.
*** They were transplanted July 20, 2019 and due for the 4 week flush/feed(CGRSFS, RME) on August 25, 2019.
*** They should be ready to harvest between September 16, 2019 and September 23, 2019.

*** Photoperiod Stages: 5 days Germination, 1 week seedling, 2-8 weeks veg, 6-12 weeks flower, 4-12 weeks cure
*** Allow 1 day to 3 days of dark before switching to 12-12
*** Pistels show up about 14 days (2 weeks) after switching to 12-12


1 C.R.E.A.M.: Day 5/ Week 12 ... Day 82 ... late flower.
1 Cheese: Day 5/ Week 12 ... Day 82 ... late flower.

*** They are in the final 2 weeks ... Flush, Full-On Bloom Nutes, Stem Split, Three Days Dark, Harvest!
*** They should be ready to harvest between August 18, 2019 and August 25, 2019.
*** I need to check the pistels and trichomes to verify the harvest date.

*** Autoflower Stages: 5 days Germination, 1 week seedling, 3 weeks veg, 3 weeks pre-flower, 3-6 weeks flower, 4-12 weeks cure
*** Pistels show up about 35 days (5 weeks) after Germination
*** Flowering takes about 42 days to 56 days (6 weeks to 8 weeks) after pistels show up


Watering and Feeding:


Bakerstreets' Regular Flush/Feed:

*** Next regular flush ... 120 litres (31.7 gallons) - pH 6.3 water on August 25, 2019.
*** Next regular feed ... 6 litres (1.6 gallons) - Full Dose - Week 10 - CGRSFS , RME on August 25, 2019.
*** Expecting about 1% of run-off. Stop watering right at run-off.


C.R.E.A.M.'s Bloom Feed & Cheese's Bloom Feed:

*** Next bloom feed ... 6 litres (1.6 gallons) - Full Dose - Week 12 - CGRSFS, CS, BPSS, BTTE around August 24, 2019 .
*** Expecting about 1% of run-off. Stop watering right at run-off.


*** I will do a regular feed(CGRSFS, RME)/feed(CGRSFS, BPSS, CS, BTTE)/water cycle for all regular weeks.
*** I will do full-on bloom feeds(CGRSFS, BPSS, CS, BTTE) for the last two weeks prior to harvest.


*** For details on my feeding schedule refer to here: The Different Feeds I need For This Grow (Version 5)


Activities:

My priority is to expose the growth nodes to light and air because they are going to become colas.


Notes:

The priority has to be to expose the growth nodes/buds to light & air, and to keep the canopy even and flat.

I am going to let the plants grow naturally now and stop tucking the stems into the ScrOG. For details on this decision, please refer here: How long to Veg Photoperiods? - Version 2

I am confident the new Mars Hydro TSL 2000W light is pentrating into the plant, so a lot of pruning is not a good idea.


The Bakerstreets are now getting some height and the budlets are filling out.

I did not prune Bakerstreet #1, it has an even canopy and I am interested in how it will develop.

I did prune Bakerstreet #2 heavily to expose the budlets to light and air and I am interested in how it will develop.


The colas at the ends of the C.R.E.A.M.'s & Cheese's quadline lines are much bigger than the side colas.

The C.R.E.A.M.'s pistels/trichomes & Cheese's pistels/trichomes indicate they are not ready for harvest yet.


With the environment #1 exhaust fan on 24-0, it keeps pulling air in from the room.

To change the VPD in the tent, I have change the environment parameters in the room.


To decrease VPD for lights-on ... I need to either raise the room RH by 5% or decrease the room temp by 2°C (4°F) .


*** I am looking forward to starting my LUX analysis soon.


Lessons Learned:

Top 5 Cannabis Strains For Making Hash

By RoyalQueenSeeds

Hash offers a smooth, euphoric, and clean high. It's an old-school extract and very easy to make at home. These 5 strains make prime candidates for high-quality home hash-making.

Hash is by far one of the most iconic cannabis products in existence, with its use and production spanning way back into human history. Hash is essentially an old-school cannabis concentrate that can be made in numerous ways. More viscous hash, or temple ball hash, can be made by simply rubbing cannabis flowers between the bare hands. Kief, which is a more powdery form, can be collected from dried flowers during the grinding process and pressed into large blocks. Regardless of how it is made, hash almost always offers a clear, clean, and euphoric high.

Here are 5 strains bursting with resin that you should consider when planning your next batch of high-quality hashish.

ROYAL GORILLA

0_royal-gorilla_6.jpg

Royal Gorilla is an outrageously potent cannabis variety, making her an ideal strain of choice when crafting some intense hash. Royal Gorilla features a perfect balance of 50% sativa genetics and 50% indica genetics. She is the lovechild of parent strains Sour Dubb, Chem Sis, and Chocolate Diesel. This breeding project created a strain with THC levels rarely seen before, reaching immense levels of 27%. The flowers of Royal Gorilla are dripping with psychoactive resin, making them perfect for hand-rolling some high-grade and mind-blowing hash. The high is both relaxing and stimulating as the cannabinoids and terpenes within the strain work to relax the body while igniting the mind. To top it all off, Royal Gorilla offers earthy, pungent, and piney scents and tastes.

Royal Gorilla performs well in both indoor and outdoor environments. Indoors, this strain will provide yields of between 500–550g/m² and grow to heights of up to 160cm. Outdoor plants will grow to slightly taller heights of 170cm and produce harvests of up to 600g/plant. She features a flowering time of 8–9 weeks, with outdoor plants usually ready for harvest during the middle of October.

OG KUSH

0_og-kush-_36.jpg

OG Kush is another excellent strain to select when hash-making. She offers potent highs, rich flavours, and good yields. OG Kush is an indica-dominant lady with a genetic makeup consisting of 75% indica genetics and 25% sativa genetics. This ratio results in a high that primarily stones and relaxes the body. She makes an excellent smoke at the end of a long and stressful day to calm down the nervous system and induce restorative sleep. The flowers of OG Kush contain 19% THC, resulting in satisfying highs that aren’t overly intense. This strain was created via the crossbreeding of parent strains Chemdawg, Lemon Thai, and Pakistani Kush. The terpene profile within her resin results in flavours and aromas of citrus, pine, and fruit. As well as being quite calming, hash made from this strain is also delicious to boot.

OG Kush thrives both indoors and outdoors, favouring a mild climate. Indoor plants are capable of producing yields between 425–475g/m² and grow to heights of between 90–160cm. Outdoor plants, on the other hand, pump out yields of up to 550g/plant and soar to taller heights of up to 220cm. OG Kush has a flowering time of 7–9 weeks, with outdoor plants ready to harvest during the month of October.

ICE

0_ice_1.jpg

ICE is a highly valued strain among hash-makers due to her massive trichome production. In fact, her very name is derived from this trait, standing for Indica Crystal Extreme. ICE was created as part of a breeding project involving legendary parent strains Afghan, Northern Light, and Skunk. The result is a powerful indica-dominant strain featuring 90% indica genetics and only 10% sativa genetics. This indica beast produces compact and dense flowers that glimmer due to the amount of trichomes present. Large quantities of hash can be made by either rubbing her flowers over a sieve, or collecting trichomes by grinding dry flowers. The high from this hash is extremely physically stoning and will induce couch-lock along with a raging appetite. Each hit comes with delightful tastes of spices, herbs, and mint. ICE flowers boast 18% THC.

Indoor plants produce yields of between 400–450g/m² and grow to heights of between 80–120cm. Outdoor plants offer yields of between 500–550g/plant, reaching taller heights of up to 200cm. ICE prefers mild climates and has a flowering period of 8–10 weeks. Outdoor plants will be ready to harvest at some point in September.

SHERBET QUEEN

0_sherbet-queen_1.jpg


Sherbet Queen is an indica-dominant specimen that is simply brimming with fruity sensations. The sheer pungency of the scents and tastes of this queen are what make her so desirable as a hash plant. Mixing euphoria along with such delicious flavours is the equation for a high to remember. Such quality within this strain comes as no surprise considering she is the descendent of Girl Scout Cookies. Sherbet Queen features 85% indica genetics, a trait which is very apparent in the high. A few strong tokes of this strain will result in utter relaxation, couch-lock, and the feeling of stress melting away.

Sherbet Queen is a relatively easy strain to grow and doesn’t require that much attention. She puts out good yields and will thrive both indoors and outdoors. Outdoor plants will be ready to harvest during the end of September/beginning of October.

WHITE WIDOW


0_white-widow_34.jpg


White Widow is a name known all across the world of cannabis. This award-winning variety is shrouded in mystery, as its exact origins are still not confirmed. However, what is known is that the strain is an absolute Dutch classic and was cultivated for the first time within the Netherlands. Legend states that White Widow originated in the wild as a landrace strain from Brazil that was pollinated by an indica hybrid form a southern region of India. The strain features a perfect balance between 50% indica genetics and 50% sativa genetics. This makes her ideal for creating hash to stimulate the mind and stone the body. This strain features a THC content of 19% alongside medium levels of CBD. Every hit is infused with the grounding flavours of earth and pine.

White Widow can be grown indoors and outdoors, providing great results in both environments. Indoor plants will churn out yields of 450–500g/m² and grow to heights of 60–100cm. Plants cultivated outdoors offer yields of up to 600g/plant and top out at heights of 190cm. She has a flowering time of 8–9 weeks. Outdoor plants will be ready to harvest during late October.


ToDo:

Learn more about ... When Is the Right Time to Harvest Cannabis Plants?

Learn more about pests and nutrient deficiencies.
 
August 24 2019 - Update

Images:


IMG_20190825_004412.jpg

Bakerstreet #1 - Hanna Hemp - Looks healthy so far - budlets are exposed to light and air - limited pruning.


IMG_20190825_004430.jpg

Bakerstreet #2 - Henna Hemp - Looks healthy so far - budlets are exposed to light and air - heavy pruning.


IMG_20190825_004814.jpg

C.R.E.A.M. #1 - Cowgirl Hemp - Looks healthy so far - budlets are exposed to light and air - only 8 primary colas.


IMG_20190825_004830.jpg

Cheese #1 - Gouda Hemp - Looks healthy so far - buds are exposed to light and air - only 16 top colas.


Environment #1 - Autoflower Veg/Flower:

I am tracking the RH, canopy temperature and VPD with the Inkbird IBS-TH1.

Environment # 1 is mutually exclusive from Environment # 2.

The exhaust fan is running 24-0 to prevent a rise in temperature & RH, and to prevent smells in the house.

I do not want to turn off the exhaust fan because it will smell up the house.

The humidifier is turned off.

The dehumidifier is turned off.

The three X6 lights are running 4 cycles of "5 hours lights-on and 1 hours lights-off".

Two of the X6 lights are 30 cm (12") above the canopy centered over the 2 flowering plants.

The third X6 light is turned off.

The three X6 lights give off 2°C (4°F) of heat each.

CO2 is refreshed frequently because the exhaust fan and the oscillating fan are always on.

*** The room temperature is running around 26°C (79°F) and RH 43%.

*** The environment humidity is running steady around RH 50% with lights-on.
*** The environment humidity peaks up to RH 65% with lights-off.

*** The environment temperature is running steady around 29°C (85°F) with lights-on.
*** The environment temperature dips down to 22°C (72°F) with lights-off.

*** VPD is running steady about 1.66 - Danger Zone: Over / Under Transpiration - lights-on.
*** VPD is peaking at about 0.65 - LowTranspiration: Propagation/ Early Veg - lights-off.

*** With the exhaust fan on 24-0, it keeps pulling air in from the room.

*** To change the VPD in the tent, I have change the environment parameters in the room.

*** To decrease VPD for lights-on ... I need to either raise the room RH by 5% or decrease the room temp by 2°C (4°F) .


*** The VPD Values I am Using For This Grow (Version 1)


Environment #2 - Photoperiod Flower:

I will start tracking RH, canopy temperature and VPD again when Environment #1 is dialed-in.

Environment # 2 is mutually exclusive from Environment # 1.

The exhaust fan is running 24-0 to prevent a rise in temperature, RH and to prevent smells in the house.

Environment # 2 does not have a humidifier.

Environment # 2 does not have a dehumidifier.

The Mars Hydro TSL 2000W light is running 1 cycle of uninterrupted "12 hours lights-on and 12 hours lights-off".

The Mars Hydro TSL 2000W light is 30 cm (12") above the canopy centered over all plants.

The Mars Hydro TSL 2000W light does not give off a lot of heat.

CO2 is refreshed frequently because the exhaust fan and the oscillating fan are always on.

*** The VPD Values I am Using For This Grow (Version 1)


Growth Stage:

2 Bakerstreets: Day 6/ Week 13 ... Day 90 ... week 5 flower.

*** They got their pistels on August 05, 2019.
*** They were transplanted July 20, 2019 and due for the 4 week flush/feed(CGRSFS, RME) on August 25, 2019.
*** They should be ready to harvest between September 16, 2019 and September 23, 2019.

*** Photoperiod Stages: 5 days Germination, 1 week seedling, 2-8 weeks veg, 6-12 weeks flower, 4-12 weeks cure
*** Allow 1 day to 3 days of dark before switching to 12-12
*** Pistels show up about 14 days (2 weeks) after switching to 12-12


1 C.R.E.A.M.: Day 6/ Week 12 ... Day 83 ... late flower.
1 Cheese: Day 6/ Week 12 ... Day 83 ... late flower.

*** They are in the final 2 weeks ... Flush, Full-On Bloom Nutes, Stem Split, Three Days Dark, Harvest!
*** They should be ready to harvest between August 18, 2019 and August 25, 2019.
*** I need to check the pistels and trichomes to verify the harvest date.

*** Autoflower Stages: 5 days Germination, 1 week seedling, 3 weeks veg, 3 weeks pre-flower, 3-6 weeks flower, 4-12 weeks cure
*** Pistels show up about 35 days (5 weeks) after Germination
*** Flowering takes about 42 days to 56 days (6 weeks to 8 weeks) after pistels show up


Watering and Feeding:


Bakerstreets' Regular Flush/Feed:

*** Next regular flush ... 120 litres (31.7 gallons) - pH 6.3 water on September 01, 2019.
*** Next regular feed ... 6 litres (1.6 gallons) - Full Dose - Week 10 - CGRSFS , RME on August 25, 2019.
*** Expecting about 1% of run-off. Stop watering right at run-off.


C.R.E.A.M.'s Bloom Feed & Cheese's Bloom Feed:

*** Next bloom feed ... 6 litres (1.6 gallons) - Full Dose - Week 12 - CGRSFS, CS, BPSS, BTTE around August 25, 2019 .
*** Expecting about 1% of run-off. Stop watering right at run-off.


*** I will do a regular feed(CGRSFS, RME)/feed(CGRSFS, BPSS, CS, BTTE)/water cycle for all regular weeks.
*** I will do full-on bloom feeds(CGRSFS, BPSS, CS, BTTE) for the last two weeks prior to harvest.


*** For details on my feeding schedule refer to here: The Different Feeds I need For This Grow (Version 5)


Activities:

My priority is to expose the growth nodes to light and air because they are going to become colas.


Notes:

The priority has to be to expose the growth nodes/buds to light & air, and to keep the canopy even and flat.

I am going to let the plants grow naturally now and stop tucking the stems into the ScrOG. For details on this decision, please refer here: How long to Veg Photoperiods? - Version 2

I am confident the new Mars Hydro TSL 2000W light is pentrating into the plant, so a lot of pruning is not a good idea.


The Bakerstreets are now getting some height and the budlets are filling out.

I did not prune Bakerstreet #1, it has an even canopy and I am interested in how it will develop.

I did prune Bakerstreet #2 heavily to expose the budlets to light and air and I am interested in how it will develop.


The colas at the ends of the C.R.E.A.M.'s & Cheese's quadline lines are much bigger than the side colas.

The C.R.E.A.M.'s pistels/trichomes & Cheese's pistels/trichomes indicate they are not ready for harvest yet.


With the environment #1 exhaust fan on 24-0, it keeps pulling air in from the room.

To change the VPD in the tent, I have change the environment parameters in the room.

To decrease VPD for lights-on ... I need to either raise the room RH by 5% or decrease the room temp by 2°C (4°F) .


*** I am looking forward to starting my LUX analysis soon.


Lessons Learned:

What To Do When Your Homegrown Cannabis Won’t Flower

By RoyalQueenSeeds

Successful breeders know that getting cannabis to bloom is a strategic process. Most bloom issues are caused by a failure to manage the light your plant receives. There are some basic step by step things to do and check if your plant is not flowering. Worst case? Only grow autoflowering varieties.

It is always exciting. You have set up your home-grow op. You have planted and germinated your precious seeds and the little green sprouts have finally turned into real plants.

But. Then. There. Is. No. Flowering.

We all know that without flowers, there are no buds, no payoff.

No need to panic though! It is actually a common enough phenomenon. The following is an easy-to-fix checklist of common problems that interfere with efficient bloom and bud production.

CHECK YOUR LIGHT

Cannabis is like any other plant. It needs spectrum energy to grow. When planted outdoors, cannabis follows a seasonal cycle in spring and summer. Flowering generally occurs in late summer. It is also triggered by the summer solstice (June 21st). After this date, days begin to shorten gradually. Longer nights are thought to trigger blooming. Blooming usually starts in early August.

If you are growing indoors, obviously the lighting cycle is man-made. If you are not successful in getting your plant to bloom, the first culprit is probably the light. You will need to tweak your setup to make sure that it gets the right kind and temperature of light for the right amount of time.


0_LIGHT.jpg


UNDERSTAND THE LIGHT SPECTRUM

Cannabis growers don’t need to be electrical engineers. That said, there are some basics to master when growing this plant. Blue spectrum light is best for vegetative growth. Red spectrum light is for flowering.

Particularly if growing indoors, investing in a red/blue spectrum LED light is one way to handle this issue. However, for those who do not want to invest in LED, merely changing the colour of the lightbulb at the right time in the grow cycle will do the trick.

Some growers leave their lights on 24/7 during the vegetative grow state. If and when the plants begin to show signs of stress, lessening the amount of light they get will help. 6 Hours of darkness is usually recommended.

Once plants get to a healthy size, growers can actually force the plant to flower by exposing it to 12 hours of red light and 12 hours of darkness. Be aware however, that even the smallest amount of off-cycle light during this process can stop the flowering process. Some people claim that a random flashlight beam can halt the process. Others feel that if lights are left on when they should not be for about a day, this should not adversely affect the growth. However, if the plants are left exposed to several days of extra light, be aware they will probably revert to a growing rather than flowering phase and you will have to coax them back.

KNOW YOUR STRAIN

Different cannabis strains mature and flower at different rates. This can to some extent be manipulated by indoor growers who match their lights to ideal growing situations for their personalised nursery. However, on top of this, it is also good to know your plant’s tendencies. Indicas will flower between 45 and 65 days. Sativa dominant strains take a little longer. They normally flower between 60 and 90 days.


0_SATIVA INDICA.jpg


If your plant still refuses to bloom, there is a very good chance that you have the wrong type of cannabis plant. Only female plants make buds. Male plants only make pollen sacs. Because these can also pollinate your female plants, reducing yields and creating seeds, many growers discard male plants immediately.

PICK AUTOFLOWERING SEEDS


There are some types of cannabis that are known as “autoflowering” varieties. This means that they will automatically start flowering, no matter how much or what kind of light they get. This is also one of the best reasons, particularly for beginners, those on tight budgets and indoor growers, to buy seeds from an established breeder.


ToDo:

Learn more about ... When Is the Right Time to Harvest Cannabis Plants?

Learn more about pests and nutrient deficiencies.
 
Back
Top Bottom