Xlr8's Hydroponic Adventures & Photos From The Garden - 2012

looks like we got to put names in a hat this month, how can we pick between them entries, both are totally amazing.

reps for the set up X, looks like a great way to grow and it saves you time watering also,
 
xlr8 said:
I was able to finish my little DIY hydro project, and have now transitioned cuttings from my moms to this new system.-
Seems to be working well so far and the cuttings seem to be adapting already. I'm hoping managing another hydro reservoir will be easier for me to manage than having to continually hand-water coco coir moms and all that goes with that (we'll see!).-

I'm sure I mentioned this before, but there are 3 small rubbermaid tubs that hold 2 plants each. They are connect with 3/4" tubing to one of them that serves as the control bucket for them all. It's set on a timer for periodic 4 minute flood/drain cycles, but when it isn't flooding, each rubbermaid container retains it's own small reservoir that has a flexible "bubble wand" in it. So, when it isn't flooding/draining (which also helps recirulate the nutrients with the remote reservoir) each unit acts like a DWC tub. The flood/drains recirculate using gravity to a remote reservoir below (rubbermaid trash recepticle) which has a (200 or so?) gph pump in it, and is currently kept aerated as well.

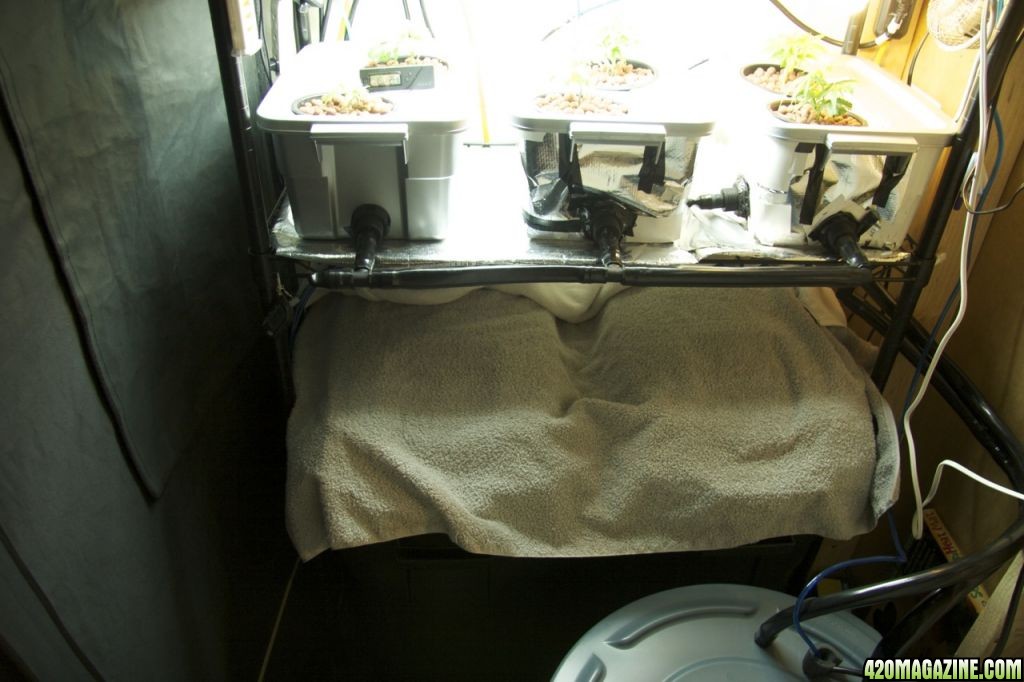
A few of the cuttings have been in about a week now, and are showing vigorous new growth and nice vibrant green leaves. I also disposed of my coco coir moms (all but one SLH and the solo cup SLH) so life will hopefully be a little easier now. It was tough getting rid of the coco coir moms, but I didn't have any room for them now. The pic below is from a couple of days ago, but there are 3 of the plant sites along the bottom now, filling the entire shelf. The reservoir is underneath of them and is controlled by flood/drain risers in the far right rubbermaid tub. There are extra bulkhead fittings on the far right container that allow things to be configured differently. I also made multiple lid configurations to accomodate different needs down the road. I'm using this 4 bulb T5 fixture and some cfl's for vegging, with more T5's on the top shelf above, which will be primarily for projects and new cuttings, etc.

Hi xlr8 !!

This seems great idea and looks really good for vegging.
Also the transfer from one system to another, must be indeed much easier now.
This is something I was looking for, alternate to "veg in aeroponic cloner" !

But can you be little more specific, maybe with few pics, if this is not trouble for you ?
English is not my native language plus I'm a new to this and I cant really , figure this out !!!!
For example you said the reservoir is controlled by risers, what do you mean by that ? I assume something like the valves, on flo 'n gro Oceanus -? Where did you find these, if I'm right ?

Thank you very much xlr8, your work is absolutely great my friend !!!
 
looks like we got to put names in a hat this month, how can we pick between them entries, both are totally amazing.

reps for the set up X, looks like a great way to grow and it saves you time watering also,

:thankyou: for the reps and kind words my friend! :)
 
Hi xlr8 !!

This seems great idea and looks really good for vegging.
Also the transfer from one system to another, must be indeed much easier now.
This is something I was looking for, alternate to "veg in aeroponic cloner" !

But can you be little more specific, maybe with few pics, if this is not trouble for you ?
English is not my native language plus I'm a new to this and I cant really , figure this out !!!!
For example you said the reservoir is controlled by risers, what do you mean by that ? I assume something like the valves, on flo 'n gro Oceanus -? Where did you find these, if I'm right ?

Thank you very much xlr8, your work is absolutely great my friend !!!

Hi Billy -

Sure, I'll see if I can take some more detailed pics, etc., when I get a little more time. Not sure if I'll be able to get to it today, but hopefully soon if not...

Oh, and thank you! :)
 
Everything is looking great, friend!
The DIY hydro system is really neat and apparently working well. I like the idea of combining DWC and flood & drain.
The clones you have in those little rapid rooters are quite amazing!
Sorry you had to get rid of some of your moms, but glad you made things easier on yourself.
All of those nugs look Xcellent!
:thumb:
 
Hey bro, been afk for awhile, I will catch up and update you as soon as I get reliable internet.
Peace and God bless.
GT


GT!!! Wow it's great to see you out and about - hope to see you around more soon. :)
 
Everything is looking great, friend!
The DIY hydro system is really neat and apparently working well. I like the idea of combining DWC and flood & drain.
The clones you have in those little rapid rooters are quite amazing!
Sorry you had to get rid of some of your moms, but glad you made things easier on yourself.
All of those nugs look Xcellent!
:thumb:

Thank you Tricome! On the clones in rooters... I made the difficult decision to cull them, but I learned something by doing that - in a pinch, they can stay happy there for quite a while. Roots were really a rats nest, but not as much as you'd think, and every bit of that rooter had roots in it. ;)
 
Thank you xlr8, yeah, whenever you find the time my friend !!

Took some pics tonight, will try to get more detail and pics posted asap. :)
 
Hi xlr8 !!

This seems great idea and looks really good for vegging.
Also the transfer from one system to another, must be indeed much easier now.
This is something I was looking for, alternate to "veg in aeroponic cloner" !

But can you be little more specific, maybe with few pics, if this is not trouble for you ?
English is not my native language plus I'm a new to this and I cant really , figure this out !!!!
For example you said the reservoir is controlled by risers, what do you mean by that ? I assume something like the valves, on flo 'n gro Oceanus -? Where did you find these, if I'm right ?

Thank you very much xlr8, your work is absolutely great my friend !!!

Unlike the Flo N Gro, this DIY I did uses gravity to help it along. In its purest essence, there are flood fittings (see below) that can be set for a minimum level and maximum level of nutrients. A pump in the reservoir, set to a timer, floods for 5 minutes at periodic intervals. 5 minutes is enough time for the roots in all plant sites to get a good soaking before it drains again. The pump runs for the entire 5 minutes, but the overflow fitting keeps it from well, overflowing. ;)

Here's a little more detail with pics on the DIY hydro system I built:


The grey "Brute" rubbermaid garbage container in the lower right of the pic is the reservoir. Notice on the lid there are 2 hoses, and an opening for electrical. One hose is "flood/drain" connection, that connects to a 200 gph pump inside (controlled by a timer). The other hose is for the "overflow drain" and simply dumps the water back into the container after (and during) a flood when it rises to a preset level. Finally, there is a small blue airline that runs paralell to the power cord for the pump, and serves to aerate the reservoir (connected to a small, un-pictured airpump). When the system floods, the pump in the reservoir pumps the nutrients from underneath the far right plantsite (top right of the photo). Along the front of the containers is tubing that connects the plant sites so that during a flood, all 3 plant sites are flooded, too:
sep_4_1.jpg


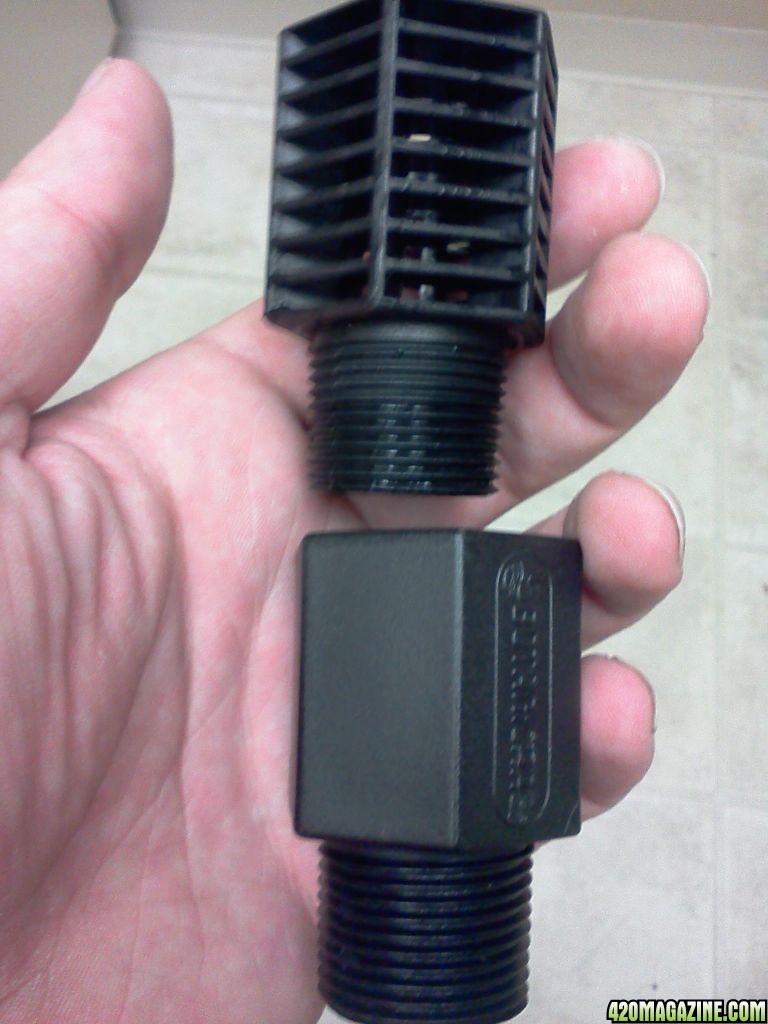
The far-right plantsite is the controller for the other plant sites, too. Inside are botanicare flood/drain fittings (available at most hydroponic stores). One of the fittings is for flooding and draining, and one is for overflow. When the system floods, it comes through one lower fitting, and will continue to flood until it reaches a level set by risers in the other fitting. While the system will flood as long as the timer runs, this second fitting is what keeps you from overflowing. I have it set to a height so that the netpots are thoroughly drenched, but not so high that it overflows. You can buy the fittings in a kit like this (google or check your hydro store). Notice that there are 2 different heights. The shorter one is for flooding and ultimately draining (once the flood cycle ends, the nutrients will drain back through the pump to the reservoir). The second, taller one has risers that allow you to set a max height for your flood before it simply drains back to the reservoir. Here's what I used for fittings (by botanicare):
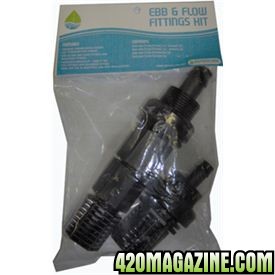
botanicare_fittings.jpg


This is a picture from when I was building it. The lower fitting now has one riser piece to allow for a set level of nutrients to stay in each plant site vs. a full drain. THe top piece on these are a filter. So, they drain at the bottom of that piece. In this earlier picture, the lower fitting would drain flush to the bottom (completely). The overflow fitting has (3) of these "risers" and allows for the nutrient level to flood the entire bottom portion of the netpots. The fittings are easily installed by cutting a (I believe 1 1/2 inch hole) and then screwing them together top and bottom:
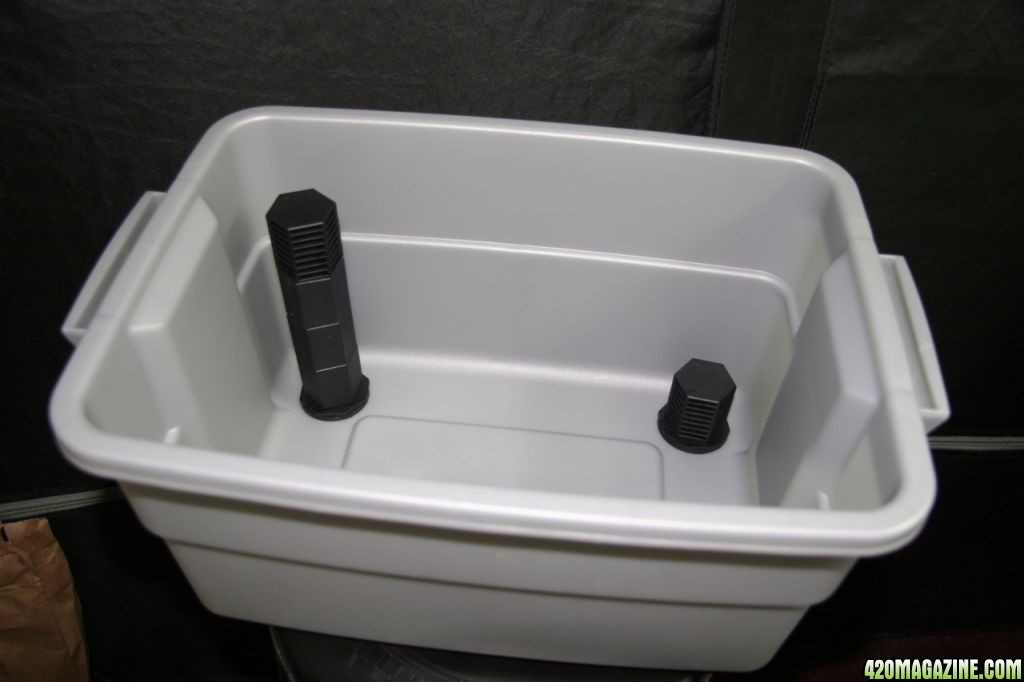
DIY_hydro_1.jpg


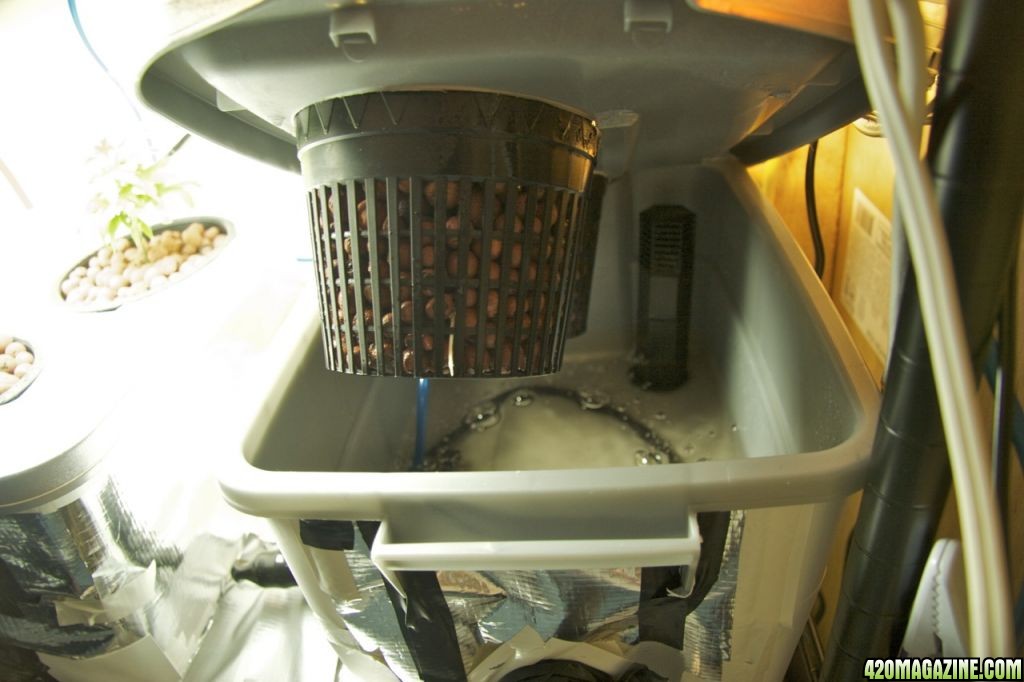
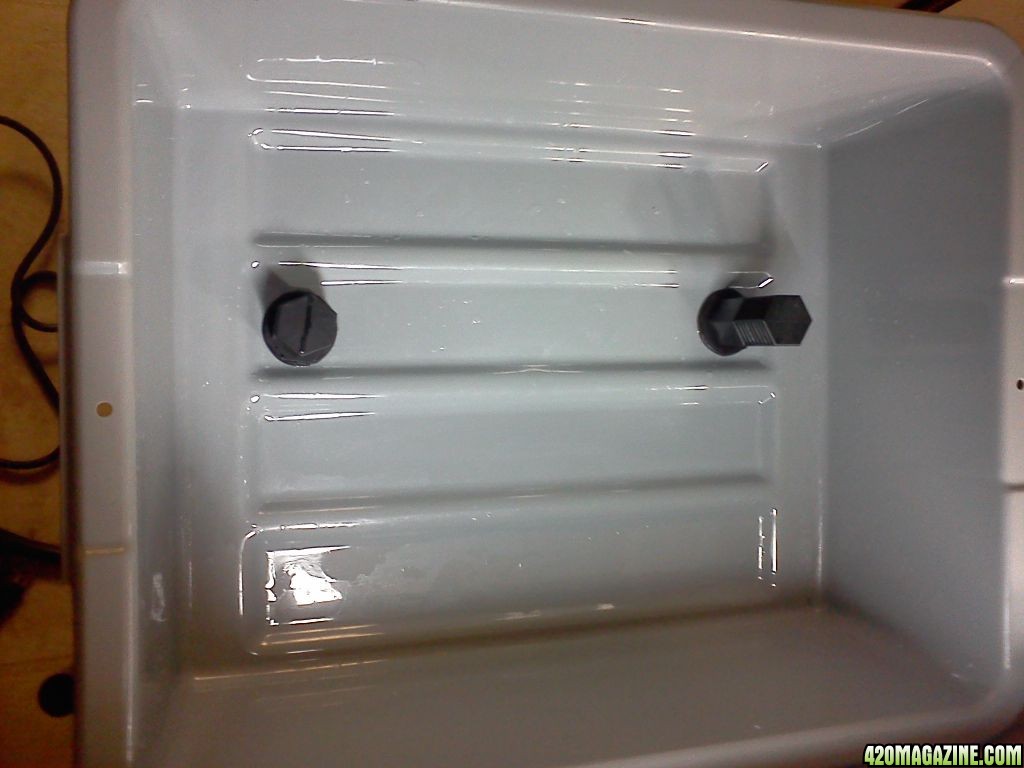
In this photo of the far-right plantsite/controller, you can see the overflow fitting that sets flood height. Unpictured is the lower drain/flood fitting, which isn't visible due to the front of the container. Notice I'm starting to just starting to get roots showing through the bottom of the netpot. The floods should allow root development all along the netpot sides, while dwc only typically results in a mat of roots extending mostly from the bottom only.
sep_4_2.jpg


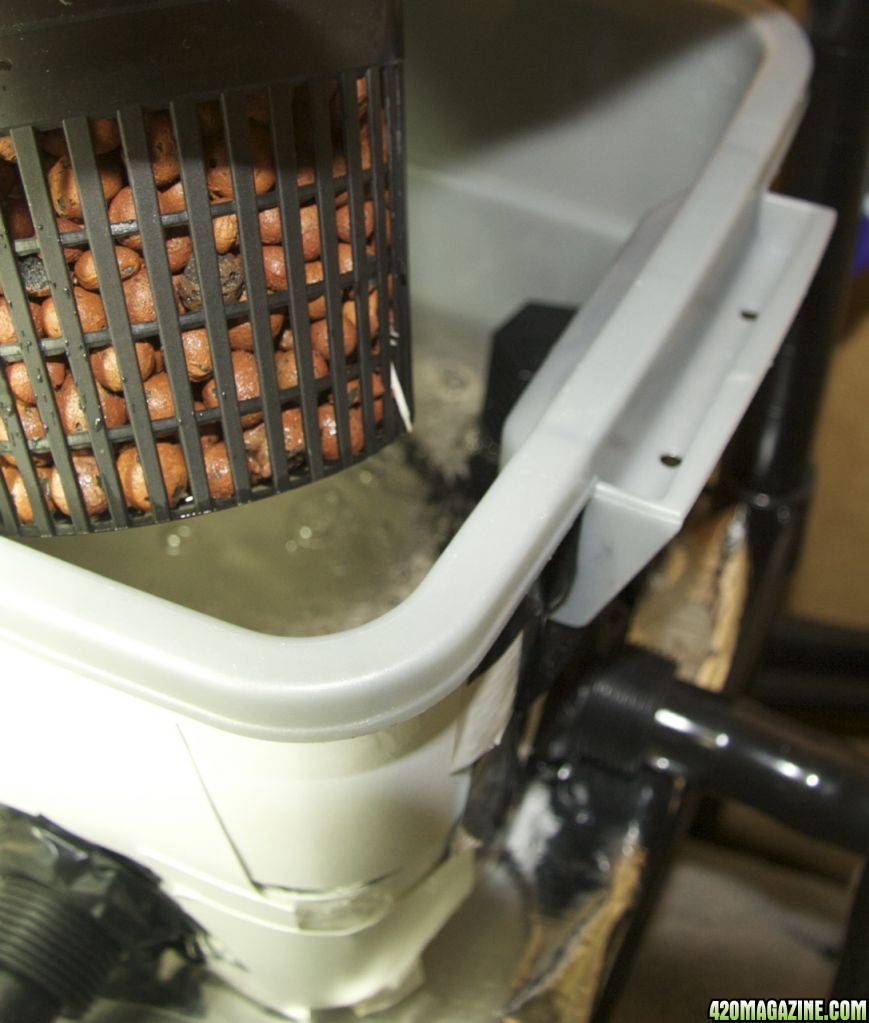
I tried to get a pic of the shorter flood fitting in the container, which can be seen to the right of the visible root in this photo. Normally, it would be fairly flush to the bottom, but I've installed a riser (available individually at my hydro store) so that after a flood, a pre-determined amount of nutrients are left in each plant site, which are aerated to perform in a DWC manner. When not flooded, the nutrients are about an inch, inch and a half below the netpots - fairly ideal for recirculated DWC I think. Without the extra riser and aeration, this would be essentially be a gravity assisted Flood/Drain unit. The riser and aeration in the plant sites allows it to be DWC when it's not flooding.
sep_4_3.jpg


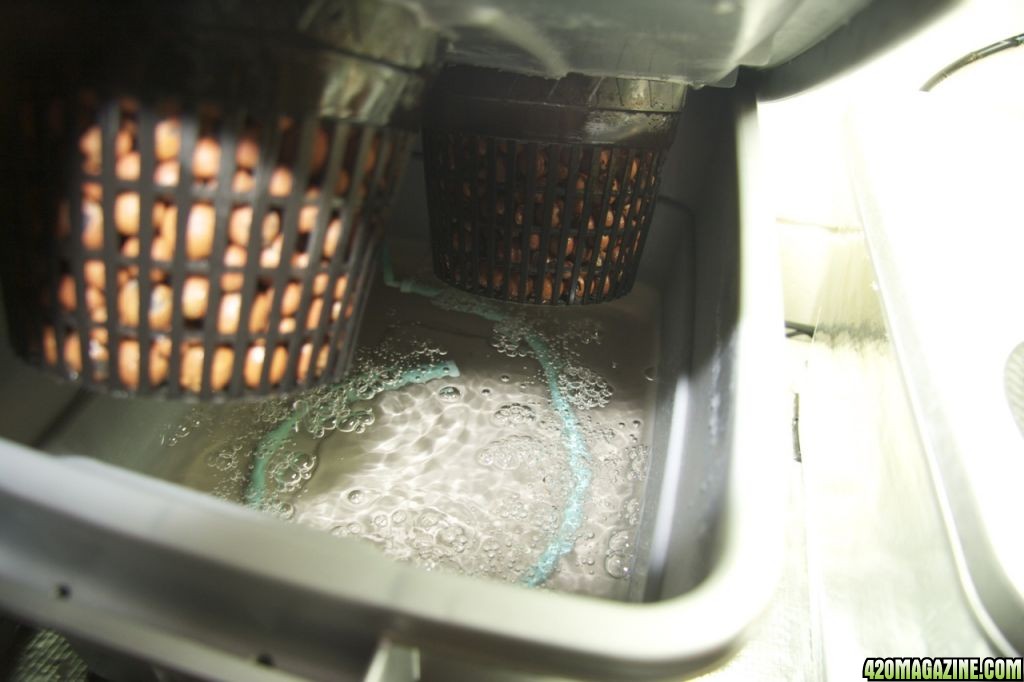
Here's one of the other plantsites. The nutrient level is controlled for it by the far right "controller" plant site, so aside from being connected in the front, they really just house the plants and contain an airstone (well, bubble bar or whatever you call this thing that acts like an airstone):
sep_4_4.jpg


Really hope this helps -- let me know if I missed anything or if you have more questions! :)
 
Unlike the Flo N Gro, this DIY I did uses gravity to help it along. In its purest essence, there are flood fittings (see below) that can be set for a minimum level and maximum level of nutrients. A pump in the reservoir, set to a timer, floods for 5 minutes at periodic intervals. 5 minutes is enough time for the roots in all plant sites to get a good soaking before it drains again. The pump runs for the entire 5 minutes, but the overflow fitting keeps it from well, overflowing. ;)

Here's a little more detail with pics on the DIY hydro system I built:


The grey "Brute" rubbermaid garbage container in the lower right of the pic is the reservoir. Notice on the lid there are 2 hoses, and an opening for electrical. One hose is "flood/drain" connection, that connects to a 200 gph pump inside (controlled by a timer). The other hose is for the "overflow drain" and simply dumps the water back into the container after (and during) a flood when it rises to a preset level. Finally, there is a small blue airline that runs paralell to the power cord for the pump, and serves to aerate the reservoir (connected to a small, un-pictured airpump). When the system floods, the pump in the reservoir pumps the nutrients from underneath the far right plantsite (top right of the photo). Along the front of the containers is tubing that connects the plant sites so that during a flood, all 3 plant sites are flooded, too:


The far-right plantsite is the controller for the other plant sites, too. Inside are botanicare flood/drain fittings (available at most hydroponic stores). One of the fittings is for flooding and draining, and one is for overflow. When the system floods, it comes through one lower fitting, and will continue to flood until it reaches a level set by risers in the other fitting. While the system will flood as long as the timer runs, this second fitting is what keeps you from overflowing. I have it set to a height so that the netpots are thoroughly drenched, but not so high that it overflows. You can buy the fittings in a kit like this (google or check your hydro store). Notice that there are 2 different heights. The shorter one is for flooding and ultimately draining (once the flood cycle ends, the nutrients will drain back through the pump to the reservoir). The second, taller one has risers that allow you to set a max height for your flood before it simply drains back to the reservoir. Here's what I used for fittings (by botanicare):

botanicare_fittings.jpg


This is a picture from when I was building it. The lower fitting now has one riser piece to allow for a set level of nutrients to stay in each plant site vs. a full drain. THe top piece on these are a filter. So, they drain at the bottom of that piece. In this earlier picture, the lower fitting would drain flush to the bottom (completely). The overflow fitting has (3) of these "risers" and allows for the nutrient level to flood the entire bottom portion of the netpots. The fittings are easily installed by cutting a (I believe 1 1/2 inch hole) and then screwing them together top and bottom:
DIY_hydro_1.jpg


In this photo of the far-right plantsite/controller, you can see the overflow fitting that sets flood height. Unpictured is the lower drain/flood fitting, which isn't visible due to the front of the container. Notice I'm starting to just starting to get roots showing through the bottom of the netpot. The floods should allow root development all along the netpot sides, while dwc only typically results in a mat of roots extending mostly from the bottom only.


I tried to get a pic of the shorter flood fitting in the container, which can be seen to the right of the visible root in this photo. Normally, it would be fairly flush to the bottom, but I've installed a riser (available individually at my hydro store) so that after a flood, a pre-determined amount of nutrients are left in each plant site, which are aerated to perform in a DWC manner. When not flooded, the nutrients are about an inch, inch and a half below the netpots - fairly ideal for recirculated DWC I think. Without the extra riser and aeration, this would be essentially be a gravity assisted Flood/Drain unit. The riser and aeration in the plant sites allows it to be DWC when it's not flooding.


Here's one of the other plantsites. The nutrient level is controlled for it by the far right "controller" plant site, so aside from being connected in the front, they really just house the plants and contain an airstone (well, bubble bar or whatever you call this thing that acts like an airstone):


Really hope this helps -- let me know if I missed anything or if you have more questions! :)

ROFL! I didn't know botanicare sold these!! I pieced mine together from singles at my hydro store! Look at the brand, lol!

(click pics to enlarge)
 
Got Brownies?

brownies1.jpg


Not sure if I already mentioned this, but Greenhouse250 was kind enough to suggest my cooking oil/brownie thread as a "sticky" thread, and it's now a sticky in the edibles forum. :) I worked hard on putting that together, so I was really pleased and honored that it was made a sticky thread (thank you Greenhouse!). :thanks:

It's really for anyone who wants to make brownies or other baked goods with oil, and wants the best oil/brownies/edibles possible. There are simpler recipes and methods, but this one isn't hard, and it really maximizes the cannabis you use - more potent with less cannabis needed. I make both brownies and snicker doodle cookies using the oil made exactly how I laid it out in the thread, and people who've had them RAVE about them. It's awesome seeing how well it's working for others now, too. Thanks again Greenhouse!
Here's the link:

Xlr8's Magic Brownies - Step by Step - With Pictures!

I can vouch for this Xlr8s. I copied the recipe before I even joined the forum so thank you.
 
xlr8 said:
Unlike the Flo N Gro, this DIY I did uses gravity to help it along. In its purest essence, there are flood fittings (see below) that can be set for a minimum level and maximum level of nutrients. A pump in the reservoir, set to a timer, floods for 5 minutes at periodic intervals. 5 minutes is enough time for the roots in all plant sites to get a good soaking before it drains again. The pump runs for the entire 5 minutes, but the overflow fitting keeps it from well, overflowing.-

Here's a little more detail with pics on the DIY hydro system I built:

The grey "Brute" rubbermaid garbage container in the lower right of the pic is the reservoir. Notice on the lid there are 2 hoses, and an opening for electrical. One hose is "flood/drain" connection, that connects to a 200 gph pump inside (controlled by a timer). The other hose is for the "overflow drain" and simply dumps the water back into the container after (and during) a flood when it rises to a preset level. Finally, there is a small blue airline that runs paralell to the power cord for the pump, and serves to aerate the reservoir (connected to a small, un-pictured airpump). When the system floods, the pump in the reservoir pumps the nutrients from underneath the far right plantsite (top right of the photo). Along the front of the containers is tubing that connects the plant sites so that during a flood, all 3 plant sites are flooded, too.......

You could have not described it better xlr8, thank you very much for this !! Very nice and clever idea, I haven seen something similar, during "my journey" in all those months !!!!-
The fact is I didnt know I could fill and then drain(with gravity), through the same pump, I thought a pump is able to pass the water/nutes only, from one side to another and not vice-versa !! That's why it didn't make sense to me .-
Allready did my research in the hydro store and found some ecoplus fittings, they are almost the same.
Btw, what is the size of those ? Something like 3/4 inch, maybe ?

Thank you again my friend !
Your post have been copied and paisted , as always ... lol

Edit: This type of "airstone", is just a little tube with drilled holes in it ?
Edit2: I tried to rep you man, it says I need to "spread arround", what it means that ?
 
Back
Top Bottom