Xlr8's Hydroponic Adventures & Photos From The Garden - 2012

Just wanted to throw out, if you can, use a smaller diameter for the flood/drain than for the overflow so if you do have "super flow" the larger diameter keeps you from flooding a *little* more.

Not the secret decoder ring!

Yes, I think 3/4" works good on both, but may need to make sure pump isn't too powerful - mine was around 200gph, which is plenty for a small system. Otherwise, yes, the flood/drain could be 1/2" and the overflow 3/4"... That would work great too, especially if the pump was a little bigger.

Good point Surf, I had issues like that with my first design. :)
 
Hey X, I wanted to thank you for the page 1 UBT lesson. I've incorporated it as the first training my girls get. A UBT shortly after rooting, then I train the 4 out in an....hehe....X pattern to help fill their allotted screen space. With UBT, LST and GLR they are showing a phenomenal number of 'tops'. It's working well so far in veg, but none of the girls that have the 'new' train regime have not gone to flower yet. 6 more weeks for the first batch of those.

No prob! I just did that, though technically a few have more tops than a true UBT this time. I do the "x" thing, too. Works great! Glad it's working for out great for you too. Seems perfect for scrogging too. :)
 
Interested to see how that OG Kush X JTR ends up late into flower.
I have a some OG Kush X Jack Herer beans I've yet to try out.

First - thanks for dropping by, LeafLady. :)

Me too! So far it smells and looks a lot like the OG Kush female it came from, but there are subtle visual and smell cues already from the Jack the Ripper, too. Could be a good one I think. I love the mystery of it! :yummy:
 
I love ye ol UBT!!!
I do it multiple times now while the plants are in veg. I'm really jazzed to try it in my new grow rooms as I will have tomato cages to tie all those tops to as they grow out. Should be interesting so see how it all works out.
Its an awesome way to build a good base for the plant, no? I love it, and the tomato cages should help you keep 'em tied down I'd think...
 
Grow update Sept 11 update:

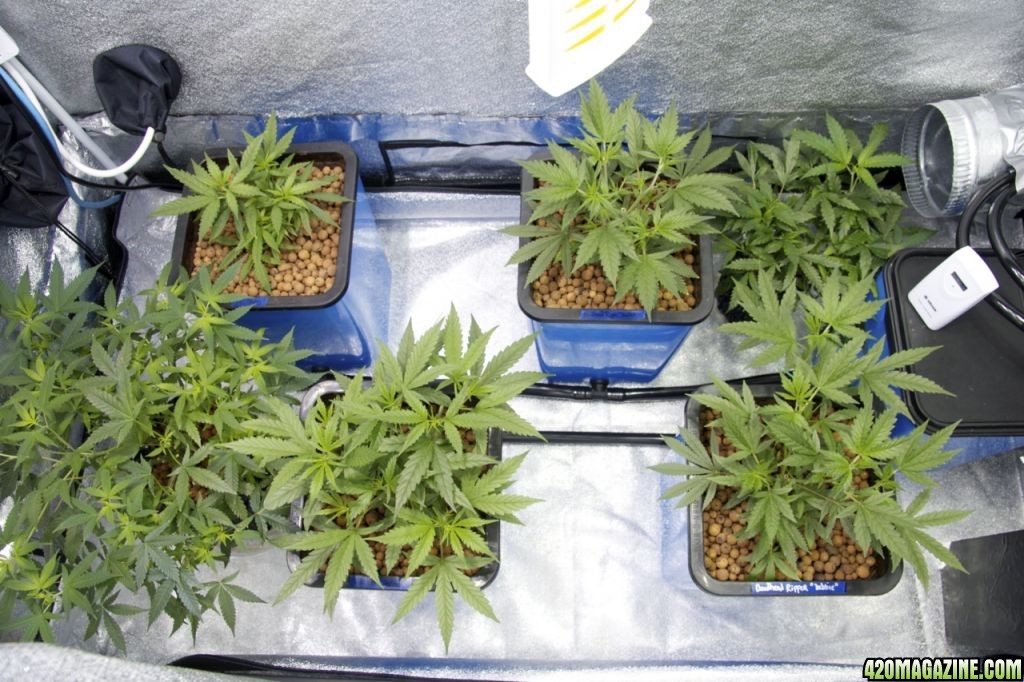
Things are vegging along nicely at the moment. The plants in the Flo N Gro are really starting to perk up after being topped, and the Jack the Ripper mom in with them, which was recently thinned, is already bushing up again. Roots are really exploding in the new DIY veg hydro set-up I built. All in all, not much news but things coming along really nicely. :)

Edit: Drives me crazy, that the colors look so good until I upload them. Always shifts to a "yellower" look upon uploading it seems like. Oh well!

Veggers in my little DIY veg hydro unit:
sep_11_2.jpg


Pineapple Express and Deadhead OG, future moms?
sep_11_3.jpg


Check out the roots!:
sep_11_1.jpg


Gals in the Flo N Gro, (plus Jack the Ripper mom, and a SLH snuck in temporarily)... Flo N Gro top row: Pineapple Express, Deadhead Ripper. Bottom row: OG Ripper, Deadhead Ripper:
sep_11_4.jpg


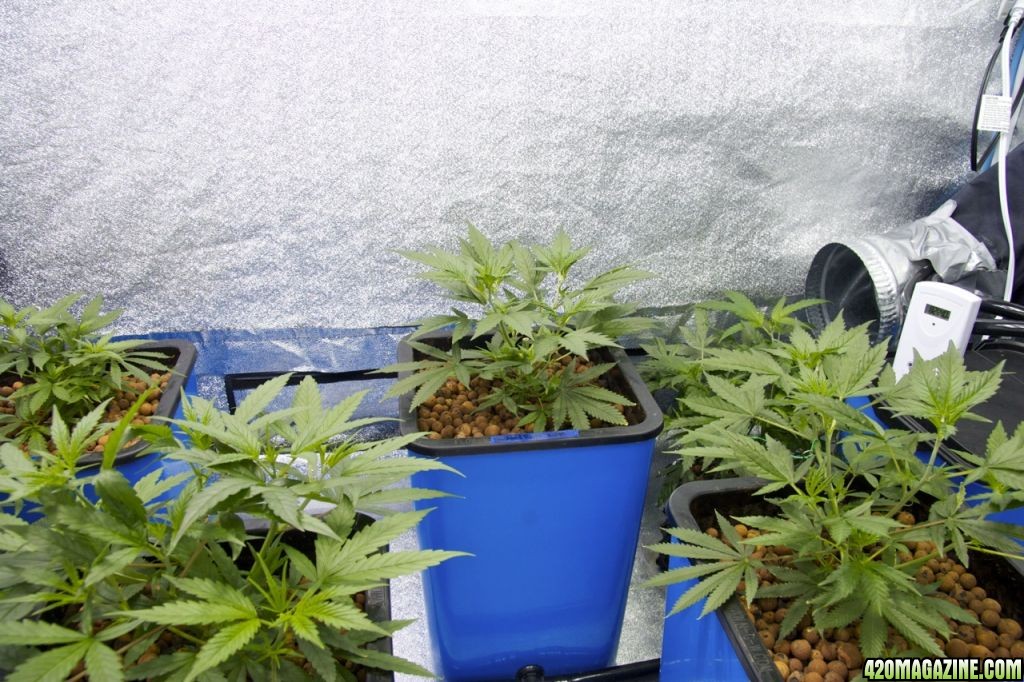
From the side:
sep_11_5.jpg
 
Gorgeous plants there Xlr8! :thumb:

My pictures always look yellowy when I upload them as well, even if I fiddle with the balance before hand. So you are not alone my dear!
 
Just a quick question for clarity.....when speaking of UBT are we talking of Uncle Bens Topping technique? I have been searching and read about that....very interesting.

:peace:
 
Just adjust your hue and sat a bit and drop back the y, if using a CMYK color space or knock back the r and g if using an rgb color space.....also since I am an artist I go ahead and set my monitor gamma to 2.2 for linear workflow which allows you to see with much better clarity what things will really look like uploaded to the internet. PM me if you have any questions xlr8, I have a BS in 3d modeling and animation....so I mess with stuff like that all the time.!!
:goodjob: so far X. After my little incident yesterday I addressed the prob. No more flying angry fans!!

:peace:
 
Xlr8,
how long are you going to veg these plants, in the DIY veg hydro machine ?
For how long you veg your plants, before you put 'em in 12/12 in general ?
Do you also continue the veg period , when you transplant the plants in the flo n gro for a week, or something ?
I'm asking because anyway with LEDS, I have to put 'em in "blue" mode after transplant , to get acclimated to the new light !
... So I have to count that week too ?!?!

Also, can I use smaller diameter netpots and put 3 plants in each Rubbermaid bin ?
Will it have bad effect at the plants of being crowded , you think ?
 
Gorgeous plants there Xlr8! :thumb:

My pictures always look yellowy when I upload them as well, even if I fiddle with the balance before hand. So you are not alone my dear!

First, :thanks:!!

Good to know I'm not the only one -- it's frustrating, especially with entering stuff in the competitions.

As I'm typing this though, I think I know how to work with it better, if I want to put the time in to do it. I'm guessing in my photo editing software there is an option to save it in a web RBG format, which hypothetically would allow me to see them, and more importantly edit them, as they would appear on the site here... Anyone try that? Seems like it should work, and that I've seen that option before?

Oh, and I love your avatar!! You should stick with that one, in my opinion - it brought a smile to my face. :)
 
Just a quick question for clarity.....when speaking of UBT are we talking of Uncle Bens Topping technique? I have been searching and read about that....very interesting.

:peace:

Yes, Uncle Ben's Topping. Really it's just "topping" but done at a specific level, at a specific time. Here's a post I made on the topic near the beginning of the journal:

Uncle Ben's Topping (UBT) - A technique popularized by a grower who goes by "Uncle Ben".

From Uncle Ben:

Selecting the point for topping to get 4 main colas -

To get 4 main colas, let your seedling or cutting (clone) grow to about 5-6 nodes and pinch out (cut) the stem just above the 2nd true node. The node where the cotyledons attach doesn't count. The result will be a redistribution of the auxins and other hormones that normally collect in the tissue of the terminal leader's tip.

These ho moans will be redistributed to dormant buds that reside in the nodal axis where the leaf petiole attaches to the "trunk", below the cut. The new foliar output response will be quick (within 24 hrs or so) if you have a healthy growing seedling and will be your future main colas - 4 instead of the usual 1:

The photo below is NOT from Uncle Ben or part of his tutorial -- it's my "Lucy" seedling from my previous grow, soon after it was topped with this method:
Xlr8's "Lucy", after UBT (Uncle Ben's Topping):
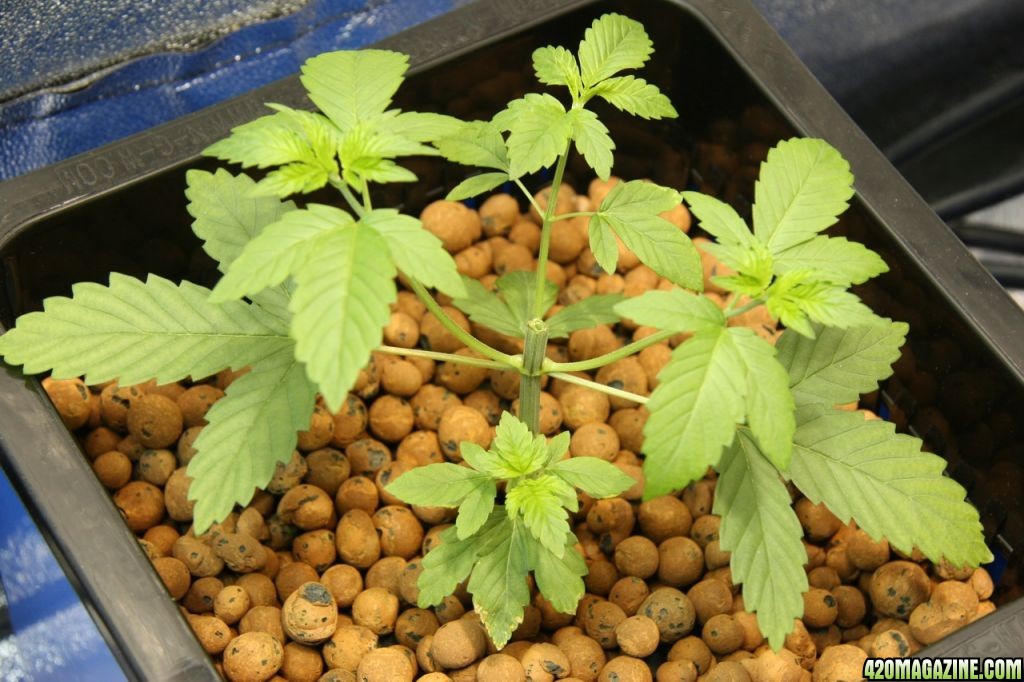

grow_sep_12_2.jpg


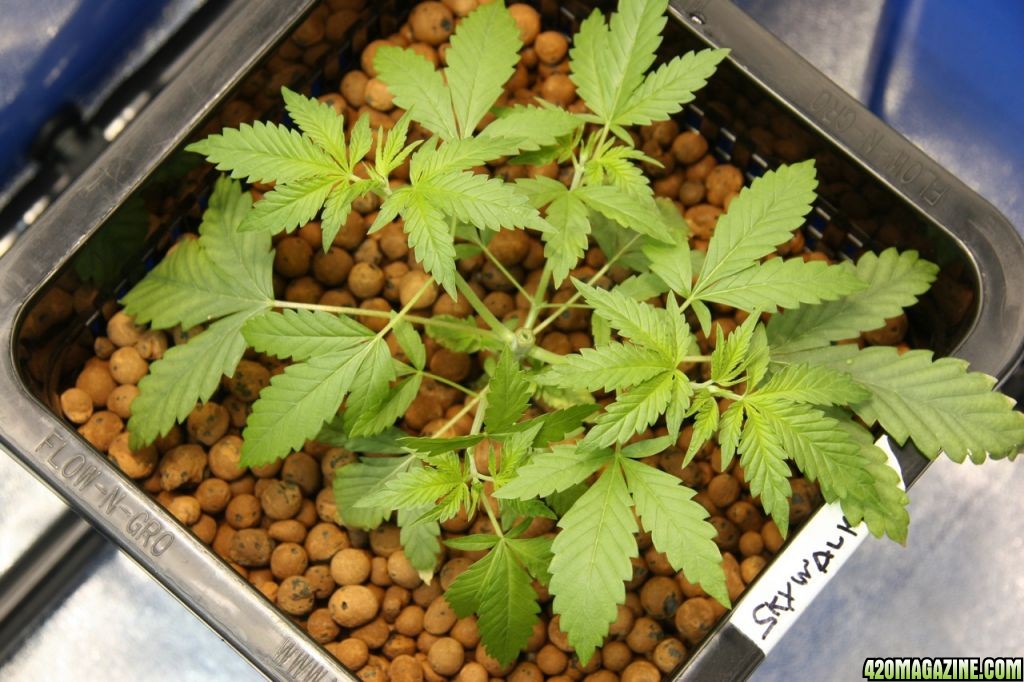
Xlr8's "Skywalker" after UBT:
grow_sep_12_5.jpg


"Lucy" at about 3-4 weeks bloom, I think? Notice the multiple tops/colas (this one was actually UBT'd and topped once more - there were about 8 colas/tops:
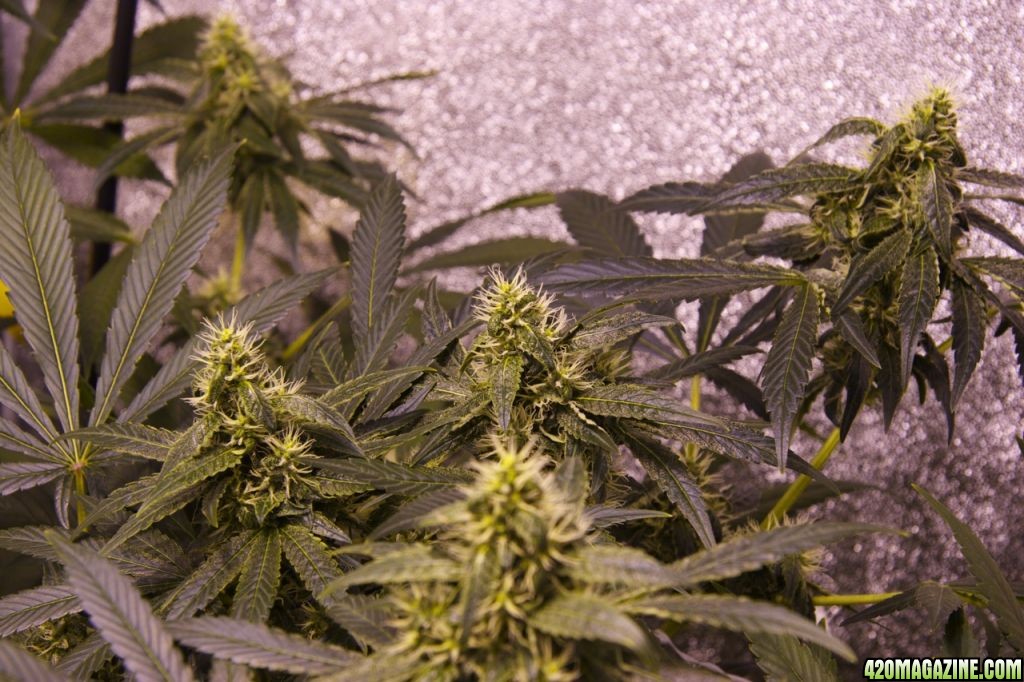
oct_30_3.jpg


"Skywalker" also about 3-4 weeks bloom - there were a total of (4) tops like thsese (2):
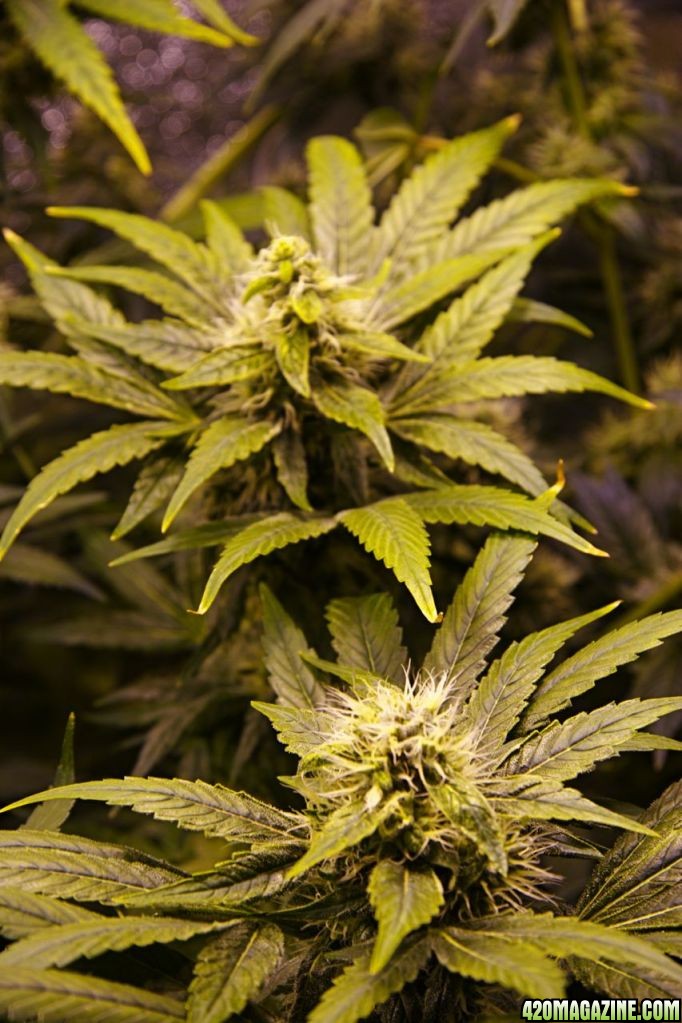
Nov_2_4.jpg
 
Just adjust your hue and sat a bit and drop back the y, if using a CMYK color space or knock back the r and g if using an rgb color space.....also since I am an artist I go ahead and set my monitor gamma to 2.2 for linear workflow which allows you to see with much better clarity what things will really look like uploaded to the internet. PM me if you have any questions xlr8, I have a BS in 3d modeling and animation....so I mess with stuff like that all the time.!!
:goodjob: so far X. After my little incident yesterday I addressed the prob. No more flying angry fans!!

:peace:

Cool, great ideas. I might give that a try. I'm wondering if my idea would work in the post I made to Fluffy? Save it in web rbg format, then finish editing for color seeing it as it would appear here, perhaps? Is that option in photo editors like photoshop, etc.? I shoot everything in raw format originally, so I have a lot of editing capability with the files, but sometimes it's not worth the headache. Though, for entering a nug in the nug of the month contest or something, probably worth the trouble to get the color right.

Thanks for the tips! :thankyou:
 
Xlr8,
how long are you going to veg these plants, in the DIY veg hydro machine ?
For how long you veg your plants, before you put 'em in 12/12 in general ?
Do you also continue the veg period , when you transplant the plants in the flo n gro for a week, or something ?
I'm asking because anyway with LEDS, I have to put 'em in "blue" mode after transplant , to get acclimated to the new light !
... So I have to count that week too ?!?!

Also, can I use smaller diameter netpots and put 3 plants in each Rubbermaid bin ?
Will it have bad effect at the plants of being crowded , you think ?

Good questions Billy. I'm planning on using it for small, hydro moms. Basically, I'll pull out anything that isn't special when flowered, and replace it with something else. They'll need to be trimmed fairly frequently, including the roots. I'm not sure how well I'll like trying to keep hydro moms, but I'm sick of hand watering plants and mixing up nutrients for them all the time. It's easier for me to automate things a bit, and just manage the extra reservoir each week, along with keeping them trimmed up. I don't plan on ever letting them get very big, and may just replace them frequently with new cuttings to keep things small.

Additionally, I'd like to use it as a way to have veg plants ready to transplant right into the Flo N Gro after a flowering run. Eventually, I'd like to use the Flo N Gro almost exclusively for the flowering phase, using the DIY hydro set-up for vegging before hand.

As I have it set up, it's probably not big enough to grow plants from beginning to finished flower. Maybe if you went right into flower immediately without vegging them up to size. But, my goal is to keep small veg plants in it as moms or for pre-vegging the Flo N Gro, so that's okay by me. I did make some swappable lids that have room for more plants per plant site, if I want to do that at some point.

You could use smaller netpots, and more per container, but you might want bigger tubs instead, especially if you want to do a start to finish grow with them.

My thoughts on the netpot size were that I wanted them to be big enough to hold some roots in them. In straight DWC, you get most root development right at the bottom in a big mat underneath. I was looking to have a little room in the netpots, so that adding floods to the process would allow more root growth in the netpot itself, and higher up (vs. just the bottom part like traditional DWC). I bring this up because, you might have to flood higher for smaller netpots, and they won't hold as many roots. Not that mine are very big or hold that many to begin with. As far as crowding, it depends on how often you trim them up, and keep them trimmed. If you are letting them stay in there long, you'll have quite a nest of roots going, the more plants per site. You might have to experiment to see what you like, but it's all about how long you'll keep them in there and how you plan to use it...

In general, I usually end up vegging for 3-4 weeks before I switch to flowering phase (12/12 etc.). As far as for your lights, feel free to put the plants with the LED into 12/12 if you want, and count the first week with the blue light as part of your flowering. The first 10-14 days of the blooming phase the plant is really vegging still anyway. So, it's okay to do the blue light right at the start of 12/12 if you want. In fact, I switch to bloom phase and keep my white/blueish metal halide bulbs going for first 10-14 days, THEN I switch my bulbs to reddish tints with the HPS bulbs. But, it would work fine to finish vegging that one week with the blue LED's and then start flowering with the redder bulbs the next week. No wrong answer, in other words. :)
 
Nice and clean X, I love it. On your DIY bubble tubs I noticed that some lids are cut different (placement of the nettie). Was/is there a reason?

Reps if I can. Those roots alone deserve it!

First off, :thankyou: for the reps!

I have a few extra lids with different hole configurations, too...

The one on the far right has both plant-sites on the left, as the flood/drain fittings are on the right. I'm worried about roots interfering with the drains, and I'll still have to keep a good eye on it. I may in the future not use that one for plants except possibly for smaller veggers prior to going in the Flo N Gro. Also, to get them closer to the 4-bulb T5... was part of it. Good question!
 
Back
Top Bottom