In The Lab

So its been about 12 days since I last watered these plants, and they were bone dry and looked a bit sluggish. So I fed them some growth energy and a splash of tea today.

Heres a little slide show of my process as I understand it from Doc Bud's instructions.

I put the gallon sized pot into the container and fill it up, while pushing the pot down so it fills up faster ;)
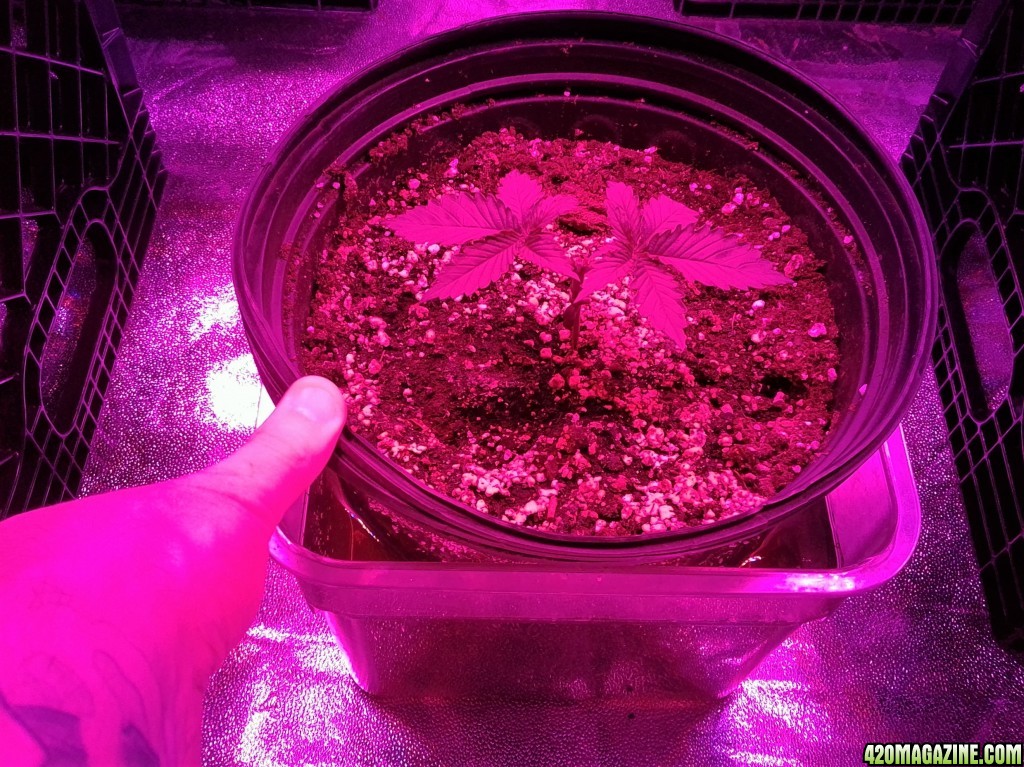
20160617_000604.jpg

I keep adding water till the water level reaches up to the top of the soil.
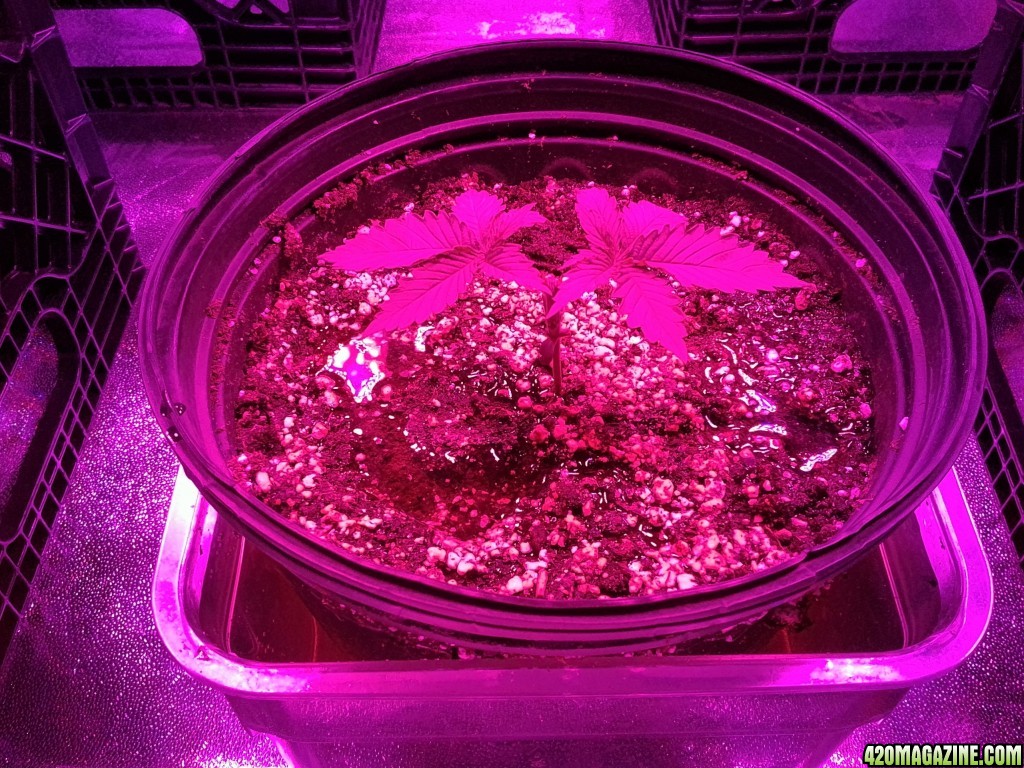
20160617_001211.jpg

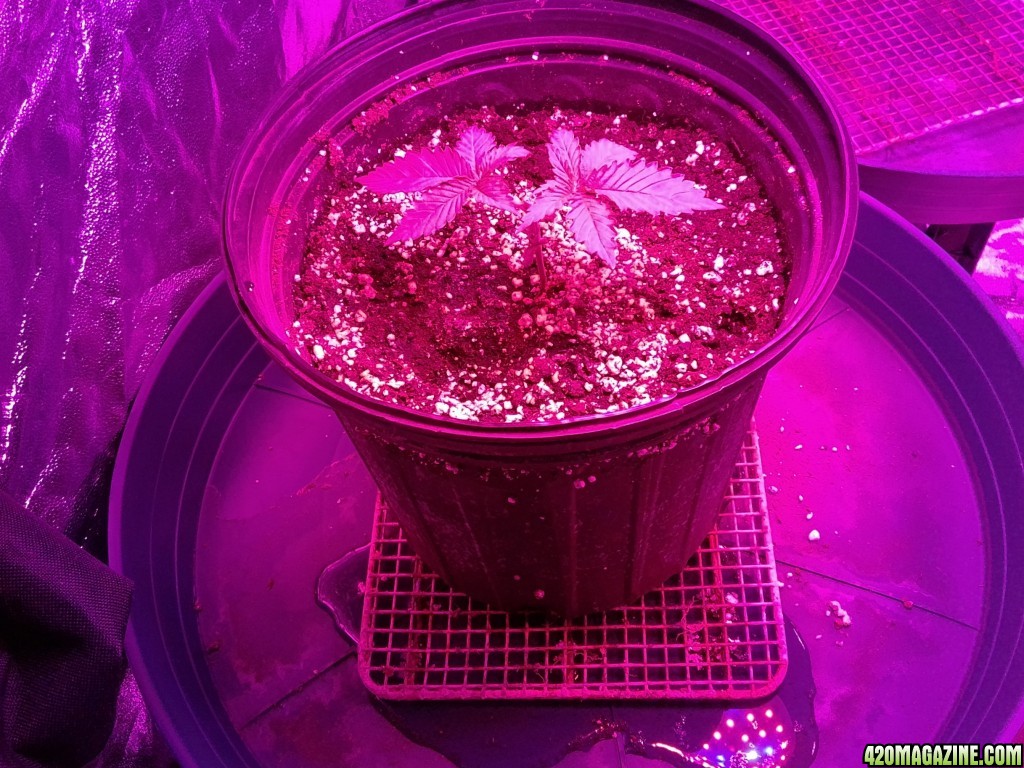
And then I set them ontop of their cookie cooling racks to let them drain out.
20160617_001807.jpg


I did 30 MLs of Growth Energy and 5 MLs of Tea. Still no foliar feeding and I'll have to transplant them into the 10 gallon smart pots in little over a week from now. Gotta make room for the new soil to start cooking :)

I'm hoping this is what you were talking about when you said make a demo from start to finish. Unless you wanted it all on one page at the end?

Perfect! How many plants did you dunk like this? Using the same water? 30 mils is a lot for one plant.
 
It was 30 ml with 10 liters of water split to all 4 plants and I had maybe 1 liter left over but i just dumped it into the sink.
I just didn't wanna repeat the photos for all the plants lol.

I think once the plants are finished and harvested, i'll make some kind of photo step by step post with everything all in 1 post. Kinda like shigg did with the cat drench timing.


You're on point bro! So plain water with 1/4 oz Transplant next time, then a Transplant drench, rinse, then repeat!

Let them get dry between waterings and you'll have a nice thick stem, tight internodes and a very high calyx/leaf ratio....what we all strive for.
 
Hey Doc, got a question/favor to ask.

In the near future, I'm hoping to install a climate controller. My current system works, but is not perfect.

If you have the time and are willing, could you describe how your controller operates your equipment. I'm curious how the controller handles adjusting temperature from night to day. Does a heater kick on to raise temps, then AC to keep temps steady? How fast do these temp changes take affect? I'm assuming you have a humidifier and a dehumidifier. Can the controller operate both without having to flip a stupid switch? In the spring and fall we experience some pretty drastic changes in humidity. One day it may be 30%, the next it could be 90%. Summer is easy... it's always high humidity.

I'm hoping your answer will be something like... set it and forget it. The controller will use what ever hardware it needs to maintain your settings.

I'm not sure if you can post the make and model of your controller. I'm still fuzzy on the rules. If not, it's ok. I'm just trying to get a better understanding of how they operate.

I use a Sentinel CH4 controller.

It has a remote sensor that goes over the canopy that senses Co2, humidity, temps and light.
It is programmable for day and night temps/humidity. C02 is not used at night, but C02 levels are also programmable, including fuzzy logic.

It can be used to trigger a humidifier OR a dehumidifier, but not both at the same time.

I have the following devices:

1. Window mount AC plugged into the controller, day/night temps programmed. Using the auto-restart feature on the AC, It's always on full blast, but only comes to life when the controller kicks on.

2. C02 generator

3. Humidifier. My room tends to run on the dry side, so I often add moisture. This is done with the controller.

4. Heater. I've got an oil-filled radiator type heater plugged in to the controller. It rarely comes on, but when needed it's a life saver as one really cold night can stall out the whole grow.

There is also a stand alone dehumidifier set on 55% rh that turns itself on and off as needed. I keep the condensate from this device and use it for foliar sprays. It's good water.

I do a daily check of high/low temps, rH and C02 everyday, but scrolling through on the controller. Mostly, this stuff is plugged in and forgotten about, but I check every day to make sure all components are working. Sometimes and AC gets tired and needs replaced, which takes about 20 minutes with two people, start to finish. I buy window mount AC's when they're on sale.

Same deal in another room, but with a mini-split.
 
Thank you so much Doc. Using the heat from my LED to create daytime temps just isn't working as well as I would like. Humidity increases in the cabinet pretty quick waiting for the cabinet to come up to temperature and exhaust kick on venting the humidity.

I guess I need to go big or go home if I want to dial my environment in any further. I have everything already, just need the controller.

Growing one flower and one or two clones means I don't need a lot of water. But, I still hated it when I'd forget to buy distilled from the store and would have to make a special trip. I now use my dehumidifier water (thank you for the idea). I get almost a gallon a day from it. More than I need. I have a 35 gallon rain barrel that I'm considering hooking up to the drain hose from the dehuey. Just need to figure out how I could plumb an overflow so I don't end up with a mess if I forget to drain off some water once in a while. I have no access to plumbing in the spare bedroom unless I cut a hole in the floor and tap in to drain in the crawl space. For now, I just empty it daily.

I'm off to do more research. I thought a climate controller would be overkill for a cabinet, so I never really looked into their capabilities considering how expensive they can be. Now I'm sold on the idea.
 
From Doc's kit instructions:

Temps must be no lower than 62 degrees and no higher than 85 degrees. Lower temps can take another week to "cook" while higher temps might be ready sooner
 
Ok so I had to transplant the 2 older ones, as I had to start training them. So heres my little step by step on transplanting.


First I get out the kiddie pool to avoid most of the mess. I get my 10 gallon smart pot and start filling up the bottom with soil.
20160620_190634.jpg

Then I get my plant inside its 1 gallon pot, and I place it in the center.
20160620_190657.jpg

Then I fill up around it with soil to the top.
20160620_191156.jpg

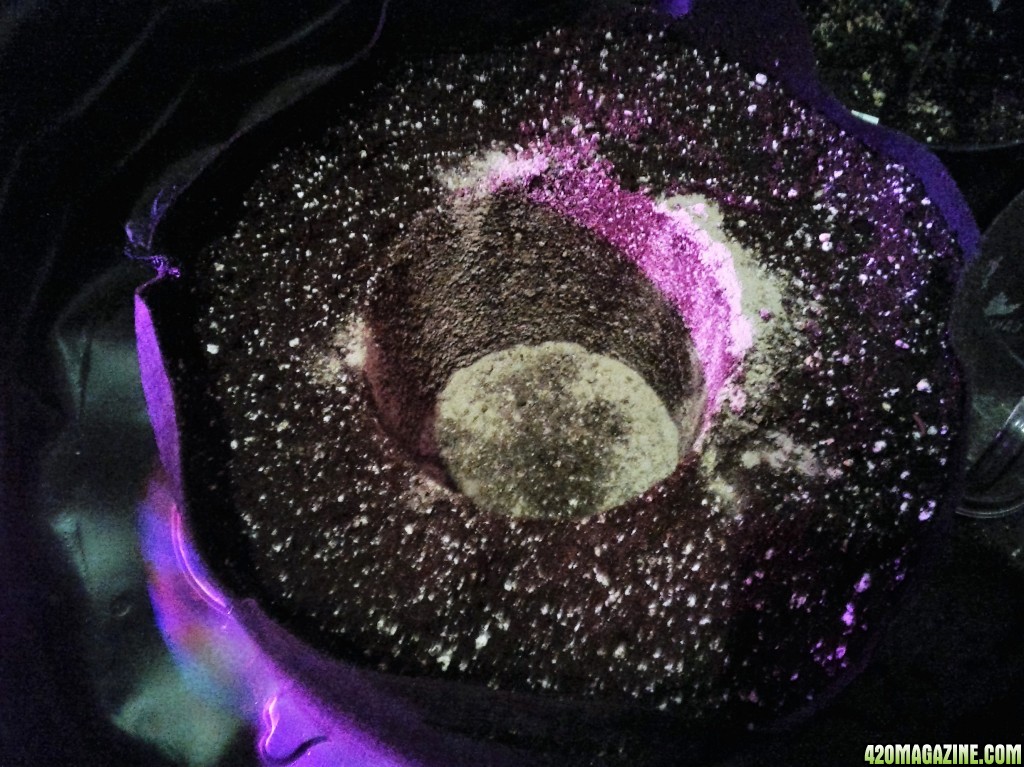
Next I pull out the 1 gallon pot so that it leaves a perfect hole for the plant to drop right in.
20160620_191216.jpg

Sprinkle in a bit of Roots
20160620_191437.jpg

I apologize for not having a photo of this last step, but I only had 1 hand free and I didn't want to risk snapping the plant to grab a photo. But Pretty much I just put my palm down around the plant so that the plant stem is between 2 fingers, then I just turn the whole thing upside down and pull the plastic pot off. Leaving me a nice root covered cylinder of soil. Next I score the roots with a razor blade going from top to bottom on 4 sides of the root covered soil, and then I just drop it into the perfect sized hole I made earlier. And add in more soil if needed.


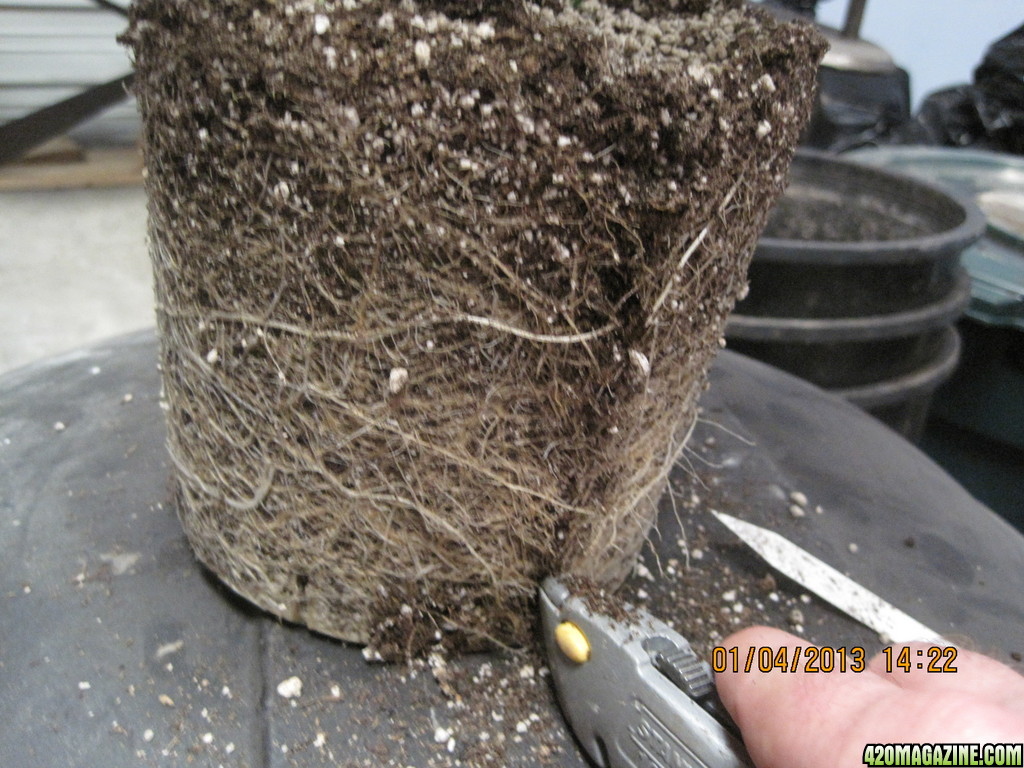
Root Scoring Technique for Transplants


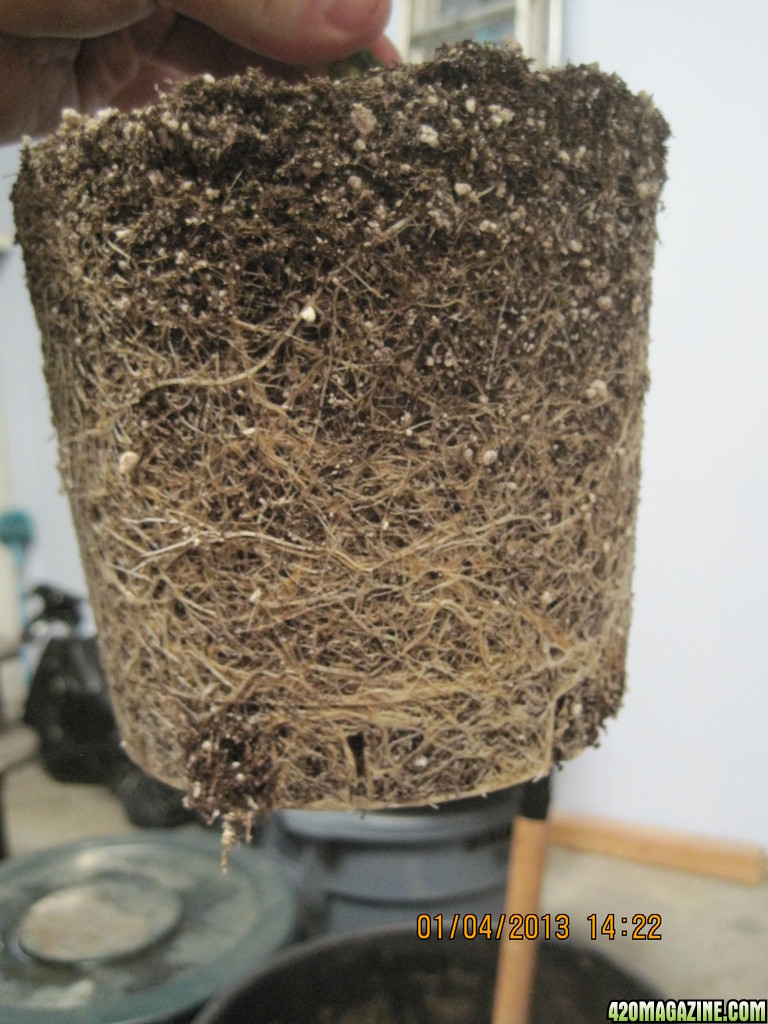
We want a large, healthy mass of roots at all times, but the early stages of flowering are very important, especially if we did a good job in the veg room and have a healthy, nearly bound, ball of roots.
Picture_01483.jpg


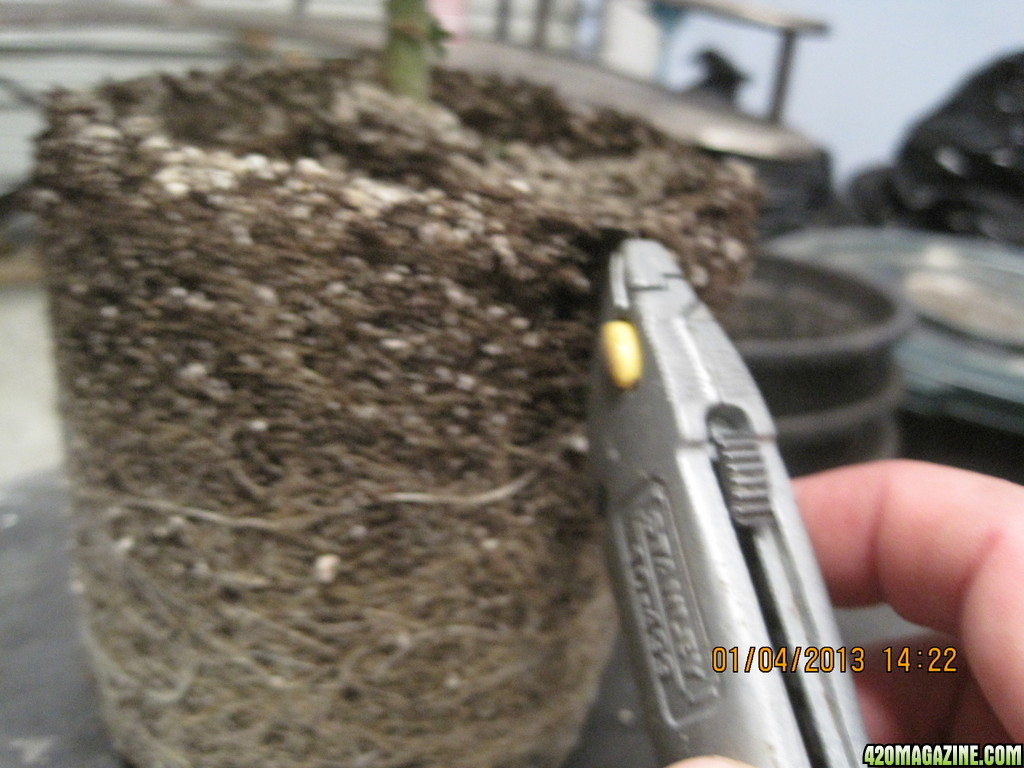
By taking a box cutter and cutting into the root ball, from top to bottom, we encourage lateral branching of the roots, as opposed to more circling. This way, they'll grow out and fill the flowering container.
Picture_01570.jpg
Picture_01570.jpg
Picture_01652.jpg

in a square pot, make four scores, on all four sides. In a round container, also make four scores at 90 degrees to eachother.
It's a simple technique used by nurseries all over the world. It works in our gardens very well!
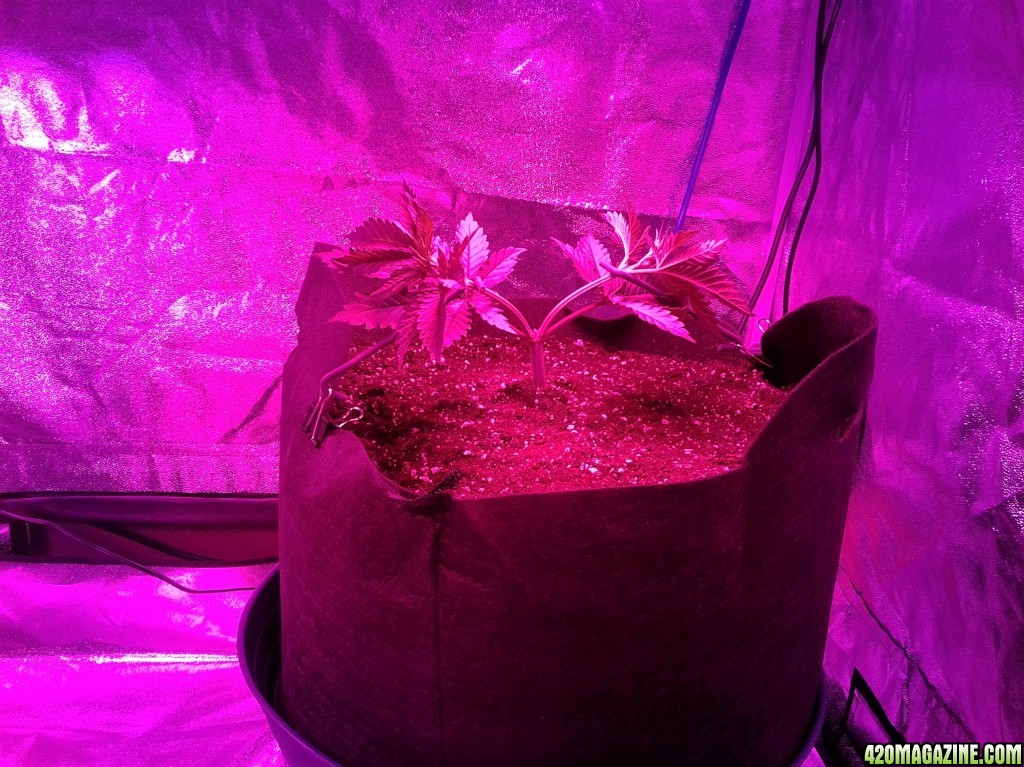
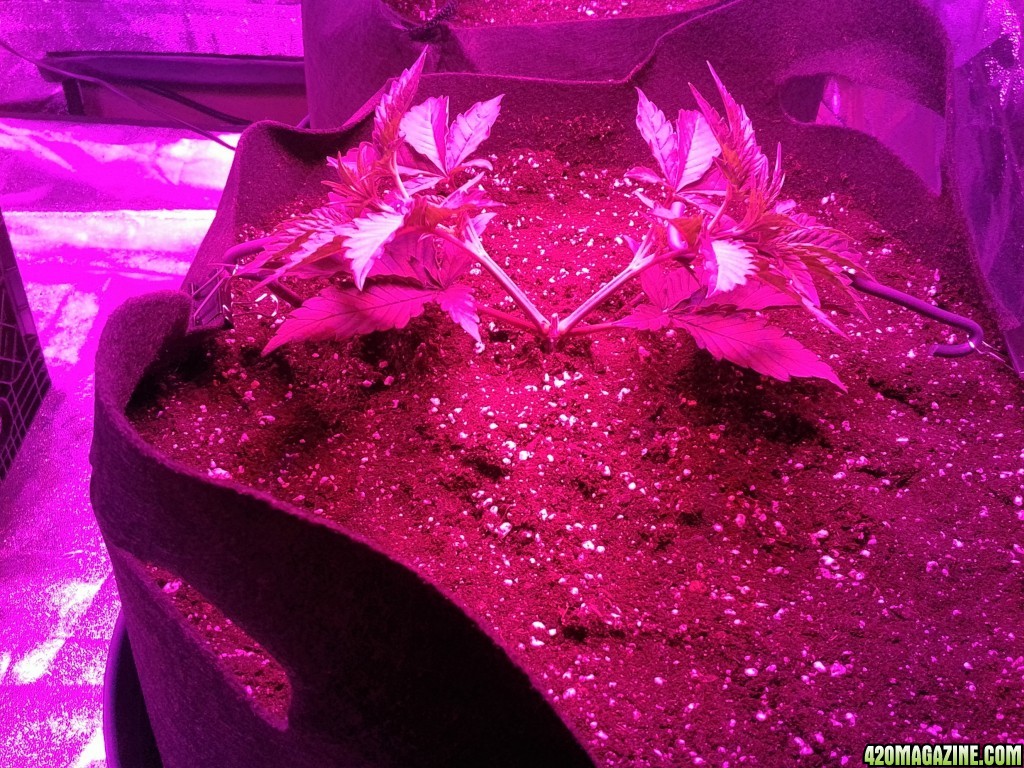
The end result is this.
Tangie Ghost Train veg day 21 Transplanted into 10 gallon smart pots.
20160620_191920.jpg
20160620_193145.jpg
 
Ok so I had to transplant the 2 older ones, as I had to start training them. So heres my little step by step on transplanting.


First I get out the kiddie pool to avoid most of the mess. I get my 10 gallon smart pot and start filling up the bottom with soil.
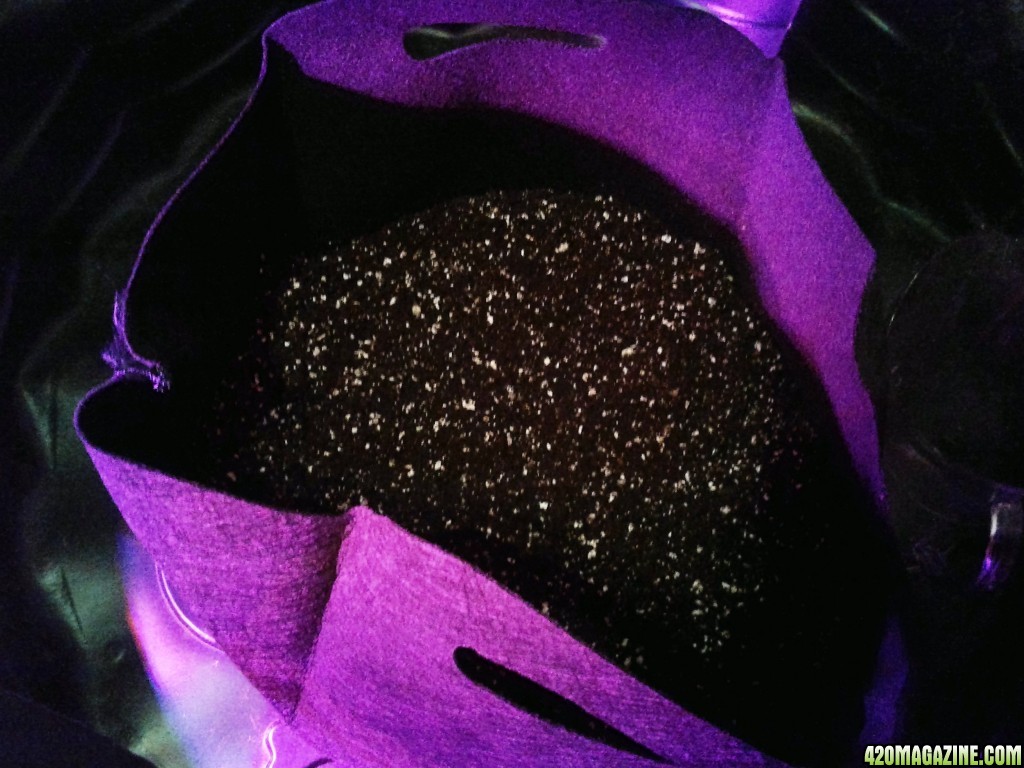
20160620_190634.jpg

Then I get my plant inside its 1 gallon pot, and I place it in the center.
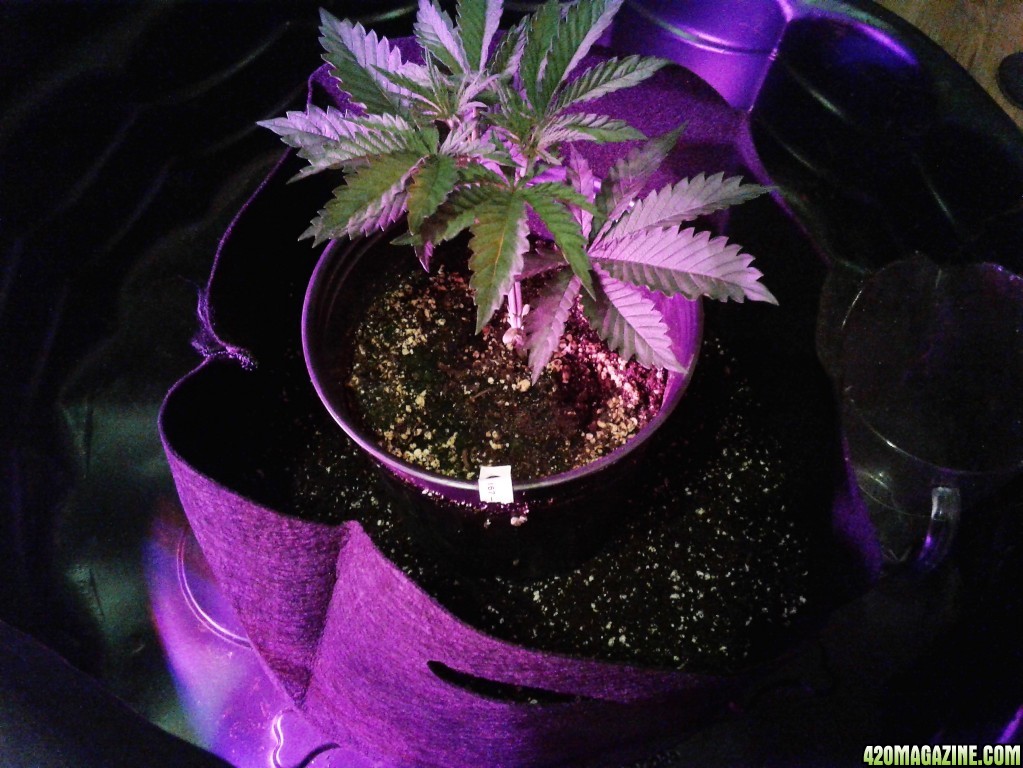
20160620_190657.jpg

Then I fill up around it with soil to the top.
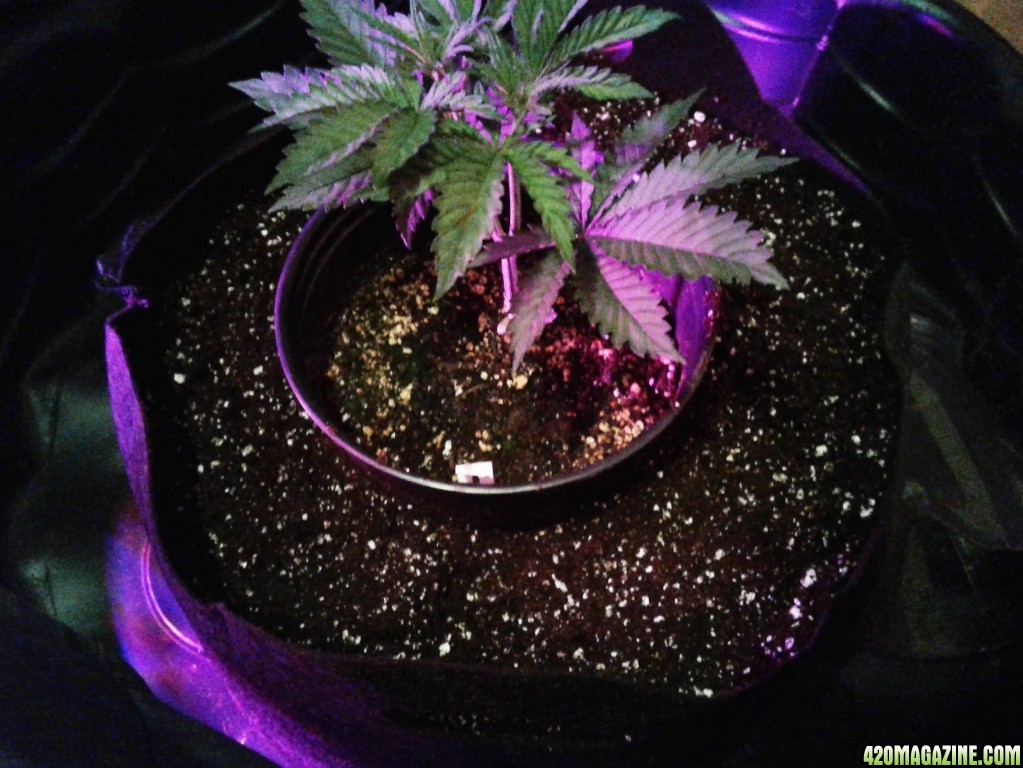
20160620_191156.jpg

Next I pull out the 1 gallon pot so that it leaves a perfect hole for the plant to drop right in.
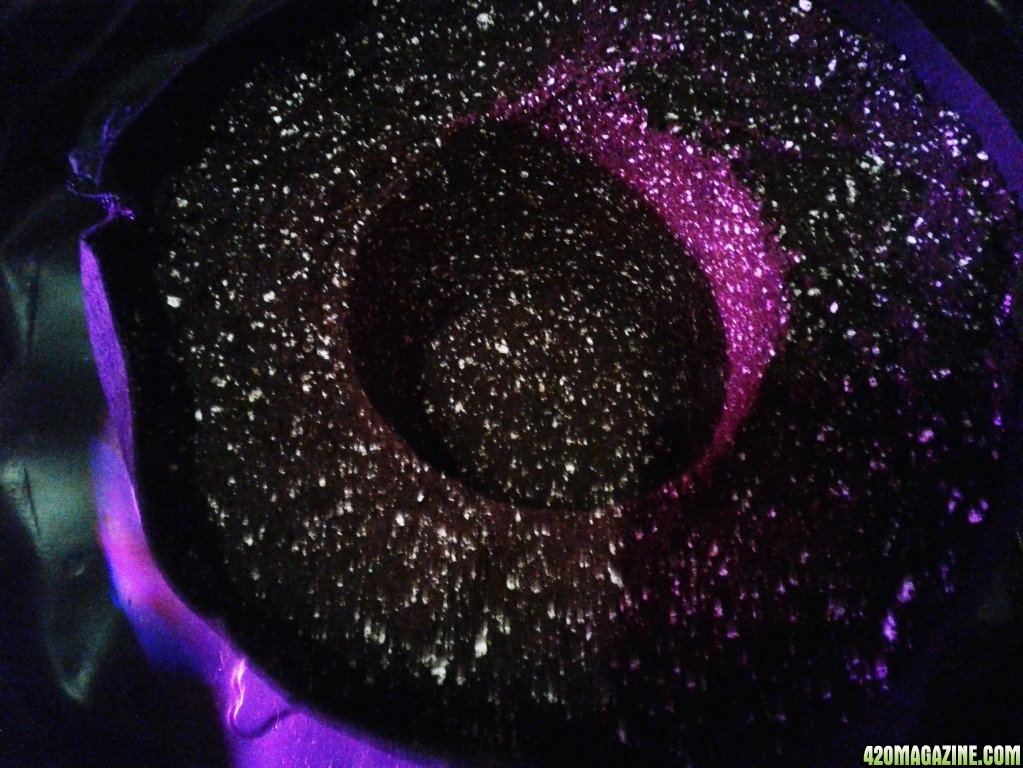
20160620_191216.jpg

Sprinkle in a bit of Roots
20160620_191437.jpg

I apologize for not having a photo of this last step, but I only had 1 hand free and I didn't want to risk snapping the plant to grab a photo. But Pretty much I just put my palm down around the plant so that the plant stem is between 2 fingers, then I just turn the whole thing upside down and pull the plastic pot off. Leaving me a nice root covered cylinder of soil. Next I score the roots with a razor blade going from top to bottom on 4 sides of the root covered soil, and then I just drop it into the perfect sized hole I made earlier. And add in more soil if needed.


The end result is this.
Tangie Ghost Train veg day 21 Transplanted into 10 gallon smart pots.
20160620_191920.jpg
20160620_193145.jpg


Perfect. Gardening 101 on display in living color. Awesome looking little plants! They're gonna be nice.
 
Any thoughts on top dressing with fresh, amended, soil... mid vegetative phase?
 
Back
Top Bottom