First Grow-Aero-Stealth Box

Thanks mcloadie, I will do that. FYI, I think the 50% strength nute was a wee too much as some leaves appear to have been burned. I think next watering I will either flush or dial it back to 25%. Thanks again for the tip.

Since I screw things up sometimes I have trained myself to look at the positive side of things.......and this is very true; "a nutrient burn is just a precursor to a rapid growth cycle".........once the plants catch up..........
 
When I did the initial transplant, I wanted to add perlite to aerate the soil and help with drainage as the mystery soil had a lot of clay in it. It was just a stretched seedling with the cotyledons still on and green. That went ok on the root stem, but after a few days to a week, I noticed the soil still was not drying at all and I couldn't even push my finger deeper than a 1/2" into the soil, so I went to the hydro store and got a bag of FFOF, premixed it with 40% more perlite and transplanted it again. When I flipped the pot, I squeezed the pot all around to separate it from the root ball and it came off easily. I then put the root ball into a storage tote and tried washing the soil off with a bottle of water with holes in the lid. this did little so I tried to gently break apart the soil to better expose the roots. The outsides came off w/o a fight, but the closer I got to the center, the larger the chunks of soil that came off. Convinced this soil was no good at all, I wanted it all gone, so I kept prying inwards until I discovered that the roots weren't strong enough b/c all the dirt came off and took most of the root system with it. I already had the FFOF prepped for the transplant and put the damaged seedling in it, carefully packed it in and watered it. Then I got it back under the light and so on.

It's been about 3-4 weeks now and I've been making advances as I can afford to. after about a week, maybe week and a half in the FFOF, it appeared to recovery pretty good so I took a chance and gave it some GH Flora series nutes @25% and from what I could see, the plant loved it. The stem more than doubled. foliage recovered and grew tremendously and new growth appeared everywhere. Some days back, someone warned me that using the nutes in conjunction with the FFOF can be too much so this past feeding I used only twice the regular amount of pH correct distilled water to flush out any possible build up. During this period, I noticed that growth had slowed down below it's previous rate of performance. It did have to recover from a FIM cut, but aside from that, there is no noted stressful event in that time period. Early this afternoon, I gave it a 50% strength feeding and I will observe what happens. This evening I must relocate the plant temporarily into a wardrobe closet w/o fans b/c I built a much larger box that will give it more ample space to stretch, and also allow heat to not build up so quickly. It also has a propagation/veg room above, but that's neither here nor there. Hopefully by tomorrow morning the plant can wake up in her new condo and hopefully she likes the new arrangement.

thank you for the summary on what you have learned.
 
Update;

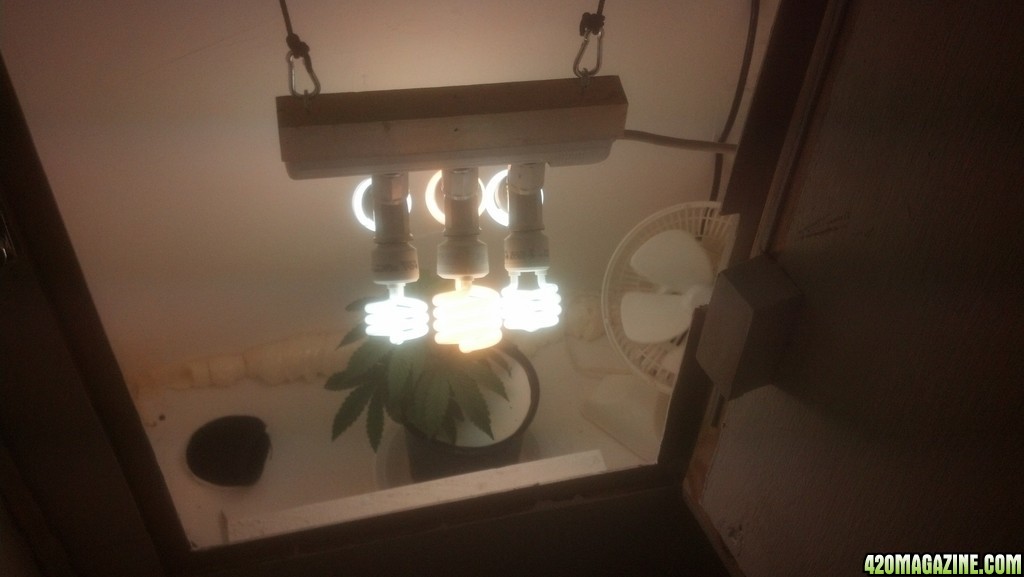
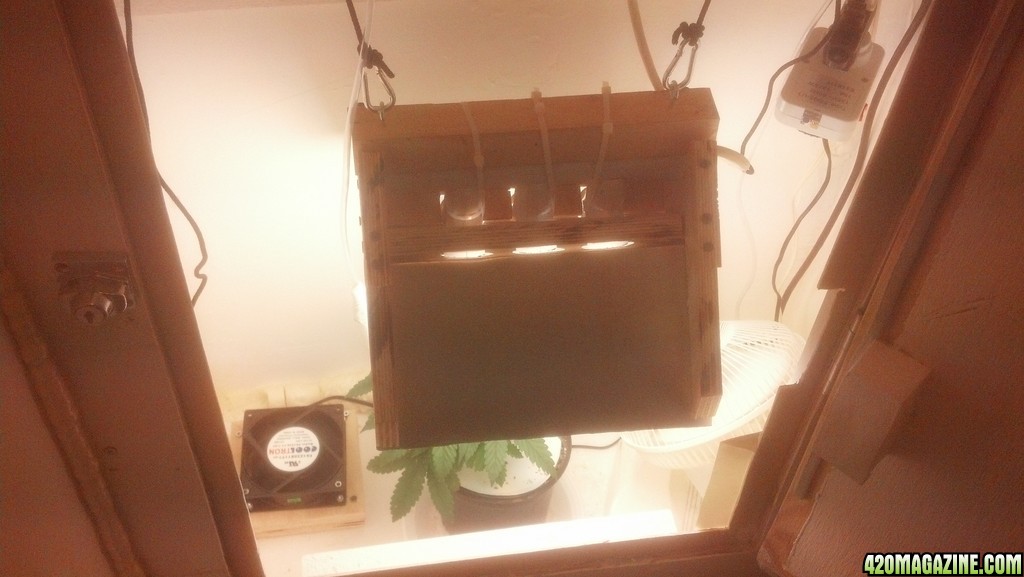
So I finally got the new box put in. It has an under veg/flower room that is 16"x30"x60" and an over veg/clone room that is 16"x30"x25". the entire thing is on 9" box frame (much like stilts) to clear some molding. this lower space hides the inlet vent and can be used for a separate res if/when I got hydro. Some more nute burn set in as some of the leaves have rusty edges. I will check the moisture level early tomorrow and if it's light I will flush with pHed water only, and mix the other half gallon of nutes down to 25% for the following feeding. I'm very happy to say that the added space can better handle the heat of the added CFLs which is a plus. I still have a few bugs to work out, light leaks, better structural integrity, power routing, CO2 etc, but this is the overall concept of what I wanted and is not that far off from my original designs save for the breathable walls.

Here's pics.

IMG_20130812_161411_860.jpg
IMG_20130812_161428_188.jpg
IMG_20130812_161443_457.jpg
IMG_20130812_161454_099.jpg
IMG_20130812_161508_027.jpg
IMG_20130812_161544_567.jpg


Edit, I will be building a new reflector in about a day. B/c the last one didn't fit, I got angry and built a whole box (pictured above). Now that I remedied the space issue, time to build a proper reflector.
 
CFL Reflector;

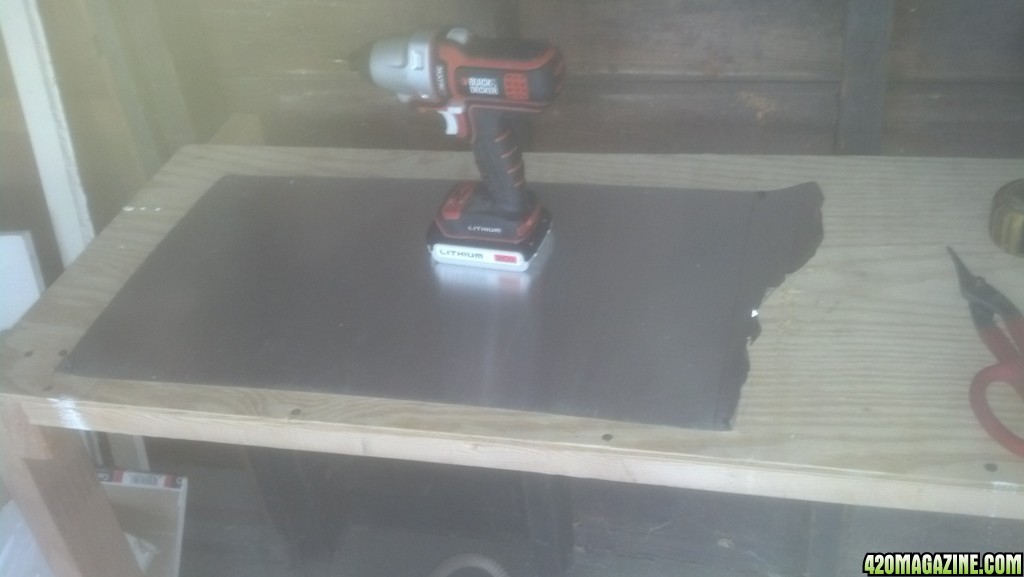
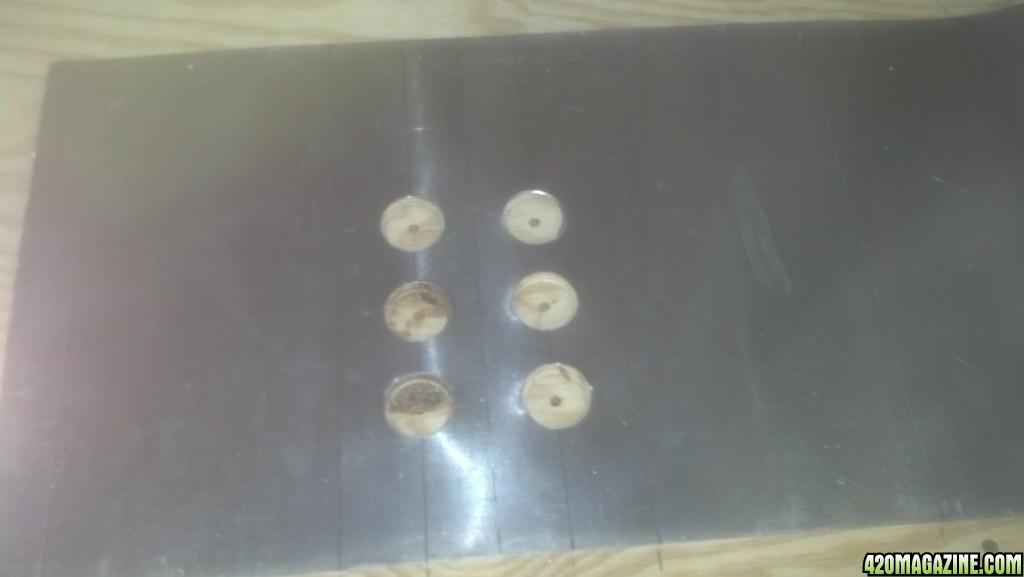
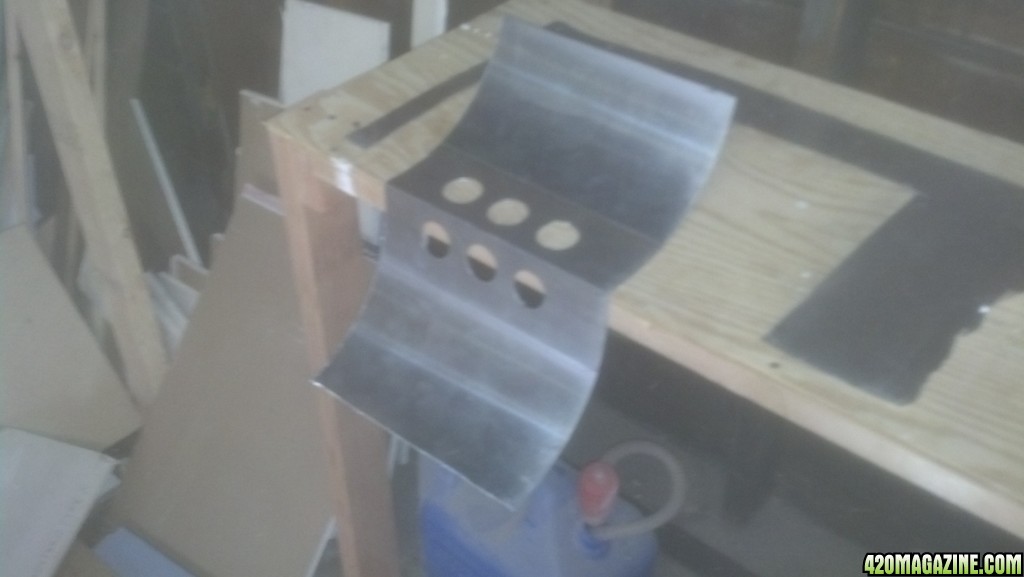
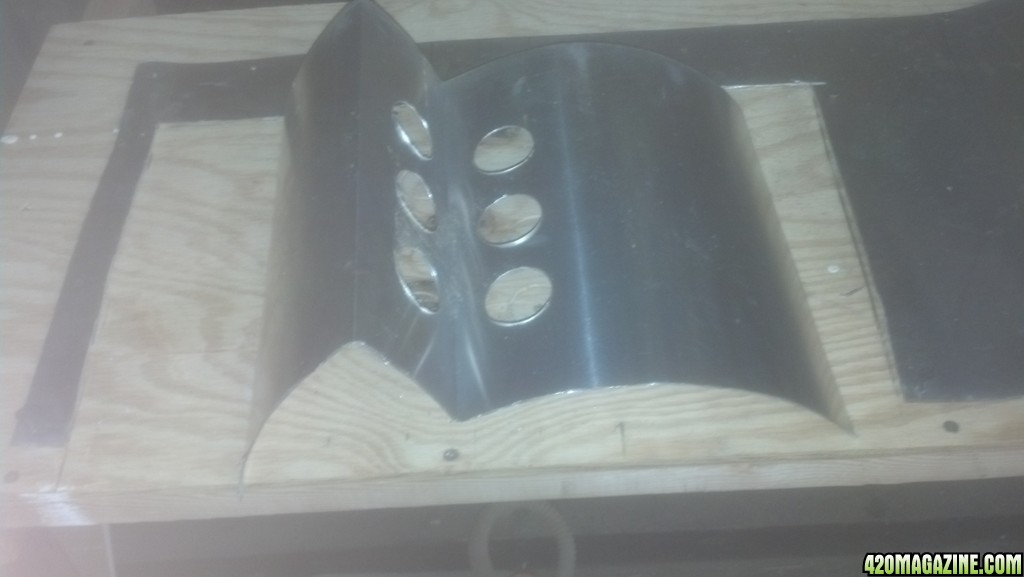
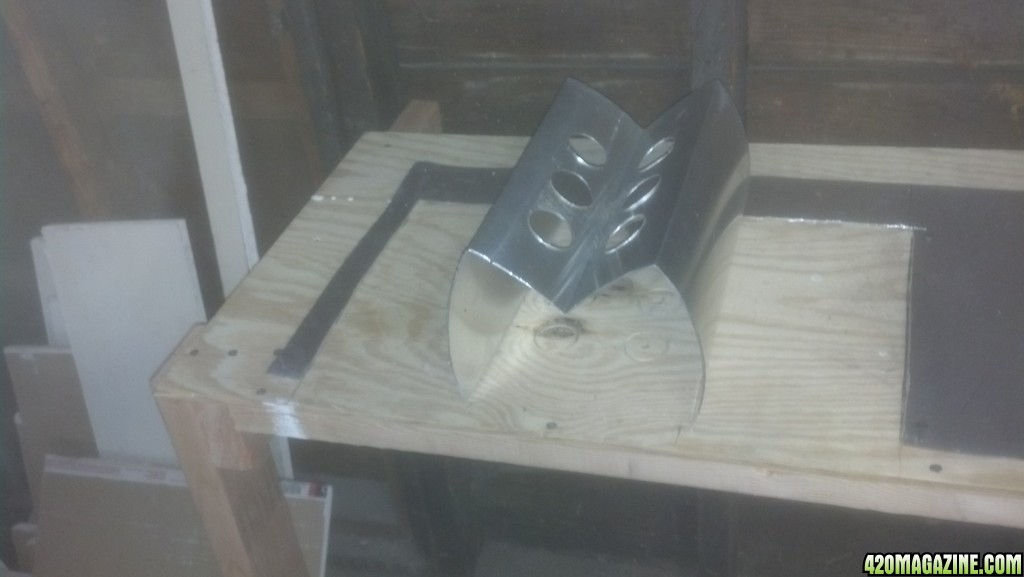
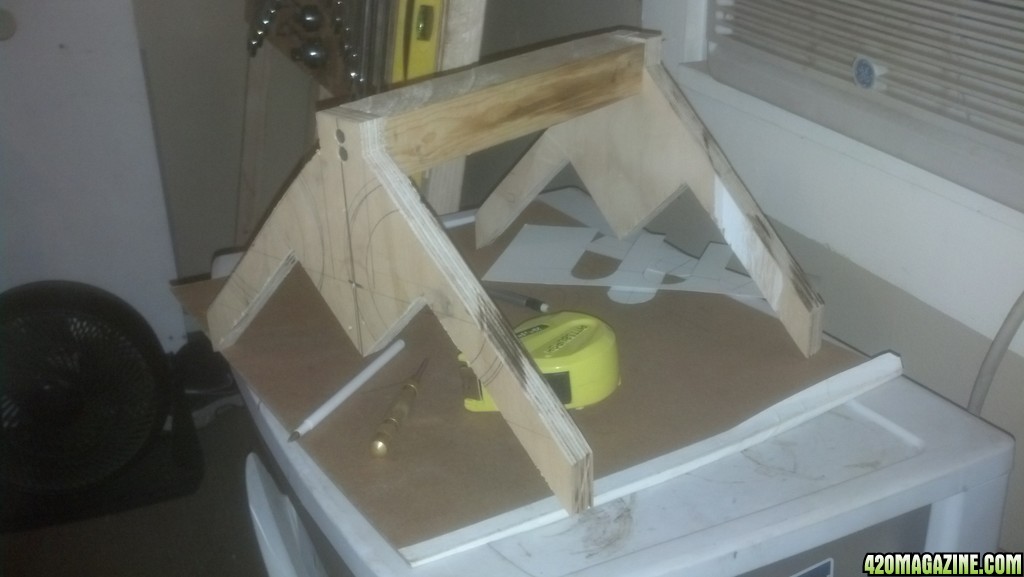
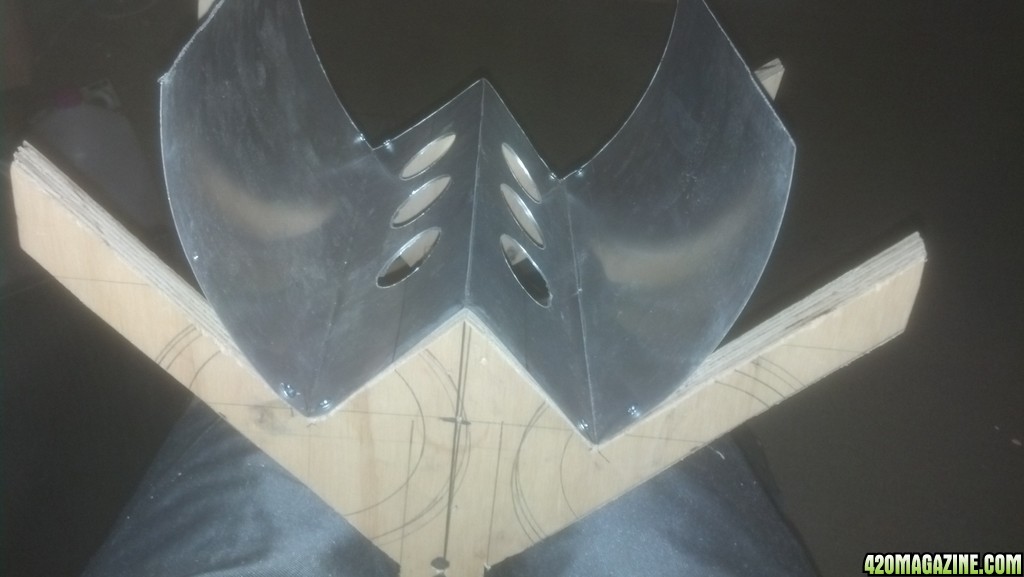
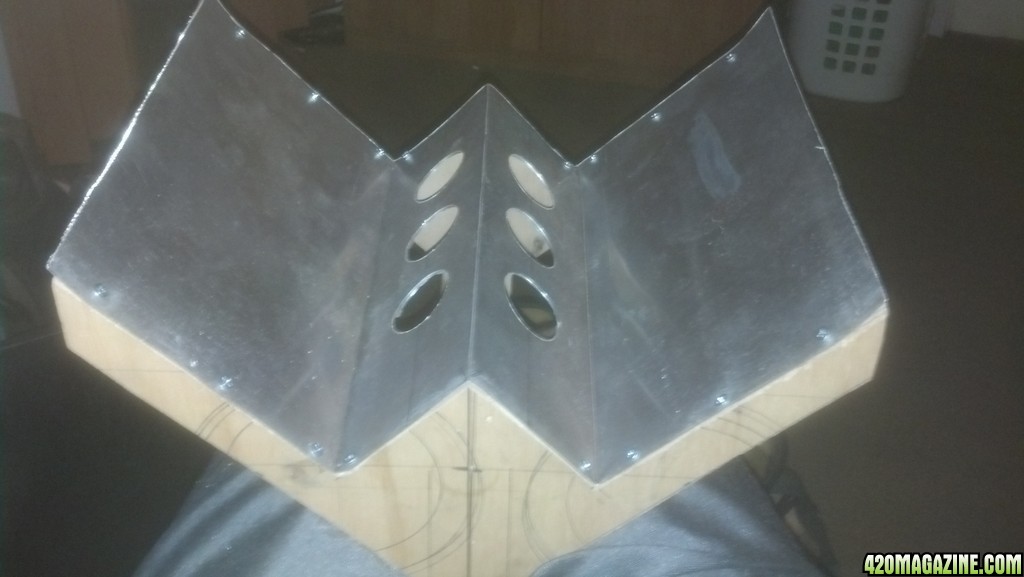
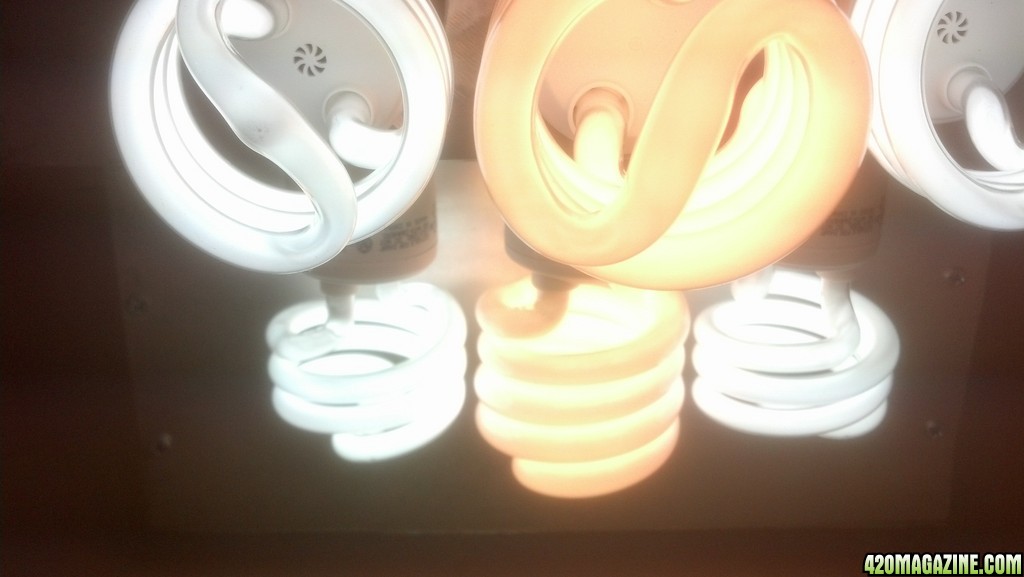
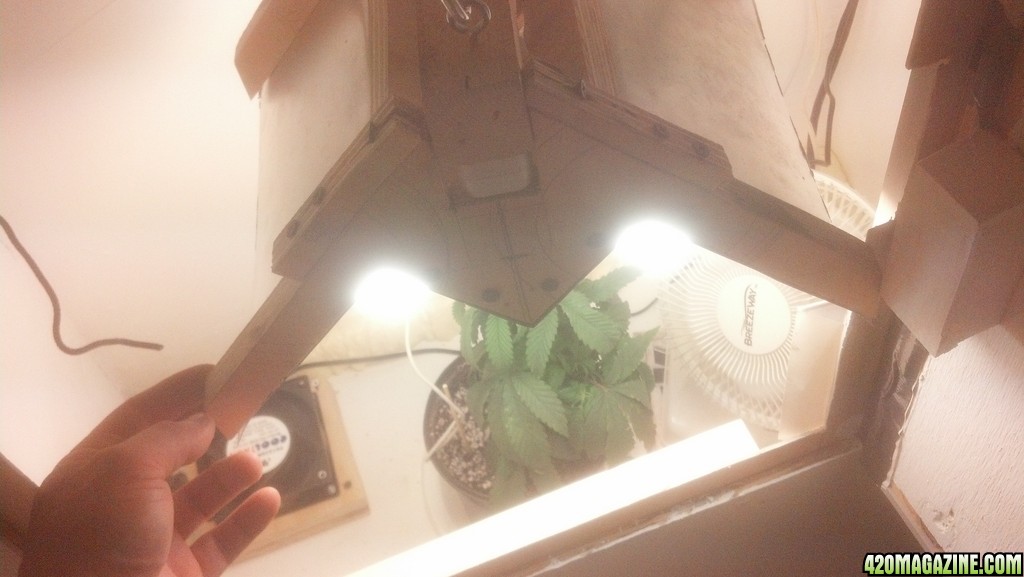
Before I get into this, I wish to stress that anyone attempting to build one of these should have at least some basic fabrication skills and a decent assortment of power tools. This is the my second attempt to build a good light reflector for my CFL rig to squeeze that many more lumens out of it. For this one I decided to go with an EM shape and to use a little less wood for the reflector's chassis, and I did my best to make all needed measurements first prior to cutting. I also did away with trying to cut it with snips as I can get a straight line out to save my life, so I opted to use my 4" grinder with cutoff wheel. But before I cut anything, I stretched out a 24" length of 14" aluminum flashing and screwed the corners down to a work bench. This allowed me to build the rest of the reflector and give the metal some time to unwind a bit. I then mapped out the external dimensions (18.5" x 11"). I then located the center of the 18.5 (9.25") and marked and scribed a line with my center punch. I further subdivided the 9.25" into a 6" and 3.25" segment and marked and scribed a line with the punch. When scribing a line, it is important to use a metal edge and scribe a few times deeply to greatly wound the metal. This makes bending easier and the metal succumbs at it's weakest points (the scribe marks). After this, I located where my center points for the 1.5" holes will be. I used a power strip and measured in from an end to locate the measurement of a specific port, and that to the next, and next. I am using 3 socket splitters that are 1.25" dia, so I cut the holes for 1.5" for some play. When cutting the holes with a hole saw, be sure to remove as many burrs as possible as they can be a hazard when handling later.

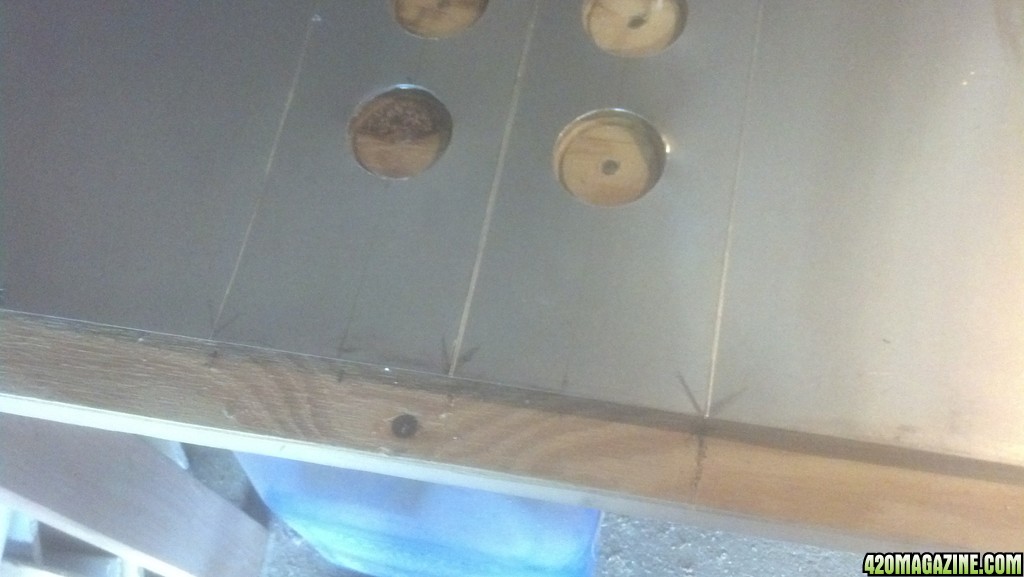
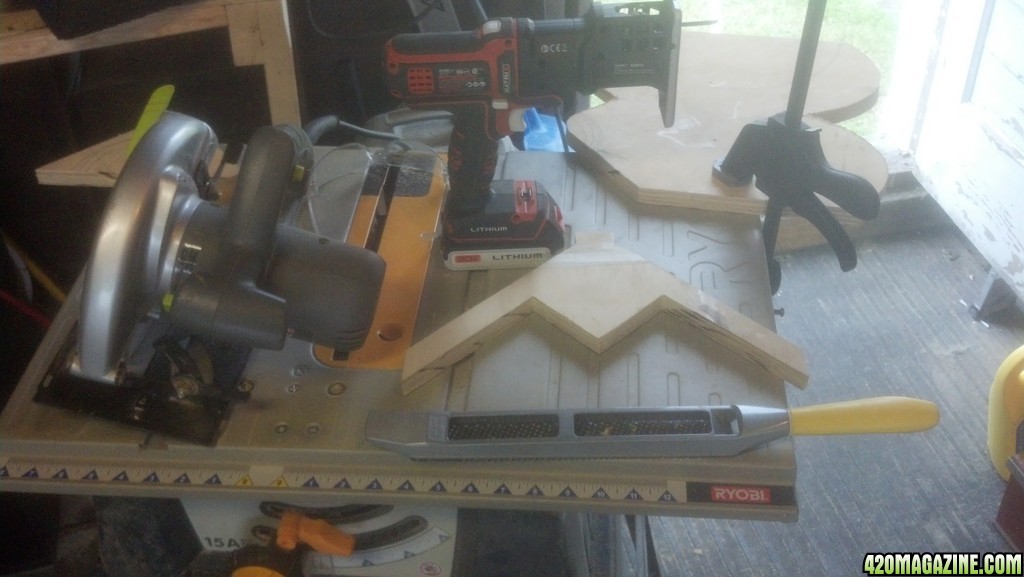
After the holes are cut, go cut the chassis, both front and back. Try to make them identical. Because my table saw is in need of a blade, I had to use a circular saw and jigsaw to make all the cuts. I aligned the 2 as close together as I can get them, then screwed them together and planed/filed until they were nearly identical, then unscrewed them. I also cut the 1x1 that the power strip will be mounted to. I then cut the external dimensions of the metal and it rolled back up some. I had to keep it weighted to finish all the cuts. I also lightly grinded the outside edges to remove some burrs. I then folded the metal over my work bench at the center point. this was easy and I pressed it out with my fingers to get the bend as defined as possible. I flipped the metal and had to wave my head back and forth some to see the indentations from the other 2 scribe marks. I picked one and centered it over the bench and made a bend. Once it was straight, I also pressed it between my finger to better define the fold. I repeated the other scribe and the metal was done.

I then put the chassis together and began to screw the metal to it. I started with an inside corner, using my center punch and a drill to counter sink the holes a bit to ensure the screws sink properly. Once all the inside corners were fastened, I then worked my way out in a cross step fashion on each of the 6" wings till each was complete.

IMG_20130813_174935_052.jpg
IMG_20130813_182452_680.jpg
IMG_20130813_183020_498.jpg
IMG_20130813_190647_402.jpg
IMG_20130813_194840_458.jpg
IMG_20130813_195035_914.jpg
IMG_20130813_195201_564.jpg
IMG_20130813_202128_300.jpg
IMG_20130813_204535_912.jpg
IMG_20130813_205742_618.jpg


Now when I said I tried to make all of my measurements first, well.... i failed a bit. I neglected to add the thickness of each of the 3/4" plywood chassis boards. So I now have to cut holes 1.25" x 1.25" in each to fit my power strip and of course have to wait till midnight for lights out to get it all. I think I will be able to make it all work. If not, I will have to build a third reflector, 2nd of this same design to measure 18" by 12.5".

I hope this helps someone that needs something like this.
 
Update;

I was able to work out most of the bugs in my new box and must say I am greatly impressed (self pat on the back). Temps stay roughly at 76-78F, there is now ample room to grow, even room for 2 so I can go perpetual in the future. The upper veg/clone room is great for storage until I can a T5 and clone dome (and of course females). there are almost no light leaks, and I am able to now use both PC fans (@110 CFM each) with less noise. The CO2 is rigged up and everything is everything so they say. I flushed the soil today with 1/2 gllon of proper pH water, Mixed the other half gal with the 50% mix to dilute it to 25%. I removed some of the lower foliage (lollipop) as it was not growing and just hanging down toward the soil. I also misted the top with a spray bottle for a light cleansing and heat management as the tops are a few inches from the bulbs.

Today was a productive day I'd say.
 
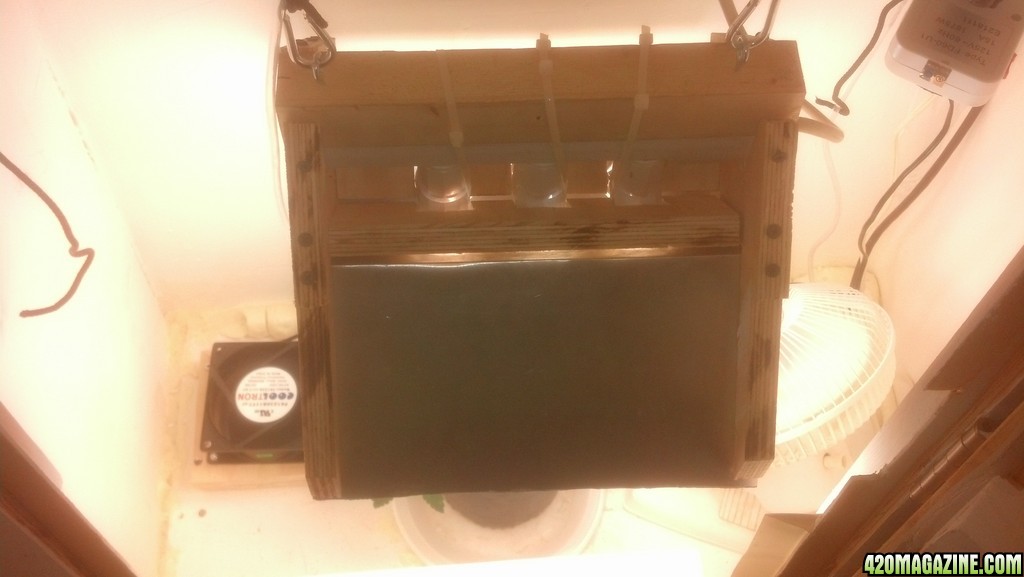
Before work yesterday, I was able to make a few minor adjustments to the reflector, but now it works flawlessly save for a few scuffs on the aluminum. I cut notches in the chassis to fit the 11" long 1x1 that the power strip was mounted to. This left me with little wood to screw to, so I had to add some 3/4 plywood cuts to the upper edges to beef it up. I also enlarged the holes in the metal another 1/4 inch for better clearance. i also cut 2 more pieces of plywood into a fork like spacer to ensure the sockets do not move the slightest. These are mounted just under the skin and can be seen in the pics below. If I could change anything, I would have made the wings a tad thicker, but other than that, I am impressed and I think this plant will thrive under the added lumens. i just hope it's a girl. Can anyone tell me when it's safe to take clones, and how many can I take?

IMG_20130814_103449_487.jpg
IMG_20130814_103436_563.jpg
IMG_20130814_103521_823.jpg
IMG_20130814_103459_041.jpg

Sky. first, that hood you made is so badass I am proud of it!+reps! Now, What I do when I want cuts from a plant is to raise the light, make em stretch and they will put out the nice cuts for me. If you're going to take em off a plant that you plan on flowering, or is in flower already, let the plant grow and take the cuts from the lowest branches that don't get a lot of light, and will probly never produce the bud you want, the energy spent on those branches will just be diverted to the other branches. Remember, this is just my opinion, and their are usually different approaches to accomplish the same goals....but that light hood is the best I've seen for those bulbs!
 
Thanks for the encouragement mcloadie! Like anything in life, it is always the first person's responsibility to utilize another's opinion or not, and to research it to the utmost extent. I, have also done my own research, I was just looking for confirmations from other people's application. I will get some supplies this weekend (clone dome, cubes, gel and T5) and have at it just after the next feeding. i even saw a video last night where the grower puts a container of water under the dome with an air stone to keep the moisture levels high. i think I'll give that a whirl. at any rate, thanx again, you've been a tremendous help, +REPs back at ya!!
 
CFL Reflector Wing Dimensions;

CFL_Reflector.PNG
 
very nice Do It Yourself reflector! you should consider making a guide for it in the DIY section of the forum. take clones from the lower branches that come off the main stem, you want a 4 inch stem minimum to clone with. if you make sure to leave a node on the lower growth you will have 2 branches that are able to continue and provide more clones. your plant appears to be too small still to provide you with clones yet.

Do It Yourself
 
Thanks John. I was planning to start cutting today, had you not set me straight. I will wait some more.
 
CFL Reflector Wing Dimensions;

CFL_Reflector.PNG


Very nice work sir, this is super valuable, quality information...........your clones will be with you soon. That Idea for the moisture in the dome is good!, I run my dome at above 80% rH. Don't trip on your clones.....it's really simple, and I have found that confidence goes a long way in this area.....you're doing great!:cheer::thumb:
 
As per John's suggestion, I just completed a tutorial in the DIY section. Also included one more schematic, but aside from this journal it's more to the point for the obvious reason.

Sheeting_layout.PNG
IMG_20130816_105603_370.jpg
 
very nice handy work, well done, id agree with mc about the plant getting bigger before taking clones, taking them to early can slow the rooting down,

do you have something to use for clones, i cant rememer as i read that many journals,

the ffof is pretty hot for the plants and if you not long transplanted then the roots wont of get all around the pot yet so its probably got plenty of nutes in it, i wouldnt flush as flushing can cause more problems due to roots not getting oxygen,
what i would do is follow a feed scedule like
feed/plant water/plain water/feed,
that way the plant is using up all the nutrients it needs and as the plant gets bigger you can give nutes every other watering. we tend to give the plants way to much as we forget their just weeds so they dont need lots of nutrients compared with fruit and veg or house plants, also make sure the grow medium is drying out before you water again,

nice job with the set up, sending you some reps for that,
i couldnt tell by the pics but have you mounted a fan at one end of the hood, doing this will alow you to get the hood as close as possible and would also stop heat building up at the left of the plants.

my hps batwin type hood is not a cooled hood so at the end with the bulb fitting i mounted a 12v computer and had it blowing the air out of the hood instead of it blowing across the bulb, so when i put my hand in front of the fan i can feel the hot air and as these hoods dont have vents at the top the heat builds up pretty quick so just having the 12v fan running has allowed me to get the light closer even though its not a cooled hood,

ideally id like a fan at the other end of the hood where the tip of the bulb is and have this fan blowing onto the bulb then the fan i got at the other end is blowing the hot air out the hood which allows it to rise and keeps my plants a bit cooler, im not sure why they did not cut small vents into the tops of these hoods as it would be a good idea to let the heat rise but with no vents the heat just fills the hood up with hot air until it escapes at either end, if the makes cut just a few angled vents then the light would still reflect as much but it would keep the bulb much cooler, but for now the fan i rigged up is doing the trick, plus ive just found the bag of computer bits and other fans so im going to mod the ballast as thats not air cooled but i have got room to drill holes into the casing along one side then ill seal 2 fans to it so the only place it can get air is from sucking it past the ballast, that should then keep the ballast much cooler and prolong its light,
ill rig up a filter over the cut out vents all ready it in so it dont just keep sucking in dust cuz when i put my fan over the holes on the ballast i could feel it was sucking the hot air out so i think that would prolong the life and cut down the fire risk due to it over heating, i know some new ballasts come with a fan so im going to do the same to mine
 
Due to the fact that my bills were deferred to next week, I went a little crazy at the hydro store today, plus I elected to not build my own carbon filter and parted with the $40 to get one from home depo. Today I picked up a clone dome and tray, 6500k 2' T5 for the upper veg/clone room, a 550 GPHwater pump for the aero bucket, Hydroton, Rootech gel, 1" rockwool cubes, 2 outlet digital timer, a pipette, some corks for my water level indicator and GH Armour Si (Silica). Oh and some more yeast for the CO2 production.

I know I'll likely catch a verbal lashing for this idea, but I want to transplant this plant into my Aeroponic bucket and take clones first. I raised the light about 2-3 days ago to promote a little stretching and I notice the gain in height already. From dirt to the split where I topped (above FIM) is 7", the stem diameter at the base is about 3/16" to a 1/4". The frame of the plant looks very sturdy. I see about 3 or 4 sites I can get clones from and since I want to lollipop it for ScrOG and super cropping getting those clones are inevitable. When I give it the 25% strength Flora feeding, it responds in a growth spurt, usually noticeable in just a few hours. When I flush out the nute build up, it just survives. I'd like to keep it in the growth spurt and in spite of the Vets always telling us noobs to stick in organics for our first grow, I still want to jump over to hydro. That is where my money has been going since I took over this project and I feel I'm better equipped for that type of grow. Correct me if I'm wrong, but isn't hydro exactly what you put in it that it gets? I gotta say, I am hard pressed to find out exactly what is in my Ocean Forest aside from the 40% perlite I added. I have seen the plethora of what additives are in it, but what is the exact composition? I feel it's be easier to know exactly what is in the hydro res, and if/when mistake occur, it would be easier to identify what and most of all learn from it.

For me to finish building my Aero bucket the way I want it, and also install the T5 and get the clone room ready, I estimate will take me about 3 days of working at it when I can. This should be enough time to read any hopeful replies this post gets and possibly reconsider my current decision. If it helps, the guy at the hydro store is not too sure of my success and wished me the best of luck with that transplant. He did say to get as many clones as possible before trying to transplant though. Worst case scenario is I keep it in the FFOF and put some seeds in a few cubes and start'em in the clone dome as I have everything needed to get that project rolling.

Hope to hear back from you great people on this.
TYIA!!!
 
Good weed sky!, you have great enthusiasm, I would very carefully develop my plan at this point........you have one plant.....I would suggest that you don't try to convert a plant from soil to hydro at this time. What you're proposing is a tricky maneuver, oh, it can be done, but at this time in your grow, you want to get some growth in those boxes that is a sure hit.........I mean it WILL work..... but there is a chance for failure. Your plant is going to produce branches that you can root very soon...........I would leave that plant in soil, take cuttings at the appropriate time...........root them in a hydroponic environment.....and grow them in it. The cuts you root are going to grow quickly once they are established........and I would keep that soil plant growing and vegging on the side til the cuts catch up, then you can flower em all, or keep the soil plant for a mom. This will give you options for most every circumstance that could occur.
 
Currently, I dont have the footprint big enough for both the roughneck tote and a flower pot, but that may soon change. If I am able to acquire more floor space, I would definitely do that, and believe me, I am researching every possible option for more security and floor space. At what point would you suggest it to be safe to get some cuttings? Is there a rule of thumb for height or number of nodes? My lower most stems are getting thick and if I hold off too long, I may need a chainsaw to get a cutting.

Also, this may be from too much stress, feeding fluctuations, or other factors, but my leaves appear to be slightly powdery. Not to the point that they match the description of powdery mildew, but along those lines. Plus most leaves have a slight fold in the middle. I wish they can all have that plastic look like everyone else's plants.

IMG_20130817_095641_732.jpg
IMG_20130817_095626_944.jpg
IMG_20130817_095612_549.jpg
IMG_20130817_095312_823.jpg
IMG_20130817_095254_209.jpg
IMG_20130817_095242_494.jpg
IMG_20130817_095219_174.jpg
IMG_20130817_095203_271.jpg
IMG_20130817_095139_790.jpg
IMG_20130817_095129_939.jpg
IMG_20130817_095122_638.jpg
IMG_20130817_095102_862.jpg
IMG_20130817_095044_162.jpg
IMG_20130817_095035_685.jpg
IMG_20130817_095008_635.jpg
 
The plant looks good Sky. I'm not sure of when or how long you have to wait before taking a clone, but i would say just on looks that your plant is big enough to take a couple of lower branches for cloning.

:rollit:
 
Currently, I dont have the footprint big enough for both the roughneck tote and a flower pot, but that may soon change. If I am able to acquire more floor space, I would definitely do that, and believe me, I am researching every possible option for more security and floor space. At what point would you suggest it to be safe to get some cuttings? Is there a rule of thumb for height or number of nodes? My lower most stems are getting thick and if I hold off too long, I may need a chainsaw to get a cutting.

Also, this may be from too much stress, feeding fluctuations, or other factors, but my leaves appear to be slightly powdery. Not to the point that they match the description of powdery mildew, but along those lines. Plus most leaves have a slight fold in the middle. I wish they can all have that plastic look like everyone else's plants.

IMG_20130817_095641_732.jpg
IMG_20130817_095626_944.jpg
IMG_20130817_095612_549.jpg
IMG_20130817_095312_823.jpg
IMG_20130817_095254_209.jpg
IMG_20130817_095242_494.jpg
IMG_20130817_095219_174.jpg
IMG_20130817_095203_271.jpg
IMG_20130817_095139_790.jpg
IMG_20130817_095129_939.jpg
IMG_20130817_095122_638.jpg
IMG_20130817_095102_862.jpg
IMG_20130817_095044_162.jpg
IMG_20130817_095035_685.jpg
IMG_20130817_095008_635.jpg

You could take the four lowest branches right now, when I top, I wait til at least 3 sets of leaves, take the internode out after the third or fourth set, then I take the internode out of the next set on the two internodes from the new branches that form...AFTER the first set of leaves on those. This will give you 8-10 main colas.....if you never top again. The more you top...the more colas you have, but they will be smaller...same quality......just smaller. Your plant looks good bro!, I would take that plant! Your plant isn't going to look like other plants...it's going to look better! Your plant is lving what you're doing. Are you in a particularly dusty area?, my plants are covered with dust this run........it depends on how I'm venting the area, I have to adjust for every grow..........to get the environment the best I can! I have never heard you mention it much, but what are your conditions?..........rH and temp.. Look at the branches of your plant, you see how thick and sturdy they are?, this is genetically pre-determined, and is an indicator of the fruit it will bear. In my experience.....a plant will be thicker branched if it's going to produce heavy fruit.....that plant looks like a thick boned girl.........and we all know "fat bottom girls make the rockin world go round". I would prepare to transplant one more time.
 
Back
Top Bottom