cOoL vids. I tried to copy and paste one of mine but can't seem to paste it in the upload bar where I put the pics in. How do you do it?
Navigation
Install the app
How to install the app on iOS
How To Use Progressive Web App aka PWA On 420 Magazine Forum
Note: This feature may not be available in some browsers.
More options
You are using an out of date browser. It may not display this or other websites correctly.
You should upgrade or use an alternative browser.
You should upgrade or use an alternative browser.
Musiks' first grow/ bagseed 2009
- Thread starter musikgenman
- Start date
- Thread starter
- #82
musikgenman
New Member
I first upload the vids to you tube, then it gives me a url code and an embedd code. All you have to do is copy and paste the url code in your post, the site automatically wraps the proper coding around the video, its really that easy. The site also auto centers it, so you can't put the video where you want.
You would type something like that and leave it. Video will pop up in post preview, if doesn't something is wrong.
Hope that helps.
Musik \\\vVv///
You would type something like that and leave it. Video will pop up in post preview, if doesn't something is wrong.
Hope that helps.
Musik \\\vVv///
InhaledFreq
New Member
cOoL vids. I tried to copy and paste one of mine but can't seem to paste it in the upload bar where I put the pics in. How do you do it?
Instead of copying and pasting in the uploader bar for pics, copy and paste to the hyperlink button. No need to highlight any text or anything, just press the hyperlink button, enter your video's url and press enter (or click Ok). That's all there is to it.

HalfOrange
New Member
Nice work with the vids and the plants, it adds a lot to your journal.
OH, OK... so I'll put a lil vid in tonight. Thanks guys!
- Thread starter
- #86
musikgenman
New Member
How come everytime i spend money it seems like my plants love me more and more. LOL Now officially $1,000 USD into the hole. But hey my plants love me.
See I had this little problem with people coming over asking why it smelled like a greenhouse but there were no plants in my house!!!! I dont want everybody knowing what I am doing. So off to the brew shop/hydro shop. By the way if anyone wants help getting started in brewing their own beer, my household brews (how i got to the hydro shop in the first place LOL) some pretty good beer. So off to the hydro shop, I needed a charcoal carbon filter(smallest one they had was $94.95 USD for a 4x9 filter), I needed an inline fan (200cfm "Wind Tunnel") which was $119.95 USD. 25 feet of Aluminum ducting which was $20 USD. Aluminum Tape Heat/Cold resistant was $5.99 USD(didn't need much but i have more for later or around the house, and clamps which were about a buck a piece, I also picked up a Soffit Exhaust Vent which also acts as a backdraft damper so no air comes back in, and I vent this air right outside. No messing around, its gonna dissipate quickly, nobody can see the exhaust port unless they go looking for it, and if anyone finds it, I just tell em its the exhaust for the bathroom, which we have been leaving on because its been stinking up the house. When you enter the room the smell just blows you away, I dont know who said these don't smell during veg, cause they were wrong. I know that during flowering the smell is gonna be really potent, so Im glad I went ahead and got a proper exhaust system.
To tell you the truth the most expensive parts were the lights (400w Ballast, 400w Hortilux Super HPS Bulb, with reflector) and the Exhaust(Filter and In-line Fan).
Believe me when I tell you this, I CAN"T WAIT TO POST PICTURES AND ANOTHER MOVIE, especailly before I flower.
OKAY I am almost past the halfway marker, I am ready to flower.
When I post pictures I would love it if people would mention what they would do, I know most of you would have been trimming or done a scrog, just remember this is my first grow.
So Im ready to flower, my plants are big enough, What would be the first thing you would do?
I will reiterate when I have pictures which is hopefully gonna be tonight.
(THE PLANTS ARE FUCKING HUGE, well way bigger than I thought by now!!)
Thanks for checking my grow out, I promise pics and a vid ASAP!!!! As soon as my sister lets me use her camera again!!!!!
Musik \\\vVv///
CharlieMopps
New Member
I can't wait to see the pics. Do you have enough vertical space for plants to double in size? If not, you should top them before switching to 12/12.
Pericodaking
New Member
^agreed
Happy Kitty
Well-Known Member
It is easy..you've got some great instruction on how to do it.
make sure to stop by here - How to Post Videos
If you still are unable to post your video, let any of the moderators know, we'll be happy to help.
Peace and 420
make sure to stop by here - How to Post Videos
If you still are unable to post your video, let any of the moderators know, we'll be happy to help.
Peace and 420

Sonzor
New Member
Once you start the bucks just keep adding up. I try to make what I can and buy the rest but its still not cheap. Im sure one day when everything works perfect it will get cheaper. Cant wait for that. But its all worth it, This growing stuff is fun as heck. Good luck with the flowering and good thing you got that filter cause you think you have a oder problem now, when you have some big, sticky buds growing on those things its going to really give your nose a treat. Good luck and great job.
- Thread starter
- #91
musikgenman
New Member
Ladies and Gentlemen!!! Boys and girls!!! Are you Ready!!!!!!
LOL sorry it took a bit, but then again, its only been 4 days. Remember the last video? I suggest taking a look at the previous videos in concession. The difference between them is astounding!
Okay so I thought I could do the ventilation cheaper, then I talked to a few people who inspired me otherwise. See the ventilation takes care of 3 essential things in a "grow room" or "grow box"
1. Cools the light
2. Rids of heat and stale air
3. Gets rid of the smell
So with that in mind I decided to do it Right!!!!
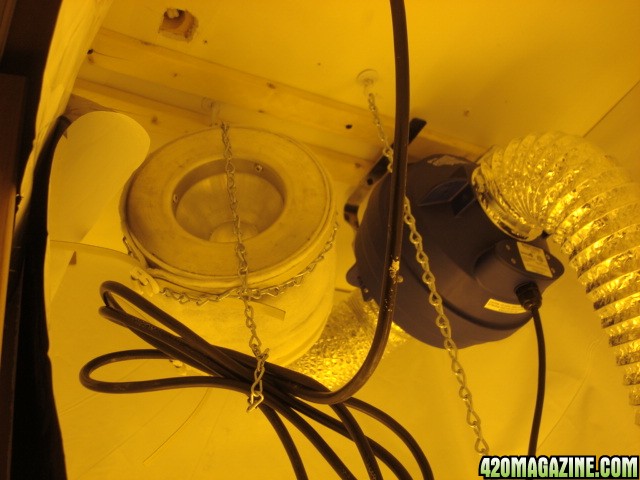
This is the charcoal carbon filter (4x9) and the "Wind Tunnel"
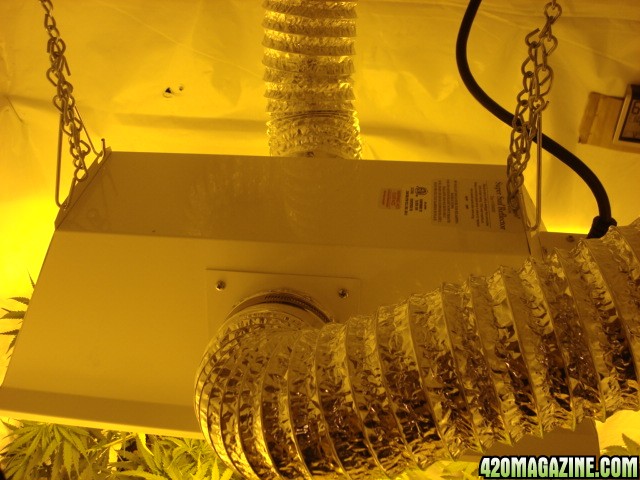
Of course its connected to the light which helps keep the heat from the bulb from reaching the plants, heck, heat make it out of the reflector? barely!
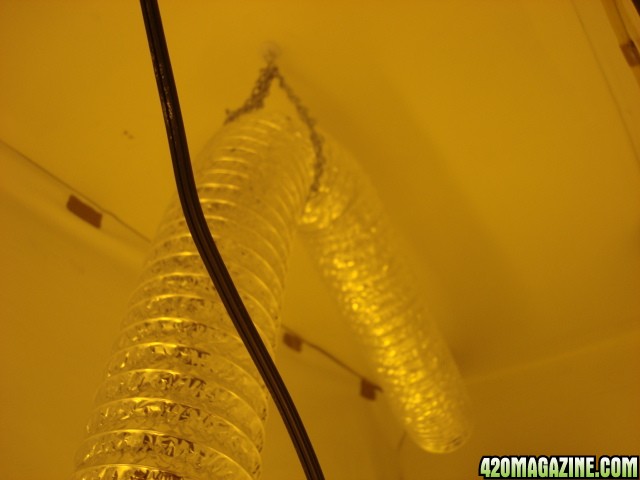
Just some 'flexible aluminum ducting' hung up by the ceilling', figured i'd use up some of the extra chain i had lying around
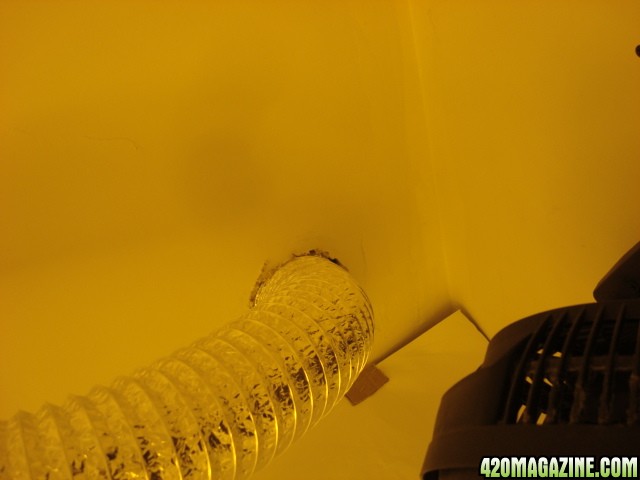
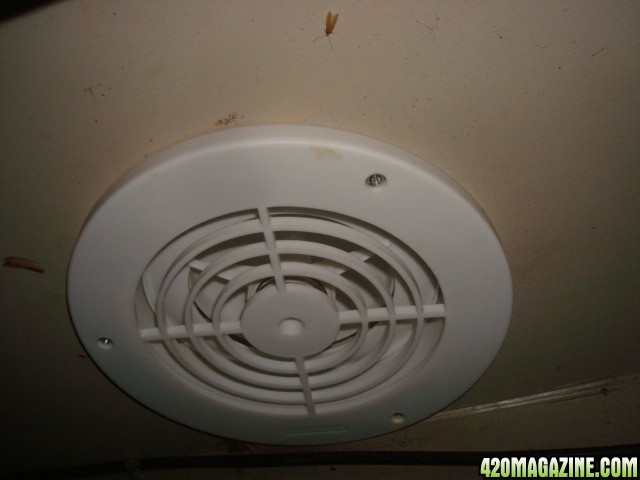
I needed a 4'' hole saw which was $30 USD after the hole saw and pilot drill bit. So exits closet then exits house via Soffit Exhaust Vent. And yeah live out in country where there are bugs everywhere. I've found a few bugs, ants, centipedes, millipedes, sow bugs, spiders, gnats. I kill what I can but i know its not been too much of a problem yet.


So big and green and bushy!!!!

Okay so now I have my third part to the formula, i really didn't care too much that they weren't getting this during most of veg and some reservoirs don't even have this yet.

Here is a picture of the Hole Saw I had to buy! Only needed it for that one hole from inside the grow room but well worth the purchase. The outside hole a neighbor let me use his electric saw. I had to drill pilot holes where the saw was cutting.........im glad that is over!

Ever since the installation of the ventilation, the humidity jumped 20% temperature dropped about 10 degrees and I think we have optimum conditions for the plants now.

I now have somewhat proper equipment to read my water conditions, just need to read temperature of the water and I should be all set.

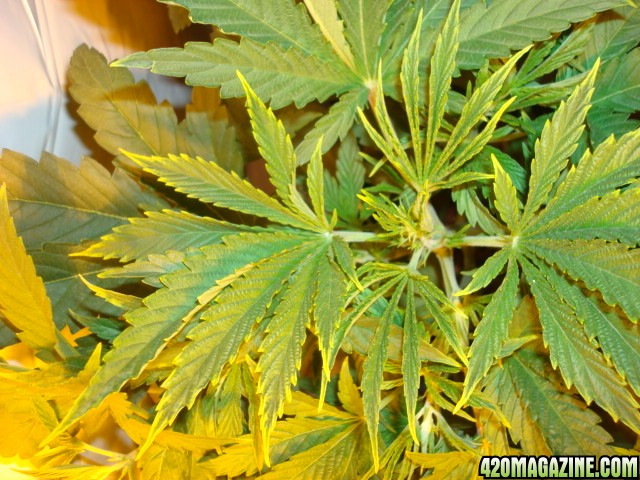
Now alot can happen in 4 days, I dont know how to assess this issue, Im not sure its an issue. I honestly was hoping that it was from shock more than anything else. Maybe minor nute burn, but not exactly what i've read about nute burn. This happens to fan leaves closest to the tops. ?????
Okay have you had enough? was that enough pictures to keep you mongrels happy? I thought so......
YouTube - Science Project Alpha
Enjoy!!! Thanks for checking out my grow. Please if you can help with problems or have advice don't be shy!!!!


And this is some Headbands my buddy hooked me up with!
Musik \\\vVv///
LOL sorry it took a bit, but then again, its only been 4 days. Remember the last video? I suggest taking a look at the previous videos in concession. The difference between them is astounding!
Okay so I thought I could do the ventilation cheaper, then I talked to a few people who inspired me otherwise. See the ventilation takes care of 3 essential things in a "grow room" or "grow box"
1. Cools the light
2. Rids of heat and stale air
3. Gets rid of the smell
So with that in mind I decided to do it Right!!!!
This is the charcoal carbon filter (4x9) and the "Wind Tunnel"
Of course its connected to the light which helps keep the heat from the bulb from reaching the plants, heck, heat make it out of the reflector? barely!
Just some 'flexible aluminum ducting' hung up by the ceilling', figured i'd use up some of the extra chain i had lying around
I needed a 4'' hole saw which was $30 USD after the hole saw and pilot drill bit. So exits closet then exits house via Soffit Exhaust Vent. And yeah live out in country where there are bugs everywhere. I've found a few bugs, ants, centipedes, millipedes, sow bugs, spiders, gnats. I kill what I can but i know its not been too much of a problem yet.
So big and green and bushy!!!!
Okay so now I have my third part to the formula, i really didn't care too much that they weren't getting this during most of veg and some reservoirs don't even have this yet.
Here is a picture of the Hole Saw I had to buy! Only needed it for that one hole from inside the grow room but well worth the purchase. The outside hole a neighbor let me use his electric saw. I had to drill pilot holes where the saw was cutting.........im glad that is over!
Ever since the installation of the ventilation, the humidity jumped 20% temperature dropped about 10 degrees and I think we have optimum conditions for the plants now.
I now have somewhat proper equipment to read my water conditions, just need to read temperature of the water and I should be all set.
Now alot can happen in 4 days, I dont know how to assess this issue, Im not sure its an issue. I honestly was hoping that it was from shock more than anything else. Maybe minor nute burn, but not exactly what i've read about nute burn. This happens to fan leaves closest to the tops. ?????
Okay have you had enough? was that enough pictures to keep you mongrels happy? I thought so......
YouTube - Science Project Alpha
Enjoy!!! Thanks for checking out my grow. Please if you can help with problems or have advice don't be shy!!!!


And this is some Headbands my buddy hooked me up with!
Musik \\\vVv///
Sonzor
New Member
Very, very nice, looks like you are well on your way, Getting to be a great setup you have there. The plants are looking very nice, Great job. I would give you a rep. but they won't let me. Hopefully next time.. Again great job...
InhaledFreq
New Member
Love the video! Makes me want to add video to my journal. 
musikgenman, thank you for posting this journal! You have made in reality a grow room setup/growing method that I have been dreaming of ever since I grew my very first plant. I get to experience the grow in real time vicariously through your journal and learn from the experience before I actually spend the time and money to do it myself, so again thank you, and everything is looking very nice, btw!


musikgenman, thank you for posting this journal! You have made in reality a grow room setup/growing method that I have been dreaming of ever since I grew my very first plant. I get to experience the grow in real time vicariously through your journal and learn from the experience before I actually spend the time and money to do it myself, so again thank you, and everything is looking very nice, btw!


fuuji0019
New Member
Niiice, your setups improved loads, great choice of HPS, you'll really notice the difference especialy with the reflector. Looks perfect now!!
Look at the growth spurt from the one in the corner!! Keep a close eye but everythings looking good. The yellowing tips of the one plant is looking like a nute problem but could also be linked to the new changes. Lets us know how its going, and do a new ph test.
Love how bushy they're getting
Look at the growth spurt from the one in the corner!! Keep a close eye but everythings looking good. The yellowing tips of the one plant is looking like a nute problem but could also be linked to the new changes. Lets us know how its going, and do a new ph test.
Love how bushy they're getting

- Thread starter
- #95
musikgenman
New Member
Thanks everyone for stopping in, I love the new setup myself! My household really appreciates the ventilation.
Fuuji you know before I even checked back on the site I had done a ph test and in that bucket the PH was over 8, I checked all the other ones and they were between 5 and 6.5 according to my liquid PH tester. I put the reservoir to 5 then added some freshly de chlorinated tap water, so the ph was higher and that solves that problem....i hope! We will find out.

If you look at the notepad that was me adding up the ppm as I added the different nutes, I wanted to get a generalization as to how much ppm of each I was putting in. I had already tested the reservoirs which were all at or under 1200ppm according to the sunleaves TDS pen. of course you see 1160 which was about average of each gallon that I mixed up before setting up the two new buckets and filling the 10 gallon reservoirs(which the plants drink that water fast, teaming up or fighting for it i dont know, but they sure are greedier when teamed up). Well according to the EC conversion of 3 different other TDS devices My EC could be anywhere from 1.7 to 2.1, which i'd say is about in range and I think i've been following the directions on my bottles just fine. now that I have the missing link for the bloom formula. FLower Time!!!!


Again thanks for stopping by. I think its time to flower these, as I don't have but a few more inches in vegetation I can spare. Might be a close one for me on my first grow. I'm down for the challenge. although should I maybe top a few plants and give it another week? Naw I really wanna know which ones are the males and I think that these plants are getting big, i've counter talked myself into it!!! Stay Tuned!!!!


Musik \\\vVv///
Fuuji you know before I even checked back on the site I had done a ph test and in that bucket the PH was over 8, I checked all the other ones and they were between 5 and 6.5 according to my liquid PH tester. I put the reservoir to 5 then added some freshly de chlorinated tap water, so the ph was higher and that solves that problem....i hope! We will find out.
If you look at the notepad that was me adding up the ppm as I added the different nutes, I wanted to get a generalization as to how much ppm of each I was putting in. I had already tested the reservoirs which were all at or under 1200ppm according to the sunleaves TDS pen. of course you see 1160 which was about average of each gallon that I mixed up before setting up the two new buckets and filling the 10 gallon reservoirs(which the plants drink that water fast, teaming up or fighting for it i dont know, but they sure are greedier when teamed up). Well according to the EC conversion of 3 different other TDS devices My EC could be anywhere from 1.7 to 2.1, which i'd say is about in range and I think i've been following the directions on my bottles just fine. now that I have the missing link for the bloom formula. FLower Time!!!!
Again thanks for stopping by. I think its time to flower these, as I don't have but a few more inches in vegetation I can spare. Might be a close one for me on my first grow. I'm down for the challenge. although should I maybe top a few plants and give it another week? Naw I really wanna know which ones are the males and I think that these plants are getting big, i've counter talked myself into it!!! Stay Tuned!!!!


Musik \\\vVv///
Pericodaking
New Member
^Everything looks pristine, I'm glad your having fun with hydro, it's so much better than soil IMO, I can't wait until all my soil girls are done so I can switch entirely to hydro once I build the new box. the yellowing tips seem to be not a nute burn so much as a nute deficiency. check your ppm and pH daily especially right after lights on and right before lights out if you can. at this point now that the girls are drinking up so much water it changes the consistency of the res. your readings will literally rollercoaster throughout the day if your not careful. and remember you've got a 400w hps in that badboy and water evaporates, so it will leave your res with a higher concentration of nutes at times. just my 2 cents  +rep if I can for now only doing this, but doing it right!
 +rep if I can for now only doing this, but doing it right!
- Thread starter
- #97
musikgenman
New Member
Thanks for stoppin in Pericodaking, You might be able to tackle this one for me, now these are tiny, like ball point on a ball point pen tiny, and I'm not sure but it might be some preflowers. Male or Female? who knows. I haven't the slightest.


What do you think?
Musik \\\vVv///
What do you think?
Musik \\\vVv///
I think you know what they are brother......lose them...you got mebe 10 days
- Thread starter
- #99
musikgenman
New Member
you really think so?
other ones turned into leaves. I just wanna cover all grounds here. I haven't even started flowering.(in fact i just clicked the timer after the lights went on this A.M.) 10 days huh?
Musik \\\vVv///
other ones turned into leaves. I just wanna cover all grounds here. I haven't even started flowering.(in fact i just clicked the timer after the lights went on this A.M.) 10 days huh?
Musik \\\vVv///
Pericodaking
New Member
Here is a general rule of thumb that I follow and it's been just about 100% accurate....If ever there is a doubt as to the sex, don't delude yourself it "might" be a girl lol, cuz you already know what it is, a girls pistils are so distinct and although they can be misconstrued for simple leaves, you will deff. spot those long whispy white hairs lol!
now that my friend that you've got on the pick is a boy. now I may be wrong, but i'd be willing to go on record that i'm >75% sure it'll have sacks in a few days.
and as far as sexual maturity goes, these plants don't really care whether or not you put them on 12/12 to sex them, all that does is speed up and begin the process of flowering.
once a plant is mature enough (5-7 nodes) it will begin to tell you what it is (pre-flowers) male preflowers often look like tiny little balls just he way you described it like the tip of a ball point pen which will rapidly become larger and clustered, and more tube shaped, eventually you'll have some man sacks hanging around your grow room. now if your objective is to breed them go ahead and keep him, but outta sight and outta mind, and take some of his pollen when its time in a zip lock, store it until about week 5 or 6 of flowering your actually females and use a clean paintbrush to brush on the pollen to desired pollen sights, (to have viable seeds you'll need a good 3-4 of the end of the flowering cycle. hope that helps


