Xlr8's Hydroponic Adventures & Photos From The Garden - 2012

Re: Xlr8's Hydroponic Adventures and Photos from the Garden - 2012

I was going to say the same thing as OMM, busy as hell over here for a "non-journal"!

You're totally rockin' the grow, though, despite the fact that you don't feel 100%. You've come a long way since the days of the mother ship!! Always an inspiration Brother:high-five:

Haha, thanks Quix. I'm having fun, but it's a lot more work than I thought keeping up with, and keeping track of everything going on. :)

:thankyou:
 
Re: Xlr8's Hydroponic Adventures and Photos from the Garden - 2012

Time to start thinking ahead a bit to what I want to flower after the current group in the Flo N Gro.

I'm already 2 weeks into flower with the girls in the Flo N Gro, and before you know it, it'll be harvest time -- probably mid to late April. I've decided to germinate a Chocolope seed that I'll keep as a mom (if it's as good as the last one I grew). Ideally, she'll be ready for cuttings by the time this current round finishes.

To go with her, I'll take a couple of cuttings from the Super Lemon Haze mom I'm keeping - so I'll plan to flower 4 plants (from cuttings) for the next round: (2) Super Lemon Haze, and (2) Chocolope.

I'll keep 4 moms for now - Super Lemon Haze, Deadhead OG, Jack the Ripper, and Chocolope. Once I've got some history with flowering these, I'll begin to cull the ones I'm not crazy about and try again either with same strain or something different. I'll probably only keep a couple long term.

I wish I had more space! After the Chocolope and SLH, I'm hoping to finally get to Jilly Bean and Vortex, more TGA Subcool strains I've been anxious to grow. :)

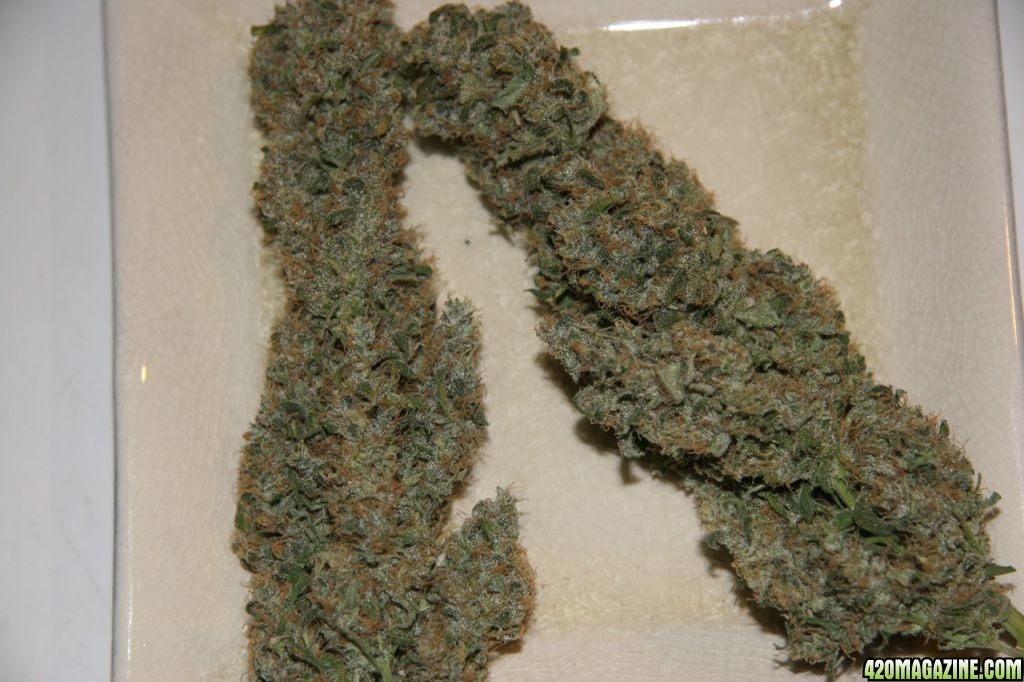
Here's Chocolope from my last grow:

dec_16_1.jpg


dec_16_2.jpg
 
Re: Xlr8's Hydroponic Adventures and Photos from the Garden - 2012

How I germinate seeds:

I really like Rapid Rooter plugs. I've been germinating seeds in them since I started growing, and now use them for cloning, too. They're great as they can be used to germinate for soil or hydro, and easy to use. They contain important micronutrients and beneficial organisms to stimulate rapid root development. They have a really nice balance between moisture retention and airiness.

Here's my process:

I soak seeds for a few hours in a glass of RO water. The Rapid Rooter is soaked overnight in a glass of RO water.

Making sure my hands are clean and sterile, I shake the excess moisture out of the rapid rooter, or give it a gentle squeeze. Basically, you want them to be "moist" but not soaked/saturated.

I take a sterile tweezers, squeeze it together, and I stick it into the hole of the rapid rooter while I gently twist it around some. I've had better luck if I deepen the hole slightly, and loosen it up a little inside the rooter plug. You could also use a pen, etc. Basically, just loosen it up and make it about a 1/4" deeper than they come from the factory.

I use a clean pen cap as a tool to scoop the seed from the cup of water, and place it into the rooter. I used to do the "paper towel" method of "pre-germinating" seeds, but it is better to plant them directly in the rapid rooter (or whatever medium you use). You will have better success, and quicker development if you skip the whole paper towel thing, in my experience. When putting it into the rooter plug, I put it in pointy end up (hinged end down). Positioning it this way will allow the taproot to make the turn it needs to, and will put the seed in a better position to succeed and remove it's "helmet".

I place the seed about half way down into the rooter (again pointy end up) and then I tear a small piece of rooter plug to cover the hole on the rooter. It should not be "jammed" in there, but placed in somewhat loosely. The hole should be fully covered to not allow light in.

I place the plug in a humidity dome, under t5's. I don't use a seedling heat mat (only for clones and not directly under). I mist the dome periodically, but high RH isn't needed to germ seeds. The rooters shoudn't be allowed to fully dry, and should be moistened periodically with plain RO water.

  • Pre-soak seeds in glass for a few hours
  • Pre-soak rooter plug 12-24 hours (probably doesn't need to be that long)
  • Use RO water from store - do not PH balance it
  • Shake/squeeze out excess moisture in the rooter
  • Use a tweezers or pen to loosen up the hole, and make it slightly deeper.
  • Position seed in the rooter plug, pointy end up
  • Cover the hole on the rapid rooter plug by tearing a small piece of the plug, and loosely covering the hole.
  • Place rapid rooter, with seed in it, inside humidity dome, under flourescent lights (I use T5's).
  • Rooter plugs should be moistened with plain RO water periodically, but only moistened
  • Heat mat is not needed - and it can dry the rooter plug too fast. Humidity only needs to be around 50%. I just mist the humidity dome periodically.
  • No nutrients are needed with seedlings until the 3rd set of true leaves.
  • I transplant when roots are showing through the bottom and sides of rooter plugs

I've had 100% success over the last year or so this way. There are lots of ways to do it successfully, this is just mine. X
 
Re: Xlr8's Hydroponic Adventures and Photos from the Garden - 2012

I do much the same as you X for Germing. I do a soak for 24 hrs or so, then drop into paper towel method. Nice tap roots show in 24 hrs.

One thing I do with the plugs though is I actually split them open lengthwise to the center hole. I place the seed exactly where I want with tap root and shell. Once placed in the rapid rooter tray the tray keeps the plug loosely closed around the seed. The reason I do it this way is I am terrible with getting the tip of seed set right and depth correct. This is the perfect way for those of us still wearing hockey helmets.:thumb:
 
Re: Xlr8's Hydroponic Adventures and Photos from the Garden - 2012

Thanks for sharing your germination technique. I just used some rapid rooters for the first time to germinate and was 5/5 all up in 4 days.
 
Re: Xlr8's Hydroponic Adventures and Photos from the Garden - 2012

Wish I had read this three weeks ago :hmmmm:
Well, I'd have been too pig-headed to not do it my way.

Planted too shallow, didn't hold their pointy little heads up, and let them get wobbly legs.
They're putting up foliage and will learn to carry it, but RRs sound worthwhile.
I only got nine of ten, and it was my Vantage bean that blew it. Missing it already.
There are compensating survivors :yummy:
 
Re: Xlr8's Hydroponic Adventures and Photos from the Garden - 2012

Whatever works for someone is all good. Splitting them after they show the tap root, sounds good to me. I use the paper towel dampened to carrying compassity with water, then covered with plastic wrap. I place it on top the cable box with a magazine on top the plate, to keep out light and keep in heat.
Those buds have a nice little coat on them. I want to try some of that myself. Keepem Green
 
Re: Xlr8's Hydroponic Adventures and Photos from the Garden - 2012

I do much the same as you X for Germing. I do a soak for 24 hrs or so, then drop into paper towel method. Nice tap roots show in 24 hrs.

One thing I do with the plugs though is I actually split them open lengthwise to the center hole. I place the seed exactly where I want with tap root and shell. Once placed in the rapid rooter tray the tray keeps the plug loosely closed around the seed. The reason I do it this way is I am terrible with getting the tip of seed set right and depth correct. This is the perfect way for those of us still wearing hockey helmets.:thumb:

I used to do the paper towel thing, but did half straight in the plugs, half with paper towels once - and the ones that were straight into plugs were up and running faster with less handling and risk for damage. And, they shed their seed casings better. Now I skip the paper towels. It works fine, but for me I now prefer going directly into the medium.

Good idea splitting them like that - that should work fine. You're right, the tray will usually hold it together. Subcool puts a rubberband around his sometimes when he clones - I could see that working too, if you didn't have it too tight (as far as after the seed is placed). I get the seed pointy tip up pretty easily with the pen cap trick - the little end that you use to hang it on your pocket (think disposable bic style pen cap) is a perfect tool for seed placing into a rooter. I got that from someone else here... SteveHman maybe? Sometimes they're still a pain to get right, though...

Thanks for sharing your germination technique. I just used some rapid rooters for the first time to germinate and was 5/5 all up in 4 days.

Cool - always feels good when they all come up, huh? Rapid Rooters rock - I can't imagine ever germinating a seed any other way I like them so much. Pretty great for low tech cloning I'm finding, too. :)

Wish I had read this three weeks ago :hmmmm:
Well, I'd have been too pig-headed to not do it my way.

Planted too shallow, didn't hold their pointy little heads up, and let them get wobbly legs.
They're putting up foliage and will learn to carry it, but RRs sound worthwhile.
I only got nine of ten, and it was my Vantage bean that blew it. Missing it already.
There are compensating survivors :yummy:

I hope this post helps someone with germinating seeds - I wanted to share it because it's worked really well and is simple.

I've had them stretch a lot before - once I had to split a straw down the middle to use as a brace. Worked pretty good. A little amount of air movement, just enough to jostle them, seems to strengthen the stems up pretty good too, but you know those tricks I'm sure.

9 out of 10 is good. Bummer about your Vantage - I've heard that's a really good one. In fact, I think it was this next guy who first sang it's praises to me:

Whatever works for someone is all good. Splitting them after they show the tap root, sounds good to me. I use the paper towel dampened to carrying compassity with water, then covered with plastic wrap. I place it on top the cable box with a magazine on top the plate, to keep out light and keep in heat.
Those buds have a nice little coat on them. I want to try some of that myself. Keepem Green

Hey buddy! Yeah, lots of ways to skin a cat, and nothing wrong with sticking with something that works for you. I used to do the paper towel thing, on a plate with a bowl over the top. Oh man, that Chocolope was amazing stuff. I have one bowl left of it... gulp. I'm so sad about that!!
 
Re: Xlr8's Hydroponic Adventures and Photos from the Garden - 2012

ahhh, the pen CAP. Now I see it working quite nicely. Good idea, thanks for passing that along.
 
Re: Xlr8's Hydroponic Adventures and Photos from the Garden - 2012

Good lookin frosty BUDS Xlr8 :peace:

Thanks Papa! Unfortunately, I'm down to my last bowl with the Chocolope - makes me sad! But, I have a seed germinating that I'm hoping will be as good as the last one - I'll keep her as a mom if she's as good.

:thankyou:
 
Re: Xlr8's Hydroponic Adventures and Photos from the Garden - 2012

A few pics from this morning. The male and the flowering plants in the tent are day 16 bloom.

Jack the Ripper male - I'm thinking in 5-7 days, I'll harvest some of his pollen and try to pollinate a branch on the OG Kush and Deadhead OG. Hopefully I can do it without pollinating everything. We'll see - I'm not worried either way, but it's worth a shot:
mar_6_6.jpg


This is the Deadhead OG clone I took, now growing nicely in it's 1 gal. coco coir smartpot in my veg space. I love how healthy and happy she looks - check out her little 9 pointer leaves:
mar_6_5.jpg


Here's a photo of the gals in the tent. Left to right, OG Kush, Deadhead OG, and Jack the Ripper:
mar_6_1.jpg


Looking from top down - I've tried to keep them low, even and spread out:
mar_6_2.jpg


OG Kush, starting to bud - she looks much better now that she's in flower - (what an ugly plant she was in veg):
mar_6_3.jpg


Deadhead OG, also starting to bud - what a beautiful easy plant she's been:
mar_6_4.jpg
 
Re: Xlr8's Hydroponic Adventures and Photos from the Garden - 2012

Dang X!!

Those are some sexy plants!!:circle-of-love::welldone::cheertwo::Namaste:


Time is a flying hey?? things are looking awesome friend, keep up the flawless work:bravo:


+reps for just being an awesome guy....and I guess rocking the grow room too;):popcorn:
 
Re: Xlr8's Hydroponic Adventures and Photos from the Garden - 2012

Scary that male in the room.......... Was Jack a fem seed? Plants are growing like weeds. They sure make pretty plants. A nice shade of green. Keepem Green
 
Re: Xlr8's Hydroponic Adventures and Photos from the Garden - 2012

Scary that male in the room.......... Was Jack a fem seed? Plants are growing like weeds. They sure make pretty plants. A nice shade of green. Keepem Green

Thanks brother. The Jack the Ripper male is in a separate room, different part of the house, with no common ducting/air supply. So there shouldn't be a big risk of contamination as long as I'm careful, but even if everything gets seeded I'm not going to stress. No, all of Subcool's stuff is regular seeds. I have a Jack the Ripper female in flower, too. Thought I'd try to pollinate a branch for a few "free" seeds (or a bunch!) this round, for fun. Thanks for dropping by! :high-five:
 
Re: Xlr8's Hydroponic Adventures and Photos from the Garden - 2012

finally caught up with the journal!

+reps
love ur methods on germinating with success

i use rooters like those! and they work great.
i think ima make the whole deeper in aswell!
my girls stretch so quick and so tall out of them they start falling over :(

ill see if that solves the problem! good journal!
 
Back
Top Bottom