

Wowsers! Isn't this just rollicking along? 
Glad you posted about ISO jus now Agemon... I had already popped a bit in my bio about it, due to a mistake I made with it recently! I haven't read the last 5 pages yet, will catch up after this!
Username:
Amy Gardner
Grow method and strains:
Really only on my 3rd-4th grow so auditioning chemovars and auditioning methods. Presently, for my first 'taking it seriously' grow, I'm outdoor and aiming for some middle ground between the mineralised soil approach of high-brix gardening and living organic. Current chemovars are Professor Chaos (TGASubcool/Homegrown Natural Wonders), CBD Critical Cure (Barney's Farm), Money Bush (Afghani x Critical Mass - Heavyweight). Have just put a 'solstice round' of seeds in (on Xmas eve): 2 from a mate that he thinks is Golden Tiger x Northern lights, and 1 Ice (Female seeds freebie) - experimenting with training these along the ground and/or up a wall. I'll do another winter grow box experiment in a few months
Camera, Lenses and Gear:
I use an Olympus SP500UZ which I bought new in 2006. As a point and shoot it was a step up from most at the time and it still takes a good pic for me. My only beef over the years has been that I've not really been able tot get prints at any decent size and maintain the digital sharpness because of the low megapixels (6MP - which was awesome at the time for a non DSLR). I underestimated how much I was going to like my own photos!
I also use my iPhone SE sometimes - it's a great camera.
I have a GoPro Hero3 that I'm learning how to use.
Experience level and photography background:
Amatuer hobbyist. Background as a performance and sound artist (nightclubs, circus, physical theatre) and DJ/producer and always loved taking photos. More recently i've Studied philosophy. ONe way pr another they're all about framing, whether the frame I sonic, visual, spatial or how you frame a thought... My father was a professional photographer - flora, landscapes, wilderness - and I accompanied him on many a feild trip, carrying the bag of lenses and the special homemade light reflector that we'd make, or touch up before we left. It was my job to hold it just right to get the sunlight hitting a flower (or whatever plant - but sooo many flowers") ) while he took the shots (and directed me a little). So I learned about light, and faking it, from an early age. I studied photography in my last year of high school too and loved it (we made pinhole cameras from scratch out of cardboard - that was awesome). All of that was pre digital, so I've kind of known about fStop and shutter speed relationships and composition as if I grew up with it, but only at a basic level. I've spent many years without a camera at all so haven't done a lot of photography until recent years (the last 15 - when you're nearly 50, that's recent years ) I am self taught in photoshop but not done a lot with my own photogaphy (mostly CD cover art and posters etc) but I did recently colour correct some blur pleas using the PS white balance adjustment - but I used white, not grey.
) while he took the shots (and directed me a little). So I learned about light, and faking it, from an early age. I studied photography in my last year of high school too and loved it (we made pinhole cameras from scratch out of cardboard - that was awesome). All of that was pre digital, so I've kind of known about fStop and shutter speed relationships and composition as if I grew up with it, but only at a basic level. I've spent many years without a camera at all so haven't done a lot of photography until recent years (the last 15 - when you're nearly 50, that's recent years ) I am self taught in photoshop but not done a lot with my own photogaphy (mostly CD cover art and posters etc) but I did recently colour correct some blur pleas using the PS white balance adjustment - but I used white, not grey.
What is your style? (portrait, journal, macro, outdoor, instructional, various)
Textural, portraits of nature. Sometimes it's narrative and sometimes it's just all about a single moment in time.
Favourite lens or type of shot:
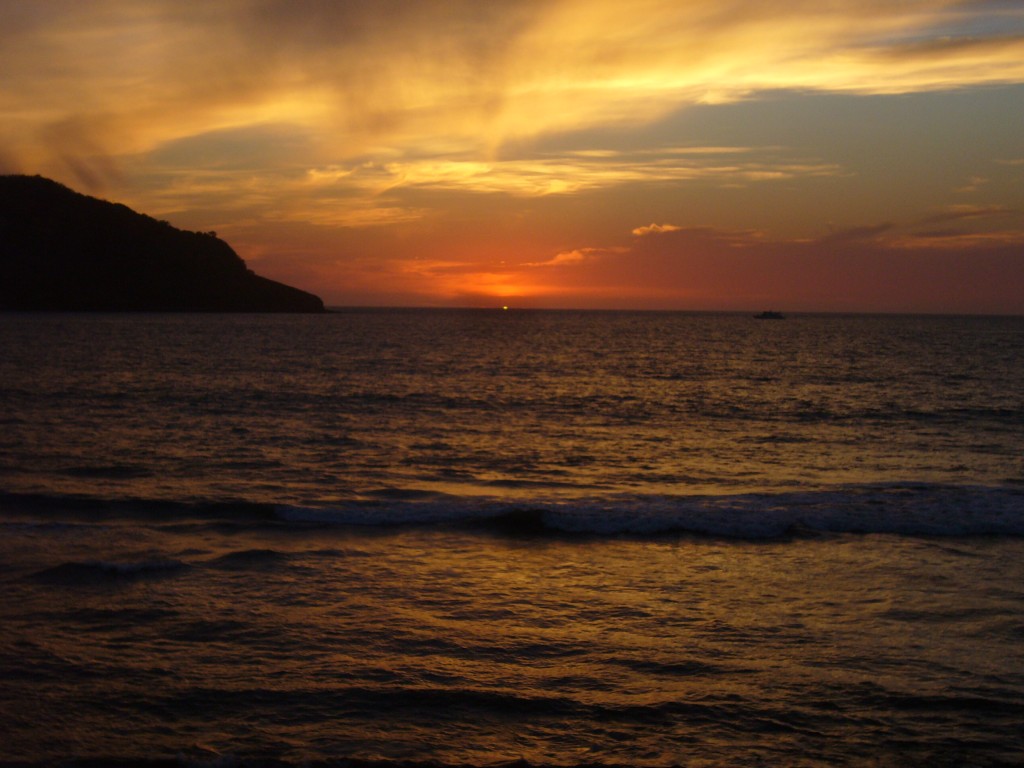
Ooh too many - I love macros, but also huge wide angle landscapes. Seeing as I don't have any lenses or the capacity to change them, it matters little.
If you could give 1 tip for new photographers:
Let it have the gift of your time.
(And I echo here the others' notes about cropping and deleting - take lots, delete almost as many and crop when needed... hence the gift of time)
Other introductory options:
Please share 1 of you favourite photos and explain why it works so well for you. What equipment did you use?
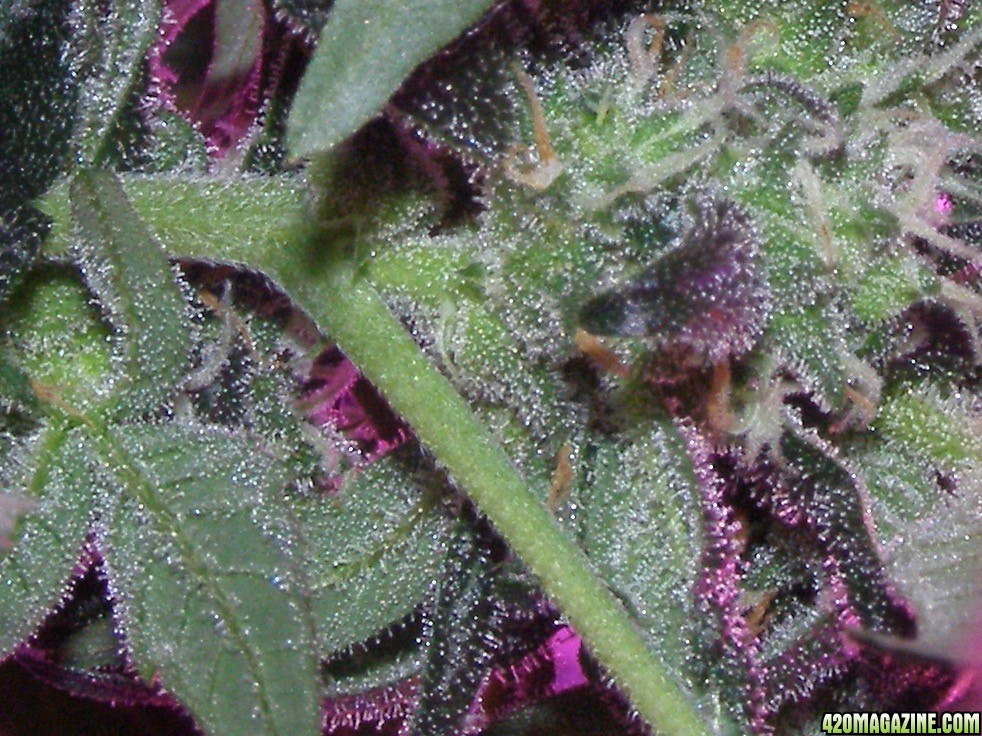
I love this because I couldn't see at all what I was doing, I just wanted to get a look at the trich production under the canopy of a very small auto. I used flash to kill the blurple (or bplink!) as much as possible and just stuck my hand with camera down there, took aim and hoped the auto focus would get it right - and it did. It was then cropped. So the photographic success is satisfying because it was an accidental outcome of something that was purely functional to start with. My pa once said to me (we were debating whether what he did was art - he resisted this notion) 'all I ever do is try to capture as much of what's going on as possible within the frame' - sometimes I think, well that's what art should do! Not necessarily claiming I managed to do that here, but it's my guiding motto.
Please share 1 technique you use in a step by step how-to.
This is minimal and not so much a technical technique but a technique of approach.
Photography for me is about weight and space and movement - I think about: the way the object(s) 'hang' in the frame, where is the movement, and is there enough space for those things to be in 'balance'.
Choose a few of your favourite photos and share them.
I don't have many canna shots yet that I think are great photos - its a developing skill. BUt I'm going to share a few because I like the way they teach me something, or expose something. My camera has ISO settings that I can change (this emulates film speed). I was photographing late one evening, looking for pistils (the macro is useful for this) and I took this using the ISO80 setting because is was nearly dark...

And then the next morning I went out in the morning sun and took some more, except I forgot to change the setting - so his is hat ISO80 looks like in full sunlight!

These 2 I love because the comparison tells me it's worth it to use the flash sometimes on an overcast day in the forest (especially for closeups)


This one I love because it was the first plant I grew - back in 2013

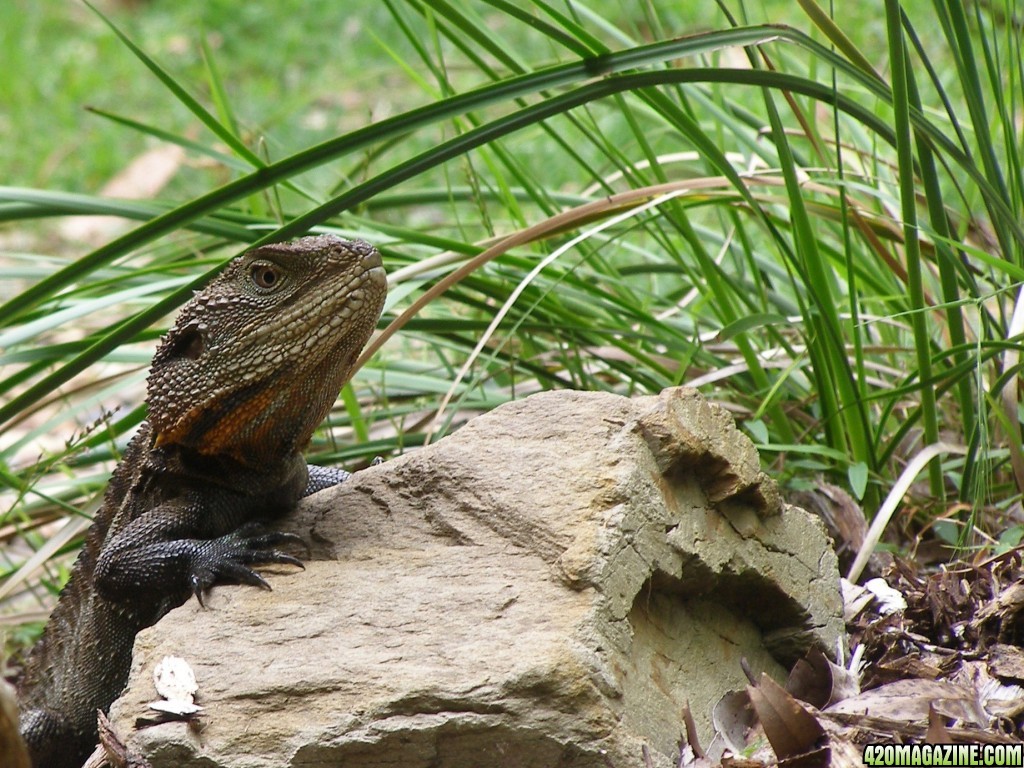
And I don't know if i'm bending the premise of the thread too far by posting a non-canna photo, but it's from my journal (where I have a critter that I see around the garden accompany every update) and I just love this one... as a photo (and as a dragon)
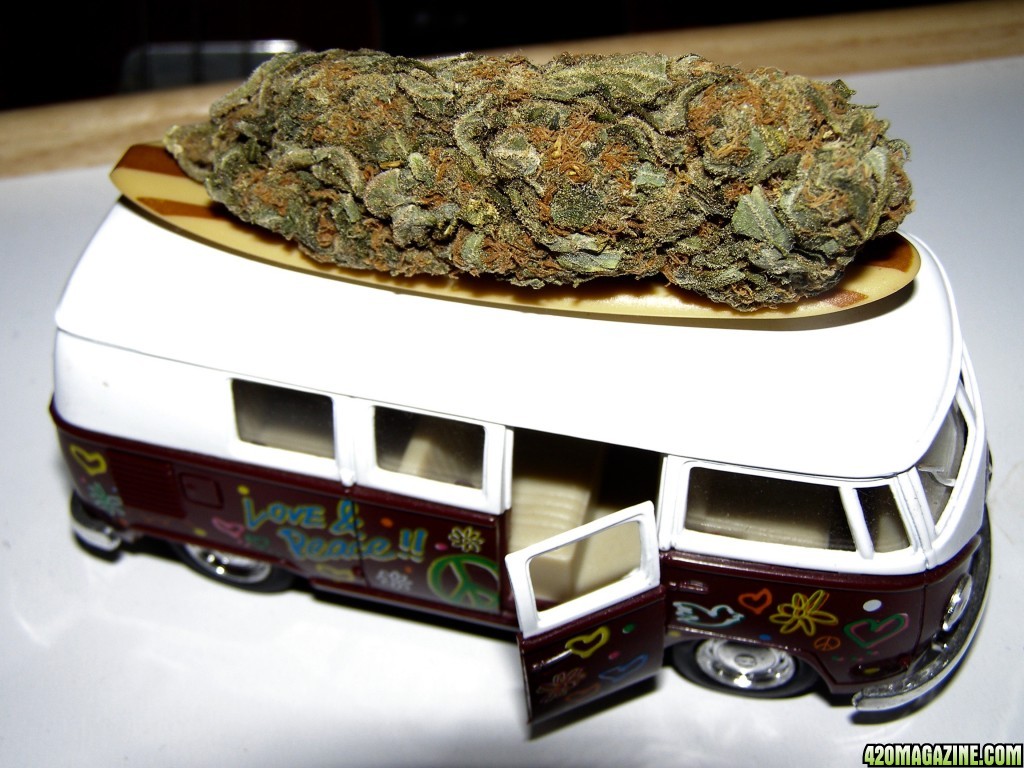
And I better share this one - cause Urban really liked it (all about staging for the nug).
Talk about a piece of your equipment you can't live without.
My glasses! Lol Without them I can't tell if the auto focus is grabbing what I want it to or not.
And soon - the single leg tripod I'm ordering after reading that tip from earlier in this thread (thanks you to whoever posted that!), I've not used a tripod (since the early days with my dad) and really want to but was wary about not being able to lug one around - the single spike style might work well
Thanks heaps (again) for the invite Urban - I'm super chuffed you asked me and I can already tell my photo'chops' are going to improve heaps. Maybe even my photoshop chops (I know what unsharp mask does, but I don't know how to use it)!


Glad you posted about ISO jus now Agemon... I had already popped a bit in my bio about it, due to a mistake I made with it recently! I haven't read the last 5 pages yet, will catch up after this!
Username:
Amy Gardner
Grow method and strains:
Really only on my 3rd-4th grow so auditioning chemovars and auditioning methods. Presently, for my first 'taking it seriously' grow, I'm outdoor and aiming for some middle ground between the mineralised soil approach of high-brix gardening and living organic. Current chemovars are Professor Chaos (TGASubcool/Homegrown Natural Wonders), CBD Critical Cure (Barney's Farm), Money Bush (Afghani x Critical Mass - Heavyweight). Have just put a 'solstice round' of seeds in (on Xmas eve): 2 from a mate that he thinks is Golden Tiger x Northern lights, and 1 Ice (Female seeds freebie) - experimenting with training these along the ground and/or up a wall. I'll do another winter grow box experiment in a few months
Camera, Lenses and Gear:
I use an Olympus SP500UZ which I bought new in 2006. As a point and shoot it was a step up from most at the time and it still takes a good pic for me. My only beef over the years has been that I've not really been able tot get prints at any decent size and maintain the digital sharpness because of the low megapixels (6MP - which was awesome at the time for a non DSLR). I underestimated how much I was going to like my own photos!
I also use my iPhone SE sometimes - it's a great camera.
I have a GoPro Hero3 that I'm learning how to use.
Experience level and photography background:
Amatuer hobbyist. Background as a performance and sound artist (nightclubs, circus, physical theatre) and DJ/producer and always loved taking photos. More recently i've Studied philosophy. ONe way pr another they're all about framing, whether the frame I sonic, visual, spatial or how you frame a thought... My father was a professional photographer - flora, landscapes, wilderness - and I accompanied him on many a feild trip, carrying the bag of lenses and the special homemade light reflector that we'd make, or touch up before we left. It was my job to hold it just right to get the sunlight hitting a flower (or whatever plant - but sooo many flowers
) while he took the shots (and directed me a little). So I learned about light, and faking it, from an early age. I studied photography in my last year of high school too and loved it (we made pinhole cameras from scratch out of cardboard - that was awesome). All of that was pre digital, so I've kind of known about fStop and shutter speed relationships and composition as if I grew up with it, but only at a basic level. I've spent many years without a camera at all so haven't done a lot of photography until recent years (the last 15 - when you're nearly 50, that's recent years ) I am self taught in photoshop but not done a lot with my own photogaphy (mostly CD cover art and posters etc) but I did recently colour correct some blur pleas using the PS white balance adjustment - but I used white, not grey.What is your style? (portrait, journal, macro, outdoor, instructional, various)
Textural, portraits of nature. Sometimes it's narrative and sometimes it's just all about a single moment in time.
Favourite lens or type of shot:
Ooh too many - I love macros, but also huge wide angle landscapes. Seeing as I don't have any lenses or the capacity to change them, it matters little.
If you could give 1 tip for new photographers:
Let it have the gift of your time.
(And I echo here the others' notes about cropping and deleting - take lots, delete almost as many and crop when needed... hence the gift of time)
Other introductory options:
Please share 1 of you favourite photos and explain why it works so well for you. What equipment did you use?
I love this because I couldn't see at all what I was doing, I just wanted to get a look at the trich production under the canopy of a very small auto. I used flash to kill the blurple (or bplink!) as much as possible and just stuck my hand with camera down there, took aim and hoped the auto focus would get it right - and it did. It was then cropped. So the photographic success is satisfying because it was an accidental outcome of something that was purely functional to start with. My pa once said to me (we were debating whether what he did was art - he resisted this notion) 'all I ever do is try to capture as much of what's going on as possible within the frame' - sometimes I think, well that's what art should do! Not necessarily claiming I managed to do that here, but it's my guiding motto.
Please share 1 technique you use in a step by step how-to.
This is minimal and not so much a technical technique but a technique of approach.
Photography for me is about weight and space and movement - I think about: the way the object(s) 'hang' in the frame, where is the movement, and is there enough space for those things to be in 'balance'.
Choose a few of your favourite photos and share them.
I don't have many canna shots yet that I think are great photos - its a developing skill. BUt I'm going to share a few because I like the way they teach me something, or expose something. My camera has ISO settings that I can change (this emulates film speed). I was photographing late one evening, looking for pistils (the macro is useful for this) and I took this using the ISO80 setting because is was nearly dark...
And then the next morning I went out in the morning sun and took some more, except I forgot to change the setting - so his is hat ISO80 looks like in full sunlight!
These 2 I love because the comparison tells me it's worth it to use the flash sometimes on an overcast day in the forest (especially for closeups)
This one I love because it was the first plant I grew - back in 2013
And I don't know if i'm bending the premise of the thread too far by posting a non-canna photo, but it's from my journal (where I have a critter that I see around the garden accompany every update) and I just love this one... as a photo (and as a dragon)
And I better share this one - cause Urban really liked it (all about staging for the nug).
Talk about a piece of your equipment you can't live without.
My glasses! Lol Without them I can't tell if the auto focus is grabbing what I want it to or not.
And soon - the single leg tripod I'm ordering after reading that tip from earlier in this thread (thanks you to whoever posted that!), I've not used a tripod (since the early days with my dad) and really want to but was wary about not being able to lug one around - the single spike style might work well
Thanks heaps (again) for the invite Urban - I'm super chuffed you asked me and I can already tell my photo'chops' are going to improve heaps. Maybe even my photoshop chops (I know what unsharp mask does, but I don't know how to use it)!


 new/old macro lens coming from the internet $ouch


