The Art of ScrOG
Introduction
Ok - so first let me say that like many things in growing and life - there is no "Right" way to do a ScrOG. But that having been said, there has been a refining of the method and a continual discussion of it for many years, so its worth learning from what others have done "right". Also, I am grabbing lots of stuff from my other posts so if some of this is repetive I'm sorry.
First a general discussion of ScrOG vs SOG. ScrOG stands for Screen of Green. The term originated apparently in about 1992 in the newsgroups. This was pre-web forums. It was a method to increase efficiency and yield by keeping the entire top of the canopy as tight and flat as possible. Basically it was just a bunch of folks like ourselves talking about ways to make life easier than using a trellis, or tying everything in place. It does not improve potency, or speed things up.
SOG is Sea of Green. This method uses lots of smaller plants harvested more often to attain the same yield as some bigger ones.
So if we take a standard plant growing straight up as the norm. The SOG technique would use more plants to achieve the same yield and the SCROG technique would use fewer plants to achieve the same yield.
It's important to understand, however, that a SOG is by definition a perpetual harvest requiring both a veg and a flower area. Both standard grows and scrogs can be done with a single area. That's an important distinction.But, as you will see below - a scrog CAN be used as an emergency measure to control big plants in veg, and YOU DO NOT HAVE TO VEG IN THE SCROG.
And finally - the SOG and SCROG Methods are not mutually exclusive of other techniques.
So here we go:
SWOT of Techniques to increase yield:
There are so many factors involved in increasing yield that to try to touch on all of them here would be crazy, but - there are some key ones that I've been experimenting with and can talk about. I didn't create or invent or even master any of these.
OK, first - I guess these are what I would call "techniques". The grower has to practice these and they can be done with great degrees of success. As opposed to "methods" of which there are two basic ones - SOG and SCROG. And as opposed to environmental and nutrient based improvements to yield like CO2 or Bloom Enhancers, Etc...
So its important to remember that to really maximize yield - ie shooting for that magical 1 g/w consistently - you can or have to maximize damn near all of the above. And you almost certainly should combine at least some in any grow. Obviously the whole concept of g/w is meaningless outside. But good pruning and farming is still essential outdoors, but not really what I'm talking about here. Outside you just go for big honkin' plants and all the work that goes with it. There's lot's of techniques to improve yield outdoors as well and some overlap, but I'll focus on inside.
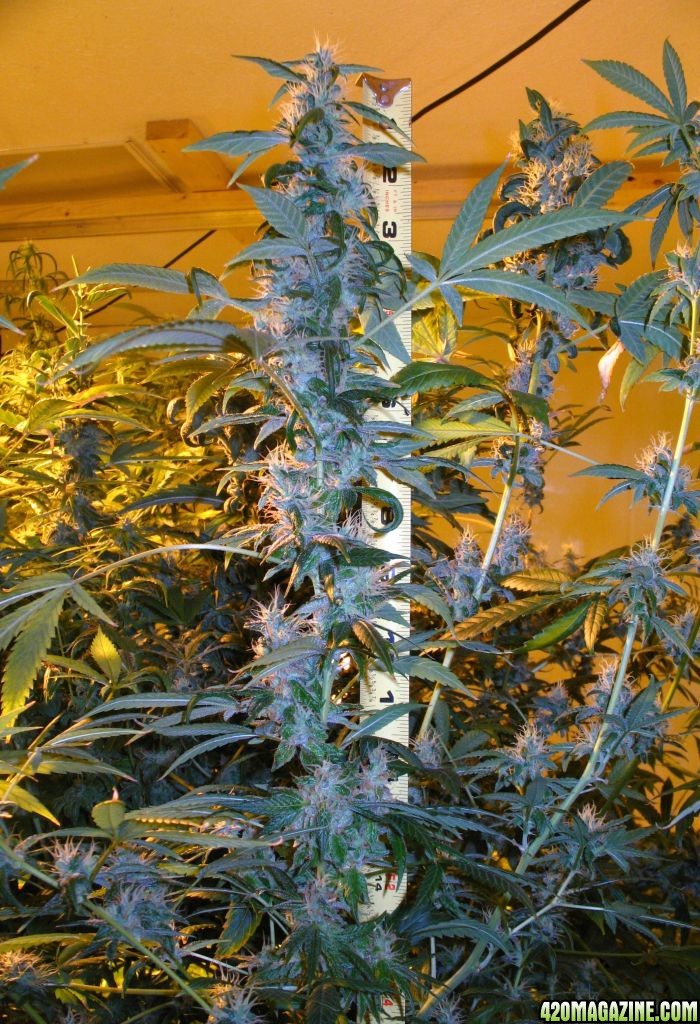
So - First - growing with 1k lights vs all others. 1K lights have a great throw. Their sweet spot extends out about 36" from the bulb. That means that if you have a plant that is about 42-60" tall, you can get a huge amount of the plant into the sweet spot vertically. This is what's known as penetration. The penetration on a 600 is about a foot less. So the same plant would yield far less. Essentially you're giving up a foot's worth of branches and bud sites across your entire grow area. That's also why the guys that grow with the 1k lights get bigger colas and outdoor even bigger.
The two main methods of growing for yield with limited vertical space or 600w lights or smaller: SOG and SCROG. You could do either with bigger lights, but you would see diminishing returns I think vs larger stand up plants.
SOG - Sea of Green. This method uses many smaller plants to make up for one larger one. Its actually an extremely efficient way to grow perpetually. Each plant might yield.75 oz and you would harvest 5 a week say. With a 6 week flowering period you would have 4 or 5 groups in at any time after clones. The problem is that you really need to have lots of small plants. And this would break most medical laws that are written to encourage larger harvests from fewer plants. Some of the newer laws are trying to account and allow for the SOG method because its so efficient.
SCROG - Screen of Green - Use a few large plants and grow them horizontally. Use the screen to flatten them and expose the most bud sites possible to the light. The site has to actually see the light to be a prime bud. Again - this method makes much more sense with a 600 vs a 1k.
Now then the techniques. Most if not all of these really should be done in Veg. You can do any or all in flowering, but you won't see much gain and you might actually cost yourself yield. I've found that putting the plants into flower is like making a turn on an icy road. You gotta point the car in the right direction - THEN accelerate. Any extra time that's required for the plant to recuperate should be added to the veg cycle with a few days to spare. The flowering period is hopefully pretty much determined by genetics. you can try to speed it up a little, but usually delays in flowering cost yield and are the results of problems, not intentional stress. But veg is the opposite. I basically think of every extra week in veg as two weeks in flower. You can veg as long as you want and the longer you do - assuming you take care of the plant - the better it is for the plant and yield.
LST - Low Stress Training. This is opposed to FIM or Topping (next two). LST is basically tying the branches apart and pulling them where you want them to go. Again - exposing as much of the plant to light as possible. Plants can turn back to face the light in a matter of hours to a day. Minimal delays to your grow.
Topping - Pinch the top grow site off the plant - Very stressful to the plant. I don't mean that it will kill it or anything. But depending on the species, they can take anywhere from a few days to 10 days to resume full growth speed. Usually I see mine recover in about a week. When they recover - you will have two tops instead of one. You must let them recover completely to see any real benefit. If you top them then throw them into flower, the plant will be fine most likely, but you won't really see any benefit from the topping. Only really works on symmetrical plants. That's important. If you try to top a plant whose branches are not symmetrical, you will still see some additional growth from the lower branches eventually, but the stress from topping will add more time to the grow, and you wont get the two tops.
FIM - Very Stressful to the plant. Comes from a guy in Texas who was trying to pinch off the top and missed. "Fuck, I missed" was coined when he discovered that if you go a smidge higher than topping it you can get 4 tops. We're talking a millimeter 1/16th of an inch type thing. Takes much practice. But if you miss high you will see it and its really no big deal. The leaf will grow looking like it has a bite out. If you miss low, you are just topping. I think you could FIM any top. Not just the symmetrical ones. Takes anywhere from a week to two weeks to really recover and see any benefit.
Suppercropping - Low-Medium Stress. This technique has been around a while in commercial greenhouses, but it looks so traumatic to the plants that folks don't often see or use it as much as it should be. Its based on the idea that when you bend a plant more than 90 degrees on itself, it triggers hormones in the plant that cause the branches below the bend to strengthen and get larger. Usually, supercropping involves squeezing the plant's stem, then bending it over on itself. It basically falls over where you squeezed. It will regrow like the bionic man - faster and stronger. If the plant is flexible enough, you can achieve this same thing by just tying the plant back down to itself. They recover very quickly from supercropping. Delays are usually anywhere from 1 to 3 days to see good results.
Pruning - not stressful at all and they love it! This might be the number one thing I've improved on my grows. Get those fan leaves out of the way. Either bend them where they don't lay flat on another (no mold) or cut them off. Get the light to the bud sites. If you get light to the whole plant - the whole plant will grow. If you get light to the bud sites - they will grow more. Everything the plant does is about those flowers. ITS ENTIRE LIFE CYCLE is devoted to procreation. You can use this. Some kinds of stress will kill or damage your plant with no benefit. But other types of stress make the plant react by essentially thinking,"Oh, Shit! This is a tough place to procreate. I better make bigger buds with more resin to help raise my chances of catching pollen."
The Method
I'm going to discuss the method first, because form follows function here.
So how does one scrog? And why? The answer is YIELD! I can almost guarantee that if you implement ANY kind of a scrog your yield per plant will go up! We all know how valuable that prime light is - there's no escaping the inverse square law of light. Its important to think of the area under the light as a volume - not a plane. Although you can get too close, or too far, there is a substantial volume under the lights both Horizontally and Vertically. It's this block of light that a scrog maximizes.
The goal at the end is to end up with as many TOPS within this VOLUME of perfect light as possible.
You achieve this in a couple of ways. Like a basketball game where there are multiple ways to score - its the same in scrogging. A nice Kola can be thought of as a 3 pointer. Secondary Tops can be thought of as a 2 point shot, and all the other buds are 1 point free throws. And like basketball, there are different ways to get the ball in the hoop for the same 2 points.
I'm gonna call the two basic shots in scrogging the "Push/Pull" and the "Weave". One can either pull a top through, or weave the top along the scrog. Just like a basketball game, you will need both types to score.
This is the "Standard" way to fill a scrog:
- Grow the plant about 6-12" in Veg and use as many pruning techniques as you want to get more tops. Experience with a given strain goes a long way here, and you'll have to decide for yourself what the trade off between a longer veg and bigger plant is. Also, you do not need to go crazy - we're talking a week or two swing at most usually. Remember the whole reason you're scrogging is cause you have a relatively small space - no need to have monstrous plants at this stage.
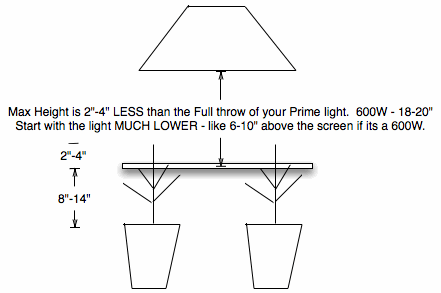
- Place the screen over the plants. About 8-14" above the buckets is where I like to be. Any lower and I find it difficult to work the plants, and any higher and you're giving up some lower branches. Also, think about where you're going to train the plant. It often makes sense to start the grow at an end of the screen.
-----------------------------------------------------------------------
As far as light height - you want the bottom of your screen and your bottom buds at the bottom of the prime light. You want your buds above the screen to grow to fill the vertical space under the light. and you will trim away all growth from under the screen.
- When the first tops of the plants reach the screen you will let them grow through the screen. About two inches above the screen. DO NOT PINCH A BUD SITE or a BRANCH SITE against the screen, and KEEP ANY LEAVES IN THE SAME HOLE AS THE BRANCH/STEM THEY COME FROM. This is one reason I like the clothesline - it is very gentle on the plants.
- Now as more tops begin to reach the screen - you will start to PLACE THEM. This is a little bit of Zen stuff here where you gotta think like Frank Lloyd Wright, and say"If I were a branch where would I want to be?" But at the same time - you must place them! If you just let them come up wherever - then you might as well be using a trellis - which is fine - but its not a scrog. You want them to form a candelabra shape under the screen, and you should begin to try to get them in rows.
- As the next tops reach the screen, and/or as it fills a row move the top to the next hole. This means moving the ENTIRE top. Make sure you pull it all the way back down below the screen and push it back up through the next hole - hence the "Pull/Push". And again - DO NOT PINCH A BUD SITE or a BRANCH SITE against the screen, and KEEP ANY LEAVES IN THE SAME HOLE AS THE BRANCH/STEM THEY COME FROM. If you're using clothesline - this is where its very handy to resize any given square by up to an inch or so, by pulling on the line, or move it up or down a little to make it easier.
- Keep doing this till the screen is about 2/3 to 3/4 full. Again its super helpful to know your strain here because the more it will stretch, the more room you must leave in the scrog to accommodate the stretch.
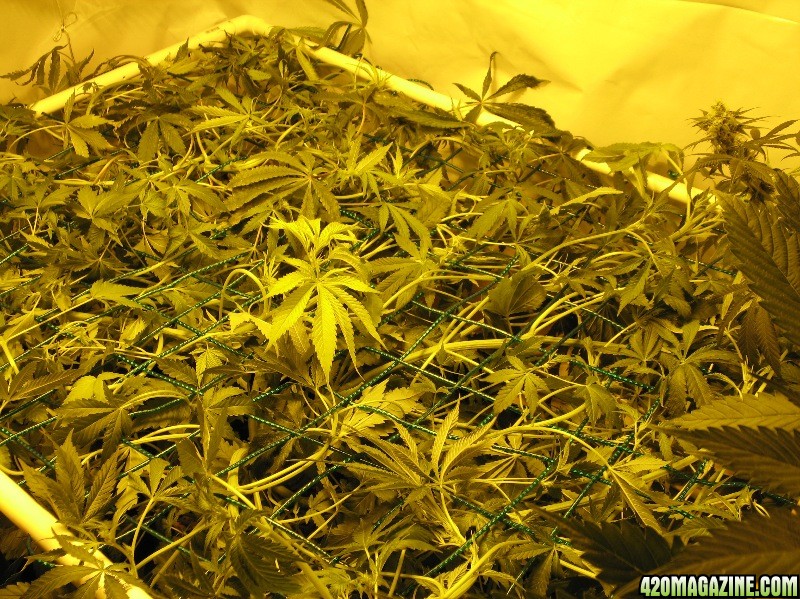
- OK - now comes the crazy part! Stretch! Strap yourself in for a ride! Flip the lights to 12/12 and hold on tight! In the next three weeks the plants will fill the scrog and grow well above it. You will need to balance techniques of push/pull and weave to keep things in check.
Now for a bit of my own technique. I've not seen this discussed elsewhere. You should still absolutely not pinch a bud site, BUT - if you put a LEAF in a different hole than its BRANCH and BUD, then it will slow the plants stem growth there. It won't hurt the size of the bud, or the potency, it just tricks the plant into thinking it can't get around the wire. This is a GREAT way to control where the fast branches grow.
Now is when you will also need to start weaving. Weaving is a great description for what it looks like when you're done, but really the actual weaving is just push/pull very tight together. And both up and down. You should not be afraid to put multiple sites in the same hole or use the plants' branches and stems as additional screen. They will get very strong in the scrog. In a month I bet you could literally lay across the top and it would support you.
The Weave: You will push/pull a branch through a hole, and pull it all the way. If its a branch close to the stem, it will likely stick up a foot or two above the scrog when straightened out. After pulling it completely up, then bend it slowly as close as you can to where it comes through the scrog. Bend the tip back down to the next hole and push it through. Now Pull the top from underneath to get the branch back down and through as far as it will go. Use your other hand to guide and protect the buds and branches.
Now do it again to get it back up in the next hole. Again - pull all the way - take up the slack basically. Also, your goal here is basically to place a bud node in each hole in the screen. As you are bending and weaving you will see that the plant sorta helps in this process. And feel free to criss cross plants, as long as you leave the buds exposed to direct light. Last tip on the weave - while it is possible to twist and curl the stems, this is not nearly as good in my experience as bending the branch.
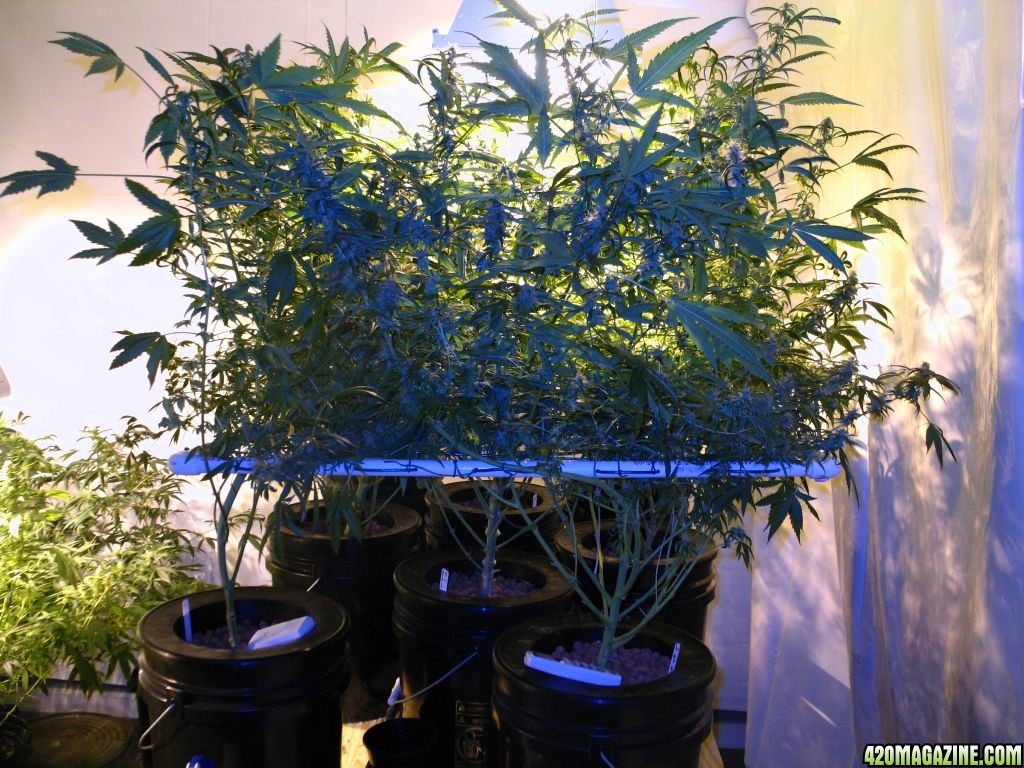
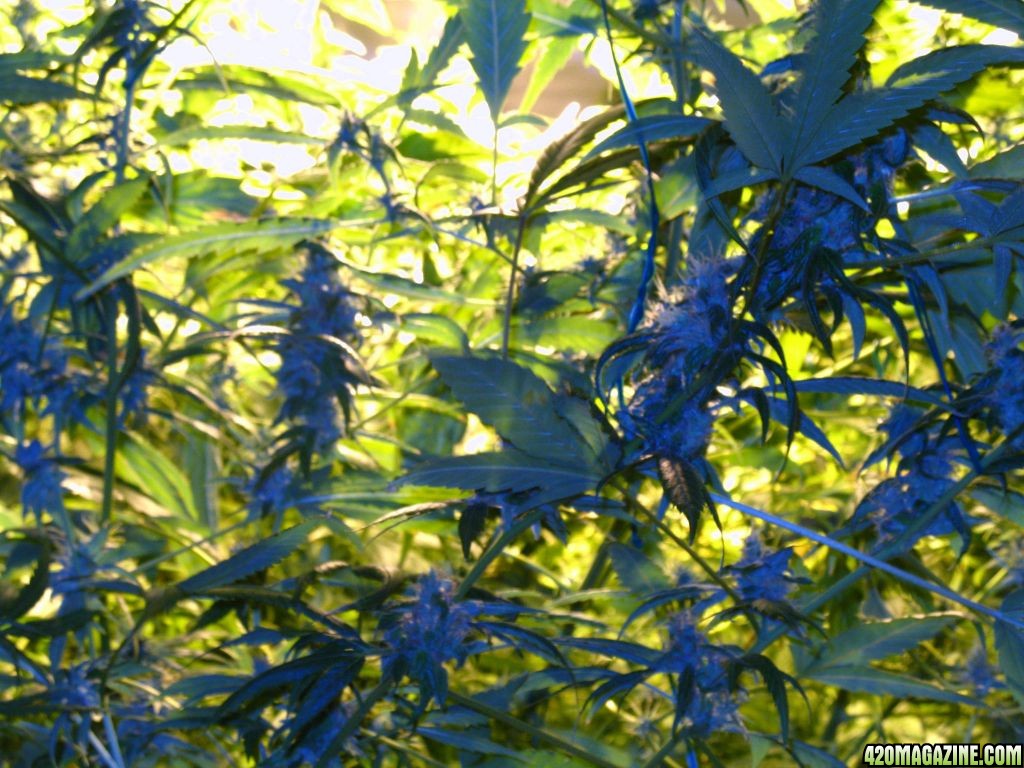
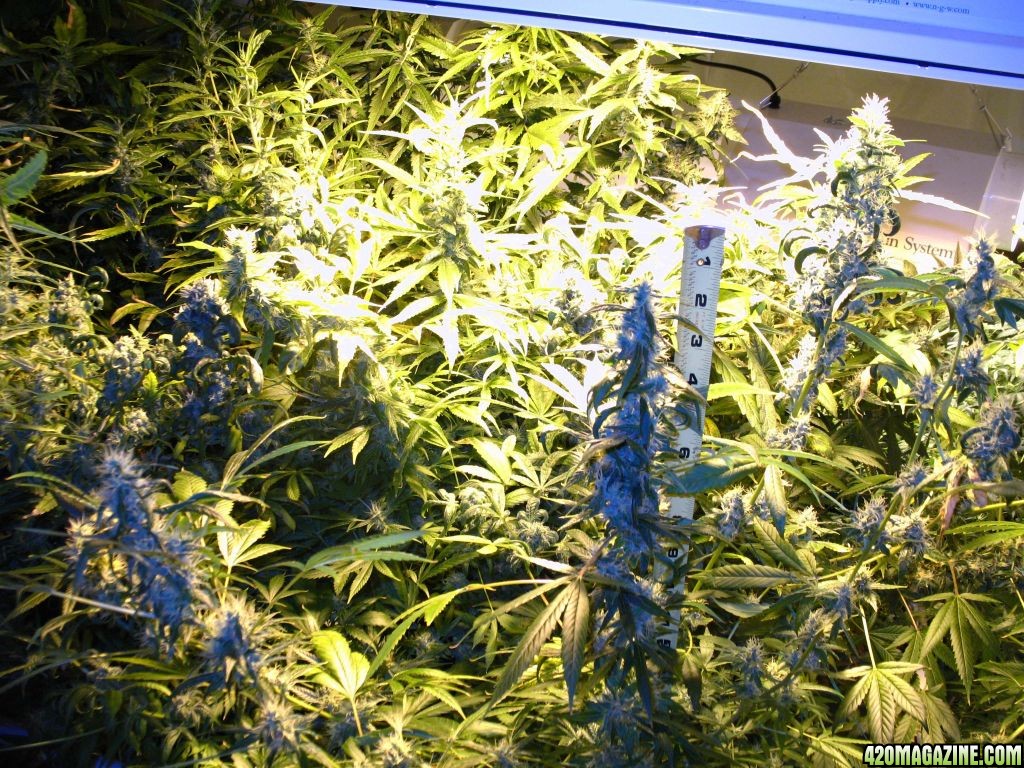
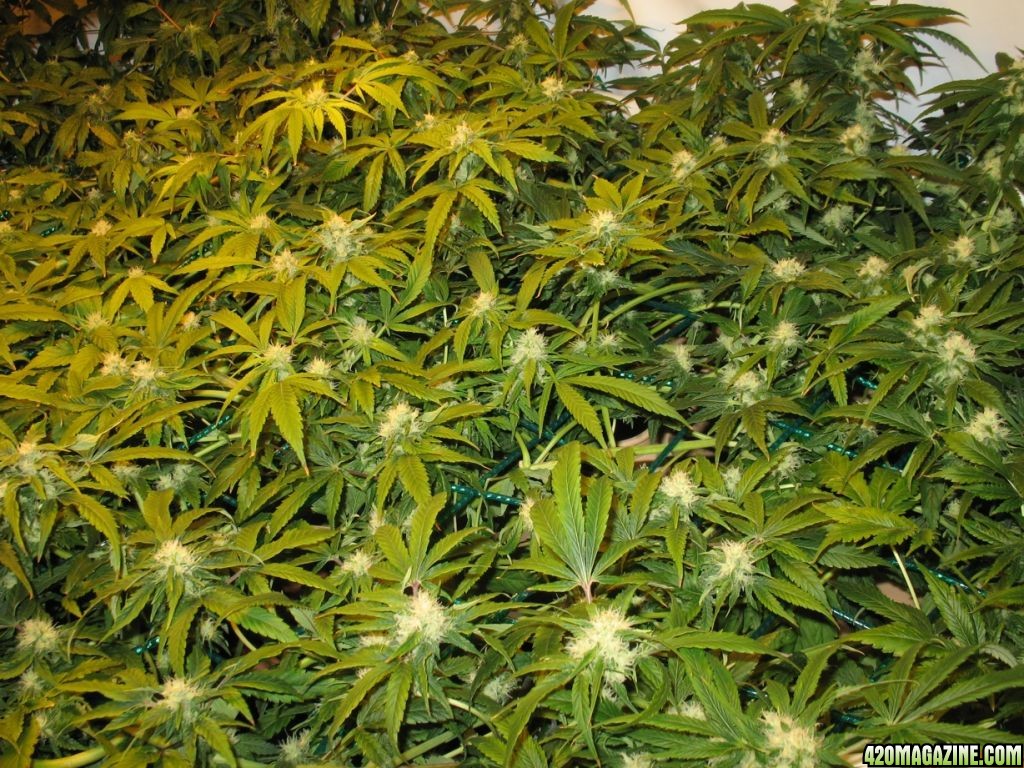
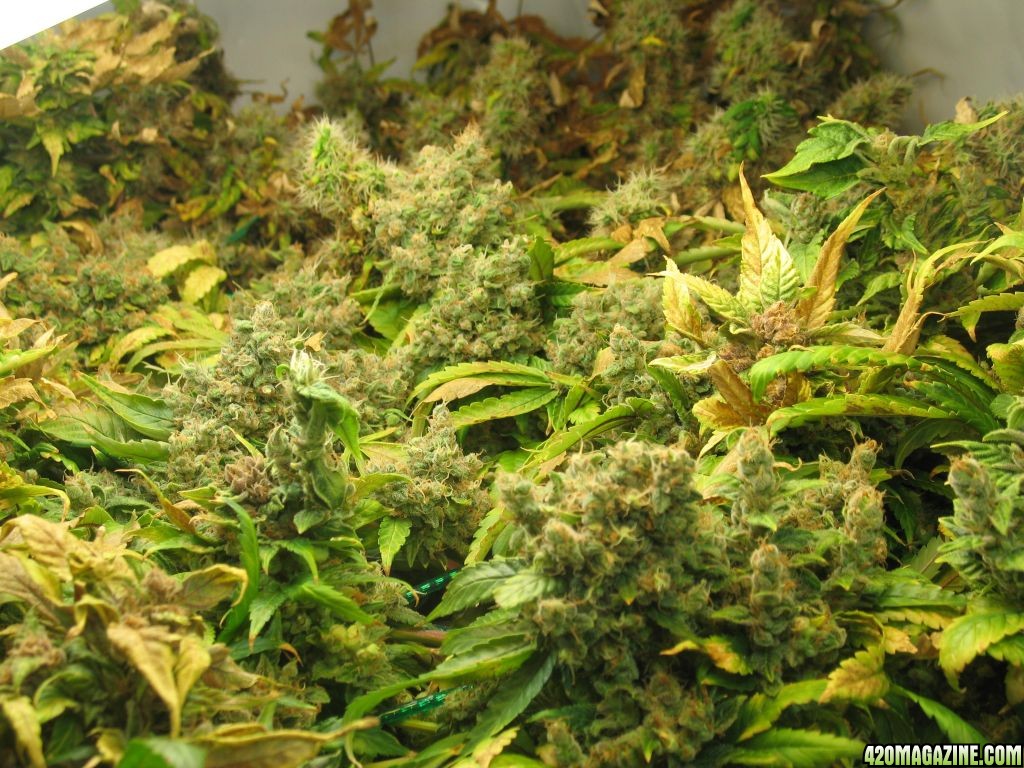
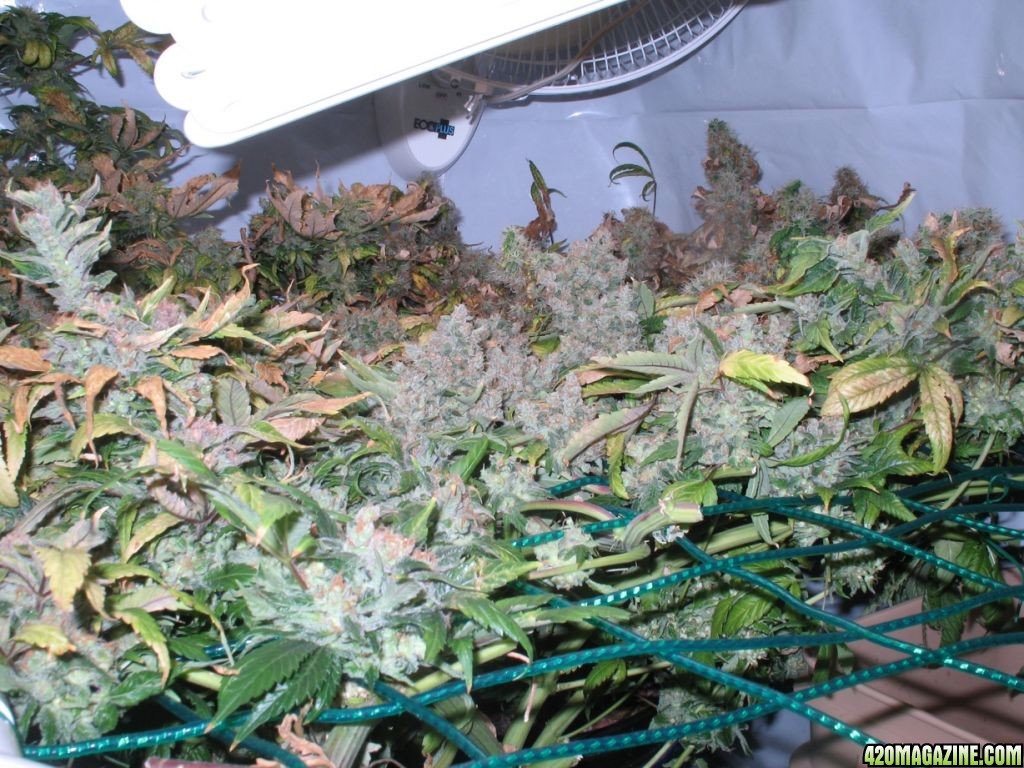
- If you've timed it right and spaced it right, you'll end up with a bunch of tops and buds all growing right next to each other, and all in the prime light.
_________________________________________________
Now let me add my perpetual tid bit. If you know what your plant will look like, or you have tall plants that are out of hand in veg - then you do not need to veg in the screen. As long as you use a nice flexible and accomodating screen material like the clothesline, you will be able to bend the plants sufficiently even at the end of veg. Some varieties this is not the case. If your plant is one with a single big bud and thick main stem, then you will need to accomodate that. But if its a branching variety then you should be able to bend the branches and stem. It just takes patience.
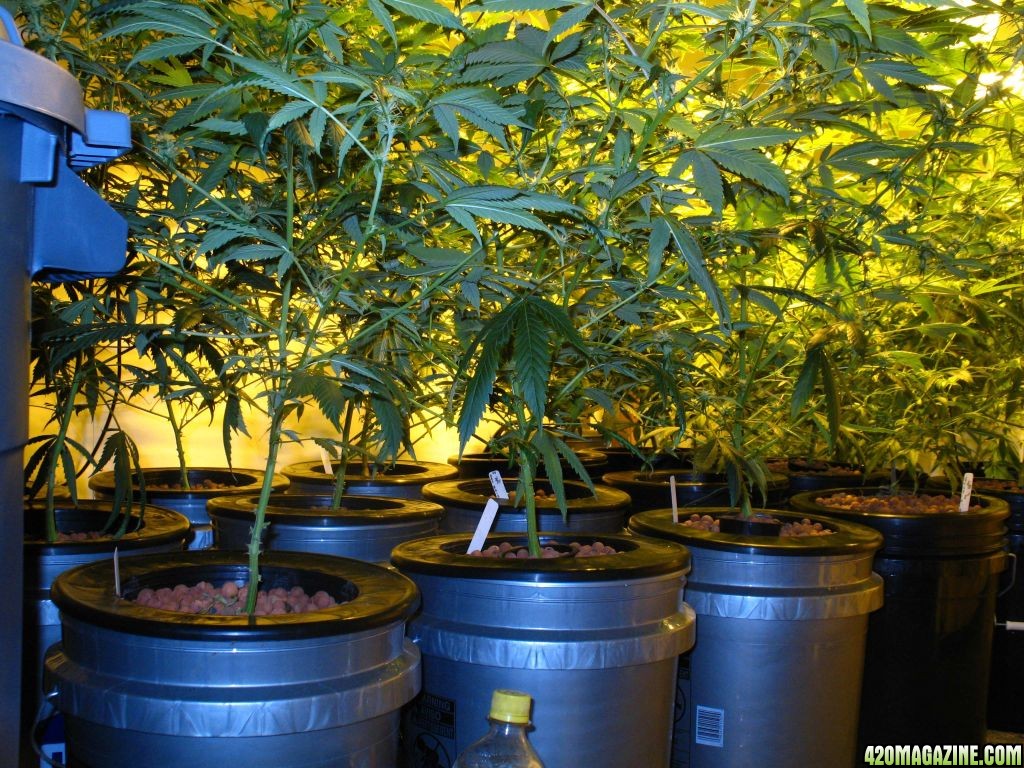
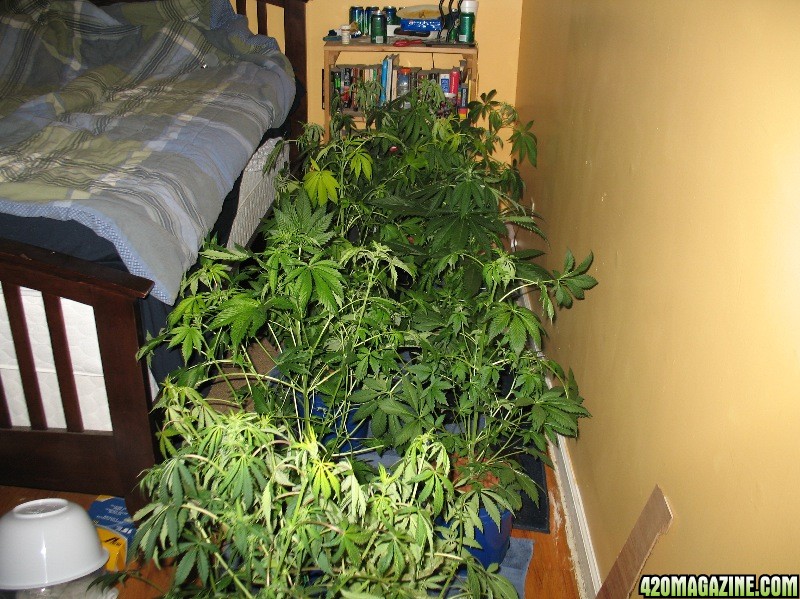
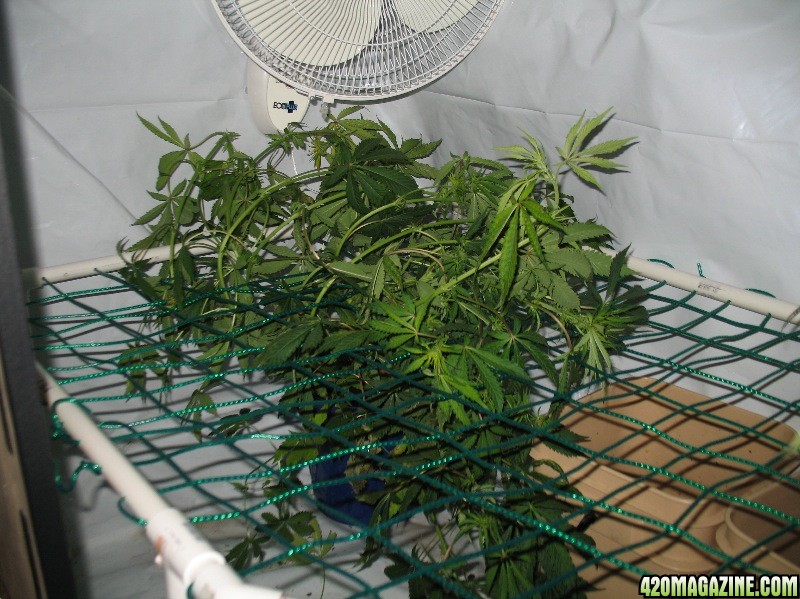
Remind yourself to slow down when working in the scrog and you can move big plants into a small place. Here are 6 plants next to a King sized bed. You can see they are messy, and easily occupy a space about 3 feet wide by about 10 feet long.
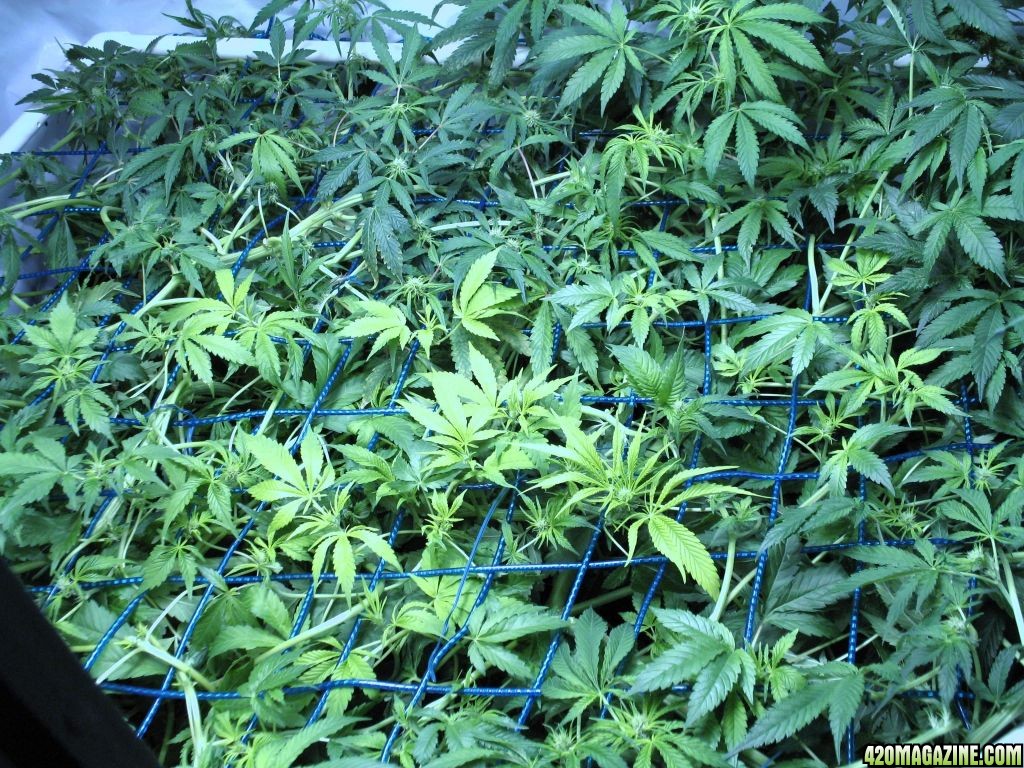
Now here's the first getting bent and placed:
And here's the screen 6 hours later with all the plants in it. This screen is less than 2'x4'. A dramatic improvement in efficiency I'd say.
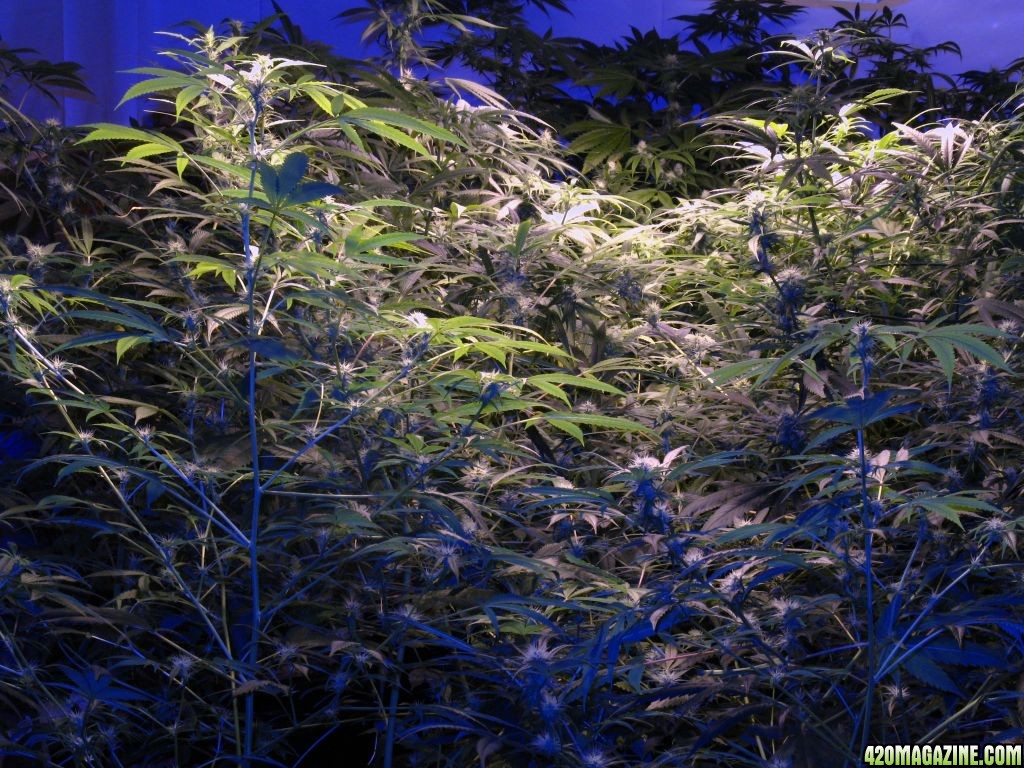
This scrog yielded 3/4lb in less than 8 square feet.
The cool thing about doing it this way is that you can run two rooms and get perpetual scrogs going. This is the best of all worlds as far as yield.
-----------------------------------------------------
How to Build a ScrOG
Once again there are lots of ways to build a scrog and its tough to say that one is right vs another being wrong. But - anyone who's not doing it my way - is doing it wrong.

For reals, I have tried 2 types of chicken wire, fencing, and string. I have made the frame out of wood and pvc.
Of all these the methods and materials - the one described next is heads and tails better in many ways. Not the same ballpark, not the same league, not even the same sport as far as I'm concerned - NYLON EXTRUDED CLOTHESLINE. It sells for $6.50/50' at Ace Hardware, could be cheaper elsewhere. You will need 100' to make a 2x4 scrog. It has a tension to it that feels like chain link fence, but bends like melted plastic. It is non-kink, and the coating on the line both protects your plants, and provides a little stickyness where the woven lines touch. This tackyness means if you pull a line a half inch to the left to squeeze in a branch, it will basically stay there - not snap back.
I can not stress enough that this clothesline might be the #1 thing you can do to make your scrogging life easier. I am continuously finding situations where I think to myself if I wasn't using the clothesline I couldn't do this.
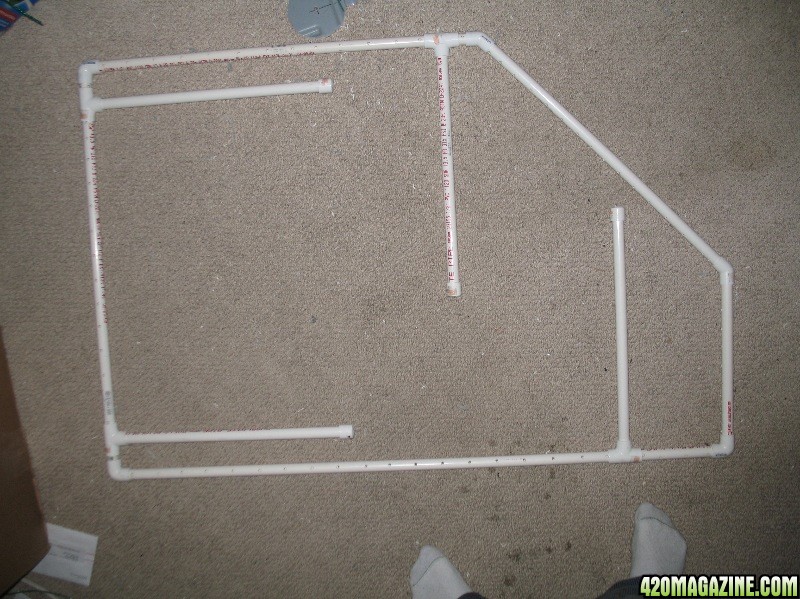
The frame - 1/2" PVC. 10' of pvc is about $3. Get 2 x 10'. You will need elbows and tees - I'm not gonna do a full step-by-step build or materials list here, cause I'm gonna do one in a week or two when I build my next scrog - but each elbow or tee is about $.65 and you'll need about 10-12 fittings - enough for each corner and each leg.
Make a frame. Pretty basic. You do not need glue.
To mark out the holes for the screen, place the length of cut pipe in a door frame. Use the door frame to keep a straight line. Space the holes about 1.5"-2" apart using a ruler. Drill the holes a little bigger than the clothesline.
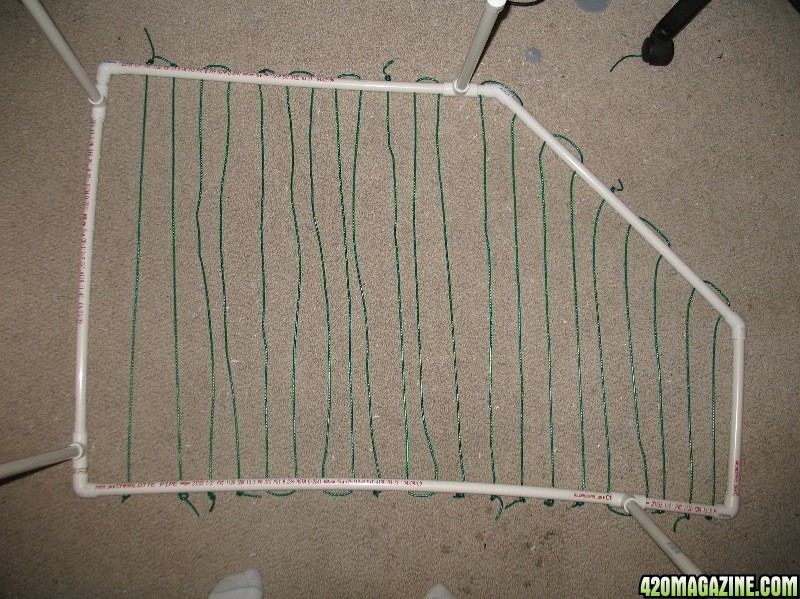
Finally, assemble the frame, and weave the clothesline. Just start from one corner, pull one of the lines through to the opposite side, through its opposite hole. Pull the entire 48' feet through the hole, and tie a knot at the starting point. Now just feed the line in the next hole and go back the other way. Don't cut the line. Just a simple back and forth between the holes. When you get to the end tie a knot behind the last hole and I tape the extra few inches of line to the frame. I do this cause sometimes I will take a scrog apart and re-use the line. The screen should look like a clothes drying rack now - with lots of lines running parallel to each other.
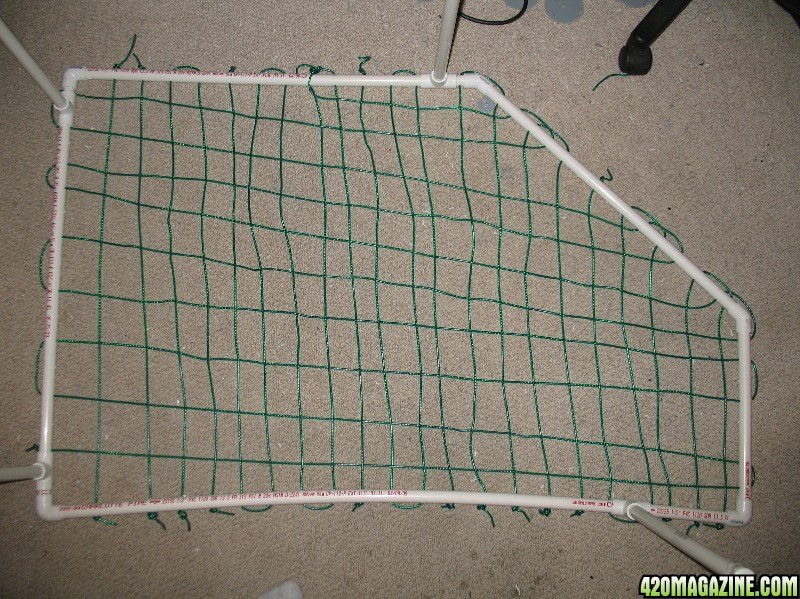
Now go back to the starting corner, and go perpendicularly. Pull the line through again, and tie a knot. This time as you cross the lines already there - just go above or below each consecutive line. Weave a net. Its really much easier than you'd think. Its very easy to do with one person, but to be honest - two people makes it much faster - simply one to feed the line and the other to pull it.
When you're done the lines will hold the frame together nicely.
That's it! With no glue you can just fold the legs flat or take them off for storage.
Here are some blah pics of one I made. Definitely not my best work. You can see a few extra knots cause I re-used line. And its oddly shaped because I needed to reach the back corner. BTW - this is not a bad tip if you will be working in a tight space where you might not have 360 degrees access. Snipping one corner makes it easier to reach across.
=======================================
And there you have it. A pretty good summary of ScrOG! I'm gonna consider this post as a rough draft for a How-To thread. We'll suss it out here, then put it up in the right place.
I'm sure I've missed some stuff. And I'm sure there are other scroggers out there who can add or fill in gaps in our technique. Hopefully the rest of this grow will provide us with a good demonstration and test bed.
Thanks All!









 +reps
+reps