Hempy Headquarters

IMG_92594.JPG


Ultra Dawg (Day 86, flip + 18)

I potted up a clone of Thin Mint GSC today, the latest of my hempy plants, and dropped a new seed in another hempy cup, a Blue Dream, the genetic product of MagicJim's talented hands. :battingeyelashes: :Love:

IMG_92472.JPG


I'm hoping I can make the Blue Dream as healthy and strong in hempy as MagicJim's lovely specimen growing in soil.

DSC_072420.JPG


I'm really hoping she ends up like this specimen from Doc Bud's hempy grow. :slide:

IMG_02028.JPG


IMG_02037.JPG


I started my cultivation adventure at :420: using LOS, graduating to Doc Bud's HBB kit. Then I discovered hempy, having been continuiously bombarded by pictures of Tead's garden of delights and reading how easy it was for him to raise them into bountiful beauties.

So I got brave enough to venture into the world of hempy and bottled nutrients. The rest is history in the making. At this point I have a total of 16 plants growing in my assorted spaces, 6 of them in kit soil and the other 10 in hempy pots of one size or another.

Obviously hempy is an addiction all its own. :laughtwo:

Over the past month or so there's been a serious uptick of interest in the lazy gardener's alternative, growing the plant in perlite. The method is incredibly cost efficient, lightweight - particularly after hauling around trees in 5-10 gallon pots of soil - and a surprisingly effective way to increase output. Hempies can take up much less real estate than pots of soil. You may get smaller yields, but I have one in my garden right now that may demonstrate the powerful potential of fabulous lighting and great nutrients.

Meet Carnival 4.1 (Day 65, flip + 4) my largest hempy to date. She stands 34" from the top of the perlite, easily my largest Carnival in any medium. I've been using RX Green Solutions Grow Better nutrients, and this one impressed me so much I switched all the hempy pots to it, excepting the four already planted with Osmocote Plus.

IMG_92685.JPG


IMG_92692.JPG


She caught me off guard. :thedoubletake: My previous experience with hempy was shorter and less tree-like. Lol! It necessitated replanting into more perlite last week before her flip. As you can see, the potential exists with hempy to create massive plants. And with such ease it'll astound you.

It's time to create a central place for all these hempy growers to congregate and share ideas, work through challenges, and jump up and down with joy when things go right and we pull down inspiring harvests. :cheesygrinsmiley:

So, want to join in the fun? Share your grow with us. Be curious about the process and pepper us with questions. Get inspired by our passion and the fun we're having to give one a go yourself. Just be forewarned, one hempy becomes two, becomes four, becomes...... You get the idea. :battingeyelashes: :green_heart:

Incidentally, Doc Bud's grow is a great read, a well-documented intro into hempy growing. Well worth looking up.

DocBud's Hempy Grow

Tead has a recent post where he describes his method of layering in the Osmo Plus, if that's the method you choose. Page 218
MakeOsmoHempy4.jpg


Hempy is so adaptable that you'll notice plenty of variety in the gardens. A couple relevant points I think we need to include in this opening post:
* Rinsing the perlite before you use the pot gets any dust out. Excess dust will turn into sludge in the bottom of your reservoir and compromise the ability of roots to drink freely. I usually fill the pot and then flush it with tap water until the stream of water has no more dust in it. Then I drain all of that water out and flush again with pH-corrected water.
* The size and placement of the drain hole is variable, but I typically shoot for somewhere in the range of 2" from the bottom and I use a 1/4" bit to drill the hole.
* When you water you want at least 10% runoff. I typically water until it shoots out of the hole and then let it drain until it stops.
* You want a strong stream exiting the reservoir, because you want it to wash some of what's left in the bottom out, to avoid salt buildup in the basin. Sometimes this means you need to poke the hole open if a piece of perlite gets stuck and is blocking the flow of water.

I'll let some of the others jump in before I post the rest of my garden. We have lots of excitement ahead. It'd be more so with you as part of the crew. :battingeyelashes: Grab a bucket, some perlite and a seedling and jump right in. :circle-of-love:
 
Wow! You're faster than I am Scorpio. :laughtwo:
 
I have been considering using a 50/50 blend of perlite and leca in my autopots to convert them into a hydrohybrid system. Both mediums can be reused over and over again. Very cost efficient.

Over the past month or so there's been a serious uptick of interest in the lazy gardener's alternative, growing the plant in perlite. The method is incredibly cost efficient, lightweight - particularly after hauling around trees in 5-10 gallon pots of soil - and a surprisingly effective way to increase output. Hempies can take up much less real estate than pots of soil. You may get smaller yields, but I have one in my garden right now that may demonstrate the powerful potential of fabulous lighting and great nutrients.
 
No, I'm not stalking you, Sue ;) . But I have been collecting green two-liter bottles for a possible set of hempy style low-vegetation clones, so this should be useful to me.

I used to do a fairly even mix of perlite and vermiculite. I learned that (with my environmental/etc. conditions) using a lower percentage of vermiculite worked for me. Am currently trying to decide whether to run 100% perlite or mostly perlite with coco coir or vermiculite as the other component (and, if so, how high of a percentage of the total).

What's leca?

One of those abbreviations that we US citizens always seem so fond of. Lightweight expanded clay aggregate. AKA Geolite, Hydroton, "clay balls," et cetera.
 
I'm in and will be participating. My current project

Blue Dream for my own S1 seeds. Seed was dropped a couple days ago into a rock wool cube. She popped out this morning and was placed in her hempy pot that was built last week. I'm using Osmocote Plus as my nutrient. She have a couple true leaves tomorrow which will be Day 1.

Blue Dream

DSC_072815.JPG


No roots poking out. I'll have water down its stem until the roots hit the res. I'm calculating 8 to 10 days.

DSC_073117.JPG


DSC_073314.JPG


DSC_073522.JPG


All of this can be followed in my current grow but I'll update here at least weekly. :Love:
 
Thanks for the Hempy Home Base, Sue!

I'm here and ready to party with my hempy peeps. :slide:
 
I'm in and will be participating. My current project

Blue Dream for my own S1 seeds. Seed was dropped a couple days ago into a rock wool cube. She popped out this morning and was placed in her hempy pot that was built last week. I'm using Osmocote Plus as my nutrient. She have a couple true leaves tomorrow which will be Day 1.

Blue Dream

DSC_072815.JPG


No roots poking out. I'll have water down its stem until the roots hit the res. I'm calculating 8 to 10 days.

DSC_073117.JPG


DSC_073314.JPG


DSC_073522.JPG


All of this can be followed in my current grow but I'll update here at least weekly. :Love:

Very Nice Jim!!!:goodjob:

So how did you dispurse the Osmo+ in yer pot? Ill be poppping some New Babies late today or tomorrow in Hempy, my 1st starts in Hempy but have 5 I transplanted going Great Now

Good luck bud
 
No, I'm not stalking you, Sue ;) . But I have been collecting green two-liter bottles for a possible set of hempy style low-vegetation clones, so this should be useful to me.

I used to do a fairly even mix of perlite and vermiculite. I learned that (with my environmental/etc. conditions) using a lower percentage of vermiculite worked for me. Am currently trying to decide whether to run 100% perlite or mostly perlite with coco coir or vermiculite as the other component (and, if so, how high of a percentage of the total).


One of those abbreviations that we US citizens always seem so fond of. Lightweight expanded clay aggregate. AKA Geolite, Hydroton, "clay balls," et cetera.

Your environment can't be that different from mine TS. I live right next to the river and we're close geographically. I have great success with straight perlite.
 
Blue Dream for my own S1 seeds.

How do those compare to the parent (strain)?

I'm using Osmocote Plus as my nutrient.

I'm thinking of using that, too. I bought a bottle on sale after last year's growing season on clearance for $1.95 before I realized some of the money would end up going to Scotts Miracle-Gro 😠 , so it is something that I have on hand.
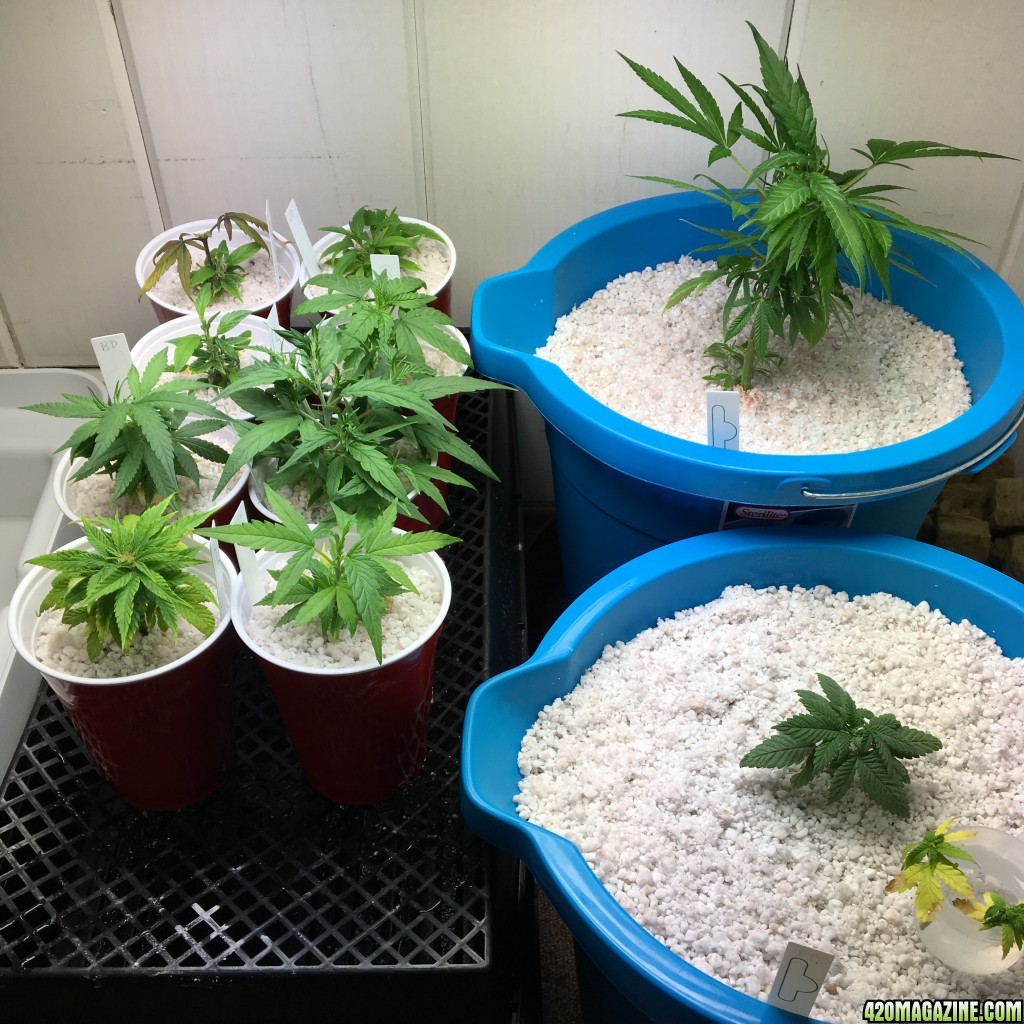
But I don't foresee having much in the way of a vegetative period, and do have concerns that there'll still be lots of nitrogen left after the flowering stretch. Thoughts?
 
How do those compare to the parent (strain)?


I'm thinking of using that, too. I bought a bottle on sale after last year's growing season on clearance for $1.95 before I realized some of the money would end up going to Scotts Miracle-Gro 😠 , so it is something that I have on hand.

But I don't foresee having much in the way of a vegetative period, and do have concerns that there'll still be lots of nitrogen left after the flowering stretch. Thoughts?

How long were you planning to veg TS?
 
Very Nice Jim!!!:goodjob:

So how did you dispurse the Osmo+ in yer pot? Ill be poppping some New Babies late today or tomorrow in Hempy, my 1st starts in Hempy but have 5 I transplanted going Great Now

Good luck bud

I used one cap full which I think is 3 tablespoons. I chose that amount because it was a label suggestion for outdoor plants. At least that's the amount I've been using on my azaleas.

About one-fourth went into the reservoir layer of perlite. The rest was just poured into the perlite as I moved up the pot. Nothing terribly scientific here as I usually don't roll that way.

I'll probably add a little kelp until she hits the res.

How do those compare to the parent (strain)?


I'm thinking of using that, too. I bought a bottle on sale after last year's growing season on clearance for $1.95 before I realized some of the money would end up going to Scotts Miracle-Gro 😠 , so it is something that I have on hand.

But I don't foresee having much in the way of a vegetative period, and do have concerns that there'll still be lots of nitrogen left after the flowering stretch. Thoughts?

I harvested the seeds this month. I started a soil grow of the S1 earlier and now I also have the hempy Blue Dream for comparison. The parent is great herb. When these two are done, I'll have some idea how it relates to the parent. So we'll see in about 3 months.
 
Welcome to my Hempy Garden of Delight :circle-of-love:

IMG_457010.jpg


My first plant to move hempy was a three week old Northern Lights from seed. That was only twenty-one days ago..... Clearly, the method has taken over my veg area. :laughtwo:
 
How long were you planning to veg TS?

Well, seeing as how I'm about burned out on the vegetative phase :icon_roll , lol...

But, seriously, if I go through with putting rooted clones into two-liter hempies, and the flowering period is up to 14 weeks, I probably should limit the vegetative period to about five minutes ;) .

I've got a couple of other things starting. One is an auto-flower so it doesn't much matter in terms of what lighting schedule I run. But the other is a young BbxWW cross that I hope turns out to be female, and it needs to grow and stretch for best results. I hope it's a phototropic strain, lol, since it's still in a little Solo cup. If I end up extending the vegetative time for those two, I'll have to do the same for the cuttings (currently only running one space).

EDIT: If a planned LST turns into a supercrop, add one week to the vegetative period.

And if I get a really wild hair and start some more strains... Well, I probably shouldn't do that right now <SHUDDERS>.

It may depend on how the cuttings do. I could just run a few in larger containers.

IDK.
 
Back
Top Bottom