Utopian Submarine - 2000W, Indoor, Perpetual

Hi all - gonna try to do quite the update today so let me say hi and welcome to some folks first:

Amazing, simply amazing!

Thanks! It always means alot when someone appreciates the work!

Looking real good there man, how's your controler comming along ?
Thanks stakkur - wb - the controller is coming along ok. Gonna be calling Parallax here in a little bit - they're on West Coast so they're last for the day. Will get some pics of it up later.

amazing grow so far man, I have to say I'm hooked. As a fellow programmer, I want to code up some sort of automated process when I build my hydro setup. What are you coding it in? I've seen a lot of home automation apps being written in flash and flex with the AIR libraries, but I would be more comfortable using a more stable platform (I have issues with flash crashing all the time if you're doing too much with it)

Glad to have you aboard, TheCriMsonK20. I'll definitely accept and prolly need help from as many programmers as we can find. This is being coded in pBASIC. Its BASIC with a few extra commands for the chip. There are a total of 62 commands in the pBASIC toolkit. It is then compiled to run on a BASIC Stamp PIC chip. It executes a couple of thousand commands a second and has about 2K of memory.

I've not used the AIR libraries - I was thinking about that kind of a thing, but I don't want to have to have a pc hooked up. This will run standalone, and spit out data to the serial port if you have a pc plugged in. As far as using Flash, although I went to Macromedia's User conference way back in 96 and was a fan of Director like noone, I can't seem to be too thrilled with Flash. It's great for making banners and web advertising. It fakes everything else - can be used - but I wouldn't. It is just too close to a Java or Javascript if you're trying to do a real anything. And with the open source libraries available now - its pretty doable to build even cross platform apps from scratch. Unless you have to worry about coding a graphics engine.

Didn't mean to go off there. I am baked and you got me thinking about Flash. At first I was like that would be cool, then I talked myself out of it as you can see. I just retyped that paragraph like 87 times.
 
Phase I Summary - Pt1

OK. Phase I is all but complete, so I'm gonna take a little time and really try to explain and show everything that's going on in the room at this time. Technically this update should be done when the Mom's have given their first clones - but that won't be for 4-6 weeks so this is as good a time as any. Also, I'm gonna break it into smaller posts, and try to get in some of the equipment and gear I use in the room.
 
Phase I Summary - Overall and Nutes

Lessons Learned:

  1. IT IS POSSIBLE TO GROW 6-8 PLANTS FROM SEED OR CLONE EVERY 4-6 WEEKS IN A SPACE 5X8X8. Actual grow space is 4x3x3 Veg and 8x3x5 Flower.
  2. So far, I like the Pureblend Pro Nutes. They are organic and still fairly easy to use, and the price isn't terrible.
  3. I use much stronger ppm of the Pureblend than I did with the Triflex or Foxfarm. With the Triflex I was about 200-500 lower ppm at each phase of growth. I don't remember exactly what I was doing with Foxfarm.
  4. The additives are not optional. If I cut back just a little on either CalMag or Liquid Karma the plants immediately show nutrient deficiencies of N,P,K.
  5. Adding Sweet and Hydroplex, and changing up to PureBlend Pro SOIL during the second half of the Bloom phase has made the girls a little happier. All these things increase the P and K and reduce the Nitrogen in the plant.
  6. Some Organic Nutes don't want O2 added. With Pureblend its ok. I have opted not to put airstones in because I have a nice recirculation going anyways (see pics below). However - even with the recirculating, I still need a circulation pump in each reservoir. The organic bits of the nutes collect on the bottom of the res unless they are circulated.
  7. I have 6 pots of the CAP Ebb and Grow and 6 of the General Hydroponics. The CAP ones are a little more sturdy, a half inch shorter (which I like) and fit inside the GH ones, while the GH does not fit nicely in the CAP. Therefore I will buy the CAP Ebb and Grow buckets from now on.
  8. I hate plumbing. Don't skimp. Glue or Seal everything. Don't go overboard on size. You can let things take their time so you don't need big pipes. 1/2" and 3/4" is MUCH cheaper than 1.5" and 2".
  9. I can use my fans to control humidity more than I thought. By turning a fan from medium to low and allowing the A/C to do a little more cooling the humidity in the room rose from 20-30 to 35-50.
  10. Not having a way to test CO2 regularly is giving me fits. While I've used the calculators, and checked with the test syringe a little, not having a real CO2 meter is very frustrating.
  11. The CO2 makes a huge difference. If I don't increase nutes, light and heat in accordance with the CO2 I see pronounced inter-nodal stretching.
  12. I don't like rockwool for the Veg medium. As you will see below, the plastic wrap around the rockwool DID inhibit root growth. There is clearly a direct relationship between how well the roots formed and the over-all size and health of the plants.
  13. A little bit of height between the water line and the return hose helps. When I had the tray on top of the res, the drain hose could get full, then back up. By raising it, the water flows steadily, and no more overflow.
  14. I like the results of my FIM test. I will continue. I will try topping as well.
  15. I like scrogs. I am beginning to think there's really no reason not to scrog every grow, unless space and timing preclude it. In other words - it would be hard to get more plants under the scrog now for example.
  16. A 1 month schedule is doable. I still may go to a 6 week schedule, depending on the yield of the current ones. But I know at least a 4 week schedule will work. That's 7-10 days in seedling/clone then 2-3 weeks in Veg.
  17. I know that my Veg area is at least tall enough to Veg plants that can outgrow my Flowering area so I will have to keep an eye on how tall I let them get in Veg.
 
Phase I Summary - Clones and Seedlings

Seedlings and Clones:

  1. The "BudBlanket" did not work for me. This was supposed to put a warm moist layer beneath the rockwool starter cubes. It did not work for me.
  2. Putting the clone/seedlings tray on a shelf even 2" off the floor allowed the thermostat on the heating pad to work. When it was on the floor, although it was on a dry towel for insulation from the floor, it was not pressed up against the bottom of the tray, so it never really worked right. As soon as I got it on a piece of wood - worked like a champ.
  3. The seeds must be well soaked when using rockwool starters. If the husk is not soaked enough the plant will not shed the husk and the tap root will never push the seed from the hole.
  4. The secret to rockwool is not the watering but the DRAINAGE. Use perlite on the bottom of the tray. Keep some water below the perlite in the tray, but make sure the cubes have ample drainage.
  5. When using Olivia's Rooting hormone, it is no substitute for your regular seedling nutes. From now on the process for cloning will be:
    1. Soak Rockwool in 15 ml/litre Hydroguard and pH 5.5 balanced tap water for a half hour.
    2. Mix the following (puts me at exactly 500ppm 5.8pH):
      1. 2.5ml Pureblend Pro Grow per litre
      2. 1.5ml CalMag+ per litre
      3. 1.5ml Liquid Karma
      4. 1.5ml Hygrozyme per litre
      5. 1.5ml Olivias per litre
      6. 2 drops pH Up per liter
    3. Soak the cubes in this for 5 minutes.
    4. Take the clone
    5. While clone is submerged in water: Strip the bottom leaves and use razor blade to sheer off the outer layer of some stem. Perhaps even make a small cut upward from the bottom to split the stem.
    6. Into Rootech cloning gel.
    7. Into the cube.
    8. Under the dome.
    9. Use an eyedropper to add a few ml of pre-mixed nutes daily on to the cube, and a couple of sprays under the dome.
  6. 3 x 125w CFL at 20" is not enough light. There was noticeable stretch. 3x125 + 1x250 is perfect. Not too much for the clones, yet enough to stop the stretch in the sprouts.
  7. There is no noticeable difference in the sprouts in soil versus the ones in rockwool. If anything, the soil sprouts look happier. They are even getting the same levels of nutes - which leads me to believe I could probably up the nutes for rockwool.
 
Phase I Summary - Veg Area

Veg Area:


  1. I don't like Rockwool for the Veg. The plastic messed with my roots. You mess with my roots you're messing with my family - and that can't happen. My girls gotta be free to spread their slutty selves all over as fast as they can.
  2. The CFLs are gonna work out. 2x125 2700K, 2x125 6500K, 1x250 6500K.
  3. Gonna definitely make more use of FIM and lst.
  4. Nutes should be 750ppm at the beginning of Veg and 1250ppm by the end. This is much more than I would have thought, but its clear those are the levels the girls like so far.
  5. Although I plan to use clay from now on, I will re-itterate - the secret to rockwool is the DRAINAGE! When the cubes were sitting on the bottom of the tray, there was about 1/16" of an inch of water at the bottom. Basically the thickness of the rubber gasket on the ebb and flow fitting. This was sufficient water to prevent the cubes from draining completely. After putting the cubes on a layer of river rock, the drainage problem was fixed and the cubes worked much better. I first tried putting them on Perlite - this works as well, but the perlite floats and is not as neat when moving to the next phase.
 
Lots of great stuff in this thread and the last three posts are 5 star stuff. Already did that so +Reps for the great insights.

:thankyou:


:peace:
 
Lots of great stuff in this thread and the last three posts are 5 star stuff. Already did that so +Reps for the great insights.

:thankyou:


:peace:

Thanks, LR. Glad it was good for you. I am really glad to have this journal to get all this stuff down. I have already gone back a couple of times to check pics and dates, and as you can see I am bordering on information overload.

Pics to come soon.
 
Phase I Summary - Flowering

Flowering:


  1. I like the scrog.
  2. I wish I had another 12" of vertical space so I like the scrog even more.
  3. I LOVE the clothesline. After having built a few of these things, and looking around a lot at others - I think I can say conclusively that this clothesline is the "right" way to build a scrog. Although the wire methods will work, placing the branches is much easier with the clothesline. And more importantly - I have felt NONE of the yucky cutting or tearing sensation you get when trying to squeeze a few leaves and a small bud into a chicken wire, and the clothesline does not cut into the nodes where a leaf and stem meet - the wire always did for me.
  4. The concept of a small flower area and big flower area is going to work out well for me I think. Its nice to be able cram 6-8 plants on one side while leaving some room on the other. Also, by having two reservoirs I am able to match their nutes to their growth much better.
  5. I am thrilled with the way the circulation and the Ebb and Grow work. I have added ball valves in a few places, and this allows me to fill the controller with mixing water and nutes without watering the plants til I am ready. I can also let one set of pots flow into the other if I need to move the water around.
  6. I like being able to test the water coming from the pots separately from the water going to the pots, and a simple ball valve at the end of the pots lets me drain some into a glass for testing very easily.
  7. I like that I can get 12 pots on one 20G reservoir if necessary. For example - while I was fixing the plumbing, I turned two valves, and all the plants were watered from one res while I worked on the other.
  8. I have started using the PureBlend Pro SOIL mix for the last 4-6 weeks of flowering. This is what they recommend even for hydro because it has less N and more P and K. It seems to be agreeing with the girls.
  9. The ppm for the early flowering goes from about 1200-1500. I have just yesterday upped the late flowering bunch to 1500 and have seen no negative side effects, so I'll leave it like that for a week, then up it some more. If things continue like this - I think its likely I will be at 1750-2000 ppm by the end. If I had done that with Triflex the plants would be dead.
 
Some Pics

OK - Now for some pics.

My Rockwool fears realized:
IMG_0007_4_JPG_800.jpg


1 transplant done - 5 to go ( I use the black box to stand on to get to the top of the scrog)
IMG_0006_4_JPG_800.jpg


I did have to splint (black tape front middle) one branch after I got a little over-zealous in the weaving.
IMG_0022_3_JPG_800.jpg


One branch weaved - there are a bunch like this in there now. Unfortunately the only place to get a good pic is also the least filled place on the screen.
IMG_0029_3_JPG_800.jpg


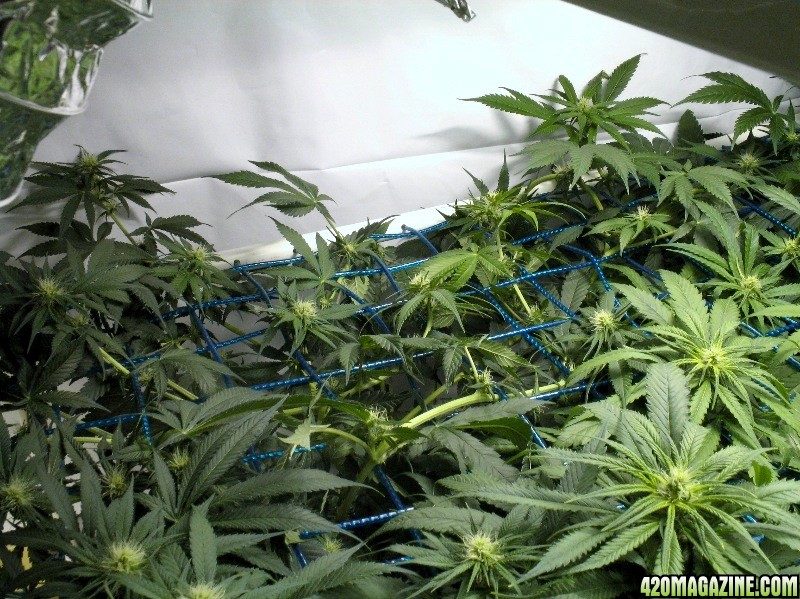
A shot from above the screen. I can't seem to get a good pic of the top. The lights are in the way. It always looks huge, or tiny, or unfilled - none of which is right. Alsthough I don't really care about the gaps - remember that this scrog was to prevent the plants from getting too tall. It was an afterthought, so its not filled as well as it could or should be.

Anyways here's a few from above - not terrible development for only 17 days into flower.
IMG_0021_3_JPG_800.jpg


IMG_0019_4_JPG_800.jpg


IMG_0017_4_JPG_800.jpg


17 days into Flower - not terrible:
IMG_0015_5_JPG_800.jpg


And last but certainly not least - just when you thought it was safe - there's 6 more coming at ya. These were started Dec 11th. So they are exactly 1 month old and are starting their flowering. These are the ones we have to see what we think will yield (taking into account that the smaller ones were plagued by the Rockwool Fish Fossil Roots (technical term I know - see if you can keep up). If they look too small then I will add a week or two to veg next cycle and def scrog the hell out of 'em. But I was hoping to grow a few nice short plants straight up.

IMG_0002_5_JPG_800.jpg


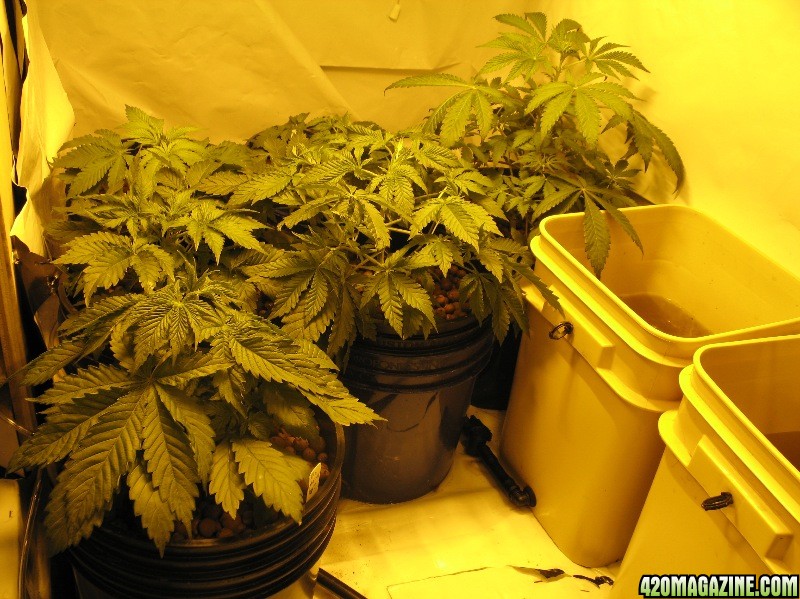
The Veg Area. These girls have taken a hit in the last few days from all the moving, watering regimen being screwed up, nutes levels up and down, an alien pissed on them - you name it they've suffered lately.
IMG_0008_5_JPG_800.jpg


For any of you with a keen eye - you may have noticed a new arrival in the clone dome. This came from Montana as a seed. Then to a friend of a friend who is growing the Mom. And finally to me. Nice to have a room where folks WANT to GIVE you a nice clone. That's never happened before. I had to turn down a few more for the time being cause of space. Maybe in a week. ;) Don't know what strain she is so we'll just call her Montana.
IMG_0010_5_JPG_800.jpg


And finally, as the batteries are dying on the camera - one from the door.
IMG_0006_5_JPG_800.jpg


OK - hope that gets everyone up to speed. I will do one final small wrap tomorrow or Wed of Phase 1 - once the Mom's are in and the lids on the two Veg bins. When that's done - I think I'm ready to slow down the testing quite a bit and settle in. I don't want to be experimenting on the Barney's.
 
Should have saw my towel from wipeing up the drool...LMFAO..

Now you got me laughing out loud. Thanks, man. Don't mean to be silly and repetitive - but it really is nice to be able to share the work with those who appreciate it.

I just checked out your outdoor. Love that Cali weather. I can't seem to get that nice shiny green to my plants. I think its cause the humidity has been so low and I had too many fans going, but I won't make excuses. Just gonna keep learning till I find my missing ingredient.
 
thats what it take. So many people want to grow different strain. I grow alot of strains. As motheres that is. To breed and to have fun w/. But i always stik w/ what i know til' I feel i have the strain down. I got 21 mothers at my disposal at the moment and wont go out beyond that. I've grown 18 out of the 21 consistanly til i was confident that I can inpoint issues w/ em. And I can now, but the new 3 are a pain, but in all due time. SO what i definetly recommend is to stick w/ what you know til you can grow it in and on everything. or atleast til you can say that you got the full potential oout of that strain. And trust me your grows w just get bigger and better. You havve a green thumb tahts for sure. And ingenuity to add. I'm definetly a fan!!
 
Wow - 21 Mom's. I don't even have 21 plants :smokin2:

I can't even imagine prepping nutes for all your grows. It takes me forever to do mine, and I always feel like I forgot something.

Hopefully I can get a few cycles of this Barney's under my belt - then start some breeding, but it would be a real shame to hybridize this plant and somehow have that get on the market - see below.

Its prolly silly to be so into a strain I've never even smoked, but it was such a mission a year ago to find it. First I started by looking at all the Cannabis Cup winners from 07. I wanted to grow something from seed where I could have a reference both from beginning to end. Then I started going through their breeding and flavors. I did not want a lemon. I do want a skunky. I want very high THC and couchlock - not meant to be a day-time high on this one. I wanted a breeder who had won multiple cups so I knew the strain would be stabilized. I wanted a nice dense bud, but not brick.

So after months of looking - no luck. Then I saw the centerfold in High Times of the Utopia Haze from 08, and given that it has everything I thought I wanted - I started looking to buy seeds. Needless to say it was nigh impossible to get after having just won both 1st and 2nd place in the same Cannabis Cup.

While I was searching, I saw a video of the breeder at Barney's. He was showing the Mom that the winning bud had come from. He also made it a point to say that all seeds of Utopia were coming from her offspring. They had selected from over 3500 plants to get the phenos, re-crossed back on themselves for 3 years, and were not letting that go by the wayside. That's why I don't wanna screw with it till I know what I'm doing.

So now - finally, I have the seeds - straight from Barney's and a glorious High Times centerfold to show me what the genetics can do. Now, when I can grow that Barney's so that it looks like the centerfold - then I will be ready to move to the next step.

BarneysSeeds.jpg
UtopiaHaze.jpg
UtopiaHaze2.jpg
 
WP I dont like the plastic either I cut it off.

Recently I read in a grow mag about air pruning with rockwool cubes basically you cut the plastic off and put the cube on a wire tray so all sides are exposed to air it needs to be a flood drain setup.
What happens is the roots grow till the reach the end of the cube then die back and the roots branch out to fill the cube.
the theory is this will give you a plant with a solid root structure before it goes into your veg area.
My experience though limited is you will get long roots that shoot right out the bottom of the cubes and not allot of lateral branching within the cube like your fish root there. So this might help that issue

I will be trying this when I get back from vacation with my NLxBB seeds to test the theory.

Just wanted to share that thought ;)
 
Permission To Come Aboard "Sir".

While I have great respect for the Marines, I was a lousy grunt. I was promoted twice and demoted twice, so I retired a Lance Corporal. So you definitely don't need to call me Sir! There were guys graduating from bootcamp with more stripes.

Glad to have you here OMM. Your journal was one of the first I read. And I did read it all the way through. Its folks like yourself that give this place the great vibe it has.
 
WP I dont like the plastic either I cut it off.

Recently I read in a grow mag about air pruning with rockwool cubes basically you cut the plastic off and put the cube on a wire tray so all sides are exposed to air it needs to be a flood drain setup.
What happens is the roots grow till the reach the end of the cube then die back and the roots branch out to fill the cube.
the theory is this will give you a plant with a solid root structure before it goes into your veg area.
My experience though limited is you will get long roots that shoot right out the bottom of the cubes and not allot of lateral branching within the cube like your fish root there. So this might help that issue

I will be trying this when I get back from vacation with my NLxBB seeds to test the theory.

Just wanted to share that thought ;)


Very, very interesting. I had thought about that, but I decided exposing the roots to light was worse. I didn't think about that they might succeed in growing back through.

I'm actually liking the switch to clay. The basic premise being it doesn't really matter how big the net pot is. So I will be using smaller net pots than the rockwool. This should let me get the plants in there a little more comfortably, while still giving the roots a full 360 of access to the nutes and air.

Since they both can use a flood and drain of some kind, the systems are the same, except the lid on the tray.
 
Last Major Tuck and Weave

Hi all - I just finished what I think to be the last major bit of placement. The girls have basically slowed their stretch now I think.

I wish I had built the screen about 4 inches lower. I would have been able to get about 20 more bud sites above the scrog and it woulda filled nicely.

As it is - I don't think it will be terrible. I tried to take some pics as I moved some of the bigger ones, so you could see how I do it. There are lots of different ways to scrog, and its always helpful to see different methods. And the method of placement and/or movement will vary according to when and why the scrog. Mine was an emergency move caused by not keeping nutes, heat and light in line with the added CO2 - big stretch.

As always, any suggestions greatly appreciated.

Without further ado:

This is the area that needs to be filled. The 9 spaces in a square. The bud in the very bottom right is the tip of the branch we're gonna put there.
IMG_0034_4_JPG_800.jpg


Here's the one to be moved:
IMG_0032_4_JPG_800.jpg


Here's where it currently comes through the scrog:
IMG_0027_5_JPG_800.jpg


Here's a view from underneath - the branch comes in from the left, goes above the big fan leaves and the splinted branch (my only one this grow and the one that was SUPPOSED to have filled that gap) and finishes out on the right.
IMG_0036_4_JPG_800.jpg


First thing to do is get her untangled and standing straight up, so we can pull her back through. You can see here that she would have been touching the light - and this is one of her lower branches.
IMG_0040_4_JPG_800.jpg


Now we pull her back through:
IMG_0063_1_JPG_800.jpg


OK she's bent into place, but still under the screen:
IMG_0066_1_JPG_800.jpg


Now I will pull her all the way up and through again, then gently weave her through the gaps. Remember to bend the whole branch when possible - use that flex. Also, and this is why I'm lovin the clothesline - it is often better to move the screen a half inch to make a tight bend than it is to try to bend that branch the last few degrees.
IMG_0068_1_JPG_800.jpg


Finish the filling the same way:
IMG_0072_1_JPG_800.jpg


That's it! I think I brought at least 10-15 more little bud sites up to where they will be real buds instead of popcorn buds. Well worth the effort. You'll have to come back in a few days to see how they filled out.


I'm gonna see if I got any decent shots of the plants - and post those next.
 
Back
Top Bottom