Part 3:
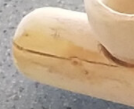
Now we're ready to fill the cracks with some wood filler. I used a natural color to best match the cannabis wood color.
You can apply with your finger or a cotton swab. Let dry for about 4 hours (or whatever the manufacturer recommends).
Once the filler is dry, time to sand everything smooth – use 220 grit sandpaper.
Be sure to clean out the air channels by blowing, or reaming with a pipe cleaner.
One last thing before applying the finishing coat – for better mouth comfort I like to slightly flatten the mouth piece area, but that’s my personal preference and not really necessary.
It’s now ready for the finish coats. You can use whatever you like, but I prefer water based for easy cleanup and (I feel) is less toxic.
Be sure not to coat the inside of the bowl, so that you will not be inhaling burnt chemicals as you smoke.
I like to apply 3 or 4 coats with an hour or two to dry between coats.
Add a screen to the inside of a bowl. I bought some online very cheap, and cut them to match the shape of the bowl.
Here’s the finished pipe ready for a smoke!

Once I figure out how I want to decorate this pipe, I'll post some pics. I hope this gives you a helpful start to making your own custom creations!


 .
.
 again BeezLuiz!
