The Proper Way To Water A Seedling In A Large Final Container

Greetings Emilya,
So today is day 22 of my second indoor auto grow and I am trying to follow your watering guide but having some difficulty. It's a 4x4 tent, 500w led (dimmed to 200w to start 300w now @ 18-20in.) , ffof soil w/20% pearlite and some dolomite lime, botanicare pure blend pro liquid nutes. I also switched to fabric pots this run. Watering went according to schedule from seedling through until this week. I'm wondering if I have way too much drainage maybe because the lift test says the soil is dry in 2 days now and the plants are confirming the light weight of the pots by exhibiting thier I'm thirsty droop. Aside from the wet dry time frame being off the plants look amazing. They're all past node 5 already and growing like weeds. I disregarded the 'you don't need to feed them in this soil for a month' advice from the fella at the nursery and am following the feeding schedule on the nute bottles. Any advice on how i get back on track?
 
its sounds like you might be in too small of a container if you are draining the water that fast, but unless you want to transplant them you will need to water more often. No worries on that though, because more watering means you can give more nutes, resulting in bigger plants! Are you in 3 gallon containers at least?
[/QUOTE
5 gallon pots mostly. Although, I'd read that the Bloody Skunk Auto was a notoriously small and quick finishing plant so I popped a couple in 1 gallon pots to see how they'd do. They've definitely outgrown thier pots but I'm hesitant to up pot with all I've read about it stunting autos. Not sure it could hurt at this point though. The 5 gallon pots short wet/dry cycle is what's puzzling me.
 
5 gallon pots mostly. Although, I'd read that the Bloody Skunk Auto was a notoriously small and quick finishing plant so I popped a couple in 1 gallon pots to see how they'd do. They've definitely outgrown thier pots but I'm hesitant to up pot with all I've read about it stunting autos. Not sure it could hurt at this point though. The 5 gallon pots short wet/dry cycle is what's puzzling me.
it sounds like you simply have better roots in the 5 gallon containers so they can USE the water faster. On the smaller containers... you are right now stunting your autos by being in too small a container. Everything you read about stunting autos is in error. A proper transplant does not stunt our plants, to the contrary, they experience a growth spurt upon hitting that fresh soil. The auto transplant fears are the result of a myth, promulgated to sell more auto plants, an inferior product, by convincing the buying public that they are easier to grow. Actually they are no easier or harder to grow than any other plant... they simply grow faster, ignore the light period and are generally smaller and produce less than their longer running photoperiod cousins. Transplant your suffering autos asap.
 
This might be a silly question, but do you water a small clone the same way? I'm getting some clones today and transplanting into the 10g smart pots because that's all I have. Should I just saturate while doing partial waterings in between until they catch up?
Not a silly question at all... yes all small plants with small root systems that are placed in large containers have the same watering problem, and this method will work just fine for clones too.... they will just recover faster and get to a point of watering the entire container sooner, because they are working with more leaf mass and energy right from the start and their roots are going to grow out more quickly.
 
Not a silly question at all... yes all small plants with small root systems that are placed in large containers have the same watering problem, and this method will work just fine for clones too.... they will just recover faster and get to a point of watering the entire container sooner, because they are working with more leaf mass and energy right from the start and their roots are going to grow out more quickly.

Appreciated as always Emilya...

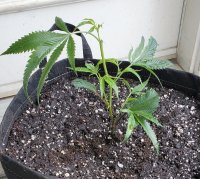
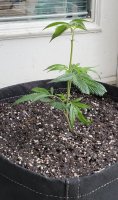
Hope I did this right. Transplanted clone into 5g fabric pots. Ocean forest soil.

Used mykos and watered with one gallon of water, recharge included. It was barely running off but I deemed it 'good enough'.

First pic is before/during watering. Second is after watering.
 

Attachments

  • 20200725_173615.jpg
    20200725_173615.jpg
    1.4 MB · Views: 182
  • 20200725_180751.jpg
    20200725_180751.jpg
    802.6 KB · Views: 186
Appreciated as always Emilya...

Hope I did this right. Transplanted clone into 5g fabric pots. Ocean forest soil.

Used mykos and watered with one gallon of water, recharge included. It was barely running off but I deemed it 'good enough'.

First pic is before/during watering. Second is after watering.
It looks perfect, especially the way the plant perked up after watering!
 
Emilya, I know I'm a little late to the party, but I would like to tell you that I am learning a lot reading your how to posts. I started reading about your work the other day when you helped me out with the mega crop nutes. I just wanted to take a second to give you my appreciation for the work and dedication you put into your posts and your growing.
Just being a newborn to this hobby this is the kind of information that is needed... Thank you for that and thank you for reaching out the other day, it is and always will be greatly appreciated.
Always glad to help Kevin... good luck!
 
In the beginning, you may even want to start your seed directly in the final container, simply by putting it one inch deep, pointy end down. It is surprising to some how often this works, even though mother nature does it all the time. If you go this route, lightly mist the area around the seed several times a day with 5-10 good squirts, attempting to only wet down as far as that seed. Continue this until the seedling hits the surface.

Keep using the spray bottle twice a day, now attempting to give enough water to soak in to roughly 3x the plant's height, and in a circle out to 3x the plant's diameter, by at least doubling the amount of squirts you gave to the seedling. Do not soak the entire container right away.... your new seedling cant handle that much water and if the seedling starts to wander or swim in the wet soil, you are giving too much.

Water like this, with these relatively small amounts a couple of times a day, always attempting to get a good part of that water out away from the trunk of the plant, by trying to make the outside edges of that circle 3x the diameter of the plant, the wettest places in the container.... you are attempting to entice the top roots to grow out in that direction.

After the plant has gotten a couple of leaves and gotten taller, it will no longer swim around in the soil if given a lot of water, and it is time to get a bit more aggressive than the spray bottle can do... it is time to move to the watering can and a couple of cups of water at first, slowly soaking the entire top surface of the container. We aren't trying to saturate the container yet, but we do want enough water to soak into the entire surface at least 3x the height of the plant, and we want some of that water to head straight down the middle, where the roots are trying to reach the bottom. This is when it is handy to have been an outside vegetable gardener, so that you know how to test the top of the soil to see if it is moist. When you can no longer feel moisture a day or two later, water like this again.

When the plant's 3x diameter reaches the outside edges of the container, water the entire container slowly, to saturation (runoff) for the first time. It will take a week or more for the plant to use all of that water on this first round, but you don't want the plant to sit idle all of that time either, or it will stagnate. It is time to change the watering pattern again.

Every 3 days or so do a partial watering of the top of the surface, again with only enough water to soak in to the first 3 or 4 inches of soil. Two specialized sets of roots are now forming, the top spreader roots designed to choke off other plants and quickly gather up rain, and the bottom tap and feeder roots. You are attempting to water only the top spreader roots, while the bottom tap/feeder roots continue to work on the water sitting in the bottom of the container for as long as it takes to clear that first full watering.

You may have to do this secondary top watering 2 or 3 times while you wait for the container to dry out all the way to the bottom. Force the plant to grow the necessary roots to do this job by being patient, and the plant will eventually use all of that water. Once the lift method, a dip stick or a moisture meter tells you that is is finally dry down to the last inch of container, it is time to water completely again and repeat the process, while every 3 days watering the top, until the bottom finally syncs up with the top.

Every time you go through one of these cycles, the roots will get stronger and the time between complete waterings will diminish. Eventually the top and the bottom will sync up and you will not have to do the secondary watering any more, you will just be watering the whole container every 3 days or so, as the wet/dry cycle stabilizes at around 3 days.

It is important to cycle the plant like this all through veg so as to force the plants to develop a solid root ball... the roots do not grow to fill that container unless you challenge them. Once you get into bloom, it is time to change your watering strategy.

From then on your goal is not building roots, it is time to really start using the roots that you have carefully built. Your goal at the end of stretch should be to start pumping as much water/nutes into the plant as it can take. I typically will force a plant that is perfectly happy with a 3 day wet/dry cycle into an every other day watering all during bloom... and with the roots you have forced the plant to grow in Veg, they will be able to take just about as much water as they did in 3 days, if you have done this correctly.

Good Luck and Good Grows!
Emilya

Do you follow the same method if you start in a solo cup?
Thanks as always for your contributions.
 
Do you follow the same method if you start in a solo cup?
Thanks as always for your contributions.
no, in a solo cup I will use a mister until I see the 2nd set of true leaves and at that point I do a full proper watering of the solo cup to the point of runoff, and from then on I am letting the cup dry out each time between waterings. The very first cycle may take around 5 days to drain that cup, and in that case only, I do a partial watering of about 1/3 the amount of water that would cause runoff, after about 4 days, and then sit back for another 2-3 days until the cup needs a full watering.
 
You were told incorrect folklore, not fact. The truth is that you can give nutes any time you like, in FFOF or any other soil. If you want big plants, fertilize them. Strike the word feed from your mindset for a bit... soil can feed the plants, your timid advisor was right, but if you want to be serious about this thing and grow big plants, fertilize them. Use the feeding chart and give the recommended amounts for that week of the grow. Not 1/2 strength either... you are either going to do this thing like a boss, or you can grow little plants... its totally up to you.

Spoken like a true Boss!!! :Namaste:

Heading down to add nutes to my watering cycle!!
 
Hey @Emilya,
After reading your information on watering I've just realized that I knew nothing as detailed as that.
Thankfully now i can water with confidence understanding how your watering technique works.....
A "lesson from Jah" hehehe :ganjamon:
Thanks again :hookah:
 
I ran down that first post, then read it again. I was so close to having the same procedure you have on my first indoor auto grow.
Then I realized, I forgot the spray bottle this time. Tearing into one of my first harvested plant, I had pretty close to what you described as the top mat. Glad I came back and looked again. Good stuff E thank you.
 
Hi Emilya, great info!! Did not know you could transplant an auto, I was told it was a big NO, thanks for unravel it for me. So, it I would like to up-pot using autos, I would just follow the old post (The great original one)?
 
Thanks a lot for the quick response, I'll post some pics... The biggest one is in a 2 gallon container, the smaller ones are .75 gallon container

IMG_20201216_200802.jpg


IMG_20201216_200755.jpg


IMG_20201216_200749.jpg
 
Back
Top Bottom