“It’s all code. If you listen closely, you can hear the numbers. There’s a cosmic flowchart that dictates where you can and where you can’t go. I’ve given you the knowledge. I’ve set you free. Do you understand? ”
-- Bandersnatch (Colin)
Today's update is mostly automation, although I did drop another couple hundred bones at my home away from home (big box store...you know who you are). I'm still waiting for all these rebate checks to start flowing in. Should supply me with nutes for a few grows


After getting the irrigation system running...I started thinking about what would happen to my pump if the well run dry...so here we go.
first we need a float switch...the one I chose goes through the side of the reservoir and comes with a grommet...no sweat...similar to the dutch buckets

so first things first...put a hole in the bucket dear Henry...
I used the washer as a guide for how big a hole to carve out. Then put in your grommet in from the inside and push the wires through from the inside. Push the float switch in all the way.
Then add the washer and nut on the outside. You have to start the washer on the threads and as you tighten the nut the grommet will start to mushroom.
Tighten her down good and tight by hand...no tools required.
Next...we add some male solderless connectors so we can unplug the switch from the pi when needed...
I love these connectors especially when joining wires of different gauges...or even combining solid w/ braided wires.
Then we use an ethernet cable to connect the switch to the breadboard connected to the pi. I've got both the 6 gang relay box and now the float switch connected to the same mini breadboard
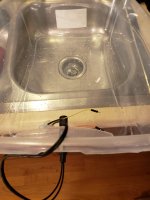
and of course I had to prototype before just cutting a hole in my reservoir


 . Before I added the germination dome and heat pad I raised the temp in the lab. Now that I have the germinator I went ahead and dialed the cabin temp back down a bit.