Radogast's Hi-Brix Basement Grow - New Location - New Soil - New Experiences

Garden Update


For no particular reason, I decided to take pictures of all the girls in the garden, starting with those who needed water.

Borderliner, clone of a clone, 22 days in soil
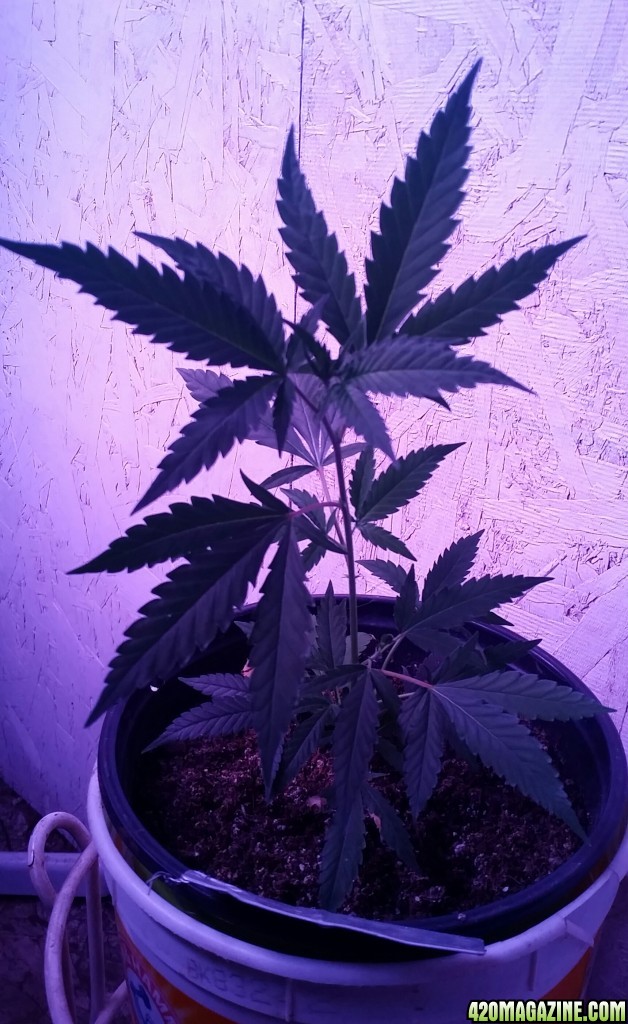
20170625_190508-1.jpg


This was her first watering since planting day (actually a weak 0.2 ml tea)

20170625_190501-1.jpg


AK47 XTRM, clone of a cone, 16 days in soil

20170625_190640-1.jpg


Also her first watering since planting day (0.2ml tea)

20170625_190655-1.jpg


Carnival, 1st clone, 22 days

20170625_190922-1.jpg


She has been thirsty, watered and nuted 4 times in 22 days

20170625_190948-1.jpg


Tangerine Widow #1, unsexed seedling, 51 days

20170625_191921.jpg


20170625_191900.jpg


Tangerine Widow #2, unsexed seedling,

20170625_191135-1.jpg


I planted this one as a backup in case Tangerine Widow #1 is a boy. If they are both female, I'll probably flower them both.

20170625_191129-1.jpg


Haze x Kali China, seedling, 21 days

20170625_191442-1.jpg


One of the 2 seeds recently purchased from Ace

20170625_191446-1.jpg


Guawi, seedling, 21 days

20170625_193345-1-1.jpg


The other new Ace genetics that I am really excited to try

20170625_193340-1.jpg


Amherst Sour Diesel, clone, 68 days

20170625_191527.jpg


She's been in her final pot for 3 weeks, but at 5" tall, she's not ready to flower yet.

20170625_191531.jpg


Agatha (Ace free seed), clone, about 50 days

20170625_191616.jpg


People are choosing to smoke her over Delicatessen Lilly, and I like the shape of her buds, so I'm running her again

20170625_191634.jpg


Lilly, clone, about 70 days

20170625_192022-1.jpg


She is close to being flowered, but her mom didn't stretch much, so I'm growing her taller before flower

20170625_192010-1.jpg


Bubba's Gift, reveg, 76 days - still no signs of new growth or dying off.

20170625_192423-1.jpg


That's all for the veg area. No clones in the clonebucket.


Carnival, 43 days in flower area. She has stretched from 18 to 44" tall

20170625_192620-1.jpg


43 days, 2 days after second cat drench (She showed buds late)

20170625_192643-1.jpg


CBD Critical Cure, 19 days in flower area

20170625_192935-1.jpg


She has stretched from 20 to 42" and is still growing

20170625_192944-1.jpg


Borderliner, 37 days in flower area

20170625_193019-1.jpg


A solidly performing, pain managing, indica dominant hybrid

20170625_193035-1.jpg


20170625_193050-1.jpg


AK47, scruffy but fun

20170625_193212-1.jpg


20170625_193207-1.jpg


A last glance at the veg area

20170625_194007.jpg
 
I've had an uncharacteristically busy social life the last 4 days - visited 3 folks in their homes (victorian mansions) met up with a few at the pub, had more stop by the house, went to a fund raiser, offered advice to a neighbor on pool and yard maintenance (solicited advice, I'm not THAT pushy) discussed with another setting up a grow room which was moved and has been languishing for several months .


But the Big News!

MrGreene went to thetime and expense to set me up with some COB grow lights. He mounted COB LED modules onto heatsinks, with little hanger clips, and drilled and tapped threads to mount PC type cooling fans, matched power supplies to fans and chips, soldered on connectors and wires and whatever else to build me two sets of 4 lights. I guess he felt it was time for me to move my lighting into the current century, and I am both grateful and excited to see the difference this will make in the flower area.

My current plan is to set up an array of all 8 50W COB modules (running at a nominal 240 watts) in place of one of the HPS 600W lights in the flower area.


4 COBs hanging from the ceiling to test the light - the plugs and cords MrGreene built couldn't have been much easier to connect

20170625_193635.jpg


4 channel driver? I think he said it was adjusted for 30W per channel, 137W draw at the wall socket.

20170625_193651.jpg


I didn't install the lenses yet. I think I'll install the 60 degree lenses (he shipped both 60 degree and 90 degree)

20170625_193703-1.jpg


I've been prepping the front porch floor for painting (scraping, planing, and sanding) so today, when I purchased paint, I strolled down another aisle and purchased aluminium angle stock to build a rectangular frame to hold the lights. After I get the angle stock cut and drilled, I'll go back and buy a rivetter and rivets to hold the frame together.

20170625_193810-1.jpg


I'm sorry for the cheezy pictures. The box holding the boxes of parts was very well packed with everything nestled in cosy bubble wrap. It was done very nice, but I just tore open the box and unwrapped and generally made a mess of the living room like it was Christmas morning. Then I carefully moved parts down to my basement work table and took photos - or so I remember - but there is no evidence of photos on my phone.

Thank you, Mr Greene. I would have probably researched until winter before making a decision on parts to do this. I'm really excited to use these LEDs - and they don't hurt my eyes. (I get near instant headaches under the purple lights.) I'll be passing on my rarely used 100x3W LED lights to a friend in the community :)
 
Sweet lookn girls u got there rad very nice im so glad i took ur advice on traning with my strawberry cake she is doing amazing under my new light n congrats to hear about ur new cob lights those r fukn awesome i got a cheap version 1200w online n it did some amazing work altho it still kinda produced alil more heat then i originally wanted from a cob but not knowing stuff about lighting and electronics n electricty i got a light with more red in the spectrum so it makes more heat im guessing idk but yea my perfect sun the dwarf star now that is a light lol if i had a setup like urs i wud def go to cob lights those seem to work the best from what ive seen anyway but yea man lookn great an again congrats on ur garden looking amazing an the new light hope it works out great 4 ya
 
Incredible.... and sexy.

so....
After I get the angle stock cut and drilled, I'll go back and buy a rivetter and rivets to hold the frame together.

I'd go with self taping screws just for the firmness factor. Seems to me like rivets often loosen and considering the fans and inherent vibrations, I can't help but fall on the screw side of that choice option.
 
I'm sorry for the cheezy pictures. The box holding the boxes of parts was very well packed with everything nestled in cosy bubble wrap. It was done very nice, but I just tore open the box and unwrapped and generally made a mess of the living room like it was Christmas morning. Then I carefully moved parts down to my basement work table and took photos - or so I remember - but there is no evidence of photos on my phone.

Thank you, Mr Greene. I would have probably researched until winter before making a decision on parts to do this. I'm really excited to use these LEDs - and they don't hurt my eyes. (I get near instant headaches under the purple lights.) I'll be passing on my rarely used 100x3W LED lights to a friend in the community :)

I'm glad you like them Rad. It made my day to read this and visualize the excitement.

It's interesting that you measured 137 watts. I think I measured 112 watts on your lights with my generic kill a watt. I'd bet mine is not accurate and needs replaced.

I'm looking forward to seeing how they compare to the HPS and if you eventually decide to use them as primary lighting or supplemental.

I haven't come to any kind of decision about what is the best setup for reflectors and lenses. I have 60 degree and 90 degree reflectors and lenses in the small tent. No lenses or reflectors in the big tent. I'm planning to remove the lenses in the small tent and just run reflectors then make a decision from there. I'm interested in what combination you find that works.

I'd bet that the self tapping screws would work good like Tead suggested or even just a bolt and nut would do ok plus if the bolt is long enough you could use a washer and second nut to hold the ends of some chain to hang the frame with.

Oh, only 6 of them are 50 watt chips. There are two 100 watt chips in there. They are marked on the heat sink and on the chip so you'll be able to find them easily. I don't think they put out any more light than the 50 watt chips since they are being run at the same wattage but they seem to run a little cooler I think.
 
Incredible.... and sexy.

so....


I'd go with self taping screws just for the firmness factor. Seems to me like rivets often loosen and considering the fans and inherent vibrations, I can't help but fall on the screw side of that choice option.

I'm glad you like them Rad. It made my day to read this and visualize the excitement.

It's interesting that you measured 137 watts. I think I measured 112 watts on your lights with my generic kill a watt. I'd bet mine is not accurate and needs replaced.

I'm looking forward to seeing how they compare to the HPS and if you eventually decide to use them as primary lighting or supplemental.

I haven't come to any kind of decision about what is the best setup for reflectors and lenses. I have 60 degree and 90 degree reflectors and lenses in the small tent. No lenses or reflectors in the big tent. I'm planning to remove the lenses in the small tent and just run reflectors then make a decision from there. I'm interested in what combination you find that works.

I'd bet that the self tapping screws would work good like Tead suggested or even just a bolt and nut would do ok plus if the bolt is long enough you could use a washer and second nut to hold the ends of some chain to hang the frame with.

Oh, only 6 of them are 50 watt chips. There are two 100 watt chips in there. They are marked on the heat sink and on the chip so you'll be able to find them easily. I don't think they put out any more light than the 50 watt chips since they are being run at the same wattage but they seem to run a little cooler I think.

The new lights look great Rad!
I'll second what Mr.Greene said about using bolts for your frame. Just throw either a locknut or locking washer on it and your good to go.

OK. You have convinced me. No rivets. I thought rivets might be better because they don't unscrew themselves. Machine screw threaded eyebolts with multiple locknuts sounds pretty, but standard nuts and bolts are good enough. I'll need to check my parts bins :)


MrG, the 137 volts was me quoting you from memory. I don't have a kill-a-watt type meter. I try to avoid buying tools unless I really need them, I have 2 racks full of tools in the basement and constantly remind myself I don't need a table saw or joiner just because it is available for a low price.

I was contemplating 4 lights to replace a single HPS, but that is only 120W in place of 600W. The area used under each light is 3x2.5' for 7.5 square feet. 4 lights would be 16W per square ft. 8 lights would be 32W per square foot. I think 32 COB Watts per square foot is a more reasonable comparison to 80 HPS Watts per square foot.

About a year ago, Cree tried to build a direct replacement for the performance of a 1000W Gavita HPS with a phillips bulb and they spent 553 LED watts to replace 1000-ish HPS watts. With a standard lighting goal of 50W HPS per square foot, 32W COB per square foot sounds like it meets/exceeds the lighting goal.
 
I'm glad you like them Rad. It made my day to read this and visualize the excitement.

It's interesting that you measured 137 watts. I think I measured 112 watts on your lights with my generic kill a watt. I'd bet mine is not accurate and needs replaced.

I'm looking forward to seeing how they compare to the HPS and if you eventually decide to use them as primary lighting or supplemental.

I haven't come to any kind of decision about what is the best setup for reflectors and lenses. I have 60 degree and 90 degree reflectors and lenses in the small tent. No lenses or reflectors in the big tent. I'm planning to remove the lenses in the small tent and just run reflectors then make a decision from there. I'm interested in what combination you find that works.

I'd bet that the self tapping screws would work good like Tead suggested or even just a bolt and nut would do ok plus if the bolt is long enough you could use a washer and second nut to hold the ends of some chain to hang the frame with.

Oh, only 6 of them are 50 watt chips. There are two 100 watt chips in there. They are marked on the heat sink and on the chip so you'll be able to find them easily. I don't think they put out any more light than the 50 watt chips since they are being run at the same wattage but they seem to run a little cooler I think.


Now that you mention it, the 100W chips ARE clearly labelled

20170625_193703-1.jpg
 
Nice little lights my friend. It'll take a minute to get them dialed in and should prove to be interesting. In a comparison ways. I don't know how cost effective they wood be in a larger room against HID lighting. I'm a old dog who don't take change easily, but I can see them in tents and is a place for them. I hear them big ones are costy. But I can see what ya mean about head aches leds cause, Even the little one I'm going to play with can hurt your eyes. Almost as much as the big hid guns. Speaking of that, it's close to time to replace my bulbs for my next run indoors when the temp cool a tad,, or I hook up the A/C unit in there. I have afew weeks anyways.
That reveg will take off. You going to have alot of cleaning up on it with all that bud. I leave 2 or 3 little buds on mine and go from there.When that one kicks your going to have a million branches everywhere.. And looks like you have a nice crop coming in soon. I'm abit behind on keeping up on all people journals but I timed this one right. I get to see a kid in a candy store..
Nice lights GL and Keepem Green
 
Say MrGreene.....

Without the long story, I'm generally unhappy with the cooling configuration of commercially produced LED fixtures. The major bump for me is that the fans blow the wrong way. The ones I've seen have all been sucking from the top and exhausting out the sides. This makes it impossible to connect an exhaust tube.

Side note.... how are manufacturers this clueless? They spend so much time telling me they run cooler, but then poke themselves in the eye with a poorly designed cooling system. Geez.

Anyway.... I assume you can just flip those PC fans and use the holes on the other side with no problems? This would give one the option to go either way. I know that fans are more efficient on the output side, but I would imagine that even a smaller fan would provide plenty of airflow. I assume they float in CPU heat ranges since we use PC fans and heatsinks to cool them.
Did you use dielectric grease between the light and heatsink?
 
I have no idea what the light angle is without lenses but should be in the neighborhood of 120 I'd guess. I'll try to see if I can make a better guess after removing lenses.

This are able to run without fans although they get uncomfortable to touch. I've run mine a couple days with the fans off as a test. I'm sure that reversing the fans would do OK since they are cool to the touch with the fans blowing down. They look like they would mount upside down just fine.

The thermal paste was a big syringe of gray stuff that was inexpensive online. Seemed to have similar ratings to the arctic silver that the guys are using on the more expensive lights. Most of those heat sinks came with little packets of thermal paste that I didn't use because the syringe was convenient. I sent a couple of those packets in a zip lock along with a couple spare 6000k chips. The installed chips are all 3000k.

Rad, one light per square foot at about 30 watts send to be the formula that I've seen most often so I'd bet it'll be close to what you want. I'm running 8 in the 32" x 32" tent which works out to 7.1 square feet.
 
I have no idea what the light angle is without lenses but should be in the neighborhood of 120 I'd guess. I'll try to see if I can make a better guess after removing lenses.

This are able to run without fans although they get uncomfortable to touch. I've run mine a couple days with the fans off as a test. I'm sure that reversing the fans would do OK since they are cool to the touch with the fans blowing down. They look like they would mount upside down just fine.

The thermal paste was a big syringe of gray stuff that was inexpensive online. Seemed to have similar ratings to the arctic silver that the guys are using on the more expensive lights. Most of those heat sinks came with little packets of thermal paste that I didn't use because the syringe was convenient. I sent a couple of those packets in a zip lock along with a couple spare 6000k chips. The installed chips are all 3000k.

Thanks man.
The Arctic Silver stuff has been a touch of a computer industry standard over the years.... but I really don't think it makes much difference. I've used it all and have seen no issues with any of it.
hmmm.... whattayaknow.... I've got a small syringe of Arctic Circle in the bottom of my pen cup. Probably a few more hiding in the backs of drawers in my world.

I've been tossing design ideas for lights around in my brain for a few years now. The COBs seem really easy. Panels seem fine, but I think I like the COB form better. I run in a really hot world, so it's a constant concern for me. The heatsink, fan, and COB combo is floating to the top of the pile slowly for many reasons.... mostly heat related.

I think most any decent thermal paste is OK considering that we aren't running the chips at their maximum current. It seems like the heat is pretty easy to get away.

I've had some ideas of making a set of lights mounted in an enclosure with a fan exhausting out the top. My goal would be less fan noise by using a larger quieter fan. The same kind of thing might work for you to get the heat out of your grow area. I don't have any idea how these compare to the name brand cobs either. I see a lot of people using Cree or Vero chips on the big pin heat sinks without fans and doing very well with them. This style for my budget OK and seemed to be a decent balance between light output and cost.
 
I have no idea what the light angle is without lenses but should be in the neighborhood of 120 I'd guess. I'll try to see if I can make a better guess after removing lenses.

This are able to run without fans although they get uncomfortable to touch. I've run mine a couple days with the fans off as a test. I'm sure that reversing the fans would do OK since they are cool to the touch with the fans blowing down. They look like they would mount upside down just fine.

The thermal paste was a big syringe of gray stuff that was inexpensive online. Seemed to have similar ratings to the arctic silver that the guys are using on the more expensive lights. Most of those heat sinks came with little packets of thermal paste that I didn't use because the syringe was convenient. I sent a couple of those packets in a zip lock along with a couple spare 6000k chips. The installed chips are all 3000k.

Rad, one light per square foot at about 30 watts send to be the formula that I've seen most often so I'd bet it'll be close to what you want. I'm running 8 in the 32" x 32" tent which works out to 7.1 square feet.

Thanks for the confirmation on watts per square foot. I was a bit unsure of my logic.

I'm guessing the unfocussed spread is at least 150-160 degrees - I took this photo (of lights with no lenses) at a shallow angle.

20170625_193635.jpg


I've been tossing design ideas for lights around in my brain for a few years now. The COBs seem really easy. Panels seem fine, but I think I like the COB form better. I run in a really hot world, so it's a constant concern for me. The heatsink, fan, and COB combo is floating to the top of the pile slowly for many reasons.... mostly heat related.

I saw one photo online where someone installed a grid to hold their COB array on the bottom of an HPS hood. If it's a vented hood ....

Do you think you could trade ... Hot ashes for trees? Hot air for a cool breeze?
 
A cool breeze will be seriously unfamiliar to me for many moons to come.... unless a swirly blows in... they have cool air in their wakes.

Thanks tons for the words guys.
I've often pondered putting LEDs inside a cooltube... mainly just because I love my cooltube... but I have a vented hood on hand and the larger space and square format seems better.
Luv to punt the ideas about.

It helped me to talk about it. I went on the front porch and sketched a few shapes for lights with equidistant spacing. 2 rows of 4 was too long a rectangle for my space, so I settled on 3 rows of 3-2-3 with 16" centers - exterior of frame will be 20" by 36" to cover a 32x48" area at 30 watts per square foot.

I had purchased aluminium stock for the 2x4 array. Instead of the original 6 piece/4 cut design for the 4-4 array, I came up with a 10 piece/6 cut design for the 3-2-3 array. I will have two 4" scraps left over when I finish :)

I have decided on the 90 degree lenses over the 60 degree lenses. At 16" spacing, the beams from the lights touch each other at 14" for 60 degree lenses and 8" for 90 degree lenses. Anything closer and I won't have a fully lit canopy. I have a tendency to let my buds grow close to the lights, so I will go with the 90s.

- - -

Thanks all for the discussion - I now have a construction diagram !

20170627_195359-1.jpg
 
A cool breeze will be seriously unfamiliar to me for many moons to come.... unless a swirly blows in... they have cool air in their wakes.

Thanks tons for the words guys.
I've often pondered putting LEDs inside a cooltube... mainly just because I love my cooltube... but I have a vented hood on hand and the larger space and square format seems better.
Luv to punt the ideas about.

I can visualize a vented hood that has the glass replaced with a sheet of aluminum. Cobs mounted on the bottom side of the aluminum and heat sinks on the top/inside. I spent a little time at work today browsing hoods and heat sinks. It looks like it wouldn't be a bad project. I'd expect to use lower profile heat sinks so the cobs could be mounted closer to the corners of the hood to get a decent spread.
 
It helped me to talk about it. I went on the front porch and sketched a few shapes for lights with equidistant spacing. 2 rows of 4 was too long a rectangle for my space, so I settled on 3 rows of 3-2-3 with 16" centers - exterior of frame will be 20" by 36" to cover a 32x48" area at 30 watts per square foot.

I had purchased aluminium stock for the 2x4 array. Instead of the original 6 piece/4 cut design for the 4-4 array, I came up with a 10 piece/6 cut design for the 3-2-3 array. I will have two 4" scraps left over when I finish :)

I have decided on the 90 degree lenses over the 60 degree lenses. At 16" spacing, the beams from the lights touch each other at 14" for 60 degree lenses and 8" for 90 degree lenses. Anything closer and I won't have a fully lit canopy. I have a tendency to let my buds grow close to the lights, so I will go with the 90s.

- - -

Thanks all for the discussion - I now have a construction diagram !

20170627_195359-1.jpg

I've been studying your drawing for a few minutes and think it is a good plan for the shape of the space and the number of lights you have. I am concerned that there might be a couple of places between the lights at the sides of the room that won't be lit well. I wonder if doing a mock up of the spacing with zip ties, string, or whatever to suspend the lights would confirm that the spacing is right before cutting the frame pieces.
 
Back
Top Bottom