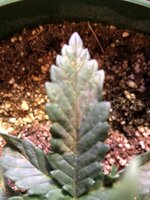
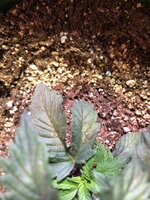
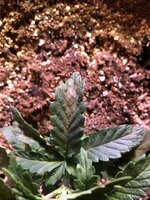
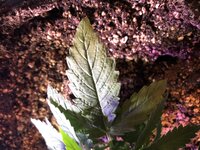
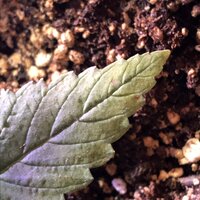
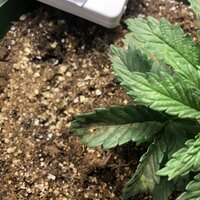
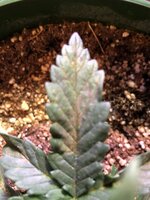
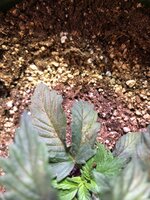
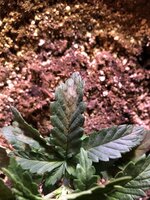
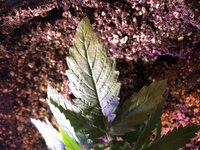
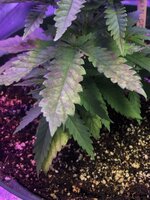
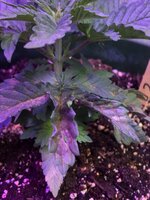
Looks to me like a phosphorus deficiency to me
Adjust pH to Correct Range
Your cannabis plant may show signs of a phosphorus deficiency if the pH at the roots is not in the right range. That is because when the pH of your root zone is off, your cannabis cannot properly absorb phosphorus through its roots. Therefore the first step is to ensure that you have the correct pH for your growth medium.
Phosphorus is best absorbed by cannabis in soil at a root pH of 6.2 – 7.0. Phosphorus is best absorbed by cannabis in hydro at a root pH of 5.5 – 6.2. If you believe you have a cannabis phosphorus deficiency, it’s important to check the pH of your root zone to make sure the deficiency isn’t caused by the pH being too high or too low.
If you suspect your growing cannabis plant has a phosphorus deficiency, flush your system with clean, pH’d water that contains a regular dose of cannabis-friendly nutrients that includes phosphorus. This will remove any nutrient salts that may be affected the uptake of phosphorus and help restore pH to the proper levels.
- In soil, phosphorus is best absorbed by the roots in the 6.2 – 7.0 pH range (in soil, it’s generally recommended to keep the pH between 6.0 – 7.0, but phosphorus specifically tends to be best absorbed above 6.2 and below 7.0)
- In hydro, phosphorus is best absorbed by the roots in the 5.5 – 6.2 pH range (in hydro, it’s generally recommended to keep the pH between 5.5 – 6.5, but phosphorus specifically tends to be best absorbed below 6.2)
2.) Take Good Care of the Roots
Wet, compact soil or overwatering can trigger a phosphorus deficiency to appear even when all other factors are perfect. So make sure you water your plants properly every time to help prevent a phosphorus deficiency.
3.) Provide the Right Temperature
Cooler temperatures lower than 60°F (15°C), as well as large temperature swings, can make it harder for the plant to absorb phosphorus. Cannabis plants are therefore more likely to show signs of a phosphorus deficiency when the temperature drops too low, or if they go through a cold spell.
Cannabis likes a comfortable room temperature (they like about the same temperatures as we do).
4.) Give the Right Nutrients
Most growers have actually already given plenty of phophorus to their cannabis plants since it is found abundantly in quality soil and cannabis-friendly nutrients. However, even if you are giving phosphorus, it’s important to give your cannabis the right ratio of nutrients.
An excess of Fe and Zn may cause the symptoms of a phosphorus deficiency by preventing the plant from being able to absorb phosphorus properly. If you believe there may be a buildup of nutrient salts in your growing medium (or if you are growing in hydro and have not recently flushed or changed your reservoir) you should make sure it’s not an excess of other nutrients that is actually causing the phosphorus deficiency to appear. Flush your plant thoroughly with properly pH’ed water containing a regular dose of cannabis nutrients including phosphorus, or completely change your reservoir if you believe that an excess of nutrient salts may be causing the phosphorus deficiency.
Sources of phosphorus:
- Bat guano (phosphorus is readily available, especially if made into a teat)
- Bone or blood meal (takes quite a bit of time to break down in soil unless made into a tea first)
- Worm castings or worm tea
- Soft Rock Phosphate
- Fish meal
- Crabshell
- Most cannabis-friendly “bloom” or “flowering” nutrients contain high levels of phosphorus to aid in flower production, and phosphorus from a liquid nutrient is one of the most readily available forms of phosphorus you can provide to your cannabis plants
If you’ve tried everything else, then you may try adding a higher percentage of phosphorus to your feeding schedule and see if that helps clear up the problem for your plant. Cannabis plants love phosphorus, and therefore it is unlikely that you will give your cannabis too much phosphorus.
Most nutrient systems that are formulated for a plant like cannabis will carry and abundance of phosphorus, especially in budding/flowering formulas, so it is unlikely that you will see signs of a phosphorus deficiency before other nutrient problems when using nutrient systems formulated for cannabis (as long as you keep your root pH in the correct range and prevent the plants from getting cold or being overwatered). If you’ve got very high powered lights, or if your plants are growing in direct sunlight, they may be going through a lot more phosphorus in the flowering stage than average and may need you to provide extra phosphorus to make sure buds get as big as they could be.
Just remember that if there’s no actual phosphorus deficiency currently appearing on your cannabis plant, adding more phosphorus is probbaly not going to help plants grow better or make bigger buds – in fact adding too much phosphorus may actually hurt your plants by preventing the uptake of other nutrients! While it’s difficult to overdose your plants on phosphorus, adding too much compared to other nutrients will often cause other strange & unexpected deficiencies to appear.
5.) Take Good Care of the Roots
Phosphorus deficiencies can show up with the plant is having root problems or if the plant is overwatered, even if the pH is right and the phosphorus is there. Proper watering practices help plants grow healthy and avoid a host of problems!
6.) Watch for Recovery
After going through all the above steps, watch to make sure that the phosphorus deficiency starts to clear up within a few days to a week or so. After a phosphorus deficiency is cleared up, the problem (brown spots, unhealthy lower leaves, red/purple stems, etc) will stop appearing on new leaves, usually within a week.
Please note that leaves which have been damaged by a phosphorus deficiency will probably never recover or turn green, so you want to pay attention to other leaves for signs of recovery.


 let me know what you think, you guys can laugh i got big shoulders