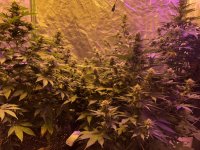
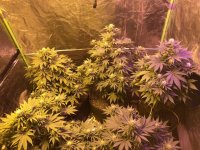
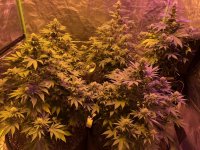
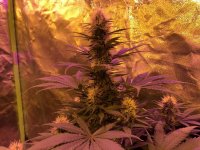
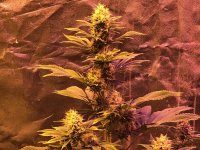
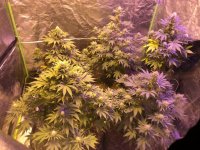
Mother of Berries, M.O.B. Maine Strain

I’m trying to learn absolutely everything about cob curing and was wondering if you had heard of or know anything about this that may not have been made public over with sweetsue. I’ve read 1 - 2 oz is best so that is going to be my range. It’s looking like my yield may be more bountiful than in the past (let’s hope!). I’m going to make sure I know the perfect conditions and all of that. I’d enjoy a deeper, heavier eye. Interested in the concept of chewing (my understanding is that it’s quite palatable (prob read around here somewhere) at the end of the process. I really want to experiment with the jars for deeper fermenting but seems difficult to get answers (not complaining as I know things like this tend to be somewhat obscure). I’ll probablg subject myself to criticism and document the cob thing over with sweetsue (and you get more value out of my posts by being able to see other users content).
From what i have read it is best to use an ounce cobbed and then a half ounce canary per bag. The good thing about those numbers is that that is when it is still fairly moist so it wont impact you final weights as much. The first page or two of that journal has a good flow chart to help guide you and then a few member spell it out step by step again throughtout it. i have not done it so I cannot say exactly how it works. I will say that Neiko ended up with a little mold trying to do it in a jar and Tangwena (I think that is how to spell his user name) was saying that the jar cured "cobs" were not as potent as the actual cobs are. So you are better off using vacuum bags. What I understand is to cut you crop and hang to dry 1 to 3 days later gather the amount of material you need and take 28-30 grams and roll it up in a corn husk you have soaked in water using a sushi mat. Tie that up with string and then roll up 14-15 grams and leave it unwrapped and put them both in a vac bag. Vacuum seal it and then put it in something that can hold 104* for 12-24 hours. I have seen people use a seedling mat that they put things on to keep the bag off the mat. They then cover the mat with a small tote that is upside down. They then wrap the tote in 1 to 2 towels to insulate it to hold temp. Most people set things up before they cobbed to figure out what they needed to do to get the temp where they wanted. I think they had one of the dual zone thermometers and put the prob in the tote to see what the temp read. After the sweat is done (what I just went over) You open them up and leave them out until they dry a bit. This is where you would want to get help because I do not know how dry to go here. Then you seal them up and keep them some place warm to ferment for 1 to 4 weeks I think and then you dry and cure for long term.

That is a break down of how I understand it but you may want to ask people that have done it for a better explanation. Hope that helps bud.

I really appreciate the lengthy response it will be included in my notes and used in helping my preparation. Testing the cob environment is a good idea in that what seems like what requires such a sensitive handling and constant attention should have the planned environment tested for accuracy, consistency, etc. I will be ordering a seed mat, vacuum sealer and rubbermaid. Etc. to mimic the setup presented by I believe it was sweetsue. I’m cautiously optimistic because while excited I know that the smallest screw up is going to kill the whole thing.

I’ve read different things about it being wetter the better (harvest to cob?) or dry for a few days, etc.

With regard to separating the bag from the mat can I use something like aluminum foil or if that’s too thin a baking sheet (trying to be proactive against any possible fire risk)

Do you have a recommendation for a specific size heating mat? With a single cob I wonder if a slightly larger mat would be beneficial? (Only in consideration of a larger heating area as room must be made not only for the cob itself but the area of the vacuum sealed package will be larger than the plant material)

Thanks for all the help Yeti!
I would just get one that fits under a standard clone/seedling tray but others may have better advice. You want the plant material to be about 85% rh I believe. If it gets too dry the reaction wont work as well. Also From all they have said, pure sativas are the best thing to cob. You get more of the trippy/psychedelic high that way. Others seem ok with hybrids or indicas. They say that smoking cobs is so smooth it is like smoking flavored air!
 
I unfortunately don’t have any Sativas but maybe on the next go round I’ll order some. I like the sound of that kind of smoothness. Definitely excited to try this.
 
Ladies & Gentlemen (and Yetis)

WeedMonkey presents:

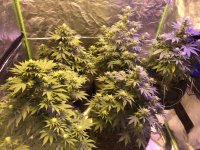
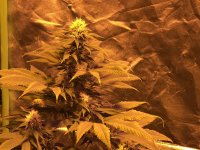
Week 5 Day 5 Skunk Kush in Flowering
 

Attachments

  • FC1FD47B-3A8D-4B46-91E1-2355A998AC3B.jpeg
    FC1FD47B-3A8D-4B46-91E1-2355A998AC3B.jpeg
    886.3 KB · Views: 157
  • 33B1FF2C-CCDE-401E-855E-54FCD0DD546E.jpeg
    33B1FF2C-CCDE-401E-855E-54FCD0DD546E.jpeg
    976.1 KB · Views: 150
  • D85C1B76-0375-451F-81C9-1F8B0F5A5B7B.jpeg
    D85C1B76-0375-451F-81C9-1F8B0F5A5B7B.jpeg
    885.4 KB · Views: 139
  • 0934A4FF-9CA9-45FE-9565-D651D71F7296.jpeg
    0934A4FF-9CA9-45FE-9565-D651D71F7296.jpeg
    1.1 MB · Views: 167
  • 4866C2F9-04D3-4EEE-B597-3E018AC6AE1B.jpeg
    4866C2F9-04D3-4EEE-B597-3E018AC6AE1B.jpeg
    929 KB · Views: 156
  • 80529BB3-34CB-42C0-A490-5189AD52D7EE.jpeg
    80529BB3-34CB-42C0-A490-5189AD52D7EE.jpeg
    884.3 KB · Views: 164
  • DCD92BA9-455F-4505-95BA-4446C186778E.jpeg
    DCD92BA9-455F-4505-95BA-4446C186778E.jpeg
    687.8 KB · Views: 150
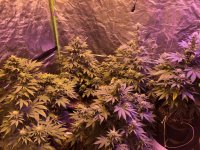
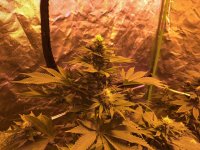
Skunk Kush: Week 6, Day 1 Flowering Average Temps 80’ F
 

Attachments

  • 34CC7211-1838-424F-BF6C-AF6610F0FF94.jpeg
    34CC7211-1838-424F-BF6C-AF6610F0FF94.jpeg
    863.2 KB · Views: 150
  • 28255417-4E45-4F6C-86FE-03F9F9FA0D5C.jpeg
    28255417-4E45-4F6C-86FE-03F9F9FA0D5C.jpeg
    899 KB · Views: 156
  • C5909230-DF22-43C7-BA11-9BCDA7325CFE.jpeg
    C5909230-DF22-43C7-BA11-9BCDA7325CFE.jpeg
    998.3 KB · Views: 134
Looking good bud! Coming right along. How long do you plan on flowering for? I think they will go 9 or 10 weeks.

Thank you!! I was thinking about 10 weeks bringing us to around Mid August and do a 2 day dark period prior to harvest (unless you believe it to be a load of crap). I was starting to miss you.
 
Thank you!! I was thinking about 10 weeks bringing us to around Mid August and do a 2 day dark period prior to harvest (unless you believe it to be a load of crap). I was starting to miss you.
I went on vacation for a few days and did not have a computer to check up on anything! I do not know that you need 2 days. Duggan has explained it in such a way that when you give the plant a dark period like that what you are actually doing is allowing it to dump all the water it pulls into itself during lights on back into the soil. It makes sense to me that way and I would probably do it myself if i had a spot to do it. Since I run perpetual I do not have anywhere that this is possible so i just try to cut as soon as my lights come on.
 
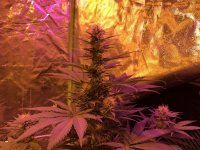
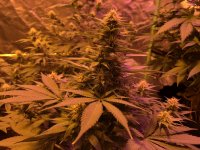
Skunk Kush Week 6 Day 4 Flowering
CDC46BE0-4ABB-489C-A98B-F419AD2F9B64.jpeg
C796CD49-89E9-4E66-9EBA-6F79091C8317.jpeg
CDC46BE0-4ABB-489C-A98B-F419AD2F9B64.jpeg
8A3FA691-FFF9-40ED-AE2B-F48EDD96D0BC.jpeg
 

Attachments

  • D37169B7-0F1D-40D9-A078-2829A28AF921.jpeg
    D37169B7-0F1D-40D9-A078-2829A28AF921.jpeg
    958.5 KB · Views: 155
  • 79C4033F-2D57-45E9-8330-9833B1624BA4.jpeg
    79C4033F-2D57-45E9-8330-9833B1624BA4.jpeg
    890.2 KB · Views: 164
  • 15B1C173-BD38-4272-B9CB-DB1C9F5B74A9.jpeg
    15B1C173-BD38-4272-B9CB-DB1C9F5B74A9.jpeg
    1.1 MB · Views: 153
I went on vacation for a few days and did not have a computer to check up on anything! I do not know that you need 2 days. Duggan has explained it in such a way that when you give the plant a dark period like that what you are actually doing is allowing it to dump all the water it pulls into itself during lights on back into the soil. It makes sense to me that way and I would probably do it myself if i had a spot to do it. Since I run perpetual I do not have anywhere that this is possible so i just try to cut as soon as my lights come on.


I did some research around the site and couldn't find the information from @Duggan
about darkness (as there is a lot of content). I hope he's willing to chime in here. I found a reliable academic source (non TOS infringing link below) that states chlorophyll degradation doesn't actually happen until days 2 and 3 in darkness. I'm wondering if it's ok to go this far without harming the plants otherwise. Any help would be greatly appreciated. (Other sources available this seemed the most clearly what I'm trying to understand/conversate)

Effects of Light on Degradation of Chlorophyll and Proteins during Senescence of Detached Rice Leaves | Plant and Cell Physiology | Oxford Academic
 
Quick pic tonight.

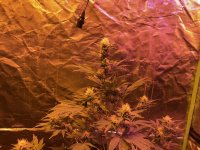
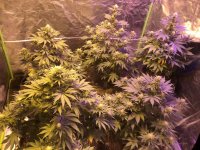
Skunk Kush Flowering: Week 6 Day 5

Seeing a lot of yellowing in the 5 gallon (far right)

Only some in the larger pots.
 

Attachments

  • ADC20E2B-A43E-4E27-B8EA-7A44ADC58E86.jpeg
    ADC20E2B-A43E-4E27-B8EA-7A44ADC58E86.jpeg
    850.3 KB · Views: 173
I can send you a list of parts I used to build my panels. I was just talking to Neiko and some others about it. I have about 225 in each panel and Timber sells a comparable kit to each panel for 549... So it is definitely more cost effective.

That would be great, if you could it would be a huge help.
 
Back
Top Bottom