Let's Find a Mother! Hiking Through a Field of Mary Jane

But I also like the idea of an open centered square. build around a 60x60 (we grow most of our food aside from cannabis so i meed some space) area so the only way in is from the house. Then excavate the.top 3 foot and replace with super soil... then I could make a frame on wheels and line it with greenhouse plastic with a small pitch to it (to stop accumulation of water on rainy days) if its raining fire up some lights, if its nice go pull the frame back and let the sun beat in
"I want the best of both worlds. Baby I know what its worth if we could have the best of both worlds"
 
I don't think you need to supplement light during cloudy days. Extra light is only needed to manage photoperiod AFAIK. I can't recall teh exact number, but I think it's something like 85% transmission of sunlight through the clouds.

You gotta decide what you want canna! Either you want the stealthy underground grow space, or the space with lots of fresh air and natural sunlight. :rofl:

I did do a little reading about the containers, and it's pretty clear that they are not strong enough to bury on their own. By the time you reinforce them, you could have used more traditional construction methods for the same cost and effort. A lot of what I was reading was people building bunkers and such, but we have similar goals. Seems to me, the easiest solution is to dig a hole, pour a concrete pad, and set half a metal culvert tube on top. You'll want to anchor the metal to the pad somehow, but the arched shape will hold a LOT of weight. Maybe just bury the whole tube and then pour a concrete floor into the bottom of the tube? That might work better actually. You still have the issue of making a stealthy entrance though. Other methods just use cinder blocks to build walls, than lay joists or trusses across the top. I forget the terminology, but they use a method called "dry stacking" where instead of mortering each joint, they spray on a reinforced concrete directly onto the brick walls. Then you fill the empty voids with sand or more concrete and add rebar to every other hole.

This is an idea that's always floating around in the back of my mind. The Mrs and I both want to get a little land with our next place, and she already realizes I want another "basement". After reading today, I'll probably just use cinder blocks. Most likely, it will just be a basement, but it might be bigger than the house! :)

FYI, the biggest thing I learned was this... MAKE SURE TO HAVE 2 EXITS! I had not thought about what would happen if a tree fell on my entrance while I was inside. :winkyface:
 
A nice livable home size could be achieved with 6 40' containers. They cost about 3k a piece. U wont find a home that size for no 24k ;) that leaves ALOT of budget for drywall siding appliances plumbing etc. No expense would need spared really. Thinking about doing it ALL underground at the base of the vineyard and putting solar panels on the ground above next to he pumphouse. Noone would even know we were there. "Tennessee pot cave" style entry. Just a hydraulic door that looks like a 6 ton boulder

I daydream about this stuff all the time. You can build all kinds of interesting shit with containers and there is a huge surplus of them. I'd go somewhere with access to fresh water and a river strong enough to run a small turbine. Go totally off the grid with the exception of internet. :tokin:

I so badly want to live somewhere I can just be away from people and work \ live off my land. Basically modern homesteading. The tech to do this kind of stuff gets better and cheaper all the time so hopefully someday.
 
But I also like the idea of an open centered square. build around a 60x60 (we grow most of our food aside from cannabis so i meed some space) area so the only way in is from the house. Then excavate the.top 3 foot and replace with super soil... then I could make a frame on wheels and line it with greenhouse plastic with a small pitch to it (to stop accumulation of water on rainy days) if its raining fire up some lights, if its nice go pull the frame back and let the sun beat in
"I want the best of both worlds. Baby I know what its worth if we could have the best of both worlds"

I want 3 double wide cabins connected by underground tunnels also made with shipping containers. That way it looks totally unsuspecting but what you end up with is huge compound.

And then surround the place with a bamboo / black berry fence.
 
A nice livable home size could be achieved with 6 40' containers. They cost about 3k a piece. U wont find a home that size for no 24k ;) that leaves ALOT of budget for drywall siding appliances plumbing etc. No expense would need spared really. Thinking about doing it ALL underground at the base of the vineyard and putting solar panels on the ground above next to he pumphouse. Noone would even know we were there. "Tennessee pot cave" style entry. Just a hydraulic door that looks like a 6 ton boulder
Tennessee pot cave was a bad ass setup, they just got greedy and got caught. Thats about 75 miles from me and I never heard anything about it until I saw it online lol.
 
Does anyone reading use coco and GH Flora?

My clones are not looking great, and I was hoping to be taking more clones by now. I've never used coco, and suspect I did something wrong with it's prep perhaps. I've been using a slightly week GH seedling/clone run to waste recipe plus a little calmag, epsom, and superthrive. Would Hygrozyme be good in coco? I think there is too much coco and verm, but I've heard of people growing in pure coco, but I didn't soak mine really. I got it wet is all.

It's not pure coco. It also has perlite and vermiculite. I have grown plants in just verm/perl before, so the coco is the variable. It's the GH Coco Coir that comes in a block wrapped in white plastic. It gets a LOT bigger when you get it wet.

FYI... Don't put a whole block into a bucket, then add water! haha :biglaugh:

And since I'm handing out learned wisdom today, here is a little PSA about hole saws...

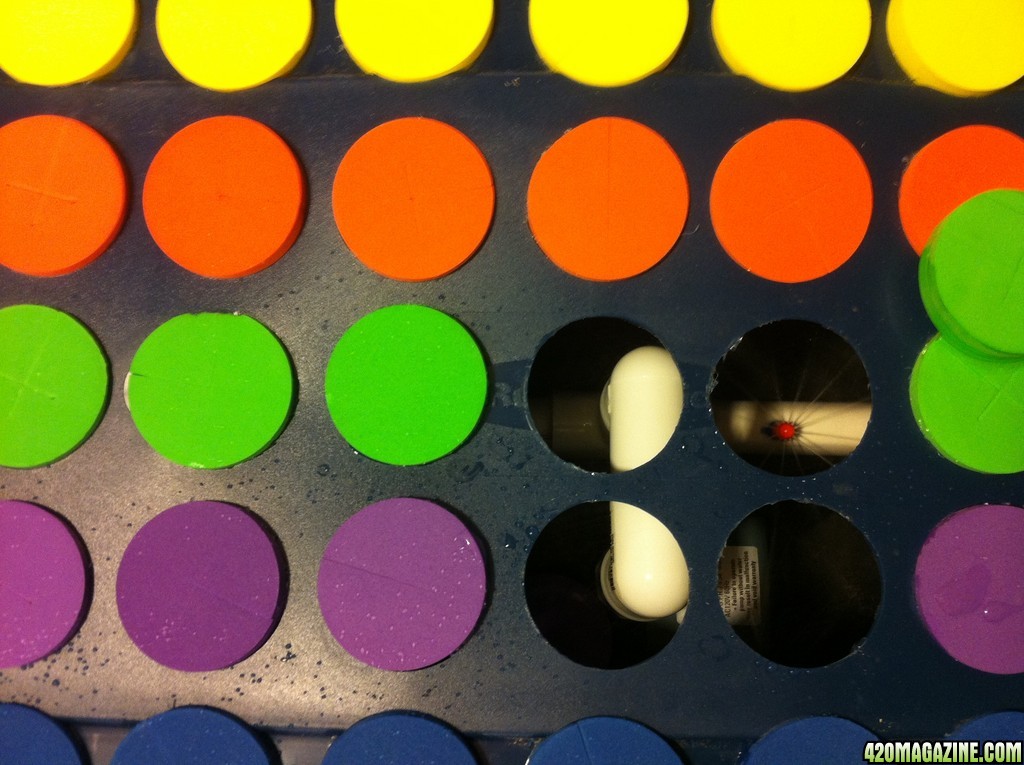
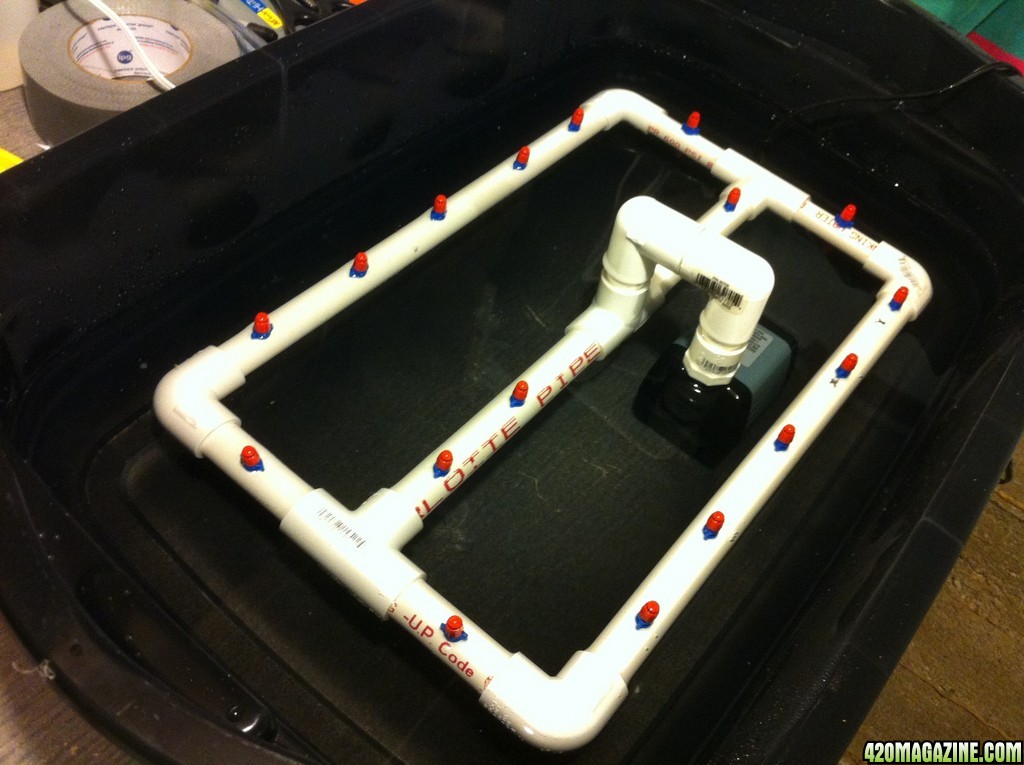
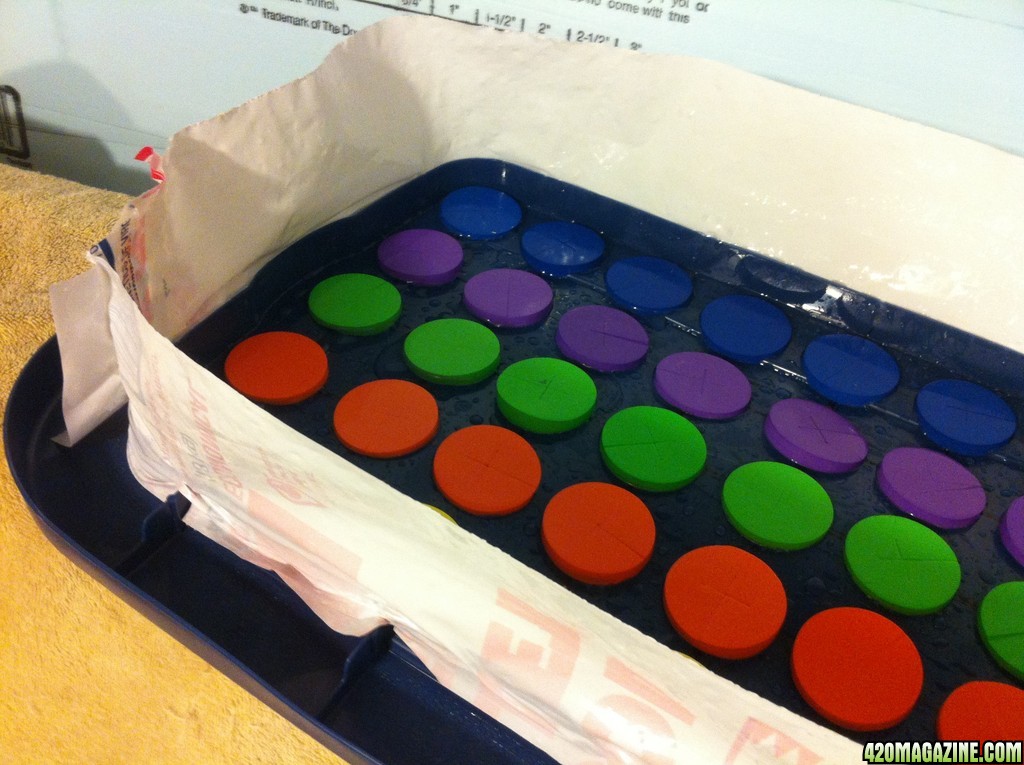
So you want to build yourself a cloning machine? Great! Just grab yourself a Rubbermaid tote, drill some holes, and stick a pump and some jets inside. Easy!

You're gonna need one of these babies. They will make a very nice clean hole.
Hole_Saw1.jpg


They are designed to be used with one of these. The packaging leads one to believe the saw will work with a regular drill bit.
pilot_bit.jpg


This is a lie! If you use a drill bit, you will end up with this. Trust me. I have 2 of these. :winkyface:
broken_bit.jpg


If you don't get the right tool the first time you will end up buying this too. :)
new_bit.jpg


And because I'm just full of helpful energy today... :rofl:

Here is why I love bucket systems, or at least why I like it with my small modification. The systems like mine are intended to be setup with the 'T', in the supply line from the controller, going directly into the bucket. Instead, I put a 90* elbow into the bucket and ~20" of tubing between them. This lets me still put the bucket right next to the T by 'rolling' the tubing around the bucket, but I can 'unroll' the tubing to let allow a large amount of movement of each site without disconnecting anything. The only other change I would make it larger tubing. These buckets can't take larger tubing, so I'll probably DIY my next bucket system.

Anyway, here is a picture where I've made a path to get to a plant in the back row.
IMG_1751_-_no_EXIF.jpg


Bucket systems are cool.

Sorry no bud porn. Been busy doing stuff outside the flowering room. I'll get some pictures this weekend I'm sure.

If you're still reading this post, don't forget the question I asked at the top! :Namaste:
 
I can say what I do with coco coir. A few water rinses till most tea-color is gone, and the residual ppm is about what the water is. I use tap @ 240 ppm, BPN 2-part lightly, and nothing else. As you say, the verm & perm are inert, so if the coir is rinsed that way there should be no problem. One thing: I use one teaspoon each of A & B with tap water gallon, nothing else till flower time. Rinsing/flushing is my goto defense if anything doesn't look right. I use straight coir for everything. Keep it wet, no drying out.

The Gen Hydro CocoTek is the stuff I get, and it will fill four Homer buckets. For $12 :)

Thanks Gator :Namaste:

I was surprised how much it expanded! I bought 4 of the bricks, and didn't even use 2 :biglaugh:

I won't run out of coco for a year haha
 
Hiker, I found a dried pint pot of coir. It weighed 71g with the plastic, which was 12g. When saturated no drips, it weighed 351g. One pint of water would weigh a pound, right? 280 g of water was held in the matrix of that coir, all available to the plant. There was still plenty room for air, within. I believe that pure coir is the most efficient solid medium that gives support to the plants, and... it is wonderfully inexpensive :)
 
I use straight coco coir, with nothing like perlite etc. added, but I then I also use aeration style pots like "Air Pots" or "Smart Pots". I pre-soak it in a light mixture of nutrients, cal-mag, and seaweed extract (I'll note that I use RO water). I do use Hygrozyme with coco coir, though I don't use it in the pre-soak. I like the bricks because they are easy to store for future use, cheap, and more certain to be bug-free at the start...
 
I have a couple bricks around, they are a conveinient package but I also found their quality less consistent. They're barky & hairy like a burley tolerable old hound. GH is more like coffee grounds, but 5kg is a bear of a pkg. A skill saw or an icepick, or tough old hands. Wish my nephew would show up for more than just a buzz :hmmmm:
 
Had a little excitement in the grow room this weekend. In the picture I posted Friday, I show that I moved the buckets around so I could inspect a plant in the back row. What I didn't go into is why I was trying to get to that plant. It, and the one next to it a little, were looking "droopy" as if they needed watering in soil. Weird in a hydro system, huh? I pulled them up and the roots didn't look terrible, but not spectacular either.

On Saturday I realized the entire back row is being affected and the worst one looks worse. I moved aside all the healthy plants in the first two rows and started investigating the problem. I begin a fill cycle on the system. I notice that the back row isn't filling very fast or as high as the first two rows. Eventually, I trace the problem to a fitting at the control bucket. There was a flaw during the manufacturing of one of the elbows. There was a flap of plastic almost completely blocking the elbow. I was able to clean it out easily with a drill bit, so everything is fine now. The plants have recovered, although I assume there will be some, hopefully minimal, impact on yield. Three of the 4 plants on that row lost a lot of their bottom fan leaves, but that's about it. The White Widow didn't lose as many leaves, and was the last to show signs of stress, but it was actually hit worse in a way. It's showing signs of nute def (yellowing of the leaves). That makes sense since this row was really not getting much of a flood, so it's as if they weren't fed for several days.

I suspect that the little excess plastic "flap" inside the elbow shifted at some point in the last week. That elbow was put where it is now when I redid the plumbing after culling the males. That was more than a week ago, so it could not have been like this the whole time. Perhaps they were getting a good fill, but weren't draining fast enough. The first thing I noticed was that the back row all had standing water in the bottom of the buckets. I think that may be what the problem was. Before I reconfigured everything and that elbow ended up where it is now, it was in a bucket. Now I suspect that bucket had a problem. I know I was had root issues, but it seemed to only be certain plants, and every time I noticed it, I would move the plant. I guess I was just spreading the problem around. Oh well, at least it's fixed now.

Here is a picture of the 2 plants that looked droopy.
IMG_1753_-_no_EXIF.jpg


This is the WW. She has yellowing on all her larger leaves. It's not real clear in this picture due to the HPS lighting and my crappy phone pics. Sorry.
IMG_1771_-_no_EXIF.jpg


Here is a shot of her buds. Both of the droppy plants had their pistils turn brown, but they are also showing new white pistils, so hopefully they will still put on more weight.
IMG_1772_-_no_EXIF.jpg


I anticipate a full recovery for all of them and hope the impact on yield will be minimal. I wonder what next week's mini-crisis will be? :rofl:

*************************************************************************************

I rebuilt my cloner. I tried many methods to stop the leaking with the old tote, but I finally gave up and used a new tote.

I found this great Rubbermaid tote that already has a curtain molded into the lid! It is a short tote though, so I wasn't sure I could make it work. With the manifold above the pump, it was too tall. I eventually figured out a way to lower the manifold so everything fit. Here are the pics.

The tote running away. You can see I painted the lower section black to block light.
IMG_1755_-_no_EXIF.jpg


You can see the jets spraying inside and part of the PVC manifold.
IMG_1756_-_no_EXIF.jpg


The "guts". That's a CAP Ebb&Gro pump. I really like them. They are small, quiet, and they still put out 345GPM! Plus this way I have a backup for my Ebb&Gro. :)
The manifold isn't very high above the bottom of the tote, so it has room to spray the clones. I've filled it with water to where it's just below the jets. Seems to work great.
IMG_1757_-_no_EXIF.jpg


This is the inside of the lid. You can see the molded curtain that goes all the way around the lid. It made a great place to attach the plastic to. I did try running it without it. It took many hours, but eventually it did leak a little at the handles. A little hot glue and some scrap plastic later, and no more leaks. I let it run for 24 hours and not a drop.
IMG_1758_-_no_EXIF.jpg


I'm very pleased with how it came out. I like that it's shorter. Hopefully it's not too short. I'm a little worried about the roots ending up in the water, but I don't plan to leave them in this thing too long. Now I just need these clones to grow faster so I can take more clones!

*************************************************************************************

I've met with the budget department and they have authorized procurement to purchase an air conditioner. I'm not going with a mini split. There are things about my basement that make installing one extremely difficult and it would compromise my stealth I think. I'm just going to put a portable inside the flowering room and vent the waste heat outside the room. This will put the heat into the main basement. This should be OK as I will be moving the vent fan from inside the flowering room to vent the basement proper. Even if it warms up the basement, that's OK. It's too cold for the clones and other vegetative plants anyway. In order to cool the flowering room without an AC, I have to keep my basement so cold, the other plants' growth is slowed.

Sealing the room and adding the AC is all pluses except for CO2. I'm not sure I can afford a CO2 generator and an AC, so I'm a little unsure how to proceed. I could just add the AC, and switch the exhaust to only kick on 15 minutes every hour to bring in some fresh air, but let the AC cool things in between. That could cause an odor problem though if I don't maintain a negative pressure.

My other option is to buy a light mover and remove one light. I'm unsure how much that would affect yield. It might not have a huge impact since all the lower bud sites should do better getting light from more angles, right? I'm already hoping to make that change for the next grow anyway. This would probably lower the temps enough that I could make it to the end of this harvest before adding AC.

There is a small chance I could swing an AC and a CO2 generator. I won't be able to get a controller, but I could just use a timer in the meantime. Again, this is all stuff I plan to buy anyway, so at least I'm not having to spend money on things I can't use after this harvest. I'm not 100% sure, but I can probably spend ~$1000 right now. That includes ~$250 from returning the dehumidifier I bought a couple weeks ago. I know I still need one in a sealed room, but there is a model that is the same, except with a drain pump already installed, so I want to exchange mine since it's not been opened.

So what would you do? Temps are too high. I'm consistantly right around 80-85F all the time. It makes sense. The basement's ambient has climbed to 60, from 56, so that 4* increase is reflected in a ~4* increase inside the room.

*************************************************************************************

Well this post has sat on the computer since yesterday, and it's gotten rather long. For that I apologize. There is a benefit however. I have some updated pics, so BUD PRON TIME! :yummy::party::kiss:

I apologize in advance for the crappy pictures. I thought I was getting better pictures with this phone, but it wasn't cooperating this time. Needless to say, I won't be submitting entries for NotM or PotM until I get a new camera :eyebrowsmile:

I didn't take pictures of all of the plants, but I did get the WW that was in the back row. She will be fine I'm sure, but she was pretty yellow last weekend. You can see it in the picture above, but it's hard to see with teh HPS lighting and crappy iPhone pics. All of these pictures were taken on day 40 since flip.


Here is one of the AK-48s. I think this strain is going to be a staple. All 3 of these look great, but are all slightly different. This pheno has some great looking buds and has responded well to the environment.
IMG_1761_-_no_EXIF.jpg


Here is the lovely Ms Blueberry. :) Yes, I'm biased in favor of this strain. So far, she is not disappointing. She is getting real frosty and these pictures are not really doing her buds justice.
IMG_1763_-_no_EXIF.jpg


A close up of one of her main colas. :yummy:
IMG_1765_-_no_EXIF.jpg


Next up is the plant that has pretty much become my favorite plant/strain. Ironically, it's one of the femmed freebie seeds I popped as "extra" plants. I had no intention of making any of them mothers, but I suspected I would change my mind. How can I not make this beauty a mother? Mrs hiker came down and looked at them last night, and before I said anything, she selected this same plant as her favorite as well. She's already helping me pic mothers! :) I so love that woman :circle-of-love:

Royal Queen's Critical. Top view. She's not my tallest or biggest bush. She is close in bushiness and just a little shorter than some of the taller plants. Her buds are by far, the bulkiest of the bunch, and they are super frosted already.
IMG_1774_-_no_EXIF.jpg


Close ups of some buds. Sorry for the shitty pictures. I sure hope I get my camera back before I harvest!
IMG_1775_-_no_EXIF.jpg

IMG_1776_-_no_EXIF.jpg


Here is one of the other AK-48s. Here is an overhead of most of the plant. This one is one of the larger bushes.
IMG_1784_-_no_EXIF.jpg


Close ups of some of her buds.
IMG_1781_-_no_EXIF.jpg

IMG_1782_-_no_EXIF.jpg


The clones are doing great. They are not growing as well as I hoped, but I think are happy. I just need to finish building out this part of the basement to get them some warmer temps. Even with them all covered up, the temps barely get into the 70s. Usually temps sit in the 60s for them, so I know that's slowing their growth a lot. The Ca/Mg issue appears to have been resolved. I'm pretty impressed by how much water this coco holds. I am, literally, only watering these once a week! It's not obvious in this picture, but most were topped and are now growing out 2 main branches. My goal is to clone all these doubles, then keep the lower part of the plant as the mother. Some were too short to top, so I'll only get one clone from them. I was planning to try and put ~40 buckets in the room for this next run, but I've decided to just use the 24 buckets I have now. I have to veg in the flowering room anyway, so I'll just veg an extra week and have fewer larger plants. They will be getting transplanted to bigger pots this week, then I'll be taking clones from these in about another 3-4 weeks depending on how the flowering is going. My goal is to put them in the cloner about 2-3 weeks before I can put them into the buckets.
IMG_1786_-_no_EXIF.jpg


Well that's it for this update.

I've had to cut back on the time I spend here. I'm trying to catch up on everyone's journals at least once a week. You won't see me posting as much, but if you look closely, you'll see I'm liking posts and giving out rep. I'm just a little quieter than I have been.
 

Thanks Hoz :)


UPDATE: As part of the effort to control the rising temps, last night, I disconnected the CAN66 from my exhaust. This removed a significant amount of the resistance, and in theory, would increase airflow leading to lower temps. My basement has not went over 60, and it's actually back down to 56 like it should be, but the room was still in the mid 80s! Well removing the filter has helped the daytime temp issue. Granted the lights have only been on for ~90 minutes so far today, but temps are 77F right now.

Unfortunately, this solution is not working for nightime temps. Last night, the temps dropped into the 50's. This is even after I turned up the heater's thermostat a little. I'll turn it up more tonight, and increase the intake restriction, and see what happens.

I used to be able to enter the flowering room during lights out. My basement is dark, and I put a green light bulb in one of the sockets. I just unscrew all the other bulbs, and then there is only green light. The problem is, I re-opened the openings between the garage and the basement to help improve cooling in there. It worked, but the garage has a window, so now there is light coming into the basement for more than half of their nighttime.

If I can get it a little warmer at night, then this solution might be able to get me through to harvest, but I still have to determine if odor is going to be an issue. I'm still venting out the chimney, so I may not need the filter. It's been disconnected for nearly a full day now, and so far I don't smell anything. Of course, I'm not sure I would even notice. I'm down there so much, my hands and clothes smell like the flowers most of the time anyway. I was however, able to smell it each morning during lights out before I started leaving the exhaust fan on at night, so maybe I can still smell them. :biglaugh:

Anyway, I was just downstairs to say good morning to the ladies, and noticed that the temps have improved. I completely forgot to mention the experiment in the journal, so I decided to come back and share.
 
Wow You got a lot going on Hiker i feel you on that.
I have to hand it to you though your doing a really fine job.

I had to recently strt spending less time here too. Between my grow and everything else going on there ends up being not enough time in a day.

Hope all is well. and serious reps buddy. I love your passion for the plant.

Thanks Shotta :thanks: I appreciate that a lot. :Namaste:

I have to admit, I'm pleasantly surprised at how well everything looks. I was hopeful, but it's almost a 'first grow' given the 15 year hiatus. While I forgot a lot of the specific knowledge, I think I managed to hold on to my ability to "feel" the plants though. I guess I have a green thumb. :green_heart::thumb::thanks:
 
Back
Top Bottom