Navigation
Install the app
How to install the app on iOS
How To Use Progressive Web App aka PWA On 420 Magazine Forum
Note: This feature may not be available in some browsers.
More options
You are using an out of date browser. It may not display this or other websites correctly.
You should upgrade or use an alternative browser.
You should upgrade or use an alternative browser.
DrDan's Advanced Nutrients Hydro Grow, Afghan-Gooey and Others
- Thread starter DrDan
- Start date
Drdan I'm impressed! You have one helluva garden going my friend!
I'm digging everything from the diy Ebb&Gro to the cow poop co2.
I'm doing something similar with my co2 trying to perfect it. Afetr this posting I'm gonna look up your deal to see if might be able to diy it too.
Basically mine is a version of the co2 boost bucket. After I used my first co2 boost bucket I ripped it open to find nothing more than a bucket of cow poo and straw. I thought the hell with this. I am not spending $115 on a gallon of poop ever again.
I've taken the pump that came with the co2 boost and upgraded the down spout thing to be longer. I then bought another used pump at my local shop for only $4 and made them both fit onto a 5 gallon bucket lid.
I then took the bucket and filled it with manure, mushroom compost, straw, and Medinas' Compost Activator to get the action started. It's basically a 5 gallon diy, double outlet co2 boost bucket made for only a fraction of the cost of a manufactured co2 boost bucket. It's stinky and nasty but the air pumped out does'nt seem to be all that nasty. I still need to test the co2 ppm to see if it's worth keeping around. If not I may replace all the poop with a diy version of what your'e using to see what happens.
Awesome grow Brother! + reps on the way!

Orangeblood!!!
I too have the CO2 boost bucket system. I like your idea alot. It would be very interesting to see what the test comes out with your truley homemade system!!
Thanks Mr Green.
The girls are getting too big for thier confines now. I just need to hit up the other two patients in this venture for the funds for another ballast, light and vented hood. I hate asking em only because I have been off on my timing several times about when we may need funds for each stage. Oh well, I never said I was a psychic, I only play one on the telephone.
Be ready for more pics. I will try and take some of the process of wiring my circuit breaker box too. That is if there is enough light.::
Dr Dan,
I believe your patients should be more than happy to invest with you in their own well being!!
If growing was completely legal an we were able to operate in the open. You would be sought after by the largest fortune 500 companies!!!
I can tell that you are very passionate on what you do and that means everything!!
 Big Future Comming Your Way!!!
grownavy1091
New Member
I agree with acder drdan, this grow is awesome. I looove reading these updates, its like watching my favorite sitcom! Lol
Sensibowl
New Member
Hello all and welcome to my first grow journal. I am a medical MJ patient and I grow for myself and 2 other patients. I am currently getting things rolling so I can harvest every 4 to 5 weeks. The strains I am using are high THC content and two are mystery girls that are either White Widow or Big Bud, Permafrost or Alaskan Thunder Fuck. I obtained these two clones from a dispensary and the owner forgot to mark what was what. So we will all get to solve the mystery together. Though I will only follow the progress of this batch of ladies in this journal, I will be doing a head to head comparison of Advanced Nutrients and my old GH formula in another thread that will involve this crop. I am thinking I may just compare the "Lucas Formula" since it seems to be quite popular, and I can't find my notes from my previous grows.However, for the purposes of this grow I will be following the Advanced Nutrients Grand Master Grower Level which is reported to be a 37% increase in yield over any competitor..hmm.. we will see.
A fair warning in advance, I can get long winded and ramble without realizing it but to make up for it, I will be posting lots of photos. So lets get this goin, eh?
System and Plant statistics:
Aeroponic cloner (home made one used for these clones)
Ebb and flow table (purchased from Garden store)
Ebb and Gro system (buckets home made)
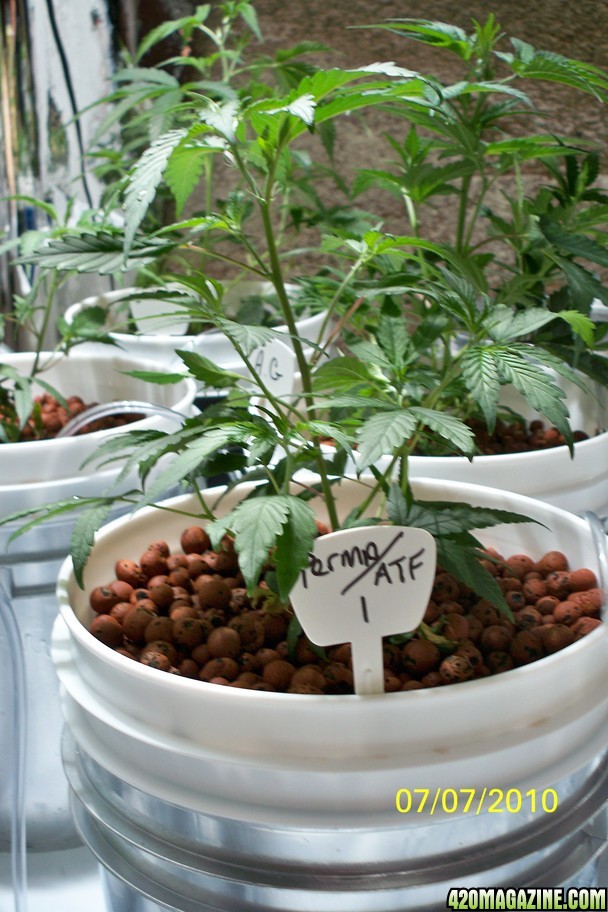
Plant strains: Afghan-Gooey (known), White Widow vs Big Bud, Permafrost vs ATF
Veg room specs: 8'x10'x8', T-5 lights for cloning and first transplant station, 400w full spectrum MH in vented hood for veg weeks 2-3, 2'x4' ebb and flo tray with 25 gal. res., ebb and gro transition table with 25 gal. res. Room temp 78 degrees, RH 60%, 4" inline exhaust with can filter 120, passive intake.
Bloom room specs: 10'x10'x8' (not inc. closet), 2 1000w HPS lamps in vented hoods on 5.0 light rail (will be total of 4 by the time these get to bloom), 8" exhaust fan and filter combo, 6" inline fan with booster fans cooling lights, two 16" circulating wall mount fans, 6" booster inlet fan, Dehumidifier with out of room drainage, 2 Ebb and Gro systems with 2 55 gal. res.
Time for some pics at this point, don't ya think?
My cloning and early deveolpment station
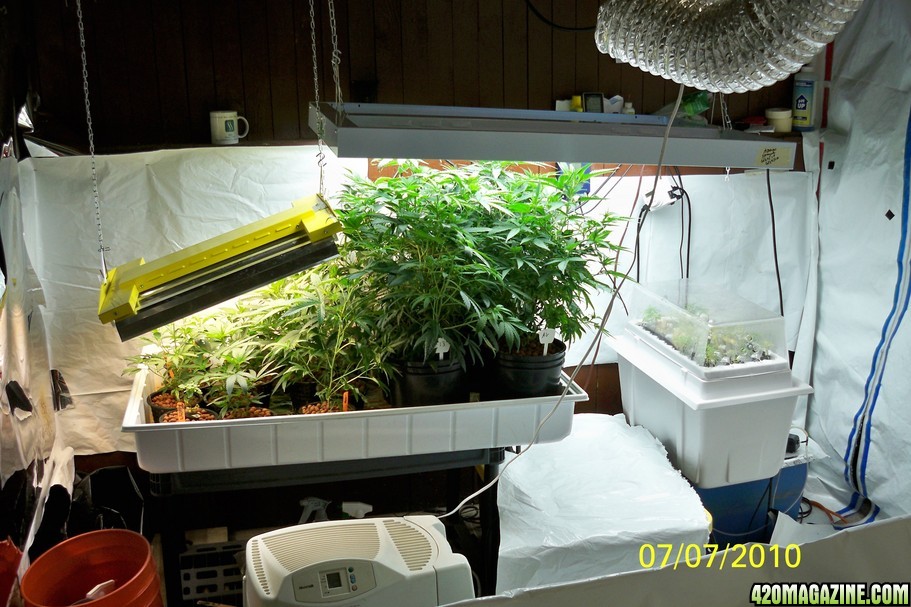
Close up of Moms under T-5s
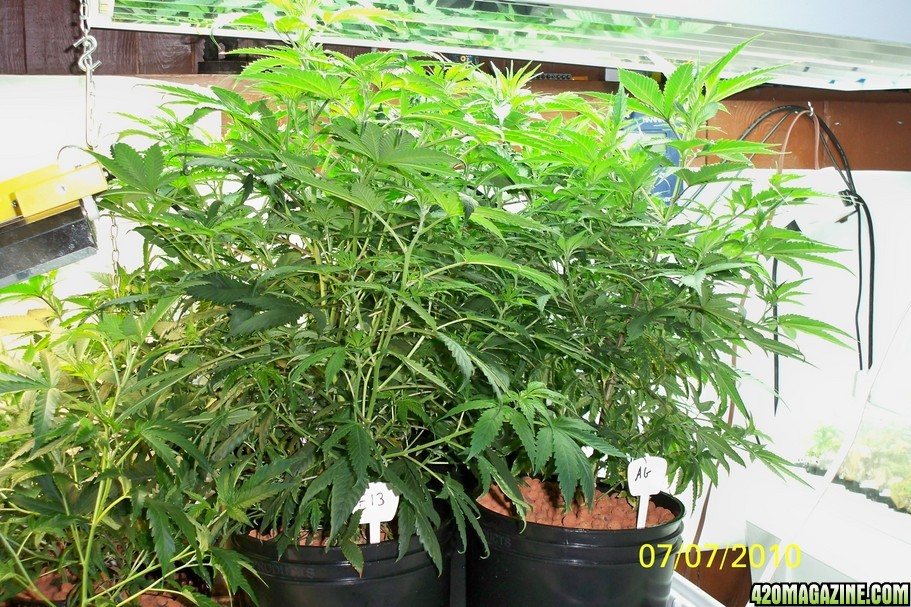
Close up of Adolescents getting thier walking papers
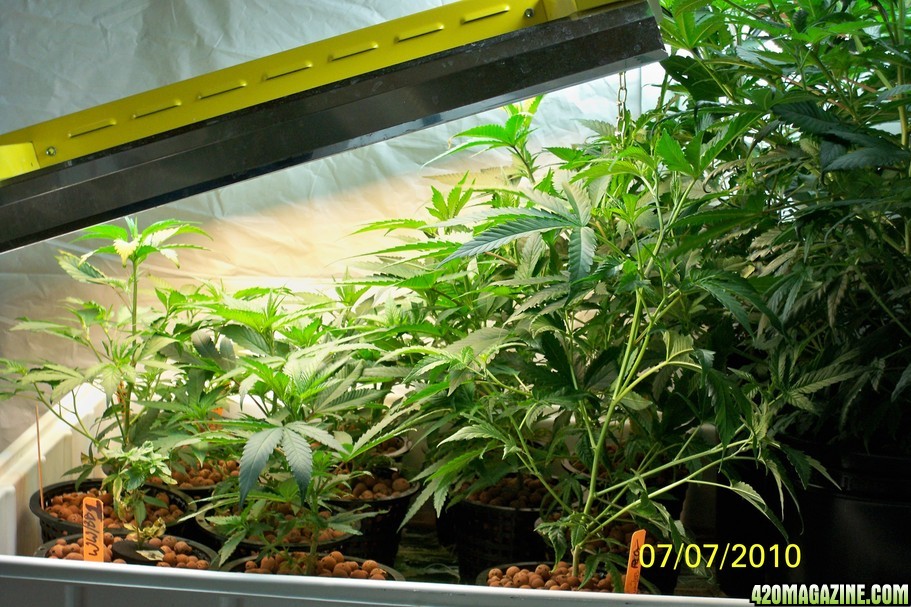
Neighborhood construction, future home of my graduates
High rise apartments springing up everywhere
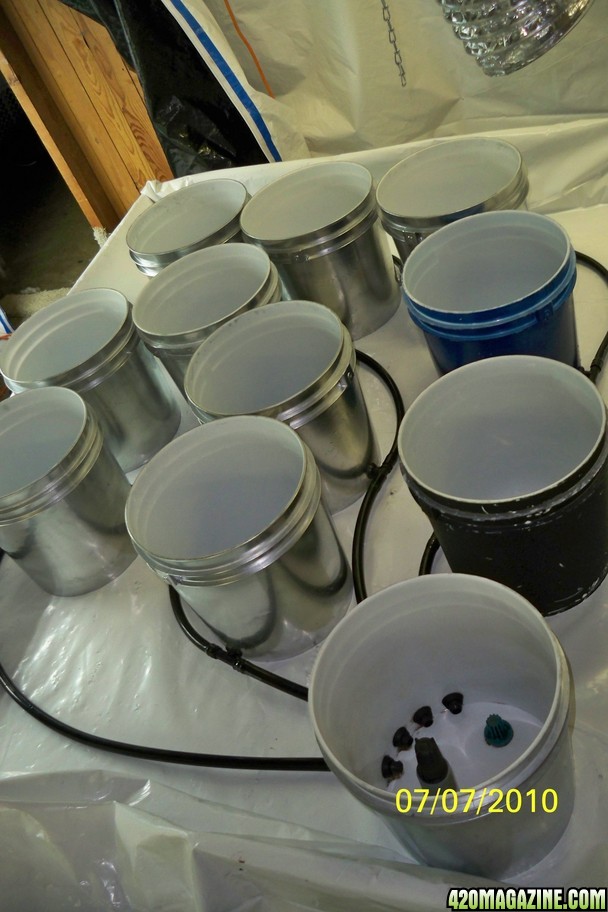
Inside look at the plumbing facilities
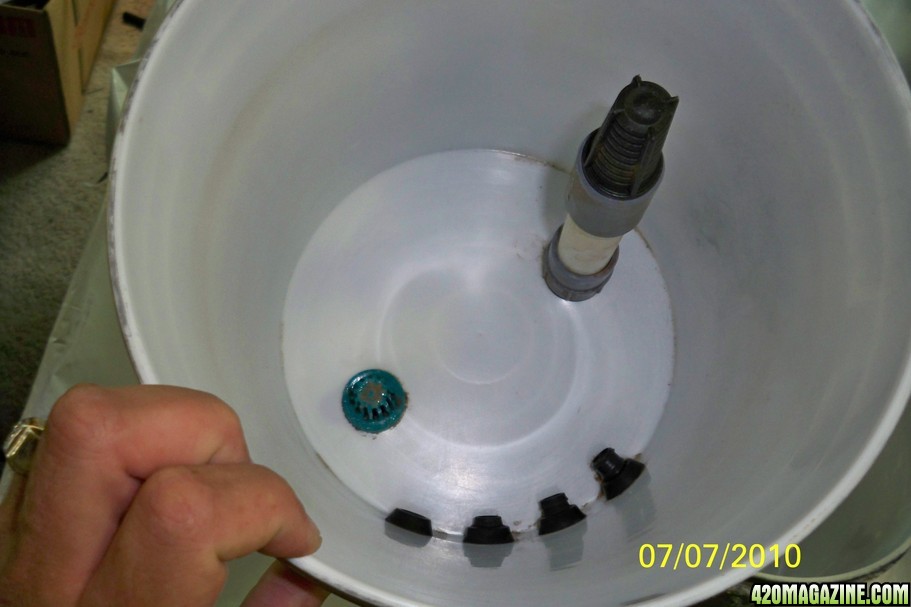
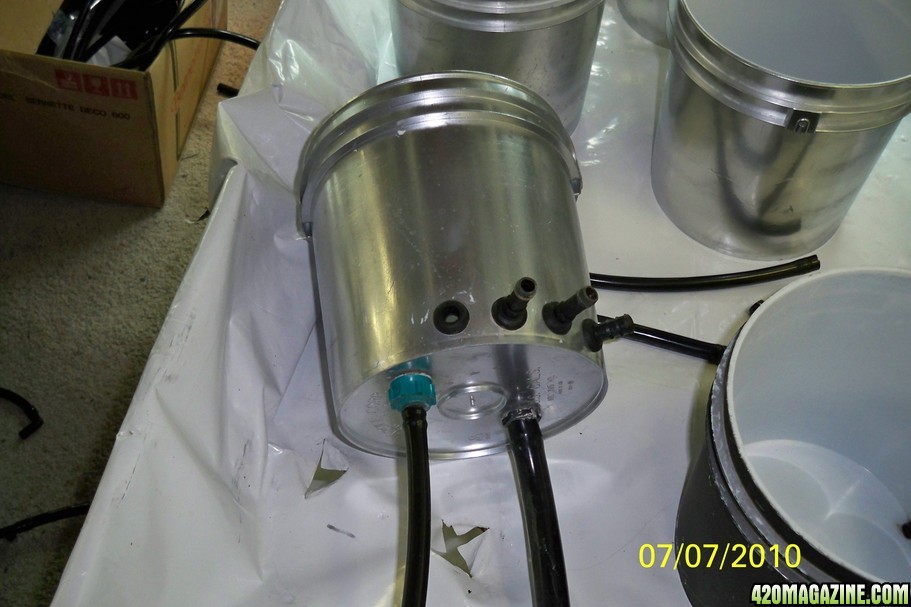
After soaking used hydroton in Flora Clean and Hygrozyme overnight, a good rinse meant the girls could start packin thier bags. With a 10 bucket 2.5 gal. system I use approx. 20 gal. of hydroton. When filling the inside bucket, I stop 2" from the top because this will never see water. When the buckets are at full flood, the water level is about 2" from the top of the lower outside bucket giving me a 2" depth of constantly dry hydroton. This really cuts down on pests, especially those nasty nutrient flies.
When I first purchased a CAP controler and was able to get my buckets off the "height stealing" table for the first time, I ran into root rot because of the standing water the system leaves behind in the bottom bucket after draining. Not everyone seems to have this problem but enough did for the company to come up with a fix while they improve thier design. It entailed putting 2" pieces of 2" diameter pvc piping under the inside bucket to elevate the roots. Works until the roots get to the water again! My fix was a bit more expensive but has benefits that improve yield. I drilled a hole in the bottom of my inside buckets for an airline to protrude into the standing water and hooked em up to an air pump. The results have been very satisfying to say the least. A couple pics of this for those that are as visual as I am.
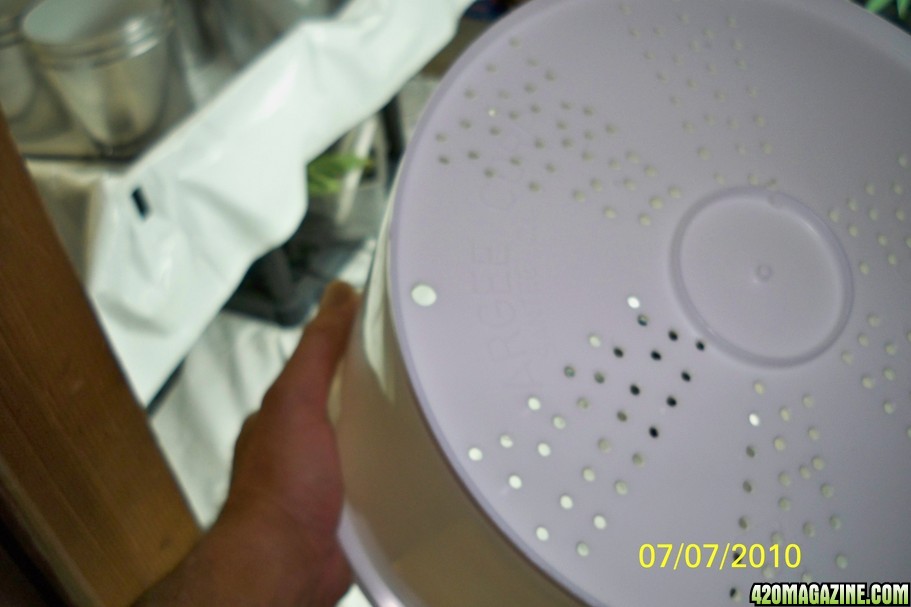
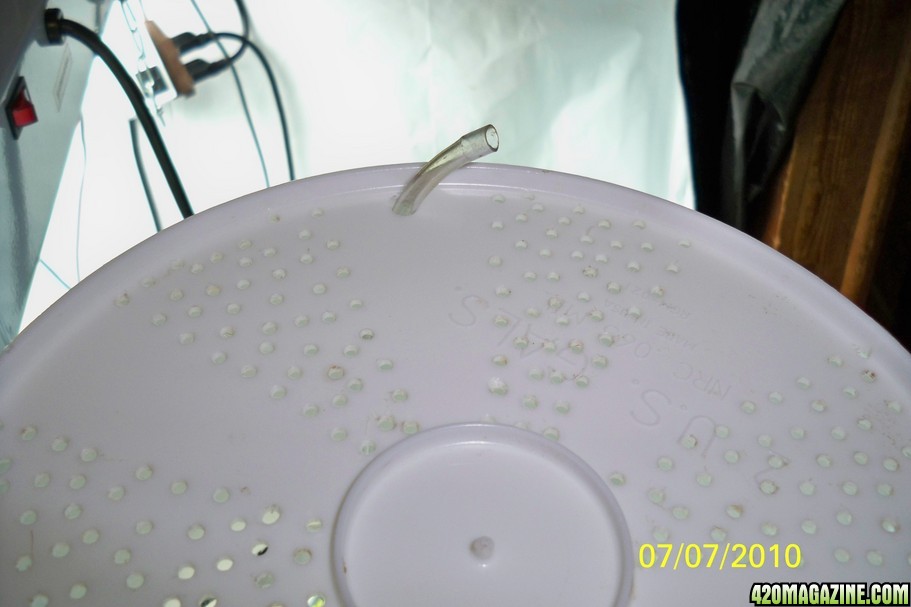
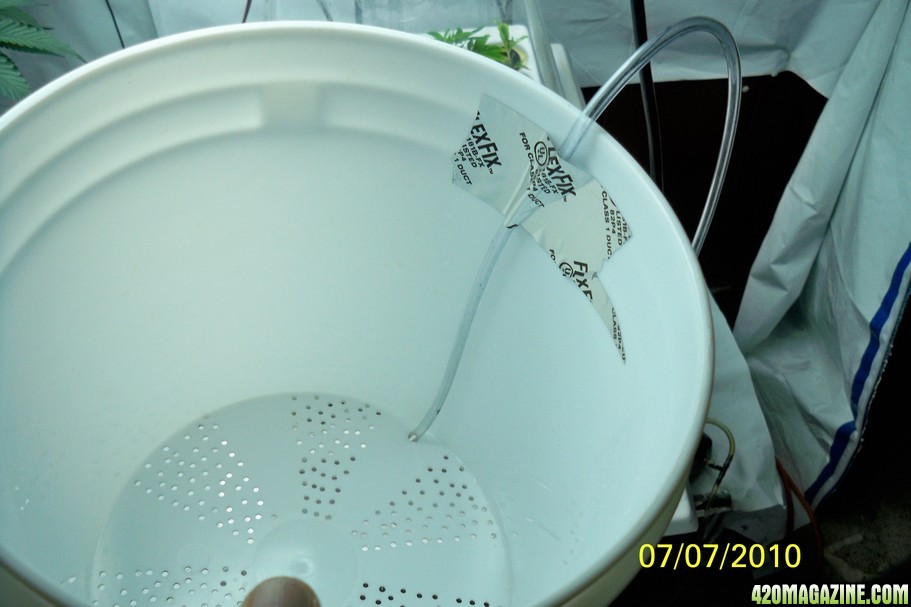
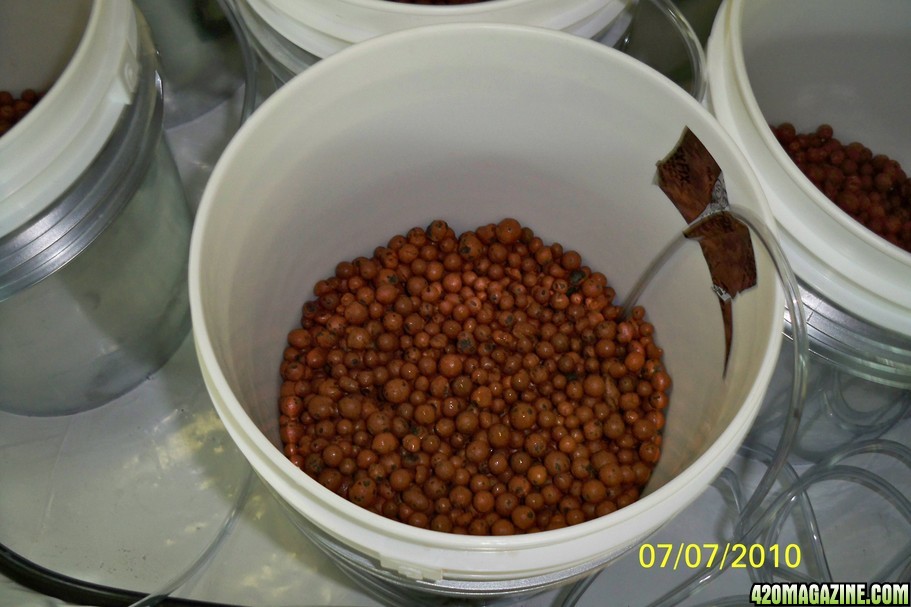
These roots are begging for a new home
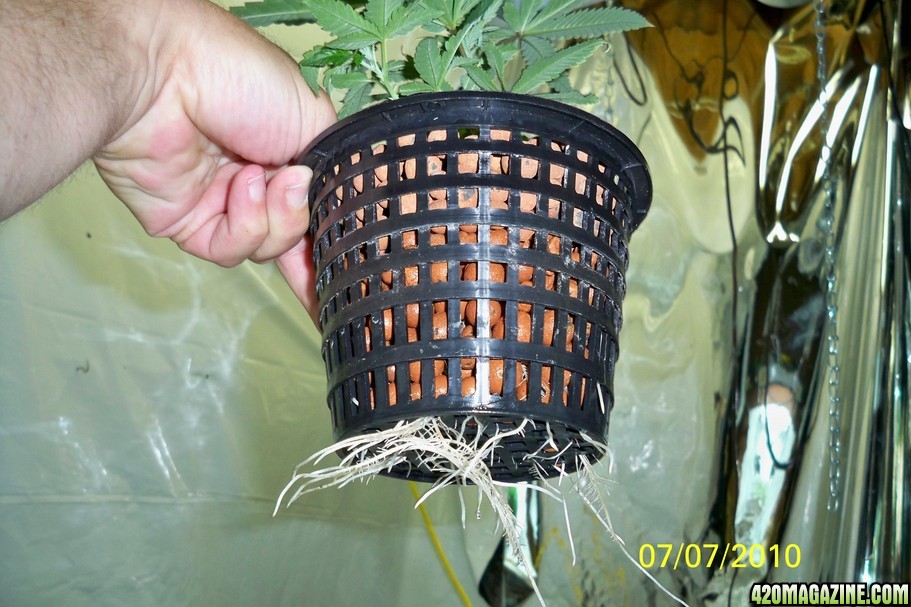
"See ya Mom, gotta groove in my new digs"
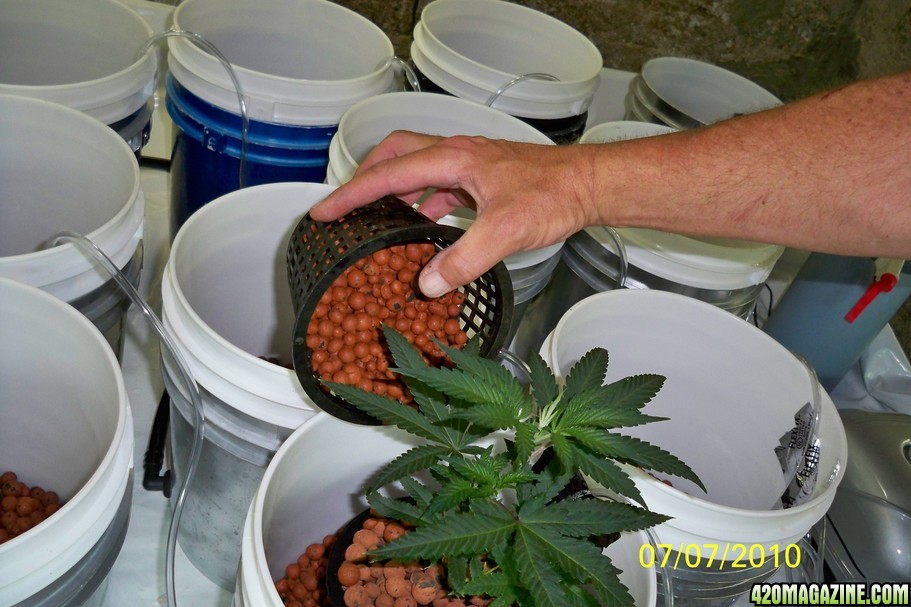
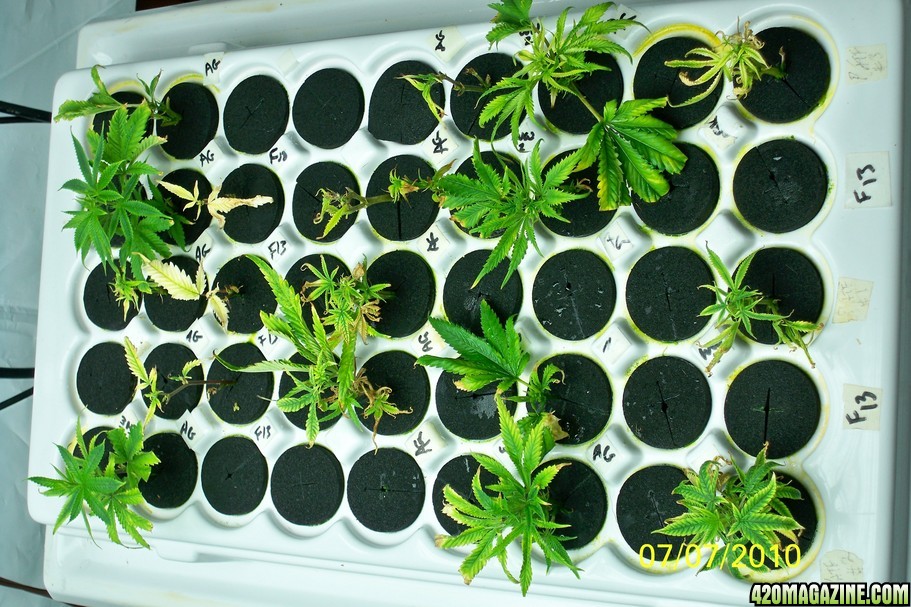
These clones were in my home made aeroponic cloner (no pics yet, cleaning it) for 2 weeks with the exception of 3 of them that were in it 4 weeks (no homes avail. when they were ready). I used a combo of Greenfuse Clonex and root enhancer with a touch of Superthrive B-1 for clone solution. I purchased a Botanicare cloner that came with Powerclone and Aqua-shield. Using this mix and the cloner has not been a very positive experience for me. I used to have a 99% success rate cloning and so far I have lost 10 starts of 30 in this system. I will be going back to my own home made system and nutrient program and selling the botanicare cloner to anyone interested and at a marked discount.:surrender:
Due to this I will be taking clones today or tomorrow and use my old system in case these tadpoles don't make it. Take a look for yourself:
These were transplanted into 6" net pots one week ago for the move to the ebb and flo table to start vegging under my FS T-5 light. I usually take the best 13 to 15 clones for this stage then the best 10 from them for final transplanting. I have 7 known Afghan-Gooey girls, 1 possible White Widow or Big Bud and 2 possible Permafrost or ATF that are now under a 400w FS MH. I have the light 3 feet above the plants at this time and will lower it by 4-6 inches a day until the glass of the hood is 5-6 inches above the canopy. I love air-cooled lighting!
I veg with the lights on 24 hours a day mainly because of location being shared with my maturing and new clones. I have vegged with the 18/6 cycle also and haven't seen any ill effects from the 24 hour regimine for the past 3 crops I have been doing this.
This batch has been getting nutes in the 900-1100 ppm range while in the ebb and flo tray under the T-5 lights so my mix for the transplant res was started at 1500 ppm. I use RO water (reverse osmosis) that has a ph of 7.1 and ppm of 6 after filtering (295 ppm prior to filtering). I store it in two 35 gal. plastic trash cans and one 55 gal plastic barrel connected to each other. This gives me approx. 110 gals. of clean H2O to work with and I need it all come fluid change day (I can have as many as 4 resevoirs running, 2 55gal and 2 25gal). I change fluids weekly and always on the same day so I don't forget how old the nutes are.I also found through experience that it should be a day you have plenty of time and the local Hydro store is actually open!
Res. Mix week 2 of veg: 24 gal. RO H20, 160mls each of Sensigrow A & B, 100mls B-52, 100mls Voodoo jc., 200mls Sensi Cal-Mag Grow, 200mls MEST-Grow (Mother Earth Super Tea Grow). PPM 1500-1510, PH 6.1 (did not require ph adjustment).
Feeding Schedule: every 4 hours, 8, 12, 4 etc.
(first week of veg same nutes, lower amounts to get ppm 900)
You may have noticed that the amounts of each nute varies from the Advanced Nutrients "Bigger Yield Flowering System" recommendations. As many have found that use AN, if mixed at the levels they recommend, ppm is over 2000. I have not found a strain that can handle more than 1800ppm in my experience with hydro so as a result I rarely mix over 1500 ppm to allow for concentration of the nutes during plant transpiration. By altering my mix this way, I am able to go for 48 hours without the need to top off due to high ppm. I tend my ladies daily but this gives me a safety net for those surprises in life.
Ok, thanks for hanging in there with me so far, just about to wrap up this intro. How about some more pics? Well... if you insist, here ya go.
Welcome to the neighborhood ladies!
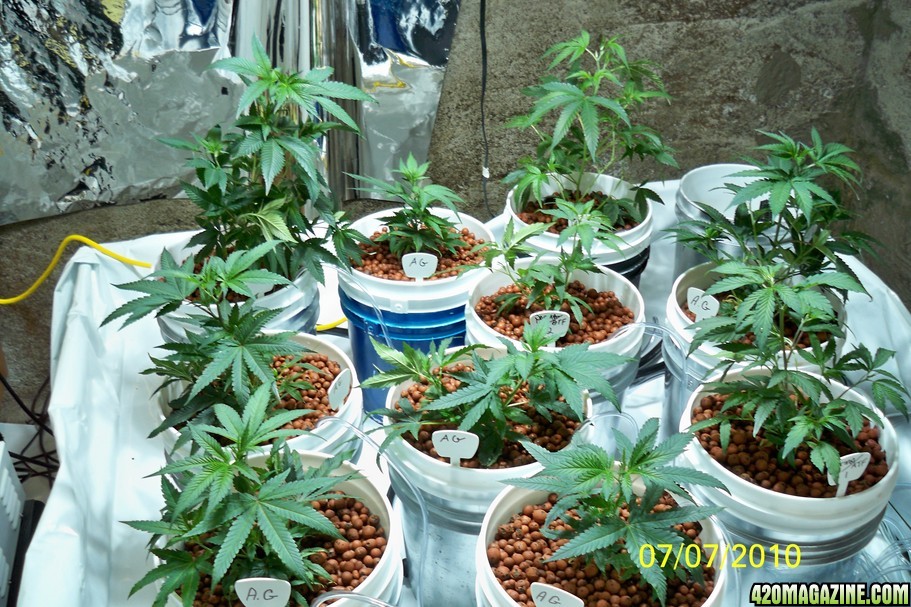
Lady Afghan-Gooey herself
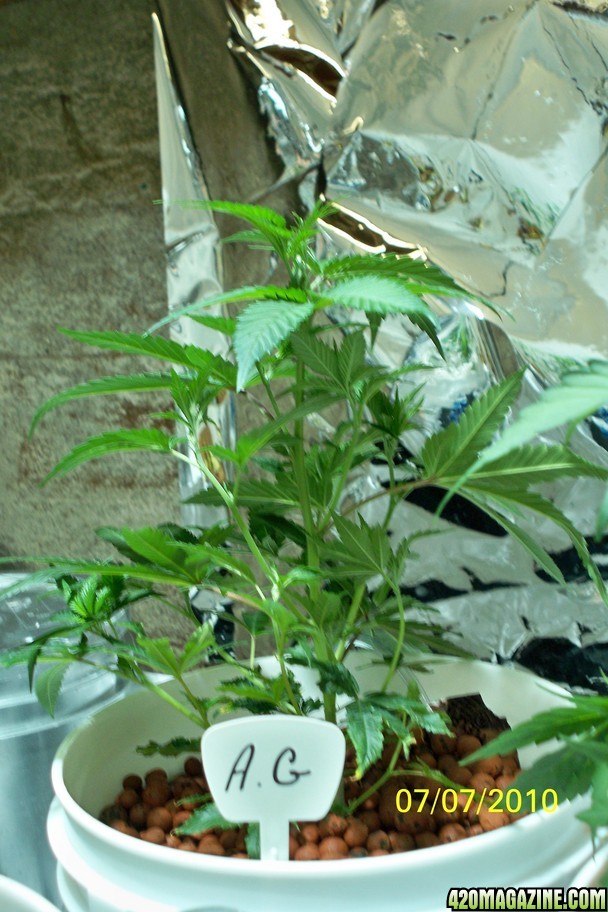
Which will it be, White Widow or Big Bud, stay tuned!
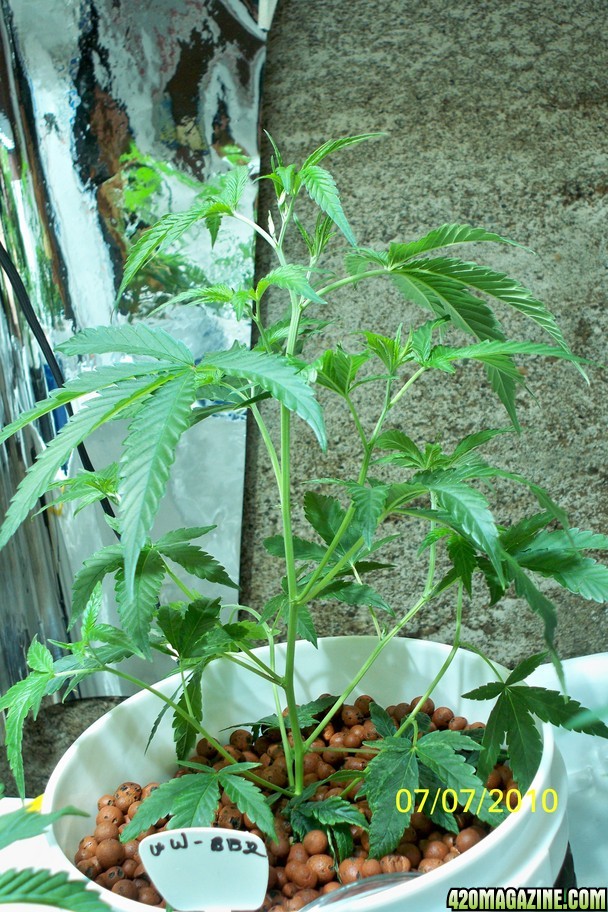
Another mystery date, Permafrost or ATF, bachelor number one wants to know, "Are you of two minds?"
Well, thats the cast of characters in my play. I hope you have enjoyed act one and please come back for the next act. No need to hold applause until then.Obviously, any and all comments or suggestions will be completely ignored so go ahead and waste your time if ya want. (thats sarcasm by the way, and I am full of it, litterally.
)
Holy bajeezus.
THis is an AWESOME thread and forum. You rock

- Thread starter
- #66
That is a serious light tube my friend.
SG
 Yes it is!
Yes, I have a Metal Halide at one end and a High Pressure Sodium bulb at the other and they are both 1000w bulbs. Check out the pics that will follow.Cool! So that 5' cool tube holds two 1000W bulbs???

Glad you are makin yourself comfy,Forget the chair, brought the whole couch haha..Looks like your off to a great start bro keep it up. Looking forward to the next update!
 for the encouragement.
Thanks so much Acer, you are too kind and my fellow patients are very appreciative of my efforts, they don't have to do much of anything except pay thier fair share of expenses. I donate my time and labor as an act of love for both my plants and my patients.Dr Dan,
I believe your patients should be more than happy to invest with you in their own well being!!
If growing was completely legal an we were able to operate in the open. You would be sought after by the largest fortune 500 companies!!!
I can tell that you are very passionate on what you do and that means everything!!
Big Future Comming Your Way!!!
 And when this passion of ours does become completely legal, I will be the first one looking to make a living doing it.
Thanks, I will try to keep em coming, same bat channel, same bat time.. well, can't guarantee the time thing...I agree with acder drdan, this grow is awesome. I looove reading these updates, its like watching my favorite sitcom! Lol

Holy bajeezus.
THis is an AWESOME thread and forum. You rock


 , and 420 Magazine is an awesome site! I know I have bennefited greatly from it. Glad to have ya aboard the grow Sensibowl.
Ok, so now for what ya all been waiting for. I just finished the deed and moved all the girls into the flowering room. Here are some statistics for ya.
Ht. 18-20 inches, almost 3 full weeks of veg.
Lights: one 1000k MH and one 1000k HPS in a 5 foot cool tube reflector
cooling: one 6 inch vortex fan, once 6 inch booster fan, ducted from outside room and vented outside room.
Venting: one 8 inch vortex fan and filter combo for exhaust, one 6 inch vortex and one 6 inch booster fan for inlet from an aircondition room.
Dehumidifier with drain tube exiting room, kept at 50%
Resevoir: 55 gal. Filled to 40 gal. with R/O water and nutrient mix as follows;
Sensi Grow 150ml
Sensi Micro 200ml
Sensi Bloom 250ml
Voodoo jc. 150ml
Tarrantula 7 scoops
Bud Candy 150ml
Great White 10 scoops (cheap Pirhana)
Sensizym 150ml
SensiCal Mag 200ml
Bud Ignitor 150ml
Rhino Skin 150ml
Bud Factor X 150ml
Dutch Master Root Zone 100ml
I know, you are saying to your self, "Hey Self, that isn't the exact Bigger Yields Formula" and you would be right! I replaced Pirhana with Great White for two reasons, one is cost, the second is the store was out and I couldn't wait any longer for transplanting. I have used this product in the past and seen some very good results. So much so, that I didn't really see much difference between it and Piranah I had used on two other crops. My environment seems to have more of a pronounced affect on them than the beneficials I have added.
The other variance is of course, the Dutch Master Root Zone. I have read good things about this and though I haven't had the issues with my current flowering ladies that I had with the crop before them, I am taking no chances.
As I said in a post prior, I made a modification to my buckets using airlines and airpumps to keep any standing water in the buckets from getting stagnant. I HATE ROOT ROT! As a matter of fact, you will see in one of the pics the nice roots of this crop. They appear much whiter in the correct light.
Ok, so the ppm is 1010 and ph 5.7 (I like a lower ppm during transition, they seem to use more water and stretch less.. go figure. I usually have them flower the first two weeks under the MH then switch to HPS. This time they are getting a combo unintentionally. I had planned to start with HPS this time but don't have enough bulbs. Of course, pay day will remedy that soon, so I anticipate only one week with the MH in play, then both will be HPS. I used to have to worry alot about stretch, not so much anymore.

Tomorrow I will have room temps and specs along with other info pertinent to the grow... for now lets get to the pics!


The res. and controler.

The buckets lined up in place, note the strings for centering under the light.
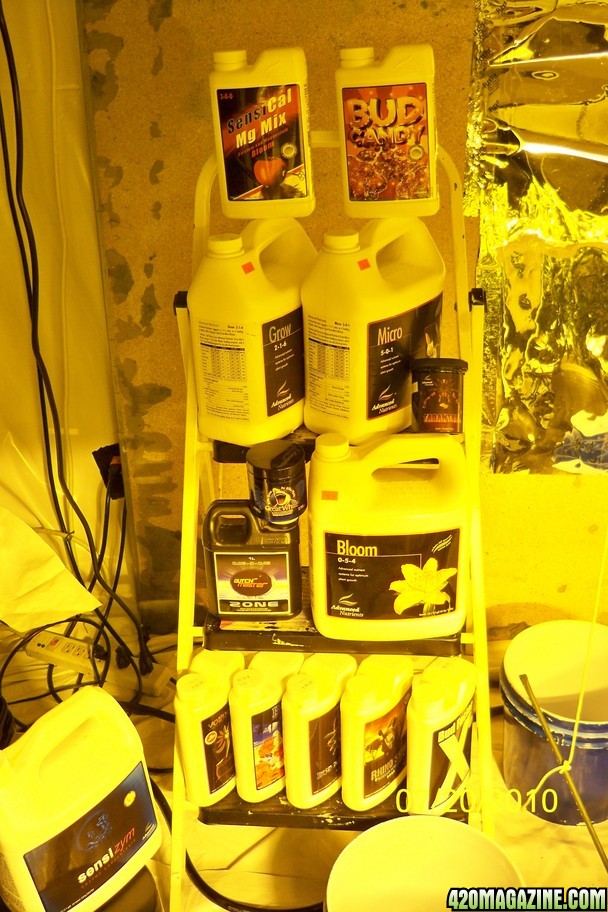
The lineup of Nutes starting the flowering phase.

This is what it is all about!

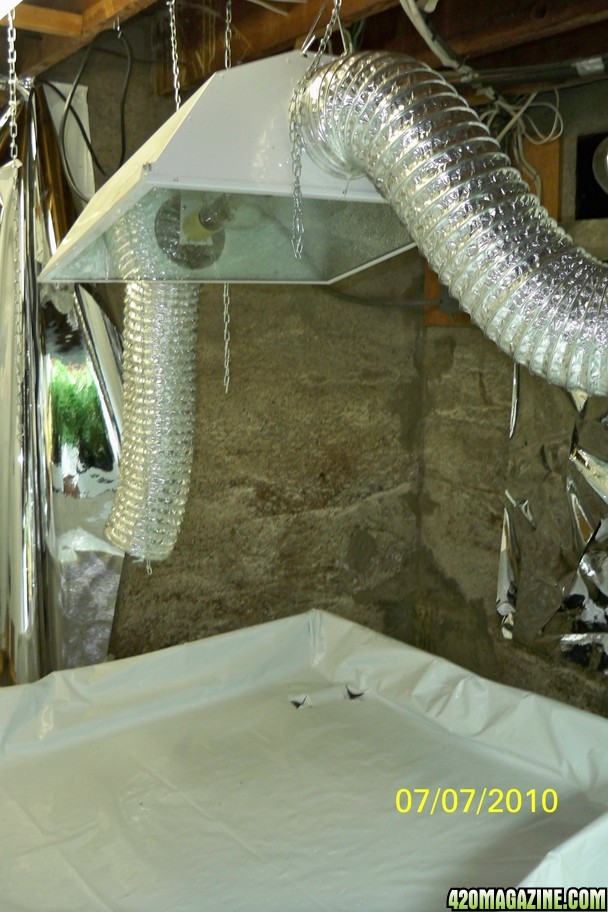
Cool Tube with lights installed and venting connected.
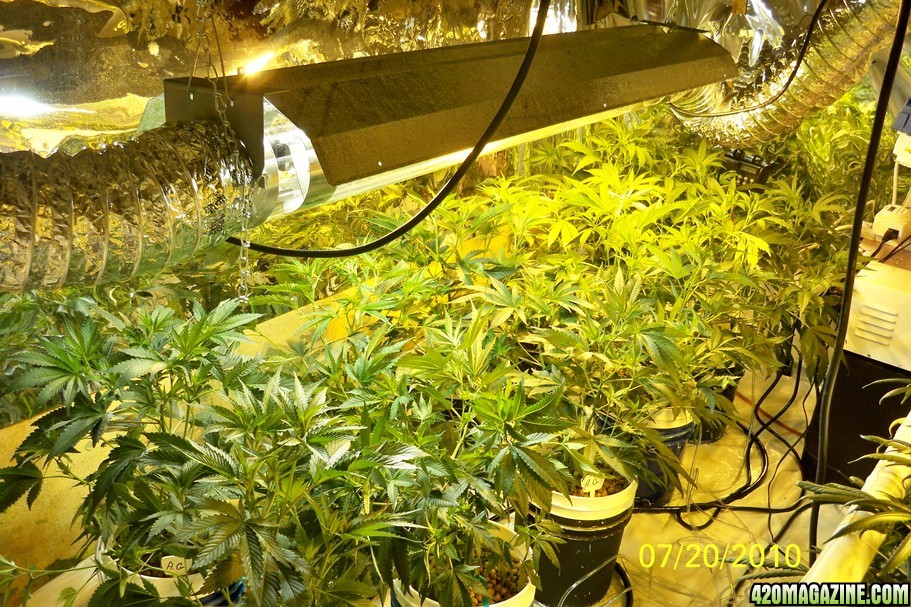
The girls in thier new flower beds.

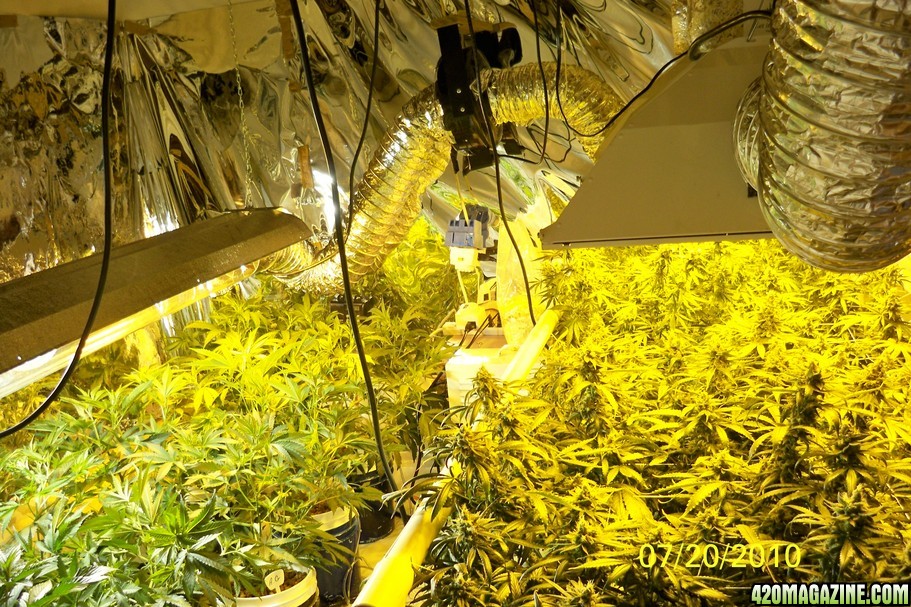
The old girls sayin "Howdy" to the young girls.

And here is the one that made it all possible.

Well, I still have to get the moms and clones back into the veg room so I will wrap this up here. It was nice to get away from the labor for a while.

grownavy1091
New Member
Outstanding.absolutely breath taking
3 Things.....
I love how you are able to MODEL all your nutes better than most web sites!!!
It looks like you are growing a football field!!
You are right.... Thank GOD for electricity!!!!!!!!!
Dr Dan............If I was your patient...I might not be growing now!!!
YYYYEEEEEHHHHHHHAAAAAAHHHHHHHHH!!!!!!!!!!!!!!!!
I love how you are able to MODEL all your nutes better than most web sites!!!
It looks like you are growing a football field!!
You are right.... Thank GOD for electricity!!!!!!!!!
Dr Dan............If I was your patient...I might not be growing now!!!
YYYYEEEEEHHHHHHHAAAAAAHHHHHHHHH!!!!!!!!!!!!!!!!
I meant.....
YYYYEEEEHHHHHHAAAAAAWWWWWW!!!!!!!!!!!!!
YYYYEEEEHHHHHHAAAAAAWWWWWW!!!!!!!!!!!!!
SanibelGreen
New Member
Impressive does not really say it lol + REPS!
SG
SG
- Thread starter
- #72
Outstanding.absolutely breath taking
Thankyou, I get the same feeling when I open the door to the ladies in the morning. I can just imagine them outside in my yard with the sun comming up, now that is bliss.

3 Things.....
I love how you are able to MODEL all your nutes better than most web sites!!!
It looks like you are growing a football field!!
You are right.... Thank GOD for electricity!!!!!!!!!
Dr Dan............If I was your patient...I might not be growing now!!!
YYYYEEEEEHHHHHHHAAAAAAHHHHHHHHH!!!!!!!!!!!!!!!!
Gotta do what ya gotta do to keep them royalty checks rollin in.

And I bet you would still grow, just for the sheer pleasure of thier company if not for the medicine. Besides, my ladies are a captive audience. I can serenade them any time I wish with any song I care to and I have never been "gonged" or heckled. My kind of karaoke! And I even dance with them too!

DrDan - wonderful, just wonderful - I owe you reps!
Thankyou Green, It is a labor of love, and when you love what you do.. you do it well and often.

Impressive does not really say it lol + REPS!
SG
Thanks SanibelGreen, you are too kind.
 all for your kind words and encouragement. I share them with the ladies and I know they appreciate it.
The bloom room is 81 degrees 1 1/2 hours after lights on with the 4 1000k lights and a dehumidfier going. RH is 52% and the res. is right on at 1045ppm and 6.1ph. I don't have a working thermometer anymore, I stepped on it during cleaning.
 So no res. temps for a bit. I am going to probably also replace the MH today with a HPS bulb. I don't want the cannopy to get uneven and cause problems down the road. I am hopeful I won't have to bring in an A/C unit yet because none of us has the fundage. Eventually we plan to go CEA (controled environmental agriculture) and seal the room for serious CO2 enhancement. This may happen in the next few months but not in time for this crop to take advantage of.
Well, I have to go teach my wife how to fly radio controled airplanes today, rough, I know. I am always being torn between the two women in my life!

More news to follow, and probably some pics too.

- Thread starter
- #75
They are a blast. I had to take a 15 year hiatus from flying due to relocation and divorce. Now I am back where most of my family live and most importantly, my flying buddy... my Dad.I love RC! I have cars, trucks, and a small heli. So much Fun!
 It is a great way to spend time and relate with family and friends (getting my wife involved is pure genious, don't ya think?). Thankfully, my Dad and I are of the same mind about marijuana and he could be a pt. if he chose. I am working on that one. Making him some butter next crop. His lungs can't take smoking and the effects from eddibles will do more for his situation than the effects from smoking anyway. Now if I can just get the nerve to do a large batch of oil... thats the stuff. It is a very volitile and smelly opperation.
WOW! Thats all that comes to mind. Jungle fever up in here. Very well done and very
clean setup also. Keep it up drdanLooking forward to the next updates.
 And since you are so kind, here are some pics to feast your eyes upon.
My new HPS bulb, now out comes the MH.

A view of the Socket setup for the 5' cool tube, identical one on the other end.

Easy to install the bulb, always use a soft cloth to keep from touching the glass. This one is made for HID lights. Oils on the glass from your fingers can cause the bulb to explode!

A rear view showing where you squeeze the flanges together for insertion into the reflector tube.

Squeeze and slide it in gently, try not to bang the bulb against the reflector.

HPS bulb in place, there is enough room for the wire to double over the end and allows 6" ducting to slide on fairly easy. I used foil ducting tape to attach the ducting and seal the area the cord comes out.
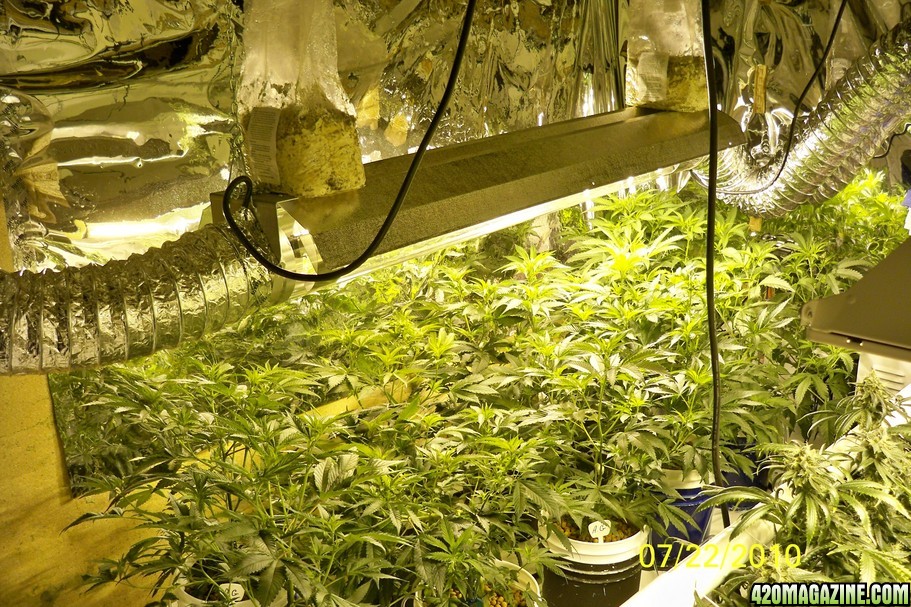
My young ladies 2 days into flowering.
Statistics: RH 52% Temp. 72 degrees lowest, 84 highest, currently 81 degrees. Res. ppm 1065, ph 6.1
I will be building a support tressle like the one my older ladies are being supported by. I should have it done in time today to put in place, I will try and take the time to post another update with pics if I can as well. Until then, thankyou all for your kind words and I hope you enjoy the ride!


- Thread starter
- #76
I almost forgot, I have a few more pics to share.

My babies in thier cradle, Afghan-Gooey, F-13 and Big Girl (bag seed)

Roots devleoping after 5 days, experiment using 2 different rooting hormone products.

Moms need a haircut again, wish I could send each of you a few clones!

 Sprouts after 2 days in the floater, White Widow, Afghan Kush, Hash Passion and Bubblelicious all have one or more sprouts!
Ok, time to go to work.. see ya later.


My babies in thier cradle, Afghan-Gooey, F-13 and Big Girl (bag seed)

Roots devleoping after 5 days, experiment using 2 different rooting hormone products.

Moms need a haircut again, wish I could send each of you a few clones!

 Sprouts after 2 days in the floater, White Widow, Afghan Kush, Hash Passion and Bubblelicious all have one or more sprouts!
Ok, time to go to work.. see ya later.

SanibelGreen
New Member
Heavy duty cloner! Look forward to having to use those one day 
SG

SG
- Thread starter
- #79
Thanks guys and good evening all, I have completed my tasks for the day and even got the pics to prove it.
I built the trellus for the plants today out of 2" PVC and tomato garden netting. The dimensions are 7' 6" long by 3' 6" wide and is 2' 4" tall. For fittings, I used a total of 8 T-connectors and 2 ninety degree corners. Cost about 12 bucks and 3 ten foot pieces ran me 9 bucks. I used two 10' lengths of pvc and cut them to 7', then I remove an additional 20" and put those 4 pcs aside. The one 3 foot scrap is used for a cross piece and the other is cut to 2'. I used a 3rd 10' length to cut the 3 remaining legs to 2'. Here is a pic of all the pieces and fittings;

The pieces have been trial fitted to each end. They are not glued yet. First prime each end that will be glued with primer.

When gluing, you have to be fast and be accurate. It only takes seconds to set. Apply glue to both pcs being joined for a good bond.

This is the end piece ready for legs. I glue only one side of the T connector for the legs, the other end that connects the long rail gets a holding pin instead so it can be disassembled.


Below is a pic of all the pieces and fittings that have been permanently glued. Note the long L shaped pieces, these have a leg on one end and the other will fit into the end piece.

The L pieces and end piece have been joined and a holding pin hole being drilled.

Another perspective on placement for holding pin.

A simple nail is used as a pin.


Netting has been tied to the trellus and stapled at the end of the wall. This is the reason I don't need a cross piece on the other end. The open end lengths and thier legs butt up against the wall and the tension from the netting being tied at the other end holds it snugly.


Well, that is what I did with my day. I hope you find it interesting and educational. My tallest lady is 24 inches... got the trellus up just in time.


I built the trellus for the plants today out of 2" PVC and tomato garden netting. The dimensions are 7' 6" long by 3' 6" wide and is 2' 4" tall. For fittings, I used a total of 8 T-connectors and 2 ninety degree corners. Cost about 12 bucks and 3 ten foot pieces ran me 9 bucks. I used two 10' lengths of pvc and cut them to 7', then I remove an additional 20" and put those 4 pcs aside. The one 3 foot scrap is used for a cross piece and the other is cut to 2'. I used a 3rd 10' length to cut the 3 remaining legs to 2'. Here is a pic of all the pieces and fittings;

The pieces have been trial fitted to each end. They are not glued yet. First prime each end that will be glued with primer.

When gluing, you have to be fast and be accurate. It only takes seconds to set. Apply glue to both pcs being joined for a good bond.

This is the end piece ready for legs. I glue only one side of the T connector for the legs, the other end that connects the long rail gets a holding pin instead so it can be disassembled.


Below is a pic of all the pieces and fittings that have been permanently glued. Note the long L shaped pieces, these have a leg on one end and the other will fit into the end piece.

The L pieces and end piece have been joined and a holding pin hole being drilled.

Another perspective on placement for holding pin.

A simple nail is used as a pin.


Netting has been tied to the trellus and stapled at the end of the wall. This is the reason I don't need a cross piece on the other end. The open end lengths and thier legs butt up against the wall and the tension from the netting being tied at the other end holds it snugly.


Well, that is what I did with my day. I hope you find it interesting and educational. My tallest lady is 24 inches... got the trellus up just in time.


Great Job!!
Thanks for the trellis instructions!
Thanks for the trellis instructions!
Similar threads
- Replies
- 37
- Views
- 19K
- Replies
- 12
- Views
- 3K
- Replies
- 15
- Views
- 3K
- Replies
- 3
- Views
- 2K
- Replies
- 316
- Views
- 40K


