DIY Stealth Cab, Hydro, LED & Multiple Strains in Small Space - Oh Boy!

DRYING & CURING BUDS

I was researching the best methods of drying & curing and came across this interesting article I thought I'd pass on:

DRYING & CURING CANNABIS

Drying and curing cannabis properly will yield the most THC-potent smoke. When dried and cured improperly, potency can diminish substantially. The level of THC in a plant is determined by its genetics. Proper drying and curing will keep the THC level as high as genetically possible. It does not increase potency.

A little background on what happens inside and outside the harvested drying plant will help you understand why proper drying and curing are so important to good quality dope. Drying evaporates most of the 70-75 percent water content in fresh marijuana. Drying also converts THC from its non-psychoactive crude acidic form to its psychoactive pH-neutral form. Once dry, THC-potent marijuana can be smoked and you will get high. Every THC molecule must shed their moisture content before they are fully psychoactive.

In other words fresh green marijuana will not be very potent.

When you cut a plant or plant part and hang it to dry, the transport of fluids within the plant continues, but at a slower rate. Stomata, small openings on leaf undersides, close soon after harvest and drying is slowed since little water vapor escapes. The natural plant processes slowly come to an end as the plant dries. The outer cells are the first to dry, but fluid still moves from internal cells to supply moisture to the dry outer cells. When this process occurs properly, the plant dries evenly throughout. Removing leaves and large stems upon harvest speeds drying, however, moisture content within the “dried” buds, leaves and stems is most often uneven.

Quick drying also traps chlorophylls and other pigments, starch and nitrates within plant tissue, making it taste “green” burn unevenly and taste bad.

Taste and aroma improve when these pigments break down.

Slow even drying – where the humidity is similar inside and outside the foliage – allows enough time for the pigments to degrade. Hanging entire plants to dry allows this process to occur over time, about 3-4 weeks at 50-60 percent relative humidity and a temperature range of 60-70 degrees F. (15-21 degrees C.) The large outer leaves also form a protective sheath around buds. This protective foliage shields resin glands on buds from rupture and bruising. Removing large leaves and stems upon harvest saves time. This is what most growers do, because fresh supple leaves are easier to work with than dry leaves. When you are looking a manicuring 5 kilos, you make it as easy as possible! However, this process often causes uneven drying and keeps moisture inside the foliage.

This is why it is important to “cure” the “dry” marijuana.Curing lets the plants continue to dry slowly. The first week of curing affects potency in that it removes moisture within the bud evenly, so that virtually all the THC is psychoactive. Curing also allows buds to dry enough so that mold does not grow when it is stored. A well-cured bud will also burn with an even glow.Note: Rough handling and friction from fondling hands will bruise and knock off resin glands. Even with proper drying and curing, brutal handling of harvested marijuana will diminish THC content.

Here is one of the best ways to dry plants to retain the maximum amount of psychoactive THC. Cut the entire ripe plant at the base and hang it upside down on a line to dry. Try to keep plants from touching each other to avoid uneven drying and mold. Keep the humidity between 50-60 percent. Keep the temperature at about 60-70 degrees F. (15-21 degrees C.). The room should be relatively dark as light, especially direct sunlight, degrades THC.A circulation and ventilation fan may be necessary to control heat and humidity. You can also use a dehumidifier to control humidity or an air conditioner to lower ambient relative humidity and control room temperature.

Do not train fans directly on drying plants it causes them to dry unevenly. Depending upon atmospheric conditions and the size and density of plants and buds, plants should be dry enough to smoke in about a week. Plants with outer “fan” leaves intact take longer to dry than if leaves have been removed.Check for dryness by bending a stem. It should snap. The bud should be dry to Cervantestouch, but not brittle. The bud should burn well enough to smoke now.Once dry, carefully manicure buds by cutting large leaves where they attach to the stem.

Leaving the petiole (leaf stem) can cause mold to grow. Snip off smaller leaves that show little resin so that buds a beautiful bud remains. Freeze DryingDry ice is frozen carbon dioxide. CO” changes from its frozen solid to a gas without turning into a liquid, a dry (ice) process that is called sublimation. The atmosphere contains little CO2. Dry ice sublimes (converts) completely into a gas leaving virtually no liquid. It is dry.When moist marijuana is enclosed with dry ice at virtually zero relative humidity, water molecules migrate from the cannabis to the dry ice. The relative humidity of the CO2 increases and the moisture content of the marijuana decreases. This process occurs below 0 degrees C (32 degrees F), preserving the cannabis.Place equal amounts of dry ice and bud into a container. Dry ice on the bottom and bud on top. Seal with a lid. Make a few small holes in the lid of the container for excess gas to exit. Place in the freezer. Check the dry ice every 24 hours. When the ice is gone, the buds will be completely dry. If not dry, add more dry ice until cannabis is dry. Conserve dry ice by partially drying buds for a few days before enclosing with dry ice.This method retains potency, freshness and causes very little degradation of resin glands by the bad guys – heat, light, air and fondling hands. The marijuana tastes ‘minty’ because the chlorophyll does not break down.CuringEven though the plants appear to be dry, they still contain moisture inside. This moisture affects taste and potency.

To remove this excess moisture, curing is necessary. Curing makes the bud uniformly dry and converts virtually all THC into its psychoactive form.

Cut stems into manageable lengths – less than 12 inches (30 centimeters) – and place them in an airtight container. Glass containers with a rubber or similar seal on top are the best. Avoid Ziploc plastic bags, which are not airtight. Many growers also avoid plastic containers such as Tupperware, sighting the plastic imparts an undesirable flavor in the buds. Enclose buds in a container. This creates a microclimate that allows moisture to “even out” within the buds. Internal moisture will migrate to the dry portions of the bud. Gently pack as many buds in the glass container as possible without damaging them. Leave the jar(s) in a cool dry dark place. Check the jar in 2-4 hours to see if buds “sweated” moisture. Check buds by gently squeezing to feel if they are moister than they were a few hours before. Be careful when squeezing buds, they bruise easily. Most often they will be completely dry. If not, leave them in the sealed jar overnight and check the next day.The buds will be a bit moist. Remove them from the jar and gently lay in the bottom of a paper bag. They can be stacked in the paper bag as high as 10 centimeters (3 inches). Close the top of the bag by folding once. Check the buds 2-3 times during the day to see if they are dry. Carefully turn them in the bag so that different sides are exposed. Remove when they are dry and place back into the sealed glass jar. Check them the next day to see if they are evenly dry and not moist again. If moist, remove and place back in the paper bag until dry. When dry place back in the glass container. Repeat process until buds are evenly dry.If buds appear to have fairly low moisture content, you may be able to leave them in the jar and let excess moisture escape out the top. Simply open the jar for a few minutes every few hours to let the excess moisture escape before closing the lid again.

Check the container daily, leaving the top open for 5-10 minutes so moisture evacuates. After a week or two, it should be totally dry and ready to seal airtight. Vacuum seal the jar and place it in the refrigerator for storage. Leave it in the refrigerator or a cool dark dry place for a month or longer. The taste and potency will be tops! Refrigeration slows decomposition but remember, refrigerators have a high humidity level, so the container must be sealed airtight. I just checked the relative humidity in temperature in my refrigerator – 65 percent relative humidity and 5 degrees C. (40 degrees F). Do not place it in the freezer. Freezing draws moisture to the surface of buds, which can harm resin glands on the surface.

I do not recommend fast drying however here is a brief rundown on several methods for those of you who can’t wait.

Method One: Manicure fresh buds. Spread them out evenly and wrap in paper or enclose in an envelope. Place the paper or envelope on top of a warm object – refrigerator, radiator, television, etc. Depending upon heat level, buds will be dry in a few hours to overnight. Buds should be a bit crispy when dry. Place buds in an airtight container until they sweat. Follow curing instructions above.

Method Two: Cut up fresh buds and foliage. Place on a 6-inch (15 centimeter) square of tinfoil. Hold or place it over a 60-80-watt light bulb. Stir every 30 seconds. The weed takes 1-3 minutes to dry.

Method Three: Place cut up buds and foliage on a cookie sheet in an oven at 65 degrees C. (150 degrees F.) for 10- 15 minutes. Check regularly until dry. Follow curing instructions above.

Method Four: Place cut up buds and foliage in a microwave oven. Power the oven to 40-50 percent and give short 5-10 second bursts. Check regularly until dry.

Method Five: Cut fresh buds and foliage into small pieces and place them in a glass jar with an airtight lid. Place several silica gel desiccant packs (the kind that come with electronic devices and cameras) into the glass jar and seal the jar. Moisture will migrate to the silica gel in a few hours. Remove the packets and dry in the sun. Replace silica packs until marijuana is dry enough to smoke. Find silica gel packs at auto parts or electronic stores.

Method Six: Peel stems so they plants dry faster. First remove large leaves. Peel off the outer layer of the stem with a knife. This exposes the inside of the stem and cuts drying time by about 20 percent.Patient growers smoke no bud before its time!
 
Yeah! Now that's some swelling... looking sweet!

Won't be long now

Hi Mr Krip. :bravo:

That Ak is monster! :yummy: Don't know how they both fit in there!

Vendor times are just a ballpark figure as you are finding out. :smokin:

I love it when plants give you so much more than you expected. :Rasta:

Good article Mr. Krip :thumb:

Love looking at the pics, keep em coming it won't be long now my friend... :peace:

Thanks, guys! I appreciate the good words & vibes! :thumb:
 
MY DIY DRYING BOX - WORK IN PROGRESS BUT ALMOST COMPLETE!

Since I'm getting real close to harvest, I figured it was time to start thinking about where & how I'm gonna dry all these sweet-smelling buds. In the last several days, I've also given a lot of additional thought to odor control (since they're really stinking, now!) and even more thought to my limited budget at the moment.

Here's what I've come up with...

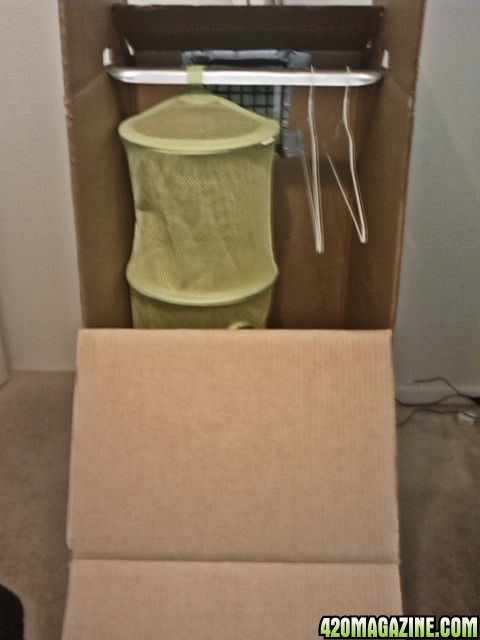
I had picked up a small drying net on eBay for $20. I then went to U-Haul and picked up what they call a "Grand Wardrobe Box" for $11.95. It's the kind they use to move clothes on hangers and comes with a hanger bar:

IMAGE_525.jpg


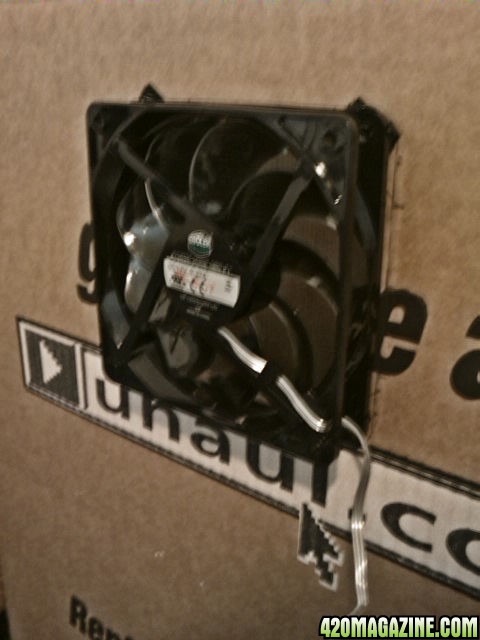
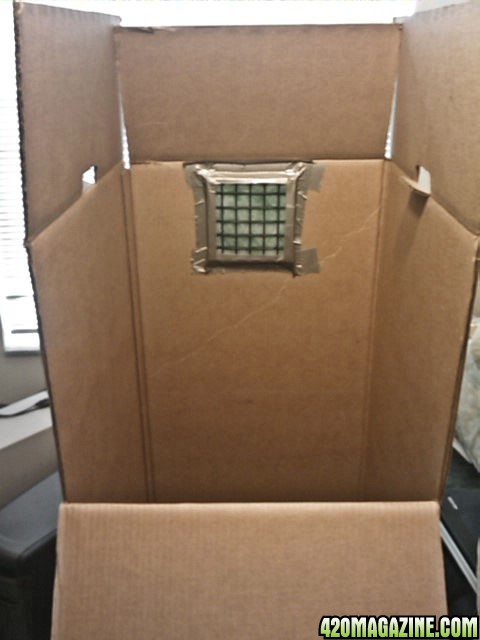
I cut an octagon centered towards the top of the back of the box. The octagon shape is much easier to cut in cardboard than a circle, and let me maximize airflow. You can see I first traced the outline of the fan and cut slightly smaller:

IMAGE_526.jpg


I then mounted a PC-fan to the outside back of the box using some velcro:

IMAGE_528.jpg


There's enough room to hang the dry net and have four usable levels, plus I can also hang 8-10 larger colas on two hangers:

IMAGE_529.jpg


And, the entire box will seal shut (although, the two top side flaps are open in this pic:

IMAGE_530.jpg


So, what's left to do....

I'm gonna cut some ventillation slots in the bottom sides for passive intake. The ventillation slots will be covered with weed block screening to prevent dust & insects from entering while allowing airflow. I may add flaps to these intakes to restrict airflow later, but with the fan attached to a speed controller, it may not be necessary.

Finally, for odor control, on the inside of the box where the fan exhaust is, I'll either cut & tape a piece of charcoal filter (i.e. a HEPA filter) or, if I can't get a hold of some charcoal filter, I'll just use one of those "Filter Mate" air conditioner air fresheners on the exhaust. Either one will not only assist with odor control, but will also block out most of any light that could come in through the fan opening.

Additionally, I'll put the box in the same room as the grow cabinet. If odor is still an issue, I'll open the top-left chamber of the cabinet which will expose the carbon scrubber, and I'll run the scrubber 24x7 while drying and let it scrub the whole room, instead of running it 15 minutes per hour to just scrub the cab.

I'll add updated pics when it's complete!

I like the fact that this whole unit can easily be disassembled and stored in very little space when not in use! :)
 
Very Nice dry-box my man! :thumb:

I was thinking of doing sort of the same thing just a bit smaller. You can get small charcoal filters at Walmart pretty cheap in the fan/filter isle. You could also set a jar of Ona in front of the fan (outside of the box) so the smell blows over the top... just thinking out loud ;)

Can't wait to see that box full of meds, just make sure you make a hole big enough to fit your head in there :) that's gonna smell gooooood :rofl:

LOL :rofl:

Thanks, DIME!

I was actually thinking of using one of these filters:

AC-Safe CarboStat Air Conditioner Filter - AC-337 at The Home Depot

But, it's good to know I can get some at Wally's, too! I'll take a look and see what they have.

I also happen to have a fan filter that will snap on the existing fan. It's supposed to filter out dust. If I put the carbon filter inside the box, then cut a Filter Fresh sheet to fit the snap on filter on the outside, I may get the best of both worlds! :)

Taking your advice, I'm also thinking of cutting a large round hole in the bottom of the box, so I can just wear it on my head all day! :yahoo:
:rofl:
 
DRY BOX UPDATE - VENTILLATION ADDED

I added the passive intakes to the dry box tonight.

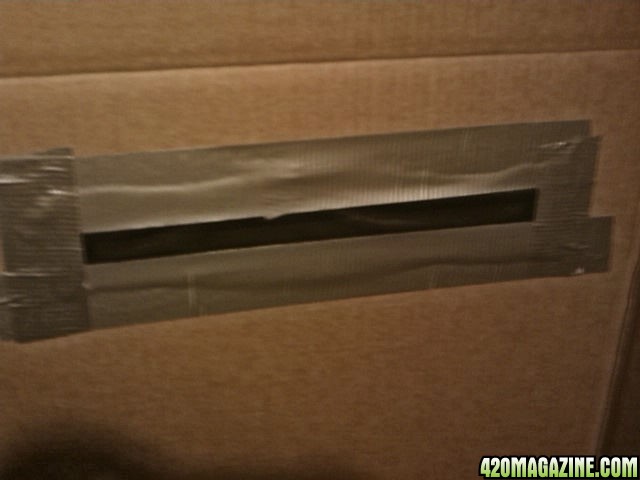
I cut a 5/8" slot, 12" across, located 4" up from the bottom of each of the two sides and duct taped some landscape weed block screening (how appropriate! :) ) to the insides:

Here's the inside with the box turned upside down, so you're looking at the bottom in this pic:

IMAGE_532.jpg


Once I dd this to each side, my passive intakes were complete and bug-proof

IMAGE_533.jpg


IMAGE_534.jpg


If I can get out sometime tomorrow, I'll try to pick up a filter for the odor control and a hygrometer to measurer RH and it'll be ready to fire up! :grinjoint:
 
Hi Mr. Krip! :Rasta:

Thanks for the post about drying! It's wonder we get high as we do off of our buds. In the process of drying.....I'm pretty brutal to my girls. :smokin:

Thanks for showing us the U-Haul box. I just may do the same thing!

Thanks! :thumb:
 
Why disassemble it Mr. Krip? You can use it as an overflow closet for your snappy wardrobe :cheer:

Seriously that's awesome. The fan is sucking out not blowing in correct? What are those nets and where did you get them? More great stuff Mr K! :peace:
 
Hi Mr. Krip! :Rasta:

Thanks for the post about drying! It's wonder we get high as we do off of our buds. In the process of drying.....I'm pretty brutal to my girls. :smokin:

Thanks for showing us the U-Haul box. I just may do the same thing!

Thanks! :thumb:

Thanks, OMM & glad you liked it. I can't wait to get the box fired up with a bunch of buds inside! :slide:
 
Why disassemble it Mr. Krip? You can use it as an overflow closet for your snappy wardrobe :cheer:

Seriously that's awesome. The fan is sucking out not blowing in correct? What are those nets and where did you get them? More great stuff Mr K! :peace:

Blue, yes...the fan is exhausting the air. There is no fan blowing on the buds, they just get the air circulated from the passive intake vents I cut in the two sides, shown in the last set of pics.

I sent you a PM with a link to the drynet (420 doesn't like posting eBay auctions)...it's only $16.95 shipped, so it's about the best deal I could find and appears to be well made.
 
DIY DRY BOX - COMPLETED WITH ODOR CONTROL!

I completed the DIY dry box today by adding the odor control. Here's what I came up with...

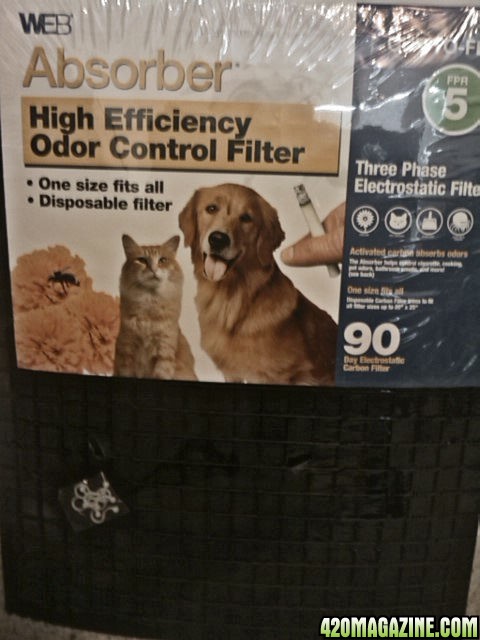
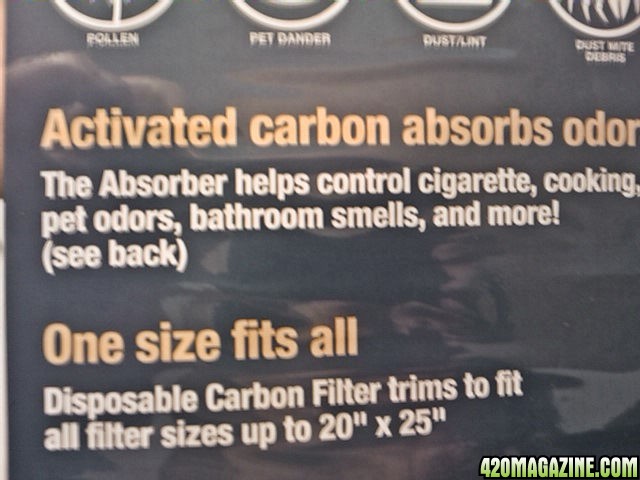
First, I decided to go with this Air Conditioning Odor Control Filter I found for $9 at Homie's:

IMAGE_537.jpg


It's got a filter grate included that you can cut to size along with the filter which has an activated carbon backing for odor control:

IMAGE_540.jpg


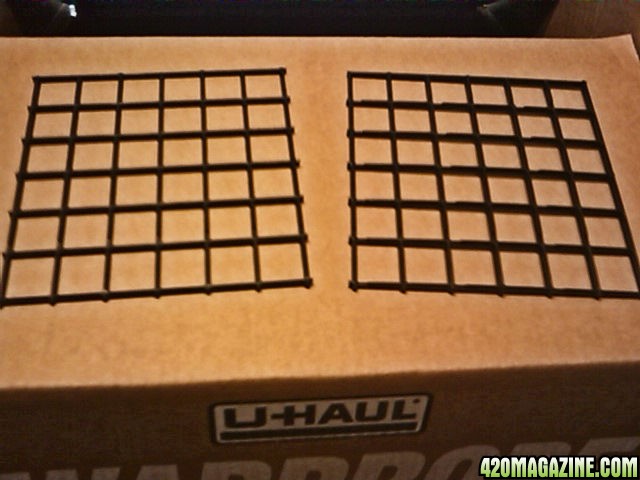
So, I first cut the grate into two equal size pieces slightly larger than the fan opening:

IMAGE_543.jpg


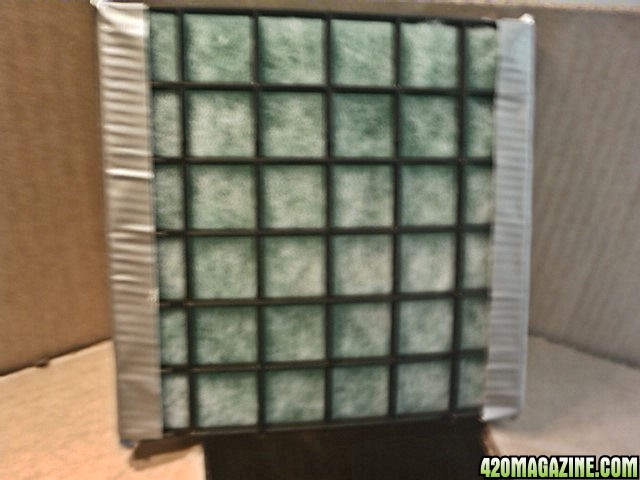
I then cut a piece of the filter the same size and made a filter sandwich using some duct tape:

IMAGE_545.jpg


TIP: Don't squeeze/tape the filter sandwich together too tight. You want it loose but snug so it doesn't constrict the fibers and end up restricting airflow.

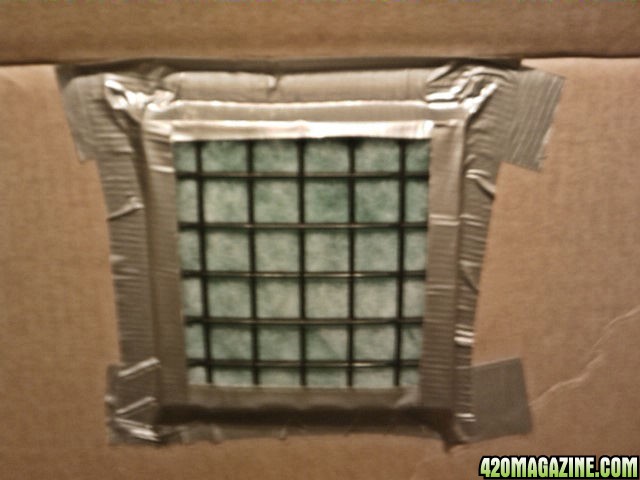
I then used more duct tape to seal it to the back of the box over the fan opening:

IMAGE_546.jpg


TIP: Make sure the carbon side of the filter is facing the outside of the box and put the fuzzy side of the filter facing inside!

NOTE: When you're using duct tape for actual ducting, it's not considered "jerry rigging"!

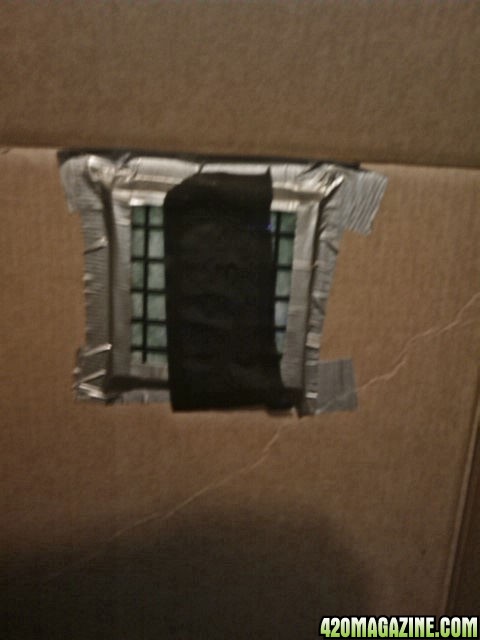
I wanted to make sure the fan had a good seal in both front and back, so plugged the fan in and held a small piece of the weed block screening in front of it and the suction from the fan was enough to hold it to the back of the filter, so it's working! :) :

IMAGE_548.jpg


Here is the completed filter assembly:

IMAGE_547.jpg


And here's the dry box all ready to fire up:

IMAGE_549.jpg


I hope this helps others out there!

One side note is that there is enough filter material left over to replace the existing filter about 10 times!
 
REAL QUICK UPDATE:

I did the final res change on the AK today before she gets her pre-harvest flush.

While she was out of the cab, I snapped a couple of pics...nothing great, but gives an idea of what's going on.

First, she's an absolute monster and can barely support her large colas now, which really look so ready to me, I was considering going straight to flush and skipping the nutes!

I did my best to get the colas, which were all sagging severely, tied as high and supported as best as possible. All the larger colas have been LST's to the back and left, since the cab walls in front and right prevented them from growing any bigger in those directions:

IMAGE_535.jpg


So, the back/left is just a huge mountain of big colas!

IMAGE_536.jpg


They're basically stacked on top of each other, but no way to really make any more room. There does appear to be enough space between for airflow, so I'm really hoping to avoid any budrot issues in these last couple of weeks.

Since she still has some white pistils (though, not nearly as many as last week!) and I wanted to give her the last week of nutes, I really didn't want to start the flush yet. Plus, I'm anxious to see how much weight she'll put on over this next week!

But, I'm not sure she's gonna go another two full weeks, so I may start the flush a little early and/or flush less than a full week based on how she's looking!

I'll get some better pics later today so you can see what the buds are looking like.

Thanks for the help!

K
 
Mr K, the dry-box is sweet! You should post that up in the DIY section :high-five: for REAL.

That girl is insane, those colas look like they are gonna be monsters. :cheer:

Have you considered a small dose of nutes in lieu of a full strength feeding?

Also, I know you have been giving her the AN Overdrive but don't remember how many times... The chart I posted in my journal was showing growth and increased weight in weeks 7-8 AFTER the Overdrive was given in weeks 5 and 6. If you have the two weeks or less, the Overdrive should keep them swelling even after you start the flush...right??? :).

I really think that either way you have enough green in that girl to feed herself for a while. But... I'm a rookie so I could be a bit off :rofl:

:theband:

Good idea! It's now in the DIY section:

DIY drying box with odor control

This will be my 2nd week of Overdrive and I've been reducing nutes each of the last two res changes. Today, the PPM's were set to 380. Also, I'm using Clearex, so I can flush in as little as three days, if needed.

If I start to see a lot of amber trichs popping up before next week, I'll start a flush right away.

And you're correct, sir! There is still a lot of green and she hasn't been feeding on herself much, which is another reason I'm comfortable waiting to flush.

You can't be more than a couple weeks more rookie than me, so you input is appreciated!
 
TODAY'S PICS - 73 DAYS OF 12/12

As I mentioned, I did the final res change today and lowered PPM's down to 380. Next res change will be a clearex flush and then plain H2O until harvest. I have to say I am VERY pleased with the way these buds look. Although I haven't taken any samples yet, you can definately tell this is gonna be some primo meds! :grinjoint:

The buds are now extremely heavy and frosty and the calyxes are huge and swollen.

I'd be happy harvesting her now, so I'm very anxious to see what happens over the next couple of weeks, or so!

Right now, my only concerns are possible bud rot (since she's so densely packed with buds) and the fact that she may supercrop herself before I get to the flush due to the weight of some of the buds. Of course, I'll need to make sure the dry & cure goes well, too.

Here's the pics from today:

IMAGE_550.jpg


IMAGE_551.jpg


IMAGE_552.jpg


IMAGE_553.jpg


IMAGE_554.jpg


IMAGE_555.jpg


IMAGE_556.jpg


IMAGE_557.jpg


IMAGE_558.jpg


IMAGE_559.jpg


IMAGE_560.jpg


IMAGE_561.jpg


IMAGE_562.jpg


IMAGE_564.jpg


Happy Harvests!
 
:grinjoint: Looks like your pretty close there K~; glad the drying net worked for ya:thumb: the box should work well as a desicant. Lots of folks like drying in cardboard:). Watching from the wings, & Happy Grows ~H~
 
I hate when the buds get so fat and heavy you have to stake them up, all that extra work is such a pain in the ass :cheer::cheer::cheer:

Seems like yesterday you were bummed at how they weren't filling in very well lol!

Soon it's time to :party::party::party:

+ reps and 5 stars for your journal my friend

Well said, Blue! Mr. K, you are on your way! LOVE the DIY dry box. I'm earmarking that one for future reference. I truly appreciate the effort you make to learn and share what you've learned. Plants are looking good and harvest is on the horizon. Way to go my friend!!! :thumb:

Oh, and I agree on the 5 stars and plus rep. One more vote on each from me as well. :high-five:

Keep on rockin' Kripster!
 
Back
Top Bottom