Trouble & Strife & Some Things Nice - Mr A Goes Perpetual Again!

Well drat and bother! Oh well, it must be time for new lights. :slide: I know you'll be very happy with them Mr A. :hugs: :Love: :hugs:

Here, your turn again. :passitleft:
 
Great. I better find my Weird Jimmy glasses so I can go look at my LED's now.

:passitleft:

:passitleft:

Well drat and bother! Oh well, it must be time for new lights. :slide: I know you'll be very happy with them Mr A. :hugs: :Love: :hugs:

Here, your turn again. :passitleft:

:passitleft: it's kinda forced what I was planning, I had all the important parts, the missing piece was only 5 English pounds so money wasn't the hold up, I'm just lazy and never got round to doing it.

Tomorrow is the day, I'll either have a fully working Mars 400w, in its original form OR a converted Mars unit running 6x 35v, 0.6a, 3500k citizen cob Modules OR I've taken a 100 mile road trip to see a very very generous member of our fine community.

:passitleft:
 
Good luck with the build mate and I hope it works out for you. If it doesn't work out I'm sure the third option will work out exceptionally well too, I know you wanted a tester of these:
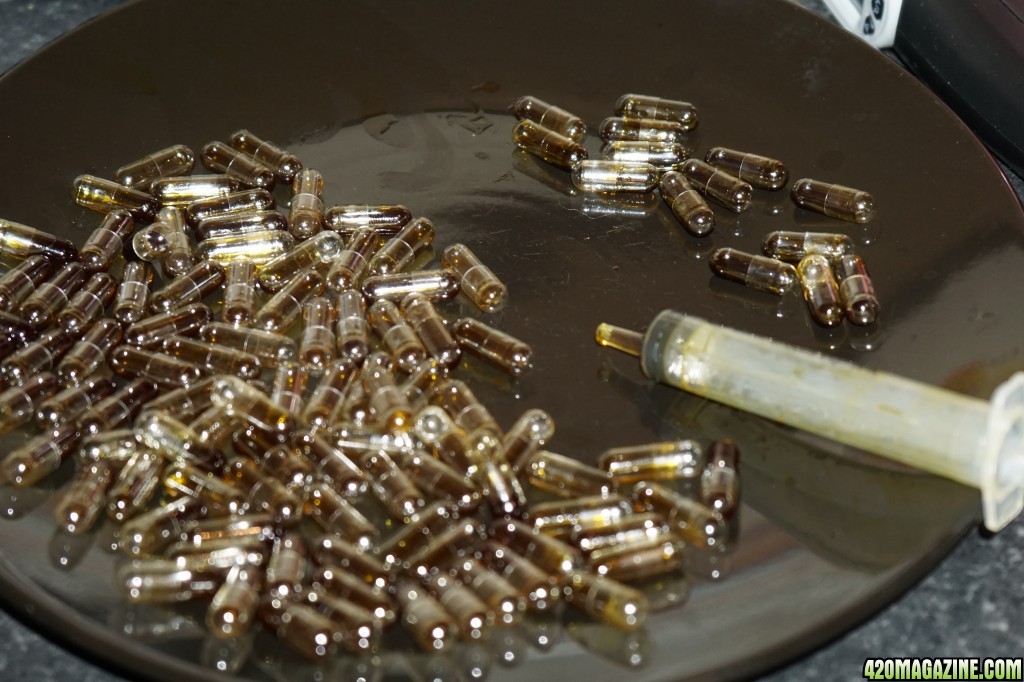
DSC012337.JPG


Just saying ya know :cco:
 
Good luck with the build mate and I hope it works out for you. If it doesn't work out I'm sure the third option will work out exceptionally well too, I know you wanted a tester of these:

DSC012337.JPG


Just saying ya know :cco:

See now I wish I'd have made the trip anyway. The build went very well, update loading.......
:passitleft:
 
Some Things Nice
Light repair/build

As you will know, my light was in need of repair.


20170708_193400.JPG


today was the day I actually got off my ass and fixed it.

I started by gathering everything I'd need.
The old Mars unit
Sheet of 1.5mm aluminium sheet measuring 12."x12.5"
6 cob modules all rated at 35v 0.6a
Soldering iron and solder
Wire
Thermal paste
Kapton tape
Screwdriver
Multi Meter


20170708_193423.JPG


Remove the 8 silver screws from around the edge so you can separate the unit.

20170708_193341.JPG


Be careful when lifting, you have to undo the wiring plugs.

20170708_193320.JPG


Once disconnected, set this part to one side. It will get left as it is.

20170708_193257.JPG


Now remove the 8 screws holding the main board to the inside.

20170708_193206.JPG


Lift the board out

20170708_193108.JPG


Flip it over and remove the 10 screws holding the Heatsink&oq, with a bit of persuasive pulling, these eventually slid off.

20170708_193023.JPG


Lift off the heatsinks and set aside.

20170708_193000.JPG


Using a soldering iron, remove the 3 wiring leads from the old board.

20170708_192914.JPG


Mark out and drill holes in new sheet of aluminium.

20170708_192831.JPG


Screw on the heatsinks, 5 screws each, ensuring enough thermal paste used.

20170708_192809.JPG


Figure out where to mount the cobs

20170708_192748.JPG


Wire them up and stick them down. Wiring these things was easy, follow + and - wire 2 cobs to each plug removed from the old board

20170708_192630.JPG


Once all the connections were checked with a multi meter it was time to rebuild the unit. Starts bi installing new board into the top. Securing with 8 screws

20170708_192556.JPG


Looking good.

20170708_192536.JPG


A quick cleanup of the fans before refitting it to the top part.

20170708_192513.JPG


Let there be light....

20170708_192444.JPG


I had to wait till 7pm before I could put the light back in its place. Time will tell how how the girls take to them.

20170708_192423.JPG


20170708_192349.JPG


It's been 2 hours since the unit was installed, temp have sat steady at 88f, it's a warm day too. :yahoo:


Great walk through MrA, I'm pretty sure I'll be butchering mine soon instead of messing about with individual heatsinks. Fantastic :thumb:

Cheers buddy, everyone should do it, it's so easy. From start to finish it took me 3.5 hours, that included many smoke breaks and a short stop for the anticlimax of F1 qualifying. :passitleft:
 
Stoney Sunday Update

Good evening friends and welcome to my weekly update. The garden has been stressful this week with the light failure but it was fixed and the flower girls appear to have enjoyed there first night under the new and improved unit.

Let's look at the spaces shall we?


Veg Space

Things are going well in here, I'm good at keeping veg plants green....

20170709_210053.JPG


DSC_004866.JPG


Starting with the youngest, we have 3 seedlings. All aged 7 days, they are Critical Jack (rear right) Liberty Haze (front) Northern Lights (back left)

DSC_004760.JPG


Up next is Bubbas Gift. She is 62 days from seed. I topped her 6 tops, she will go to flower with 12.

DSC_004266.JPG


DSC_004165.JPG


Tutankhamun comes next at 102 days from seed. I don't know what i'm doing with this one anymore...

DSC_003960.JPG


DSC_004061.JPG


And finally..

Here is a CBD Critical Cure clone 102 days (23days from roots) my flux project, is doing well. I plan on keeping her quite small, she can't take up too much room in flower.

DSC_003681.JPG


DSC_003875.JPG


Flower Space

DSC_006156.JPG


DSC_005348.JPG


I'm having some issues with my biobizz girls, all are suffering what appears to be a low soil ph. I'm gonna start to up the pH of feeds, once my new pH tester arrives. So let's look shall we?


Black DOG
is 102 days +38 . She continues to self trim only much slower since I added lime to her pot.

DSC_006250.JPG


DSC_006349.JPG


DSC_006749.JPG


Jack Herer is also 102 days +38 as with the her rate of leaf loss has slowed, Looks like she will go longer tho


DSC_007548.JPG


DSC_007441.JPG


DSC_007739.JPG


CBD Critical Cure 102 days + 28, looks to be suffering the same issues as her bigger sisters, I'll add some lime to her pot before next feed.

DSC_007135.JPG


DSC_007043.JPG


DSC_007247.JPG


Freddys Best, 102 days +28 is still here and is the greenest of the bunch. She has flowers and frost, despite being stick in the back corner, under the filter, she may turn out to be a gem .

DSC_007947.JPG


DSC_007837.JPG


DSC_008151.JPG


Last up is my poor Dark Devil Auto at 7 days from seed and no true leaves, I don't see much hope for this girl....

DSC_009154.JPG


Well that's the big tour for this week. I'll be seeing you around the yards. :passitleft::passitleft::passitleft:
 
Hi Mr Amazin, I see that you're blazin'...

Love the tutorial on the rebuild. The hardest part for me, is everything...lol. But I was reading in one of the journals that someone did a rebuild of a Mars light and was actually getting way more light without using the clear panel in front of the lights. On one hand they did get more direct light for their plants but it projected less of a cone reflection to neighbouring plants. I wonder since you're in a smaller grow space, if direct light would be more effective in a shorter area. Please forgive me if it doesn't make sense but I'm very interested in learning.

Your plants speak for themselves...and that flux is deluxe. Great updates and many things I'm learning. Have a shhhmoky sunday!

PS...your words "we didn't cuddle after"...lol *HIGHlarious ;)


Mr Am4zin's always blazin :passitleft:

Thanks for stopping by and thanks for your input.

The glass screen, I thought about this, then tried it. It does appear to help the light spread, I also read that the glass filters out some uv rays.

It caused me 1 major issue tho, heat. Lots of heat. Because my space is small heat builds up quickly, the glass helps keep some of the heat inside the unit(the unit vents outside the box).

Tempsford with glass in 91f, I'm good with that, but, temp with glass removed hit 98f. I'm not too good with that so I put the glass back.

:Love:


Great update and your new light looks like a dandy. I can not wait till weed is legal around the world so I can watch you flux a monster. I only wish I had your patience.

If you have any aches or pains you are going to love that Critical Cure

Cheers buddy, I'd love nothing more than to flux out a monster in a massive pot. Bring in the legal weed, can't see it round here anytime soon tho. :passitleft:


You got a sweet looking flowers in there MR A and the self build looks brilliant :high-five:

Love you man. :circle-of-love:
 
Well, I am slowly finding out where all the cool kids hang out, caught up/subbed up and rather impressed with your vertically challenged situation and results. Some great strains, some mighty fine harvests, and pretty ingenious mcguyvering you have done there. Keep up the mediocre work (kidding of course, its something my boss says to me to tell me I am kicking ass). :high-five:
 
Well, I am slowly finding out where all the cool kids hang out, caught up/subbed up and rather impressed with your vertically challenged situation and results. Some great strains, some mighty fine harvests, and pretty ingenious mcguyvering you have done there. Keep up the mediocre work (kidding of course, its something my boss says to me to tell me I am kicking ass). :high-five:

Welcome UA and thanks for your kind word. I like that your planning before you start growing, I did the same. My first grow was a year in the making, research, planning and funding never stops tho. :passitleft:
 
Back
Top Bottom