I'd still like to know what's in that High Brix kit.

All you have to do is ask!
First of all, I'm not in any way, nor are my products in any way affiliated with "HiBrix" from Australia. I use no chelating agents of any kind, all of my products are GMO free, all the way down the food chain.
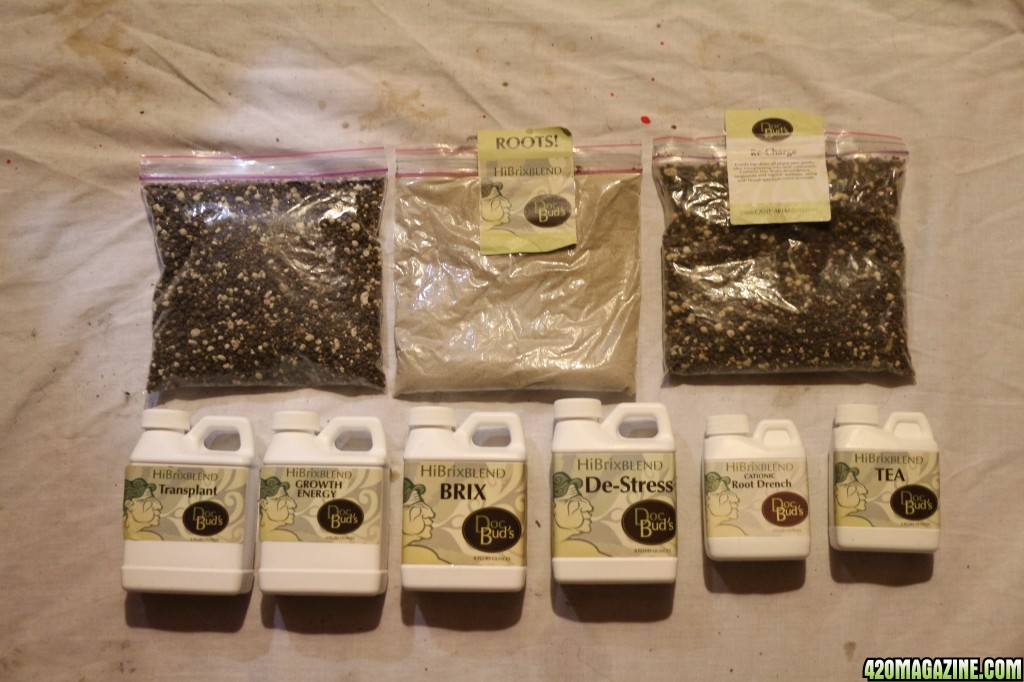
So, here's what in the kit:
Amendment: Carbonized Limestone, Soft Rock Phosphate, Organic fertilizer ( yeast based), bio-char, mycorhyzae, ammonium phosphate, copper sulfate, iron sulfate, kelp meal, some salt of molybdenum, zinc and 20 mule team borax.
Recharge: very similar to the Amendment but with a tad of magnesium added.
Tea: Liquid Humic acid with beneficials
Roots!: various rock powders, mainly limestone, gypsum and soft rock phosphate, with biochar, trace minerals a mycorhyzae that have been born and bred on the rock powders.
Growth Energy: Liquid calcium nitrate derived from naturally occuring chilean nitrate. Trace minerals.
Transplant: Cold water fish hydrolysate, chilean nitrate.
Cat Drench: fish hydrolysate from cold water fish, ammonium phosphate, ammonium sulfate
Brix foliar: fish hydrolysate, calcium phosphate, phosphoric acid, dextrose, kelp based natural plant growth regulators (PGR's...auxins, kinens, etc.)
DeStress Foliar: Kelp, phosphoric acid, PGR's, dextrose.
I think I got every ingredient. Essentially, it's just rocks, naturally occuring salts, fish juice, microbes, small amount of carbon and organic matter.
The soil is very much alive....which is the entire point of High Brix growing.
My system is designed with a post-prohibition mentality and all of these products are good to go right out of the bag/bottle with sprayers, broadcast spreaders, fertigation and all manner of greenhouse Dosatrons and related products.
But they can also be adapted to small hobby grows, just as easily.
")
So, you LOS/TLO folks are like our favorite cousins. We're about the same things, we just have a different style and understanding. I'd like to grow by the Hectare....but I'd also like quality to be BETTER than what I now grow AND I can't spend all day brewing AACT in a swimming pool to food everything!
So, products designed for farming and market gardens appeal to me. No bugs, high quality every time, flexibility, consistency.
But please don't say I'm using chemicals or chelation! That's not me, that's someone else from Australia!


 So nice of you to join us. It's going to be very interesting, if nothing else.
  Feel free to zoom right in there. She's not shy. (Probably got that from her mother.
  )
)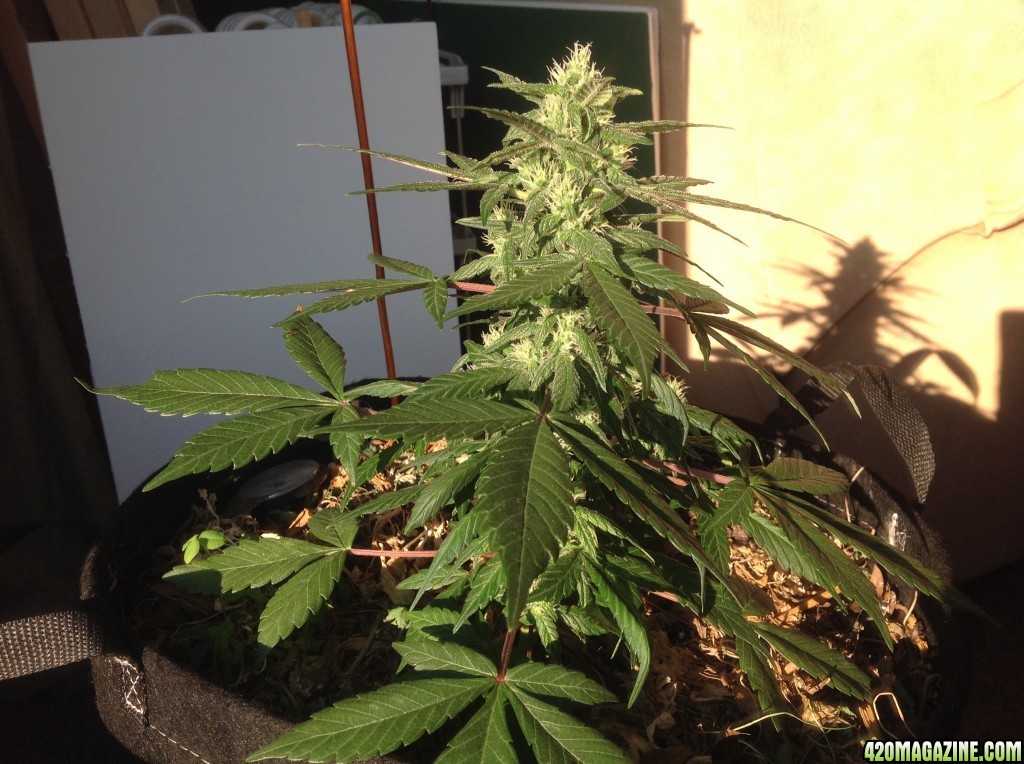


 Coming together. Before I'm done Doc, you'll be so proud of me.


")

 "Marketing"? Ouch. Heheh, seriously, no one is marketing. Doc Bud is just a guy who went looking for something really simple and universal. His early find was a slow-release chemical fertilizer called Osmocote. It comes in "prills" - tiny balls - which release in water and heat. They had a version called Osmocote Plus that had especially high amounts of calcium which our plants like. I used that method on my first grow and it was great. All I had to do was water, and I turned out some beautiful plants - easy peasy, can't go wrong. Research on the benefits of calcium led Doc to mineralization. And mineralization led to a company of organic horticulturists who did the research to determine exactly what mineral balance was best for the soil biota, and therefore the plant. That's the key - the exact mineral balance for optimum biota populations. For instance, Potassium is bad for the biota even though traditionally, tree leaf mulch has been used in organic gardens. This mineral balance has been proven to be the best. The company tests a soil sample you send them, and then formulates an amendment, if possible, to bring it into balance. Most commercial soils and soilless mediums can't be balanced. Pro-Mix and Sunshine #4 can be.