Hydro Coco Quasi Hempy Grow

The Bloom Cab

The bloom cab measure 6' long x 7' tall x 4' deep.
It's built from plywood and is painted flat white. The opening to the front is a panda film curtain. I installed tarp grommets every 8" down the length of the curtain so it can hang on a curtain rod. It opens and close the same way a shower curtain opens & closes except this has velcro closures to seal the cab from incoming light.

100_01222.JPG


The roof of the cab is made from 5 layers of sunscreen mesh. It blocks out light yet it's able to breathe.

The air system consists of 90cfm of fresh air injection every 15 minutes day & night.
Humidity & odor are exausted thru a Hydrofarm 4" inline fan set to run for 5 minutes every 20 minutes.
The lighting exaust is an 8" CAP Valuline inline fan. It runs off a thermostat. When the grow room hits 80 degrees, the fan kicks on and cools the lights & cab.
Temps never exceed 82 degrees and humidity is between 40 & 55%.

Lighting the cab is two 430 watt Son Agro hps lights made by Hydrofarm. The bulbs are Eye Hortilux and the reflectors are MelonHeads from Advanced Nutrients.
Supplemental lighting comes from two 4' two bulb t5ho Tek Lights from Sun Systems. They are outfitted with Quantum Bad Boy Triple Phosphor bulbs. These Tek lights are sweet! They are the first t5ho light I've come across that actually runs cold. Not warm or room temp but COLD!!
The t5s run down the length of the garden along side the MelonHeads and are are mounted at an angle. This way of mounting the lights creates an umbrella of lighting covering the entire footprint of the garden.
All lights are hung with Sun System Pro Grip hangers.

IMG_12467.JPG


IMG_12532.JPG


IMG_12475.JPG


IMG_12272.JPG


IMG_13497.JPG


The light fan is hooked up to a speed controller but it's set for max speed right now. I have a KillAWatt meter so my next move is to test whether it costs less to run the fan at max power for less time or medium power for more time.
Since the MelonHeads are made from aluminum & tempered glass cool tubes they run extremely cool. The exaust fan kicks on after about 3 hours from the lights coming on and runs for about 3 minutes every 15 minutes after that at full speed.
 
Re: Bandit420's Hydro Coco A GoGo

Hey Bandit! I love your thread, first thing I do is fire up Welcome to the Machine and a bowl :tokin:

Your setup is awesome.

I love love love that grommet idea thank you! I have 2 'doors' taped up and held together by velcro but it's a pain in the ass getting in and out. How did you put the grommets in the panda film?

I can't really tell but it looks like the t5's are angled inwards? If you don't mind my asking how much were they including the upgraded bulbs and do they plug into a regular outlet?

I just ordered a simple hps hood from htgsupply, they offered as an option hanging rods but I declined, I'll probably wish I hadn't in a few days. I don't have the option of hanging anything from the ceiling, I'm going to have to build a frame to hold the light. Do you think I should still get hangers and build the frame higher?

Great job my friend.

Thanks Buddy, I'm gonna have to reload the bowl for these answers lol!:bongrip:

Home Depot has these diy tarp kits that come with the punch tool and a bunch of grommets for about $10.
With the panda film I folded the top few inches over a few times to thicken it up so it would'nt tear off the hangers and then punched the grommets thru with the punch tool and a hammer. The grommet/punch kit comes with instructions that are very ez to follow. Once you do one it's a cake walk after that.

The t5 are indeed angled inward towards the garden.
I believe Sun System has quit making these lights but they're available as new old stock in a lot of shops. I got mine at a huge discount for $130 each. Their original price was $212 each but these were the last two at the shop and one was a store display. These lights use a digital electronic ballast equivilant to the Quantum Bad Boy so they too push a 54 watt t5ho tube to 94 lumens per watt.
The bulbs i had to buy seperate of course and I had to order them online. Unfortunately you cant buy them in singles. They only come in cases of 8 for $65. The box they come in is a very nice sturdy case that makes it ez to store the remaining 4 bulbs without worry of breaking them

Yeah I would build a frame for your light as tall as possible. If you make it out of 2x4s like me you can use eyebolts bolted into the frame and then use a good chain or rope to hang the light.
A good option for a single mounting point light is a ratcheting hook & rope like the Pro Grips but they come in singles and are sold at Home Depot for only $10. The Pro Grips come in two packs for $19. I highly recommend these types of hangers. $10 for peace of mind over a falling light is worth every penny. You can find the ratchet rope hangers at Home Depot in the rope & chain aisle.

:party:
 
SkunkWorks Coco Hydro System

The next part of this logistical breakdown of my grow room is the diy bucket system i built for the bloom cab.
I guess the best way to describe it is that it's a hybrid between an Ebb & Gro & a soil grow. For short I call it SkunkWorks.

The system is a ten site deal consisiting of 3.5 gallon buckets nesting inside of 5 gallon buckets.

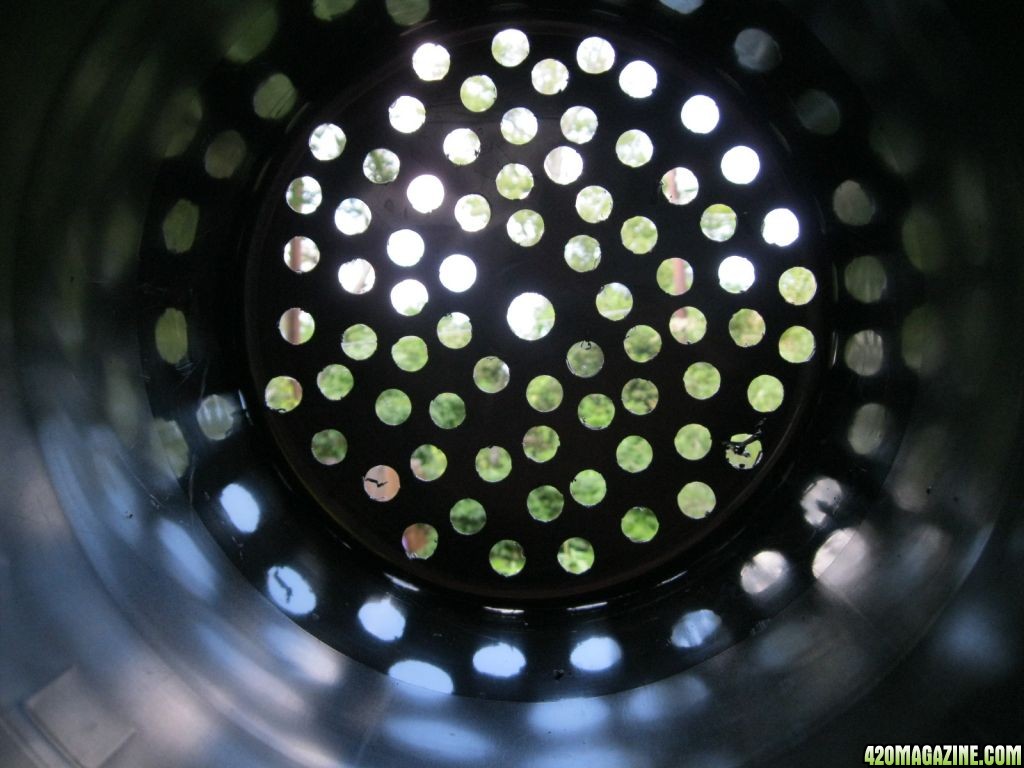
The 3.5g bucket bottoms are drilled out for complete drainage.

IMG_075812.JPG


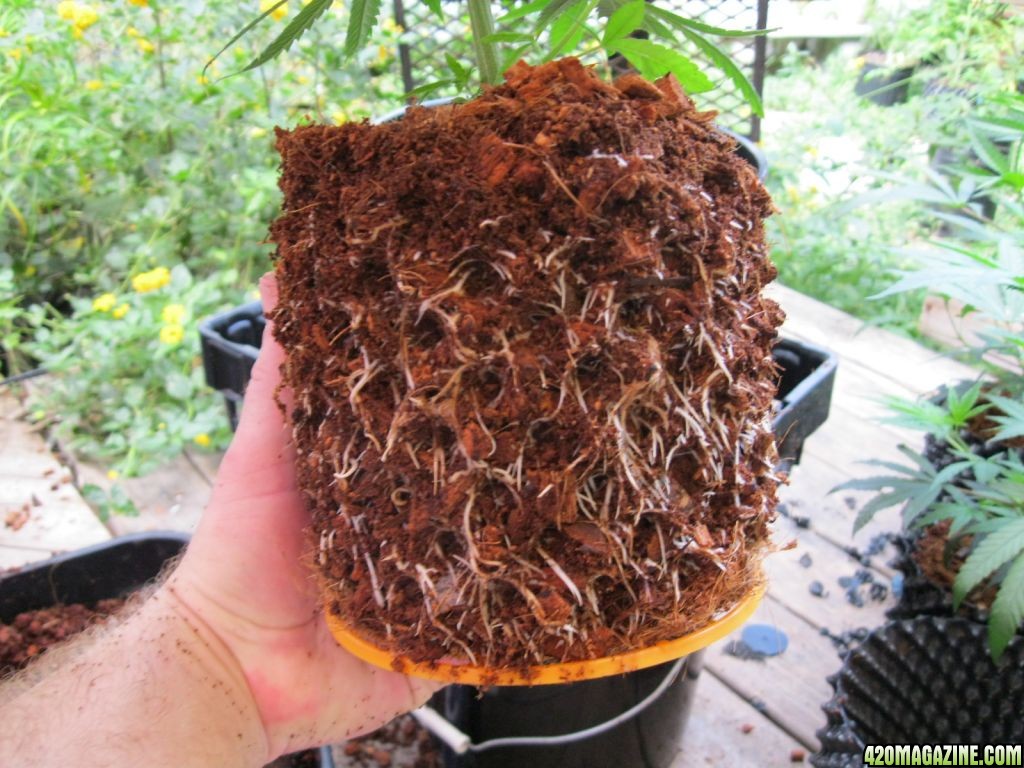
Before filling with coco & a plant the bottoms of the 3.5g buckets are lined with 1/4" coco matting to prevent loose coco from entering the drainage buckets below. The coco mat is totally optional. If the holes are drilled large like these I use it but if the holes are pencil size the matting is not needed.


IMG_07579.JPG


IMG_075912.JPG


Next the buckets are filled half way with coco chips and a plant is transplanted into the buckets the same way a soil transplant is done

IMG_076011.JPG


IMG_076110.JPG


IMG_07634.JPG


Once the plant is transplanted it's ready to go into the system!


IMG_14107.JPG


In order to collect runoff for reusing, the system must be elevated several inches above the runoff collection bucket. For this I found soda bottle crates ( yes Blue Dog these crates are from you guessed it, a dumpster! lol) to be the perfect solution!
At the bottom of each 5 gallon bucket you'll see that they are all daisy chained together with Ebb & Gro bulkhead fittings and 1/2" Hydrofarm black tubing.

The last bucket in the chain is connected to the drainage collection bucket. (The Texas Longhorns bucket) The drain line is coiled around the collection bucket and then hooked to the bottom of the collection bucket.
With the system being elevated and the drain being connected at the bottom of the collection bucket, it will create a siphoning action ensuring that most of the runoff is pulled from the system and into the collection bucket.

IMG_14112.JPG


Inside the collection bucket is a remote float switch made by Little Giant, an Eco Plus 185 gph pump, and an airstone

IMG_14019.JPG


IMG_13986.JPG


IMG_13997.JPG


After watering the water will drain out of the system and into the collection bucket. As water fills into the collection bucket the float switch will turn on the pump and move the used water back into the main watering rez where it can be refreshed and then reused.

The main watering rez is the top half of a GH Waterfarm controller. Another hydroshop dumpster find!
It's a ten gallon rez outfiitted with a 350 gph pump that connects to a watering wand via 10' of black tubing. There is also an air stone in there to keep the solution fresh.

IMG_140310.JPG


IMG_14077.JPG


An important feature to this is how the collection bucket drains back into the main rez. The tubing simply could'nt be ran into the rez. If the collection bucket drain tubing is under the water in the main rez it can siphon water back into the collection bucket and flood the grow room. The solution for me was to use a 1/2" elbow fitting inserted into the lid of the rez. The collection bucket drain tube connects to that elbow ensuring the water is dumped back into the rez without any chance of creating a siphon action back to the collection bucket.

To connect the black tubing to the watering wand I use a male hose mending kit and clamped on the tubing. I also added an additonal straight line bulkhead fitting to eliminate kinks at the wand. These are also vital connections so I used a hose clamp & zip ties to prevent any leakage.

IMG_14065.JPG


The rez pump is on it's own power strip that has an on/off switch. A simple flip of the switch turns on the pump. Then I simply squeeze the trigger on the watering wand and water the plants!
The wand eliminates using watering cans or other vessels and keeps the water in the plants with no chance of spilling and making a mess. It also eliminates bending and reaching so I can just sit on a stool and water the garden! It's a real back saver! 30 seconds of watering each plant ensures each plant is watered with at least one gallon of water each watering.

With every watering, the garden keeps about three gallons and returns 7 gallons back to the rez. The garden is watered about every other day.

IMG_14086.JPG


IMG_14093.JPG


This thing was built to be automated to save my back & time but it can all be done manually very ez. I also desinged this with the commercial grower in mind. My system is only ten sites but you can see how it could run 100s of sites if needed.
It can also be built for a hobby or closet grower by using 2 gallon nesting buckets instead of the 3.5s & 5 gallon buckets like mine.
A good start for the hobby grower would be to aquire an Ebb & Gro 6 site expansion kit and go from there. Those expansion kits come with all the tubing, fittings & buckets to build a six site system. Plus the inner buckets are already drilled out with the expansion kit.

:peace:
 
Re: Bandit420's Hydro Coco A GoGo

Love the system Bandit. Looks real neat and clean. Doesn't work for my space but i do see a couple of ideas I can adapt.
 
Re: Bandit420's Hydro Coco A GoGo

Love the system Bandit. Looks real neat and clean. Doesn't work for my space but i do see a couple of ideas I can adapt.

Thanks Bro!
Yeah this thing can be tweaked in all sorts of different ways to fit a particular growers needs & space.
The collection system can easily be adapted to hempy or a soil grow. It runs super clean so there's no need for catch trays or anything like that because it collects all the runoff from every plant and stores it in one bucket where it can be refreshed or dumped with ease.
I automated it with the pumps & float switch but the prototype system was all manual and was still very ez to run.
:peace:
 
Re: Bandit420's Hydro Coco A GoGo

Really doing a bang up job keeping this journal :reading420magazine: Thanks for the clear cut info on your set up.

For sure a 5 star journal :welldone:
:party::yahoo::yahoo::woohoo: 5 stars!! :yahoo::yahoo::party:
Thanks Sisco!!

Good luck to you too! Good ol' fashioned nug off :rofl: Only winners in that!

No doubt!!
With a name like VapedOutJoe I better bring the SSV to that dance!!

IMG_13034.JPG


The Gun

IMG_13597.JPG


The bullet

YouTube - The Good, The Bad & The Ugly Theme 1966

And a little dancing music!

:party::rollit::party:
 
Back
Top Bottom