Grow Journal #1

@MrSauga

Good morning. Hey I have a question: how experienced with Coco growing are you? I want to try it next grow maybe. For me to really step it up I think I need to try Coco next time. Not because I'm going to permanently grow in it. I'd just like to learn it and maybe base my next journal around Coco. What do you think?

Edit: just 1 plant in Coco rest in soil. Just for shits
 
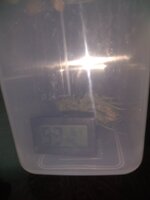
Dry tent at about 76 degrees and 56% humidity. After 36 hours not much shrinkage. Id like a 7 to 10 day slow dry but we'll see. The actual bud humidity is still pretty high. Right after I chopped it rread 99% no surprise there. After about an hour of sitting in an air tight containers and hygrometer it's still 99%. Now that's surprising after 36 hours. Seems I may get my slow dry after all. And that's one of the smaller nugs.
 

Attachments

  • 15818571026867782972732047484710.jpg
    15818571026867782972732047484710.jpg
    330.6 KB · Views: 52
@MrSauga

Good morning. Hey I have a question: how experienced with Coco growing are you? I want to try it next grow maybe. For me to really step it up I think I need to try Coco next time. Not because I'm going to permanently grow in it. I'd just like to learn it and maybe base my next journal around Coco. What do you think?

Edit: just 1 plant in Coco rest in soil. Just for shits
Coco is a great medium to grow in... you treat it like a hydro grow so you need to monitor you pH. Plan to water daily to runoff and during flower possibly twice a day.
When and if you're ready to take the leap we can call in some good coco pros that will make your life easier.
 
Coco is a great medium to grow in... you treat it like a hydro grow so you need to monitor you pH. Plan to water daily to runoff and during flower possibly twice a day.
Mr.S is spot on on!

It’s a great option to go with. Holds no nutritional value so, it’s easily re used from one grow to the next. You can also use it in home gardens as well.

In the past, when coconuts were harvested for their delicious meat and juice, the coconut husk was considered a waste product. All of the material from the husk to the inner shell of the coconut was a discard product…until people realized it had many applications in gardening and home products.


Everything in between the shell and the outer coating of the coconut seed is considered coco coir. There are two types of fibers that make up coir — brown and white. Brown coir comes from mature, ripe coconuts and is a lot stronger, but less flexible. White fibers come from pre-ripe coconuts and are far more flexible, but much less strong.

Almost all of the coconut coir used for hydroponics is brown coir, as it’s processed even more after initial harvesting.

It Retains moisture and provides a good environment – coco coir is one of the most effective growing media for water retention out there. It can absorb up to 10x its weight in water, meaning the roots of your plants will never get dehydrated. There’s also a lot of growing media for roots to work through, promoting healthy root development.

It’s environmentally safe, and insect neutral, as most garden pests do not enjoy settling in coconut coir, making it yet another line of defense in your integrated pest management system for your garden.

make sure you Ph to 5.8

along with the benefits of growin in coco coir, comes disadvantages as well.


coconut coir is inert, meaning that it has no nutrients within it. It may look like soil, but it is not soil. This means you will need to add hydroponic nutrients and control the pH when using coco coir. Growing in soil isn’t too different though, as many gardeners amend their soil constantly throughout the growing season anyways.

May need additional supplementation – you may find your plants short on calcium and magnesium when using coconut coir, so supplementing with “Cal-Mag” may be necessary.

Needs rehydration – most coco coir products are shipped in dry, compressed bricks. While this saves on shipping cost, it adds labor to your growing process as you’ll need to rehydrate them before you can use them in the garden. This isn’t too hard though!

Mixes can be expensive – garden suppliers know that coco coir can be annoying to work with sometimes, so they’ve started to offer coconut coir mixes. This saves a lot of time, but is pretty expensive — and making your own mix isn’t too difficult.

you take the good with the bad and your setting your self up for success! :thumb:
 
Coco is a great medium to grow in... you treat it like a hydro grow so you need to monitor you pH. Plan to water daily to runoff and during flower possibly twice a day.
When and if you're ready to take the leap we can call in some good coco pros that will make your life easier.
Will do sounds great!
 
Mr.S is spot on on!

It’s a great option to go with. Holds no nutritional value so, it’s easily re used from one grow to the next. You can also use it in home gardens as well.

In the past, when coconuts were harvested for their delicious meat and juice, the coconut husk was considered a waste product. All of the material from the husk to the inner shell of the coconut was a discard product…until people realized it had many applications in gardening and home products.


Everything in between the shell and the outer coating of the coconut seed is considered coco coir. There are two types of fibers that make up coir — brown and white. Brown coir comes from mature, ripe coconuts and is a lot stronger, but less flexible. White fibers come from pre-ripe coconuts and are far more flexible, but much less strong.

Almost all of the coconut coir used for hydroponics is brown coir, as it’s processed even more after initial harvesting.

It Retains moisture and provides a good environment – coco coir is one of the most effective growing media for water retention out there. It can absorb up to 10x its weight in water, meaning the roots of your plants will never get dehydrated. There’s also a lot of growing media for roots to work through, promoting healthy root development.

It’s environmentally safe, and insect neutral, as most garden pests do not enjoy settling in coconut coir, making it yet another line of defense in your integrated pest management system for your garden.

make sure you Ph to 5.8

along with the benefits of growin in coco coir, comes disadvantages as well.


coconut coir is inert, meaning that it has no nutrients within it. It may look like soil, but it is not soil. This means you will need to add hydroponic nutrients and control the pH when using coco coir. Growing in soil isn’t too different though, as many gardeners amend their soil constantly throughout the growing season anyways.

May need additional supplementation – you may find your plants short on calcium and magnesium when using coconut coir, so supplementing with “Cal-Mag” may be necessary.

Needs rehydration – most coco coir products are shipped in dry, compressed bricks. While this saves on shipping cost, it adds labor to your growing process as you’ll need to rehydrate them before you can use them in the garden. This isn’t too hard though!

Mixes can be expensive – garden suppliers know that coco coir can be annoying to work with sometimes, so they’ve started to offer coconut coir mixes. This saves a lot of time, but is pretty expensive — and making your own mix isn’t too difficult.

you take the good with the bad and your setting your self up for success! :thumb:
Thanks a ton for that info I may reread it a few times, a lot of good info! It won't be for a while. Taking it slow.
 
Have you used the bookmark feature here yet Havoc? Find the post that you want to save, and right beside the Post Number is a little icon that looks like a page. If you click the page a box appears asking you to add a Message(it could be 'Coco Info' as an example) and a Label (such as 'Coco'). Then you click save.
If you then click on your Member name at the top of the page you have two headers at the top. One says account, the other says Bookmarks. This is where all your saved bookmarks will be.
The purpose of the labels is for searching when you have lots of links.

The label function can be confusing when adding new labels because if you type the label name in and hit enter it doesn't accept it. You have to press the 'X' in the box to add it then save the bookmark as a whole. You'll figure it out.
Niiiice thanks that's gonna help a ton
 
@Backlipslide I think once I harvest and put my babies in the 4x4 I'll start setting up for a solo Coco grow in my small tent. Keep it totally seperate. Who knows I may like Coco better. How do you think MC and Coco would get along? I have read a hydro/mc only journal before. They did good. I also have pretty much brand new FF Trio. I have 2 pH pens(Im used to pH adjusting) also a tds meter. Let's say I have everything I need to grow soil successful. All I'd need is the Coco husks right?
 
Mc will do great with coco!

it all depends because you can get in dehydrated form, or hydrated form. You can also get coco mixed with soil, so it all depends on what your after. The already hydrated coco is much more expensive and a bit harder to come around. The dehydrated coco is easier to get, and less expensive. If your ordering it online, then you have no problem finding it, it would just be the price difference is all. I bought a brick of coco coir, and rehydrated it my self.

I took two 5 gallon buckets, drilled holes in the bottom of one, and put it inside another 5 gal bucket. I then took what ever desired amount of the coco, and put it in said buckets. Filled water to cover all the coco. Let sit for 24 hours. Every couple hours I would go in there and disturb it a bit by pushing the higher stuff down, and stir It a bit. after 24 hours of soaking, I would drain, for another 24 hours, by lifting the pot you drilled holes in out of the other 5 gal pot. After that, it’s ready to go into what ever desired pot your growing in, and transplant in. But before I do that I just make sure all the big clumps have broke apart, just by sitting my hands through it all. Wear gloves if you please, as it is a messy job. Have another 5 gal bucket ready to put the one with holes into and stager the two buckets untill the run off is manageable.
 
Thanks bro!
Something I should have done a while ago.
No no, everybody works at their own pace. No pressure, it will still be there when you do have the time. Reading and catching up on each journal takes some real commitment, it takes time and that’s something a lot of just don’t have! Then again, when your at work, you’ve got all the time in the world! :laughtwo:;)

I do look forward to seeing you around though! :thumb: :passitleft:
 
Ok some eye candy and trichomes!! Too many clear to few Amber to me!!
 

Attachments

  • 200217_161545.jpg
    200217_161545.jpg
    409.7 KB · Views: 56
  • 200217_161520.jpg
    200217_161520.jpg
    382.9 KB · Views: 53
  • 200217_161503.jpg
    200217_161503.jpg
    351.8 KB · Views: 58
  • IMG_20200217_161331555.jpg
    IMG_20200217_161331555.jpg
    1.1 MB · Views: 64
  • IMG_20200217_161313632.jpg
    IMG_20200217_161313632.jpg
    1.2 MB · Views: 71
  • IMG_20200217_161302547.jpg
    IMG_20200217_161302547.jpg
    1.2 MB · Views: 76
  • IMG_20200217_161254056.jpg
    IMG_20200217_161254056.jpg
    1.1 MB · Views: 69
  • IMG_20200217_161242192.jpg
    IMG_20200217_161242192.jpg
    1.2 MB · Views: 59
Back
Top Bottom