DrCannaCanadian: MarsHydro & Seedsman, Soil & Coco, 2020

Dagobah Frost Forest
Update

yoda.png
Vegetation - Day 17
Hello 420!

Always keep in mind, our ultimate goal is to have "MY harvest be the best I can possibly grow!".

That's right! I want you all to say "MY Harvest is going to be a Maximum Yield Harvest!".

And just remember, there are literally hundreds of things we can check for in the first few weeks of vegetation growth as we begin training our plants.


So, here's a quick checklist of some of the items we must check for daily:
  • New Growth is Lime green
  • Fan Leaves are Verdant green
  • Lower fan leaves are raised up off of the soil/medium
  • Main Stem is straight
  • Wire-to-Stem connections are firm (not pinching)
  • Internode spacing is even
  • Stem & branch angle at least 15° above horizontal
  • Growth nodes exposed to air & light

New Growth is Lime Green
Lime Green for new growth is typically the sign of a healthy plant.

Fan Leaves are Verdant Green
This is very important! Fan leaves give huge clues to the health of our plants because they are major factories! Typically light green means too little nutes and dark green means too much nutes. Adjust your feed strength accordingly.

Lower Fan Leaves are Raised Up Off of the Soil/Medium
A fan leaf touching the soil may begin to rot; and if the fan leaf starts to rot, then it is susceptible to disease which can quickly spread across the entire plant.

Main Stem is Straight
A straight main stem can efficiently transport water up and down the plant. It is also much better at supporting the weight of its side branches.

Wire-to-Stem Connections are Firm
We want the LST connections to hold the branch, and not restrict water transport via pinching or slip. Check connections daily because stems will widen in girth and become pinched off, thereby stunting growth.

Internode Spacing is Even
I will do a Tips & Tricks post on this topic because it so vast and so important. Essentially though, we can control this variable by adjusting the height of our grow light above the plant canopy.

Stem & Branch Angle At Least 15° Above Horizontal
If a branch angle is lowered, then the plant does not send as many growth hormones to that branch, thereby stunting the branch's growth. As a plant grows upwards, and a branch is tied down, then the branch will get fewer and fewer nutrients. Another good reason to check your LST connections daily!

Growth Nodes Exposed to Air & Light
The recipe for successful LST! This is critical!


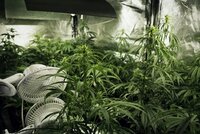
The LST on Princess Leia & Obi-Wan Kenobi is working well.

Emperor Sidius & Darth Maul were tansplanted into their final 5 gallon (20 litre) fabric pots of coco/perlite. Their LST training will most likely begin tomorrow.

Chewbacca & Han Solo are recovering slowly over in IC (Intensive Care).

The light is now positioned 54" (137 cm) above canopy and the LUX has been checked.


Just a quick update on the weight of the solo cups of soil we watered two days.

Dry Chewbacca Day 0: 190.3g
Wet Chewbacca Day 0: 313.4g
Wet Chewbacca Day 1: 229.7g
Wet Chewbacca Day 2: 194.1g

*** Chewbacca has a 2 day wet/dry cycle.

Dry Han Solo Day 0: 200.6 g
Wet Han Solo Day 0: 358.3g
Wet Han Solo Day 1: 252.8g
Wet Han Solo Day 2: 213.6g

*** Han Solo has a 2 day wet/dry cycle.


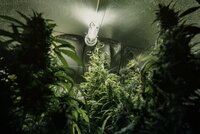
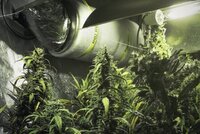
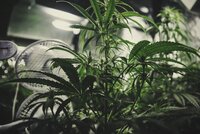
And here they are, in sickness and in health - MY Harvest becoming Maximum Yield under the expedient care of Mars Hydro:


New member to the forum, latecomer to this particular grow, yes yes... I know!

Such an informative grow journal, with all the added FAQs, "tips and tricks" and other snippets of information!!!

Really interesting reading, never tried a megacrop myself but I do use coco. Will make sure to follow this journal and all the added goodies of knowledge you sprinkle in @DrCannaCanadian :)

Anyone reading this, feel free to drop by my introduction to the community, it is a quite intimate tale.... A bit nervous regarding the response, but I'm hoping for a warm welcome by the 420fam.

Hey @GardeningGnome , welcome to the Dagobah Frost Forest where the Force is strong!

Sure, I'll head over to your introduction now - I luv meeting new people!
 
Daily Tips & Tricks
syZ3LYfZ.jpg
By Royal Queen Seeds


Cannabis Plant Anatomy: Nodes And Internodes

The importance of knowing how to read the signs your cannabis plants are sending you the grower is invaluable. We focus on nodes and internodes to assist you interpreting those marijuana messages.

00.jpg

In the wild, the cannabis lifecycle begins when a seed germinates and begins to burrow into the soil with a root. A stem will develop, and a sprout with a pair of leaves will emerge. During the seedling stage, the baby plant is literally finding its feet. Only as the infant plant begins to transition to vegetative growth does the cannabis grower begins to notice nodes and internode spacing. More so, as the vegetative stage progresses.

In ordinary decent grower terms, nodes are the intersection or joint between branches and the main stem or between a branch and new secondary shoots. While an internode is simply the gap between nodes. So far so simple. However, thoroughly understanding the nodes and internodes and knowing what to look for can be enormously advantageous to the cannabis grower.

01.jpg


WHAT CAN NODES AND INTERNODES TELL THE GROWER?

INDICA VS SATIVA

Indica cannabis plants are characterised by their short stature and densely branching structure. This is because they develop more nodes with tight internode spacing. In contrast, sativa cannabis plants are far taller and less branchy. Stretching is common to sativa varieties. Typically, plants develop fewer nodes with large internodal spaces between sets of branches. Of course, hybrids will exhibit a mix of both indica and sativa traits. Some will lean towards the indica side, others to the sativa side.

DETERMINE PLANT SEX
Usually, after weeks 3-6 of vegetative growth, cannabis plants will begin to display pre-flowers. For the grower with a keen eye and knows what to look for, this is invaluable information - especially if you happen to be cropping regular seeds with the potential for 50% males.

Pre-flowers emerge from the nodes of both male and female cannabis plants. Close eye-ball inspection of the higher nodes close to the top of the main stem is the easiest way to identify emerging pre-flowers. Essentially, you are looking for two very fine white hairs protruding from a tiny growth on the node. These hairs are really pistils emerging from a calyx just like what happens later in bloom with the flowers.

On the other hand, if you see a bump that resembles a cluster of grapes, this is a red flag for a male in the grow-op. Moreover, in rare cases or if the plants have been stressed, some may display both male and female pre-flowers. Intersex plants are commonly referred to as “hermies” by growers, short for hermaphrodite. Just like males, they too must be removed to ensure a pure sinsemilla harvest. The diligent grower regularly checks for growth on the nodes even if he/she is cultivating from feminized seeds, just in case.

02.jpg


TEMPERATURE AND LIGHT
Stretchy growth and large internodal spacing are not always due to genetics. Wide temperature fluctuations and lights either too weak or too far away from plants can cause plant stretching. Cold nights and hot days will induce stretchy growth. To keep internode spacing to a minimum and avoid branches snapping later it’s critical to maintain consistent environmental control of the grow-op. Outdoors, this is more challenging, and plants may need to be taken inside at night if temperatures plummet.

APPLYING YOUR KNOWLEDGE

TRIMMING AND PRUNING

In order to prune for yield or trim plants for a tidy, you need to make the right cuts in the right places at the right time. A clean cut is one made close to the node with a sterile scissors. The the most common pruning techniques to increase yield are Topping and Fimming; make sure you apply these high yield pruning practices during vegetative growth. During bloom, trimming should be kept to a minimum to avoid stressing plants.

Both the Topping and Fimming methods involve removing a portion of the apical bud or main stem. Topping is a clean cut made to the tip, entirely removing it. Fimming is not so clean and tidy, and pinching is probably more appropriate than using a scissors. Simply pinch off 75% of the main growing tip between your fingers. Whichever method you choose to apply, the number of colas will be increased as the shoots emerging from the nodes below the cut will become the new main colas.

03.jpg


Taking a cutting or cloning your marijuana is the best way to preserve winning grow-op genetics. Generally, the oldest most mature branches make for the most successful clones. These are to be found closer to the bottom of the plant rather than the top. Plants grow up so that the newest freshest tips are towards the top and rarely root well when clipped for clones.

Cuttings are mostly taken during vegetative growth. Although, monster cropping requires taking cuttings from plants 4 weeks into the bloom cycle and re-vegging the cuts. Regardless, the method is the same and growers enjoy the greatest success cloning from the bottom up.
 
Daily Tips & Tricks
syZ3LYfZ.jpg
By Royal Queen Seeds


Using LED Grow Lights: 6 Mistakes to Avoid?

Whether you are new to growing cannabis or just new to growing with LEDs, mistakes can happen! Find out what you should avoid in order to grow top-tier cannabis under LED lights!

00.jpg
Growing great cannabis is not really difficult—at least in theory. Get yourself some quality cannabis seeds, good soil, proper containers, and you’re already off to a good start. However, if there’s one factor that’s especially crucial to developing superb cannabis, it’s light—a lot of it. Indeed, cannabis plants require more light than most other plants, and they optimise performance if light exposure is significant and consistent. As such, you really don’t want to skimp when it comes to your grow lights.

In the past, weed cultivators largely used HID lights—with MH (metal halide) lights used for vegging and HPS (high pressure sodium) lights employed for flowering. HID lights are still viable, and they have a great track record amongst home and commercial growers alike. That said, LEDs are exponentially taking over grow rooms around the world. Why? Compared to HID, LEDs have some convincing advantages: They use (a lot) less electricity, allowing you to save money over time and reduce the footprint you leave on the environment. They also emit less heat, which can be a big advantage, especially in small grow setups. Lastly, LEDs have recently become more affordable as the tech has become widespread, allowing home growers an opportunity to benefit from this unique and powerful lighting system.

Yet, even the fanciest LED lights cannot prevent growers from making mistakes in their grow. Let’s delve into some common errors, slips, and faux pas to avoid when growing cannabis with LEDs.

1. NOT SETTING YOUR LED LIGHTS AT THE PROPER DISTANCE

This is probably the most common mistake that inexperienced growers make upon just starting out with LEDs. Since HID lights emit a lot of heat, out-of-the-loop growers might be overly cautious with their LEDs, placing them too far away; alternatively, those aware of the benefits of LEDs might get cocky and place the lights super close. If you hang your LEDs too far away, there’s a good chance your plants will over-stretch in an effort to reach closer to the light. If, on the other hand, you place your LEDs too close to your cannabis plants, this can stress the plants more than they can comfortably handle, causing burning and bleaching of the foliage and buds.

So, what is the ideal distance between your grow lights and your plant canopy? Unfortunately, there is no standard, since the best distance during the vegetative and bloom phases of your cannabis will depend on your specific LED. Each type can vary slightly, therefore affecting the final distance they should be from your plants. The first port of call is to check the manual you received with your LEDs for any information on recommended distance. If you can’t find it there, check out the manufacturer’s website. If, for whatever reason, you cannot find any information, you can keep your LEDs somewhere between 30–45cm from the canopy—around 45cm during veg, then a little closer when your plants are flowering.

When adjusting the height of your LEDs for peak performance, keep an eye out for any oddities. Dry, curled, brown, or bleached leaves signal too much light, calling for your LEDs to be raised higher.

01.jpg


2. OVERWATERING

Because good ol’ HID lights emit a lot more heat than LEDs, soil normally dries out quicker when utilising the former. Once growers make the switch, however, they often forget to take this into account. Given the significant reduction in heat, it’s likely your plants will need less frequent watering. So adjust your schedule accordingly when using LEDs, especially if you’re new to it. Overwatering is a common and sometimes serious error beginners make that paves the way for a host of pests and diseases to take hold. So this is really important to keep an eye out for. When in doubt, let your soil dry out—then you can water again.

3. CHOOSING THE WRONG TYPE OF LED LIGHT

Most LED grow lights you can find today are “full spectrum” lights, which is sort of a buzzword that means you can use them for vegging and flowering. But there are also models outfitted with a switch that allows you to change the light spectrum according to the phase. Moreover, some LEDs are made only for veg—emitting a bluish light that supports fast and vigorous growth—while others are made for bloom, giving off a reddish light to support bud development. So, before you get an LED light, make sure it’s the right type. For most growers, a full spectrum LED is likely what you'll want.

4. CHOOSING LOW-QUALITY LED LIGHTS

If there’s one drawback to LED lights in comparison to HID, it’s that a quality LED is significantly more expensive outright. Not everyone has the cash upfront for a high-quality, full spectrum LED, so they look for ways to save money while still benefitting from the technology. The problem is, there are now tons of low-quality LEDs available on the internet to satisfy this very issue—and these manufacturers are not prioritising quality. These cheap LED lights are often manufactured overseas, and claim to provide more light than they’re actually capable of. Some of these lights are only able to grow one plant (if you’re lucky), and not much more. Low-quality LEDs can also be dangerous to operate if they’re made in a country that has less strict requirements on electrical safety.

Lastly, if you get a cheap LED from overseas and you run into trouble, you will likely have a hard time with warranties and returns. As almost nothing is as important as your lights when growing cannabis indoors, it’s simply not smart to cut corners here. By spending a bit more on a quality LED, you and your plants will be so much happier. Plus, high-quality LEDs are much less expensive to run than HIDs, so you’ll surely save some serious cash on your energy bill over time!

5. NOT PROVIDING YOUR PLANTS WITH ENOUGH LIGHT

The issue with many of those cheap “beginner LEDs” is that some manufacturers intentionally confuse the grower with specs and numbers, such as wattage. This seems fine, except that, with LED lights, wattage doesn’t really say how much light the LED is emitting; it says how much energy is required to produce the light. Instead, we’re measuring in lumens—the amount of light actually emitted. So, regardless of how high the wattage is, the light could still have a poor spread and/or doesn’t penetrate the canopy well. In other words, don’t fall victim to misleading information, and consider the source of your product.

Providing your plants with enough light can become an issue if you want to grow more than one. For example, one single 300W LED light fixture may be fine for one or maybe two plants, but it may not be enough to cover a bigger space with multiple plants. So make sure to reference any recommendations from the vendor and/or LED manufacturer on how much light you will need for your growing space. You can also look for reviews and user reports on grow forums if you want to know more about using a particular LED.

02.jpg


6. PROVIDING AN IMPROPER LIGHT SCHEDULE

At most high-quality seed shops, you can get autoflowering cannabis seeds and feminized photoperiod cannabis seeds. Autoflowering strains are relatively easy to grow, especially when it comes to lighting: You can just keep them under an 18–24-hour daily light schedule from the moment you plant your seeds up until harvest. They flower automatically after a few weeks of growth, which makes them very convenient.

Feminized (photoperiod) strains, on the other hand, are typically grown under 18–24 hours of light in the vegetative stage, then under 12 hours of light and 12 hours of darkness to initiate and sustain flowering. This shouldn’t be a problem, as most growers will set their lights on a timer for this very purpose. Then again, for someone who’s just starting out, they might not feel confident tailoring different light cycles and spectrums, especially if their setup doesn’t utilise full spectrum lights. It’s certainly not impossible for beginner growers to swiftly get the hang of maintaining proper light schedules, but sometimes the new tech of LEDs can lead people to make silly mistakes. In that case, you may wonder why your plant is reaching gigantic heights, but won’t grow you any buds!

GIVE LED LIGHTS A SHOT—JUST BE VIGILANT

For more tips on growing with LEDs, check out our blog on how to make the most of your LEDs. Lastly, keep in mind that even the most advanced LED system doesn’t just magically grow good weed. So always be sure to provide your plants with the necessary water, nutrients, substrate, and all the other great things it needs. With patience, care, and some powerful LEDs, your plants will reward you with fat, resinous buds come harvest!
 
Daily Tips & Tricks
syZ3LYfZ.jpg
By Royal Queen Seeds


Cannabis Cultivation: The Light Spectrum and Ways to Raise THC Levels

Creating an ideal environment for cannabis plants is only achievable by understanding the principles of nature - the light spectrum is a factor that cannot be ignored.

00.jpg

Most cannabis growers have multiple objectives in mind when planning an indoor grow. Drafting scenarios to achieve higher yields, increase THC levels, or simply to improve the overall health of a plant is an integral part of their hobby. This element of strategic planning involves the challenge to link knowledge of different scientific fields and to match those findings to a technical solution that helps to achieve predefined goals. Besides dedication and passion, it is the willingness to learn that differentiates good growers from future experts – so let us try to grow the royal way and learn what it takes to cultivate cannabis of exceptional quality. Today, we are looking at fundamentals of physics, and learn how the light spectrum affects the growth of a cannabis plant.

WHAT IS THE LIGHT SPECTRUM?

The sun emits energy in the form of solar radiation including gamma rays, x-rays, ultraviolet light, visible light, and even radio waves. Life on Earth is only possible because the ozone layer blocks this radiation, and reflects most of it back into space. This filtering process only allows wave lengths between 300nm and 1100nm to reach our plants and an even smaller portion of this light is visible to us. It is often referred to as the light spectrum, color spectrum or visible spectrum, and ranges from 380nm to about 750nm.
  • 180-280nm - UVC: Extremely harmful and luckily almost completely absorbed by the ozone layer
  • 280-315nm – UVB: Cause of sunburn and suspected to increase THC levels (!)
  • 315-400nm – UVA: Not absorbed by the atmosphere, commonly known as black light
  • 380-750nm – The visible light spectrum: Bands of wave lengths represent visible colours
  • 700nm-1mm – Infrared light: Not visible above 750nm but noticeable as heat on our skin
01.jpg


COLOUR TEMPERATURE (KELVIN) AND HOW IT AFFECTS YOUR PLANTS

When shopping around for a grow light, you will likely come across the term "colour temperature". This is essentially a way to describe the light appearance provided by a bulb, and is measured in Kelvin (K).

Colour temperature doesn’t mean the physical temperature of your light, but the degree of warmth or coolness of a light source—the “visual temperature”. When a light has a higher degree of Kelvin, it has a more blueish appearance. Thus, we call it a “cool” light. On the other hand, a bulb with a lower degree of Kelvin emits a “warmer”, reddish light.

IS COLOUR TEMPERATURE THE SAME AS LIGHT SPECTRUM?

In a strictly scientific sense, no. Colour temperature is normally used as a way to describe how the light produced by a lamp looks to the human eye. For some types of lights, such as LEDs or fluorescent lamps, it doesn’t describe a light’s spectral distribution or wavelength.

Without going too deep into physics here, the light from an incandescent bulb radiates light spanning the entire visible light spectrum. The white light from the bulb is the result of a mix of wavelengths (colours in the spectrum) “contained” in the light.

Other lights, such as LEDs or fluorescents, may emit light from a number of narrow wavelengths, with gaps or peaks within the spectrum. In other words, even if the light appears the same to the eye, it may be missing certain wavelengths (colours) that plants require for healthy growth.

Because LEDs tend to emit light in a very narrow colour spectrum, LED grow lights are usually outfitted as “full-spectrum” setups. They consist of a number of different-coloured LEDs that together cover most of the necessary spectrum for cannabis plants. These full-spectrum LEDs are comprised of different reds and blues, often mixed with additional white LEDs. Other, newer LEDs, such as COB lights, emit a light spectrum that more or less approximates natural sunlight; there's no "gap" in the colour spectrum.

WHERE DOES KELVIN COME IN WHEN CHOOSING A GROW LIGHT?

For vegging your cannabis plants, go with a cool light, one that emits a "daylight" colour with a high Kelvin of 6,000–6,500K. For flowering, a warm light with a reddish tone, about 2,800K, is optimal. You can also find grow lights with a “best of both worlds” colour temperature of about 3,500K, which you can use for both vegging and flowering.

HOW THE LIGHT SPECTRUM AFFECTS GROWTH

Every organism living on Earth needs information what is going on around them to react to environmental changes, and ideally, get a slight advantage over other members of their species regarding natural selection and evolution. Interestingly, cannabis plants receive a lot of their information from the light they’re exposed to, and almost instantly react to different bands of wave lengths - a complex topic to fill books with, but let us focus on the basics first.

02.jpg


1. Vegetative Stage – “Blue” light for healthy leaves (range: 400-500nm; ideal: 460nm)

During the vegetative stage it is recommended to aim for as many leaves as possible, and to make sure plants stay rather compact, don’t stretch too much, and develop strong stems. Indoor growers tend to use metal halide bulbs, compact fluorescent lamps (CFL’s), or T5/T8 lighting fixtures with a blue band of light for the first few weeks to achieve these goals. When cannabis grows in nature, the high angle of the sun in spring and summer allows more “blue” wave lengths to penetrate through the atmosphere, a signal for cannabis plants to grow strong, large and healthy leaves.

2. Flowering Period – “Red” light for giant buds (range: 620-780nm; ideal: 660nm)

When cannabis plants enter the flowering period, highest yields can be achieved by exposing them to a light spectrum that contains lots of “red” wave lengths to promote budding. The rate of photosynthesis peaks when plants are subjected to “red” wave lengths of 660nm although latest NASA findings suggest that even “green” wave lengths, which are not associated as a major factor in photosynthesis, can also have an impact on how plants grow. Seeing a cannabis plant as simple photosynthesis factory is consequently a little hasty. But for now, choosing a lighting solution with a high degree of “red” in its spectrum remains the best way for growers to imitate the shallow angle of the sun in late summer and autumn.

INCREASING THC LEVELS WITH UVB LIGHT – MYTH OR REALITY?

Have you ever wondered why potent cannabis strains often originate from landraces that naturally grow in high altitude regions? There are experts who suspect ultraviolet light, especially a high exposure to UVB wave lengths (280-315nm), to be responsible for an increased THC production. The theory is based on the fact that a high elevation means lesser atmosphere between cannabis plants and the sun, leading to a higher exposure to UV rays. These ultraviolet wave lenghts knowingly damage our skin, and the human body reacts by producing melanin as protection – a cannabis plant assumingly does something similar – it produces more resin and THC as a form of natural sunscreen. It is too early to say if we are dealing with a theory or a cost-effective method to grow better cannabis but the concept seems plausible enough for hands-on experiments. UVB bulbs for reptiles only cost a few bucks; perhaps we should give it a try.
 
Daily Tips & Tricks
syZ3LYfZ.jpg
By Royal Queen Seeds


Best Lighting For Growing Cannabis

Lighting types, schedules, and electrical money-saving tricks—you will be amazed at how much you can use lighting to your advantage in the cannabis grow-op.

00.jpg
As you progress in your journey toward becoming a grandmaster grower, you will soon start identifying the limiting factors in achieving those glorious yields we all love to see in photos and videos.

Inarguably, lighting is one of the biggest and most immediately recognisable of such limiting factors. Within reason, the more light you give your plants, the more they will yield.

Other valuable aspects of growing include environmental conditions like CO₂ levels, maximum and minimum day/night temperature, and relative humidity range. Nutrition is also of equal importance. Feeding needs to be adjusted to what the plant is asking for based on its phase in the grow cycle. Some growers even go the extra mile and have classical music or biowaves playing to stimulate the stomata to squeeze in a little extra growth spurt. However, the jury’s out on whether this yields any noticeable results—but it can’t hurt!

Light is, in itself, just another type of “food” for plants. Keeping this in mind will allow you to better decide what is right for you. Just like an athlete has a specific dietary regime for his sport, so must you consider what is the ideal type of light for your growing conditions.

There is little point in blasting your cannabis plants with 2000W/m² if you are just getting started, or deciding on the latest and greatest LED fixture if you cannot dial in the right ambient temperatures. Plant height and spatial limitations also play very important roles depending on which type of lights you decide on.

In this article, we will give you rundown on what constitutes the “best” light for growing cannabis. There are many pros and cons to each, and a little information goes a long way.

01.jpg


A BRIEF HISTORY OF THE GROW LIGHT

In the beginning, there was light…from the sun! Then cannabis became illegal, and someone had the brilliant idea to bring a powerful street lamp indoors to simulate the sun and grow weed.

Not only did this work, but it also created a massive industry catering to indoor/greenhouse operations. This lighting technology is called high-intensity discharge, or HID. Typically, these lights come in one of two varieties, either sodium or metal halide. These lights are very strong, quite inefficient, and produce a substantial amount of heat. But if you manage to tame the heat, they get the job done fantastically well.

Primarily due to space constraints, some growers started experimenting with lower-powered and more efficient lights. More efficient means less electricity is lost to heat, and more of it transformed into actual light. For instance, CFLs—compact fluorescent lights—are quite efficient, small and compact, cheap, and readily found in any common hardware store or supermarket. Ideal for seedlings and clones, they underperform for flowering. This is due to the limited light spectrum they produce. On the other hand, you will be able to fit a few of them inside a covert, desktop PC micro-grow retrofit.

In recent years, we have witnessed the beginning of a new artificial agro-specific lighting era. Modern LED fixtures are superbly efficient, while at the same time producing a great PAR, which means photosynthetic active radiation. This is the measure of the quality and intensity of the light spectrum that the plants actually use for photosynthesis. This in and of itself does not necessarily mean LED is better than HID or CFL—it just means it fills a huge gap really well.

A special mention to plasma fixtures. While operating under the same principles of HIDs, they do have a better spectrum than sodium or metal halide bulbs.

02.jpg


LIGHTS ON, LIGHT OFF

Light schedule is something quite often overlooked. Some growers take years to realise they can further manipulate their plant’s behavior in their favour, with simple light schedule tricks.

The typical schedule will be something like 18 hours on and 6 hours off during the vegetative period, and a flat 12–12 for flowering.

But did you know you can do so much more? You can save significant amounts of electricity if you employ the gas lantern routine during the vegetative period, while maintaining a high level of performance.

Giving your cannabis plants 24 hours of darkness before switching to flowering is known to induce sexing substantially faster in many strains.

During flowering, if you progressively decrease the lights-on period, you will trigger the plant to speed up production. This can be done by setting your timer to turn off 10 minutes earlier each week until harvest. This will simulate the natural shortening of days as autumn sets in while saving you a little extra on electricity.

This technique is sometimes referred to as light deprivation or the diminishing light technique.

Some growers swear by a 10–10 flowering schedule. The theory is that you will trick the cannabis plant into shorter day cycles. You can fit 8.4 “short days” in each week. That means that a typical 9-week strain (63 days) can be ready in 7.5 weeks (52.3 days).

Even autoflowers can benefit from experimentation, so do not be shy to try it out for yourself.

03.jpg


SAVINGS, SAVINGS, AND EVEN MORE SAVINGS

Even if electricity were free, getting into a habit of saving electricity will not only be an environmentally conscientious thing to do, it will further improve your skills. Understanding and measuring your environment will save you time and money while improving the potential of your plants.

Investing in an automated exhaust system works wonders to save on heating. In the winter, exhaust fans will blow slower, thus conserving heat. Mid-summer, they can work full-power to keep things under control. Many modern inline–exhaust fans come already pre-built with heat sensors for this very purpose.

This can be done cheaper by manually using a quality variac transformer. These will slow your fans down while prolonging their life. Do not confuse variacs with typical dimmers, as these will create a noticeable hum and take a heavy toll on your gear.

If you use butane/propane heaters to warm up your house, slowing down the fans will not only help conserve heat, but will have a dramatic effect on the available CO₂, which will boost production potential considerably. Higher CO₂ levels also mean you can run the grow room at higher temperatures, so it is a win-win situation.

If using LEDs, you can lower the lights closer to the canopy without burning the leaves or buds. You’ll notice you will be using fewer nutrients and water while your girls flourish considerably better.

FINAL CONSIDERATIONS

There are dozens of little tricks to boost yields and save on productions costs. From training, stressing, environmental manipulation, and of course, lighting. But there are no silver bullets.

There is a reason experienced growers swear by one method over another, or one type of light over the next. Even the biggest commercial operations have radically different approaches.

Different genetics, different growing mediums, different growers—this is a never-ending debate. And thankfully so, as it keeps us on our toes and on top of our game in pursuit of top-quality buds.

Remember that what works for one person may be a complete flop for the next. Experiment slowly and gradually introduce the next features—never make rash decisions. This way, you will be able to judge what works and what doesn’t for your operation. Also, be sure to take notes and pictures so you can track your progress.

As you improve and create a deep relationship with your secret garden, you will certainly reap the rewards of the efforts you put into it.
 
Daily Tips & Tricks
syZ3LYfZ.jpg
By Royal Queen Seeds


How To Spot And Treat A Light Burn On Your Cannabis Plants

Although not fixable with a nutrient solution boost, this is a problem that your plant can survive easily. As long as it's not too late, after this article, you'll know how to fix it.

00.jpg
This is a problem faced with indoor plants only. If you have an outdoor grow operation and feel your cannabis plants are suffering from light burn, forget it! You'll probably want to look into other conditions that can show similar symptoms. The sun is too far out to damage your outdoor plants. Cannabis has existed for longer than the human race. It has developed well enough to handle the sun's heat and light.

Light burn will only happen to an outdoor plant in a specific situation. It might happen if you grew it in the shade and just now transferred it into the light. In cases like this, the plant won't be used to the heat and light and will eventually die.

WHAT IT IS AND HOW TO IDENTIFY IT

• Bleached Buds

One surefire symptom of light burn is bleaching of the flowers. This phenomenon occurs when flowers are located too close to high-powered lights. You may have seen images online of pure white “albino” cannabis flowers. This might look like the intentional development of rare genetics, but the fact is, most of the time this is simply bleaching. Luckily, it’s very hard to miss your flowers turning bright white.

Although white buds may look interesting, most of the time they have been rendered useless. The heat degrades cannabinoids present in the resin, which causes buds to lose potency. The scent and taste of these buds will also be less than desirable. The terpenes responsible for these traits are highly volatile aromatic hydrocarbons, and excess heat will also cause them to degrade.

01.jpg


• Yellow Leaves
Yellow leaves are another sign that your plant is being subject to light burn. However, yellow leaves can also signify nitrogen deficiency. The difference is that yellow leaves caused by this nutritional deficiency start from the bottom of the plant, display significant wilting, and will either fall off or are extremely easy to remove. On the other hand, yellowing caused by light burn will occur at the top of the plant, and these leaves will be much sturdier and harder to remove.

02.jpg


HOW TO SOLVE IT

The first thing you should do is move your plants a bit further away from the lights. This can either be done by moving the plants or by moving the lights, if you have the space. Take into consideration the most affected areas of each plant when choosing a new location for them. You can also remove some of your lights. If you have these well organized, it shouldn't hurt your plants to remove a few bulbs.

If reducing the light or moving the plant isn't an option, you can always low stress train your plants. This is a technique for obtaining more yields, where you try to keep the plant's branches all at the same height. As the stem gets taller, it should be bent sideways and kept in that position with an external aid.

Try decreasing the temperature of the room too. Do this very slowly and always keep the temperature consistent. The plant will need time to adjust. Any change you'll need to make to a plant's environment or medium needs to be done carefully and patiently. It won't matter how well you water and feed your plants, if you don't take proper care of the environment, the plant will die.

HOW TO PREVENT IT

Growers can also utilise a lux meter to measure how much light different parts of their plants are being exposed to. These devices are used to measure lux, the unit of illuminance, per metre squared. They are handy as they offer readings regarding the intensity of light beaming down on any given area. Lux meters are ideal for hobby and small-scale growers as they are leagues cheaper than other light-measuring devices on the market. Growers can use them to determine if their plants aren’t getting enough light to produce an optimal yield, or if they are getting too much and are at risk of light burn.

A general healthy range for cannabis plants is between 35,000–70,000 lux during the vegetative phase and 55,000–85,000 during the flowering phase. If you notice any of the symptoms above and your lux meter is giving readings above these values, move your light source further away from your plants to reduce the intensity.
 
Hi Dr. NIce place you have here! RQS has a lot of info huh?

Hey @stoneotter , welcome to the Dagobah Frost Forest!

I really like how RQS presents their information - concise with related links - and they are a great Sponsor too!
 
Daily Tips & Tricks
syZ3LYfZ.jpg
By Royal Queen Seeds


How To Use Carbon Filters In Your Cannabis Grow Room
So, you've got everything set up to grow your cannabis plants. The only thing left is an odour filter. You came to the right place if you want to learn how carbon filters can keep your operation discreet.

00.jpg
Indoor grow rooms come with a lot of advantages, but with these come a few drawbacks. Keeping your house from smelling like an intense hotbox all the time will be hard. You can always try an air purifier or odour-neutraliser, but those won’t keep the dank smell completely out.

Carbon filters will be the best option for you. They provide an air extraction solution that not only keeps the smell out of your house, but doesn’t send it elsewhere. This prevents the threat of unhappy neighbours. If you live in an area where you can’t be too careful about the discretion of your operation, carbon filters are the way to go.

WHAT ARE CARBON FILTERS?

It might seem weird how one device can simply make a smell extinct. But when you get chemistry involved, it becomes clearer. The carbon used is all active. This means it has been treated with oxygen to give it a highly porous surface. Air will pass easily through it, but unwanted smells and fragrances will bind to the carbon. These filters will need to be replaced, but will last you a long time. Be sure to inform yourself better on this depending on the scale of your operation.

Carbon filters are huge, heavy duty tubes with loads of carbon inside. You connect them to your exhaust fan, forcing all the extracted air from your grow room to pass through the filter. If you have a small setup, a granular carbon filter will be enough. In case you run a larger operation, you’ll be needing a block filter. To understand better which choice to make, you should check for the CFM - cubic feet per minute (or cubic metres per minute/litres per second) value of your fans. You have to ensure that your exhaust fans can handle the filter. Purchase a filter with an equal or lower CFM value than that of your fan. The CFM can be easily converted to metric values with simple equations.

01.jpg


HOW TO SET UP THE FILTER

Once you get the adequate filter, if you don’t set up everything correctly, you’ll be throwing all your money away. It doesn’t matter how expensive your setup is if there is still going to be an air leak. You have to guarantee that all the air that’s being pulled from your room is going through the carbon filter.

The most practical way to do this is to include the filter as part of your exhaust system. Either place it before or after your fan. The air will either be pulled or pushed through the filter, neutralising all odours as a result. The most efficient solution is to place the filter as the first passage of the air when it's being pulled. The fan should be the last element before the tubing that leads outside. Make sure everything is well-sealed. As we mentioned, it’s the “make or break” of the whole process.

HOW TO BUILD YOUR OWN - MATERIALS

Purchasing a carbon filter can cost over €100. If you’re not ready to spend this much money, there is a DIY solution. This one will be ⅕ of the price and can be just as effective, if built properly. Let’s get into it.

You’ll be needing a few materials. These are all super cheap and can be found both at your local store and online shops. The products we’ll be listing are not exclusive. This means that you can probably achieve the same, if not better results, by using other, similar materials you have available to you.

You’ll need:
  • Roll of aluminium screen or chicken wire
  • PVC cleanout cap & PVC adaptor (both should have an equal diameter)
  • Dryer vent hose to fit into adaptor
  • Roll of duct tape
  • Roll of quilt batting
  • Laundry basket (preferably with lid)
  • Activated carbon
02.jpg


HOW TO BUILD YOUR OWN - A GUIDE

Create a tube out of your chicken wire or aluminium screen. Plug the PVC cleanout cap into one of the ends. Duct tape these two elements together securely.

Then, place the upright tube in your laundry basket so that the unplugged side faces up, and trim the edges so both elements share the same height. Next, plug the PVC adaptor into the open end of the wire/screen tube and duct tape them together.

Remove the screen tube from the basket. You’ll be covering it with quilt batting, and lining your basket with it as well. Fold your batting in two, so that the thickness of the material doubles, and use this to cover the outside of your screen tube. Make sure the quilt overlaps, and then duct tape everything in place.

Now, do the exact same process, but to the inside of the laundry basket. Use duct tape as necessary to keep the batting in place. Place the screen tube inside the basket with the cleanout cap side facing down. Once this is all set up, fill the margin between the tube and basket with the activated carbon. 26mm of the carbon layer will be enough. If you feel like you’re using too much of this, your gap might be too wide.

With this done, cover the exposed carbon on the top end with more batting. Remember to also cut a hole through your basket’s lid so that the PVC adaptor is sticking out, and attach the dryer hose to this. Then, attach the opposite end with the cleanout cap to an air blower output.

And that’s it! You’re ready to roll. This will last you about the same time as a store-bought version of the product. Now that you have the system set up, just replace the carbon once every couple of years and you can truly feel safe about stopping odour propagation from your indoor plantation.
 
Daily Tips & Tricks
syZ3LYfZ.jpg
By Royal Queen Seeds


How to Control the Smell of Cannabis

Learn about what really counts when installing carbon filters and tube vents to build a reliable air system, capable of hiding the smell of your cannabis plants. Odor control is a priority!

00.jpg
When growing cannabis, there are many things we have in mind: Are our plants healthy? Is the amount of fertilization dialed in correctly? What are the final yields going to be like? Especially for novice growers, and people who want to try indoor growing for the first time, it’s crucial to understand that there are a few basic things that should get our full attention, before thinking about heavy yields and high-quality buds.

By far one of the most important thing when growing cannabis indoors is odor control, meaning the reduction of the delightful but risky smell that mature cannabis blossoms emit during flowering.

WHY IS ODOR CONTROL SO IMPORTANT?

In many countries, it’s still necessary for hobby growers to keep their plants a well-hidden secret. A house or apartment that constantly smells like a large plantation right before harvest draws a lot of attention to it. Here are three main reasons why it’s necessary to control the smell of your plants:
  1. In some countries law enforcement might enforce the local cannabis laws.
  2. You might get confronted with Neighbors who feel disturbed by the smell.
  3. People you don’t know could potentially smell your plants, and have the bright idea to steal them.
01.jpg


USING THE BIG ADVANTAGE OF PRIVACY

Indoor Growers have one major advantage they can use to minimize the risks of someone discovering their plants - the advantage of being in their private homes. Home privacy is actually a basic human right that is embedded in European Law. Article 8 of the European Convention on Human Rights, the right to respect for private and family life, is pretty clear on that:
  1. Everyone has the right to respect for his private and family life, his home and his correspondence.
  2. There shall be no interference by a public authority with the exercise of this right except such as is in accordance with the law and is necessary in a democratic society in the interests of national security, public safety or the economic well-being of the country, for the prevention of disorder or crime, for the protection of health or morals, or for the protection of the rights and freedoms of others.
When considering the fact that some authorities and lawmakers may consider indoor growing a crime that needs to be prevented, and might take the necessary steps to interfere with our basic right of privacy, the main goal for us would be, to not provide any indication or evidence for cannabis plants being in our private walls. Public authorities can’t just enter our homes without having a well-founded suspicion concerning illegal activities. This is why odor control is extremely important to grow cannabis successfully.

02.jpg


WHAT COMPONENTS DO I NEED TO BUY?

There is no way around a carbon air filter, in combination with a powerful tube vent. All these products that promise to “cover up” the smell, are more or less useless and should be avoided. Here are some basic tips when trying to find the right pieces of equipment for your growing tent:
  • Carbon filter (sizes are reflected in m³/h and diameters in mm; carbon filters have to match the lighting solution and tent size; standard sizes are >300m³/h, 125mm and 150mm)
  • Tube vent (“air extraction power” is measured in m³/h and standard diameters are also 125 and 150mm)
  • Aluminum tubing (or special tubing with noise reduction)
  • Duct tape (or cuffs from the grow shop) to directly attach your carbon filter to the tube vent
  • More duct tape (or large cable ties, cuffs etc.) to attach tubing to the tube vent
  • A solution to mount this construction to the ceiling of our grow room or tent. (use elastic materials like old bicycle tubes to minimize vibrations)
In general, it’s better to oversize the air system and the corresponding components. As time progresses, you will not regret the investments in reliable, high-quality components that do their job effectively, and rather silent. Bigger air systems can react to different climates and keep in control of both temperatures, and smell. Installing a potentiometer that reduces the voltage that goes into your “oversized” tube vent is a good idea. This way, you will get a rather silent grow room, and you will be able to run your vent on lower velocities, causing much less noise.

Hopefully novice growers got a rough idea about what counts when controlling the smell of an indoor grow room – it’s pretty straightforward and there are not many options. There is no way around a quality-made carbon filter, and a powerful extracting tube vent. Be stealth, be careful, and keep this hobby to yourself. It’s the best thing to do.
 
Daily Tips & Tricks
syZ3LYfZ.jpg
By Royal Queen Seeds


Ventilation Guide For Your marijuana Grow-Op

The most common pests and pathogens that blight buds can be eliminated if you properly ventilate your grow-op. Ventilation is too important to overlook. Whether your grow space is large or small, your cannabis plants are counting on you to ventilate. Their survival and your stash are riding on it.

00.jpg
YOUR GROW ROOM NEEDS AIR CIRCULATION

The reason for ventilating a grow room is simple; cannabis plants need fresh air. Therefore, every grow-op requires air exchange. That means cool, fresh air in, and stale, hot air out. Too many growers get ventilation wrong and encounter all kinds of problems later in the grow. Bugs, fungi, and mould love a hot, humid environment with poor airflow. Like it or not, ventilation is essential to cannabis cultivation.

Outdoors, the wind naturally circulates air so cannabis plants can grow healthy and strong. A light breeze strengthens stems and helps plant leaves transpire. Plus, it makes it that much more difficult for creepy crawlies to take up residence in the cannabis garden. If you are growing indoors, you must control airflow and maintain air exchange artificially. Below, we break down ventilation for the ordinary decent home grower.

HOW TO VENTILATE A GROW TENT

Most home growers grow weed in grow tents. Modern grow tents are designed to house your ventilation system. All you need to do is put together the right kit. Ideally, you should be considering ventilation as part of your initial grow plan. The lights you choose and the size of your grow space will dictate the type of ventilation system you must utilise.

The four pieces you can’t do without are an intake fan, exhaust fan, ducting, and duct tape. If you want to mount your extractor fan inside the roof of the tent suspended from the poles, use chains or cable ties to secure it in position close to the ventilation hole. That will be in the top corner of the tent, or actually in the roof depending on the model.

01.jpg


EXTRACTOR FAN

Make sure your ducting is a matching size for your grow tent. Otherwise, you will need clamps and reducers. Line ducting straight up with the exhaust fan and duct tape it on securely. Then, run more ducting through the hole in the tent, without any bends if possible. You can attach a carbon filter to your extractor fan and suspend it from the roof too. Alternatively, you can put the filter on the floor and sit the fan on top, running ducting vertically through the roof.

Outside ducting will need to connect to a vent or window to exhaust hot air from the grow tent. Inside the grow tent, it is also important to maintain good airflow. Clip-on fans or an oscillating fan is all you need to create a light artificial breeze. Take care they are not too powerful or positioned too close to plants or they could suffer "wind burn".

INTAKE FAN

Air should be exchanged every 1-2 minutes in order to maintain optimal temperatures and humidity. The aim is create negative pressure or suction. So you want to see the walls of the grow tent sucking inward when your ventilation system is up and running.

Your intake fan needs to be positioned near or at ground level to connect to the hole in the bottom corner of the grow tent. Keep that ducting straight and use duct tape to secure in place. Again, the external ducting must connect to a source of fresh air, ideally a vent or window. Later, we explain how to do this discreetly.

02.jpg


HOW TO VENTILATE A MICRO-GROW

Micro-growers cultivating a handful of plants or less in a cabinet or wardrobe can keep ventilation very simple. In fact, it can cost you nothing. If your micro-grow is in a spare room, you can open a window a couple of times per day to let some fresh air in. For those using LED, CFL, or lower power HID 250W lighting systems, excess heat is not an issue.

However, this technique is weather dependent and certainly not perfect. Plus, you will need to invest in an alternative odour control system. High humidity can usually be curbed with a dehumidifier and a small oscillating fan. All things considered, if you are just cropping a few fast and furious autos, you can probably get away with it.

HOW TO BE DISCREET WITH VENTILATION

It’s advisable to invest in some wicker blinds and secure them in front of the window you plan to use for ventilation. It will cover up what’s going on in the grow room and still let the air in. Then you can start connecting up your ducting. Many will just board up the window by drilling some plasterboard or plywood onto the window frame with a cut-out hole for the ducting to pass through. A quick tip is to make sure to cut out the hole first!

03.jpg


ODOUR CONTROL

The tried and trusted trio when it comes to eliminating cannabis odours are hands down the intake fan, outtake fan, and carbon filter combination. If you are already investing in fans and ducting, it makes sense. For the grower that wants to be certain that odour is under control, this system is the best.

However, some promising odour-eliminating devices that can dispense neutralising agents round the clock are on the market. That being said, they are currently unproven technologies. There is also plenty of snake oil out there, so do some research and be shrewd.

GREENHOUSE VENTILATION

Greenhouse growers should make sure they have multiple vents that can be opened and closed as required. Most basic, plastic-covered greenhouses have ventilation flaps that can be easily opened and closed manually. Worst case, you can open up the doors a little or remove a window pane or three from glass greenhouses.

Letting the breeze in makes all the difference. A greenhouse can get really humid, especially when it’s packed with lots of leafy cannabis plants transpiring. Indoors or outdoors, as plants mature, they will expel more water vapour and increase the relative humidity in the cannabis garden. Good airflow is essential in every growing area. During late bloom, most greenhouse growers with fat flowers will open up all vents and maybe even DIY a few extra to avoid bud rot.
 
Daily Tips & Tricks
syZ3LYfZ.jpg
By Royal Queen Seeds


The Complete Guide To Germinating Cannabis Seeds

Before you can be met with bountiful hauls of dank buds, there are several stages of cannabis growing that take precedence. Unless you can successfully germinate cannabis seeds, you won’t have a plant to harvest. Give your seeds the best possible start in life by reading our definitive guide to germination.

00.jpg
THE ART OF GERMINATING CANNABIS SEEDS

Often overlooked, it is all too easy to assume that the vegetative and flowering stages of cannabis growth are the most critical parts of the plant's life cycle. However, with the chance of failure high unless you know what you're doing, poor planning when it comes to germination can make or break your next grow. Giving your cannabis seeds the best possible start on their journey to bulging buds is a surefire way to encourage a healthy and robust plant.

Small, fragile, and in desperate need of a helping hand, there are several ways you can germinate your cannabis seeds. All methods have varying degrees of success, with both advantages and disadvantages. It is important to note that even with advanced growing expertise and top-of-the-line equipment, you may still end up with a few failed seeds. This is a natural part of dealing with a living organism. At Royal Queen seeds, we only sell feminized cannabis seeds, so there is no need to worry about removing male plants.
WHAT TO LOOK OUT FOR IN CANNABIS SEEDS

Regardless of where you get your seeds from, it is best to give them a slight (and delicate) inspection before planting. Most of the time, all seeds will germinate; however, poor-quality seeds will produce a weaker plant. Unfortunately, that is something you will not find out until well into the vegetative and flowering stages.

To avoid disappointment, seeds that have a darker colouration stand a better chance of germinating, while pale green or white seeds are likely to fail. Even if dark seeds look slightly damaged, they should be planted anyway. There is a good chance they will still germinate, even if the outer shell is somewhat crushed.

GERMINATION TEMPERATURE PLAYS A CRUCIAL ROLE

Before we jump straight into the germination methods, there are a couple of germination golden rules. For the best results, we recommend staying within these guidelines, no matter how you choose to germinate. That being said, of all the factors to consider, temperature is one of the most critical. Seeds will always seek out even the smallest amount of moisture, but they use temperature as a sign that they need to do so.

• The ideal temperature is between 22° and 25°C (71–77°F)​
• Your growing environment should be damp/moist, but never wet​
• Relative humidity range should be between 70% and 90%​
• Seeds favour fluorescent lighting (Cool White code 33)​
• Minimise the amount of seed handling you do​
• In hydroponic/rockwool plugs, the ideal PH value is 5.8–6.2​
01.jpg


WHAT IS AN EXPECTED GERMINATION TIME?

Three fundamental principles will trigger that first small taproot to appear: warmth, moisture, and darkness. With the promise of moisture, a single root will take shape before slowly developing into the cannabis plant we know and love. In the right conditions, seeds will begin to develop within 12–36 hours of moisture being introduced to them.

Timescales can vary, as it all depends on how ideal your germination environment is (see the golden rules above). Even the worst grower could make a seed germinate, but it may take a few weeks and, of course, increases the risk of a weaker plant.

CHOOSING YOUR GERMINATION METHOD

GLASS OF WATER APPROACH


Arguably one of the least effective methods, but it is still viable. Incredibly simple to facilitate, beginner growers may opt to germinate their seeds in a glass of water. Half-fill a glass or bowl with water that is approximately 22°C (71°F).

After 3–5 days, the seeds will start to open, and you should see tiny white tips appear. Once these roots reach 2–3mm in length, use extreme care to transfer them from the water to pre-prepared soil pots.

The soil pots will need small holes (roughly 10–15mm deep) for the newly germinated seeds to be placed into. Once the seeds are secure, you will want to place a fluorescent light 13–15cm (5–6 inches) away to encourage growth. Finally, don’t risk overwatering your seeds at this early stage. Use a plant mister to make sure they stay damp but not soaking wet.

02.jpg


WET KITCHEN TOWEL METHOD

Probably one of the most common methods of germination. The kitchen towel method comes in several iterations. Some growers use cotton wool pads or absorbent pieces of paper. For this guide, we will be using kitchen towel as it is readily available and holds moisture relatively well.

Place one sheet of damp kitchen towel on a flat surface. Space your seeds a few centimetres apart before placing the second piece of kitchen towel over the top. You need to ensure both pieces are damp, not wet. Once again, when the white root tips reach 2–3mm, move the seeds (carefully) to soil pots. Use the same guidance found above for planting techniques.

03.jpg


PLANTING DIRECTLY INTO SOIL

Planting directly into your growing medium prevents having to move seeds when they are at their most fragile. That first root tip is covered with microscopic filaments that are easily damaged. Given that both a cup full of water and moist paper towels are more prone to temperature fluctuations from their environment, planting in soil is a much safer option.

Start by filling pots with a premium-quality soil that has been soaked in water. Many growers also choose to lace the water with a root stimulator. Make a hole roughly 10–15mm deep. This will be your seed’s new home. Remove the seeds from their packet and place them into the pre-dug holes. Loosely cover the seeds, but be careful not to compress the soil above the seed too much. The root will struggle to penetrate solid soil, slowing plant growth. Lightly spray the top of where you placed the seed so that your growing medium stays moist.

If you don’t like the idea of pre-soaking your soil, you can use a spray to moisten the holes before you plant each seed. With enough moisture surrounding your seeds, you can still encourage a root to develop.

Your growing pots will need to be placed in a damp climate that is within the temperature range listed under our golden rules. After 4–10 days, you should see a young seedling sprout, while the roots will have begun to develop underneath the soil. The entire plant and its soil can now be transferred to a larger pot, where normal growing routines should start.

04.jpg


USING STONE WOOL BLOCKS

Maintaining the ideal temperature (between 22–25°C/71–77°F) and moisture for germination is tricky. Leaving seeds out in the open environment or on a windowsill is far from ideal; a DIY climate-controlled cupboard would do a much better service. A warming mat is perfect for maintaining a constant temperature, but it doesn't tackle the issue of moisture.

You will need to invest in a few pieces of unique equipment, but by using stone wool blocks, you can create a perfect utopia for germinating cannabis seeds. Soak the stone wool blocks in the same way you would a soil medium. The wool will retain the moisture and prevent the need to water during the early stages of germination. After the wool blocks are soaked, stick them in a plastic tray that also has a lid. Large cake tubs are ideal.

The dome of the plastic container will create your seeds’ own mini tropical climate. If you then place all the components in a temperature-controlled cupboard, you will have created a self-perpetuating supply of moisture—no need to touch the seeds again until they are ready to be transferred to your final growing medium as a young seedling. Using the stone wool block method, your seeds should germinate in one to two days.

Two or three weeks after germination, your young seedlings should be ready for their new home. At this point you have two options; transplanting them into soil pots, or taking on the challenge of hydroponics. You’ll know when the seedlings are ready to be moved because the root system should start to poke out of the bottom of the wool blocks. As long as the roots haven’t begun to engulf the bottom half of the wool block, they will seek out water and nutrients in their new surroundings and continue to grow downwards.

05.jpg


ROYAL QUEEN SEEDS FEMINIZED STARTER KIT

There is, of course, a far simpler way to germinate seeds. Ideal for beginners, the feminized starter kit by Royal Queen Seeds has everything you need to kick-start your next cannabis project.

The Royal Queen Seeds Feminized Starter Kit contains:
  • 3x RQS Critical feminized seeds
  • 20x Easy-Start seedling pots
  • 1x Propagator Pro
  • 1x pack of Bacto
  • 1x perlite
  • 1x fluorescent lights
  • 1x instruction manual
  • 4x AA batteries
  • 1x Royal Queen Seeds catalogue
*You will also need a measuring cup and a stirrer (not included in the kit).

Let's get started

1. Gently remove the foil from the back of the seed packet and place them carefully into a dry container.

2. You will need a shallow container that is large enough to accommodate the seed tray. Fill the container with one litre of lukewarm water (22–25°C/71–77°F). Pour in the packet of Bacto enzyme, allowing it to dissolve before setting the seed tray into the container to soak. The seed tray only needs to be immersed for 5–10 seconds. Do not discard the Bacto mixture after the seed tray has been soaked.

3. After removing the seed tray from your shallow container, poke a 10–15mm deep hole into the soil of each pot, and delicately transfer your seeds from their dry container into each hole. Remember, one seed per pot.

4. Using the supplied propagator, sprinkle a 15mm-thick layer of perlite into the bottom of the tray.

5. Place your seed tray into the propagator, adjust the walls, and position the lid. The lid comes with an on/off switch for the already-attached lights.

6. Check the water level in your reservoir once a day. Your aim is to maintain an even level. After 1–7 days, the seeds should have sprouted, with visible leaves appearing. Once the seedling is 3mm tall, transfer it to your final growing medium.

IF IN DOUBT, THINK SPRINGTIME CONDITIONS

No matter which method you choose, always think about what conditions would naturally be like in spring. In their natural environment, cannabis seeds would start to sprout in-line with the seasonal change from winter to spring. Moisture is still high, and temperatures will be naturally rising. Always ask yourself the question, “Does my germination setup replicate spring conditions”. If the answer is yes, there is a good chance germination will be a success.


GIVING YOUR SEEDS THE BEST POSSIBLE START IN LIFE

In most cases, germination will go off without a hitch. However, there are a few troubleshooting issues we can help with.

LIGHTING

The first is lighting. Your seed/young seedling will only need fluorescent or CFL grow lights, at least to begin with. While plants need light to thrive, too much of a good thing will damage cannabis in its first few weeks.

Position lights about 15cm from seeds. Once your seedling has developed its first proper leaves (they will have jagged edges), you can move the lights as close as 5cm. If you are concerned about damaging your seedling, place your hand between the leaves and your lights. If you cannot hold your hand in place for ten seconds without it being too hot, move the lights 2cm away. Repeat until you are comfortable with the temperature.

As young seedlings grow quite quickly, you will need to keep adjusting lights to get the best results. After two weeks under fluorescent lights, you will be able to switch to high-powered HPS or MH-style grow lights.

06.jpg


UPSIDE-DOWN SEEDS

Don’t panic, where possible roots will always grow downwards. It is not necessary to try and reposition the seed yourself. Disturbing the seed at this crucial time will do more damage than good. In most scenarios, what you are actually seeing is not a root protruding from the top of the seed, but the stem of a cannabis plant.

If you are ever unsure, always wait a few days for the first leaves (cotyledons) to appear. As long as a seed’s requirements have been met, the seedling should sort itself out. The best approach is not to panic; follow the golden rules and your young seedling will be ready to transfer to a larger pot in no time.

07.jpg


GERMINATION AND BEYOND

WHEN DO YOU START FEEDING?


It will depend on the growing medium you are using, but in most cases, you will not need to supply any nutrients for the first 2–3 weeks. There will be of plenty of nutrients available in the soil, and even coco will only need nutrients added after a week or so. If you do opt for coco or hydroponics, nutrients should be added at 0.25x their regular strength. Once the first set of leaves appear, increase this in increments of 0.25 per set of leaves. For beginners, we would always recommend using a soil medium. It allows you to get to know the intricacies of growing cannabis more efficiently, and can be the least punishing if you make mistakes.

An easy way to spot if more nutrients are needed is to observe the leaves. The serrated leaves will start to turn pale green as nutrient stores are depleted. Left long enough, leaves will eventually turn yellow. This is a definite sign that more nutrients are needed. Your plant will not die if the leaves turn yellow, but it is a timely reminder to feed your young seedling.

Nitrogen is the most commonly needed nutrient during periods of high growth. Once the seedling has been fed, the colour of the leaves will return to normal. Depending on how long you waited to take action, this can take a few hours or a whole day.

SIT BACK AND RELAX

The first few weeks of a seedling’s development require very little interference. Nutrients, as we have mentioned, will need minor tweaks, as will lighting. However, now that your seed has germinated, you have a few weeks of grace. Sit back, relax, and enjoy your cannabis plant taking shape.

Once those initial weeks have passed, you can treat your seedling like it is in the vegetative stage, and switch to strict lighting routines and full-intensity light. During germination, always remember the golden rules, and if in doubt, ask yourself if you have created “springtime conditions”. If you are confident everything is on track, all you need to do is observe and marvel at the creation of your very own cannabis plant.
 
Daily Tips & Tricks
syZ3LYfZ.jpg
By Royal Queen Seeds


Best Way To Germinate Cannabis Seeds

Germinating your cannabis seeds is one of the most thrilling and yet intimidating stages for the new grower. Let's examine the options for germination.

00.jpg
THE WET PAPER TOWEL METHOD

This method starts your plants with a major setback, and most times is a waste of time and energy. That tiny sprouted root is covered with microscopic filaments that are easily damaged.

01.jpg


DIRECT SOIL PLANTING

There can be a significant loss of seeds, as weather changes and moisture fluctuation will affect the sprouting process. Maintaining even moisture and warmth is essential. Some people have success by inserting the pot or seed tray into a plastic bag with a few small holes poked into the top and sprout their seeds in a warm sunny spot, opening the bag once sprouted to prevent cooking the plant.

02.jpg


ROYAL QUEEN SEED STARTING KIT

Our seed starting kits simplify the germination process and provide your plants the best beginning for a healthy growing season and a bountiful harvest.

03.jpg


The Royal Queen Propagator Pro Starter Kit provides everything that you need to germinate your seeds and get your plants off to a healthy start. This kit provides a propagating container that will help you maintain essential warmth and humidity as your sprouts germinate and begin their life journey. We even include three White Widow Automatic seeds to get you started. The kit includes:
  • EASY START pots with a water reservoir to help maintain even moisture. The seed sprouting tray will hold up to 20 seeds.
  • BACTO enzyme packets to provide a great growing medium with plenty of microbial activity
  • PERLITE, lighting, and a thermometer will ensure the perfect environment for germinating those precious seeds

THE STARTER KIT provides the Bacto seed germinating enzyme, seed sprouting tray, and the water reservoir. You will need to provide the seeds and pearlite along with a propagator.

  • Gently remove the foil from the back of the seed packet. Don't risk damaging your seeds by pushing them through the foil. Set the seeds in a dry container, and then set them aside.
  • Next, measure out a liter of lukewarm water 25 degrees Celsius or 77 degrees Fahrenheit into a shallow container large enough hold the seed tray and dissolve the Bacto enzyme packet into the water. Set the seed tray into the water and allow it to soak.
  • Using a pre-marked poking utensil, poke the pre-marked niches in the seed pots to the depth of 5 to 10 mm, then insert your seeds into the holes and cover them with the potting mixture.
  • Sprinkle a 15 mm or ½ inch layer of pearlite into the bottom of the water reservoir and add enough of the Bacto mixture to cover the bottom of the reservoir, but not to the top of the pearlite. The idea is to keep the potting medium moist, but not waterlogged.
  • Place the seed tray into the water reservoir, and then both into the propagator or plastic bag. Turn the propagator on, or place the bagged seed tray in a warm spot.
  • Check the moisture level in your water reservoir once a day. Once the seeds have sprouted in one to seven days, let the seedling reach about 3 mm before transferring them to their final growing medium.
 
Daily Tips & Tricks
syZ3LYfZ.jpg
By Royal Queen Seeds


Cannabis Seeds Germination Troubleshooting Guide

At Royal Queen Seeds, we are proud to offer you this step-by-step guide to troubleshooting the germination process of our cannabis seeds.

00.jpg
Our hope is that we can help you detect, and even prevent, some of the most common problems that can occur when germinating our seeds. Thankfully, when you chose our seeds, we guarantee the quality, eliminating the most common variable.

QUALITY GUARANTEE

Every step of the way, we hold our breeders to the utmost scrutiny. We inspect every step of the production and packaging system. Our seeds are selected by hand. Even healthy seeds are frequently rejected simply because they are smaller than average or have an unusual shape.

We also pre-test every batch of every strain of our seeds. This means that every mother plant is screened and tested to eliminate bad batches. If germination is not perfect, the seeds do not get sold.

Then, we ship using methods that eliminate many of the risks. For example, every package must be signed for. This keeps the seeds from being exposed to extreme temperatures, being mishandled during shipping and much more.

Unfortunately, after that, it is up to the consumer to use proper methods to germinate the seeds. Thankfully, we offer a germination kit that is perfect for cannabis. We also offer the following tips to ensure the optimal germination and growth of your seedlings.

ENSURE A PROPER ENVIRONMENT

To ensure that your seedlings start their life off on the right foot, it is important to ensure that the environment is optimal. The temperature, humidity and soil quality are all variables that are important to control. The pH in the water is also an important variable.

Many people mistakenly assume that this means they should use some sort of mini-greenhouse. Unfortunately, this is the most common reason that germination fails. Thankfully, we offer an Easy Start Kit that works perfectly to eliminate many of the problems growers face.

It is also important to note here that soaking or sprouting the seeds in water or wet tissue is not recommended. Because our seeds are of the highest quality, this actually lowers your chance of getting healthy plants. Using our kit is the best way to maximize the number of healthy seedlings.

TROUBLESHOOTING SEEDLINGS

After your seedlings have sprouted but before they are full-fledged plants, many things can still go wrong. They can grow too tall and skinny, they can fall over or the seed casing can get stuck. Thankfully, most of these things can be easily fixed in the present and prevented in the future.

TALL SKINNY SEEDLINGS

The most common problem is seedlings that grow too tall and skinny. The most common reason for this is the insufficient light. To fix, simply move the plant to an area with better light and then support the seedlings so that they can regain their strength.

DAMPENING OFF

Another common problem is seedlings that begin growing well and then simply fall over. It will look as though the stem simply gave out. This is caused by a fungal infection called dampening off. Unfortunately, there is no treatment for this ailment. Ensuring that soil is free of fungus and controlling variables like temperature and humidity are controlled are the only ways to ensure prevention in future seedlings.

SEED CASING DID NOT DETACH

When the seed casing does not detach, the seed was not placed deep enough in the soil. It can also be caused by soil that is too dry. To fix, simply spritz the plant with mineral water. After waiting a few moments, ease the casing off. In the future, this can be prevented by planting the seed deeper and ensuring that the soil stays moist.

TRANSFERRING

Once the seedlings are established, they can be transferred to the growth medium of choice. This should be done when the plants reach a height of two to three centimeters. When using our Easy Start Kit, you can simply cut the pots apart and place each pot into their long-term placement.

We hope that this guide has been helpful. When germination is successful, you will begin to see results in about 7 days. After that, it is simply a matter of counting down until your harvest.

Remember, if you have any questions, you can contact us via phone, email, Facebook or the contact form on our website. Our experts are always ready and willing to help you with any problems you may have. Good luck!
 
Dagobah Frost Forest
Update

yoda.png
Vegetation - Day 18

Hello 420!

I reviewed my journal yesterday and I'm happy with how I am progressing so far.

It is still disappointing though, to have lost the Hippie Cripplers and the Dinamed CBD Plus; but live and learn, quality seeds from @SeedsMan and learning to germinate seedlings is truly a critical part of growing cannabis.

Hey! Good news! It looks like Chewbacca might survive! I am in awe by the quick rebound - the stem, cotyledons and new growth look healthy again. I'm just hoping Han Solo will bounce back too - although, he still looks a bit sickly.


My adventure into photography to learn to take better pictures is fun, but it is also a lot harder than I thought it was going to be. Nevertheless, I'm still trying to play with light and with composition to get those interesting shots. Actually, I think I'll scout around for a photography club here in Barrie next week.

As for watering in coco - I read something interesting yesterday - a good rule of thumb is to start feeding at 25% strength when the first set of leaves is grown, and then increase the nute strength by 25% as each new set of leaves appear.

Even though I am using Advanced Nutrients pH perfect Coco Grow, I am still choosing to pH the solution down to 5.80, just to be safe.

Hmmm, the soil I am using is reconditioned - and there may be an issue with it - because, I am finding it very difficult to grow in this round; so again, I am choosing to pH the water down to 6.5, just in case.

I got those pH numbers from this:

pHChartForSoilAndCoco.gif


I think I better do some review on topping today, since I'll be doing some topping on the Peyote WiFis as soon as those plants have 9 nodes.

The Seedsman Peyote WiFis are looking pretty strong - so I think I'll be taking some clones off of them!

Alright, the lights just came on in the tent, so it's time to go fiddle :)

And here they are, growing stronger everyday under the Force of Mars Hydro:


Back
Top Bottom