DrCannaCanadian: MarsHydro & Seedsman, Soil & Coco, 2020

Exploratory Data Analysis
of
Green Leaf Nutrients & Fox Farm Nutrients


data_analysis.jpeg

Follow Up # 1


I am noticing that GLR products are really high in Nitrogen (N) and Potassium (K) - especially the K!

Cal+Mag Pro 0-0-16, Sea-Kelp 0-0-15, and their Bud Explosion is no exception at NPK 0-19-37!

Even their BE NPK ratio deviates from the classic 1-3-2 nutrient ratio that has been proven to be the standard for blossom enhancers during the flowering stage.

I have no idea what the GLN feeding schedule is for all their products, but I am convinced, after only one day of research, that if anyone tries to combine their products into a feeding schedule like Fox Farm and Advanced Nutrients do - disaster will likely strike.

Basically, IMO, GLN products are not scientifically engineered to play nicely together in the same sandbox! I bought BE and Cal Mag Pro already and need to figure out how to use them safely with MC - so I don't get Potassium toxicity!

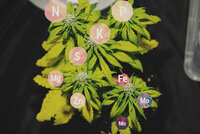
Potassium-_deficiency_marijuana_diagram.jpg

I am confident I will be able to use the Fox Farm flowering trio successfully with MC, but I will need to investigate further who is using MC and BE together successfully.

I was going to buy the SC and the SK - but I am going to hold off on those because they don't seem to be balanced - and their is no other product I can think of to combine with them to balance the NPK properly.
 
Daily Tips & Tricks
leafly-logo-redesign.png
By Leafly
In my ongoing quest to learn to take better photographs, I happened upon the following article I thought some of you might find useful.

A Guide to Photographing Cannabis Flower

photographing-cannabis-patrick-bennett-1.jpg

This two-part series will show you how to photograph cannabis, regardless of your experience level. Get tips on how to take pictures of live plants, harvested buds, and concentrates, as well as how to shoot indoors and outdoors. There’s something for beginners, experts, and everyone in between.

We live in a day and age where photography and technology have enabled anyone at any skill level to easily capture the beauty of what they see. This is true for cannabis enthusiasts as well, and we can share our experiences with such a visually stunning plant in a way that has never been done before.

In this installment, we’ll focus on photographing cannabis flower in its different forms. Don’t be discouraged if you don’t have any experience with photography. With the proper tools and a little bit of knowledge, you’ll be surprised how easy it is to create captivating images of cannabis.

Eliminating the Barrier to Entry

Getting into cannabis photography is easier now more than ever, with technology like smartphones bringing people together and making it easier to take pictures.

Not only do more people own devices capable of taking photos, but this abundance of devices has lowered the cost of high-end equipment like DSLR cameras, as technology manufacturers compete for the attention of consumers. Today, taking high-resolution images is simply more accessible to more people, regardless of budget.

The stigma around cannabis is lessening, thanks in large part to digital platforms. Major social media outlets are now beginning to demand that cannabis-related content be treated fairly. Creatives are engaging in social media to share their experiences with cannabis and the trend is gaining momentum every day.

Why Photograph Cannabis?

If you identify as a creative, the intrinsic value of capturing the beauty and aesthetic of cannabis may be the only reason you need to start taking pictures. But there are many other reasons to get started.

Share on Social Media
Utilizing and leveraging social media to share photos is a great way to gain inspiration, present your own portfolio, and connect with fellow cannabis creatives. Instagram, Reddit, and a host of other social media platforms have communities where you can view and share cannabis photography.

Keep a Grow Journal
One of the best ways to inspire creativity with cannabis photography is to grow at home. Capturing cannabis as it transitions through the grow cycle will allow you to take different types of pictures as your plants change and mature. Taking pictures of your harvested crop will also make for great content.

Keep a Strain Log
Maintaining a photographic strain log is a great way to track the various cannabis varieties that move through your collection.

Create Art Prints & More
The sky’s the limit for you to share your work across various mediums. Creating art prints for canvasses is a tangible alternative to digital sharing, and cannabis prints translate well to other formats, including textiles for upholstery and fashion.

Getting Started to Photograph Cannabis

If you are brand new to photography and not sure where to start, fear not. Start small and use what you have. You don’t need to invest in expensive camera gear to get great shots of cannabis.

As mentioned above, cameras on smartphones are very capable of capturing stunning images with ease. You can even make a few modest improvements to your mobile phone setup without breaking the bank.

There are a few key differences between photographing living cannabis plants and photographing cured flowers. These differences will impact everything from the gear you need to the types of images you will be producing, so choose your subject beforehand.

Living Plants

01.jpg

Living plant subjects will either come from your own garden or from gardens that you visit. Shooting in gardens will give you more variety in subject matter. As plants grow and transition, you’ll be forced to shoot them at different angles and in different lighting conditions.

But shooting in a garden has its disadvantages. Often, you will have very little control over lighting. Using filters is imperative in some lighting situations—like when purple LEDs or yellow HPS bulbs are around—and be sure to adjust your in-camera white-balancing. Keep in mind that modifying photos in post-production may be your only hope for achieving certain shots.

Unless you can physically move plants to a controlled area, which is highly unlikely if you are a guest in someone else’s garden, you will need to operate as a mobile setup. This will limit your ability to provide additional light sources, modify backgrounds, and achieve stability with external hardware like tripods.

Cured Flowers

02.jpg


The easiest and most efficient way to approach photographing cured flowers is to treat it like product photography. You will have total control over all environmental factors: where the light comes from, how strong it is, and what spectrum it’s in.

Background color and distance are also in your control. You can shoot with or without props, on location or in a studio, and even in a light box. The downside to photographing cured flowers in a studio is that certain composures may require you to spend money on additional hardware.

Practice Makes Perfect

You will become a better cannabis photographer with every picture you take. Experiment and try the following:
  • Shoot the same subject from multiple angles
  • Experiment with contrasting backgrounds and creative foreground props
  • Don’t be afraid to zoom out for an establishing shot or to get in close, even really close, for a good macro
  • Shoot from above, from below, or even through a filter
  • For living plants, photograph everything from the leaves and stems to the seeds
Try to take a picture of every strain you come across. Having a social media account will inspire you to post more, shoot more, and engage with like-minded cannabis photographers.

Advanced Gear for Cannabis Photographers

Try out cannabis photography for a little while, and if it’s something that you want to pursue seriously, either as a hobby or as a potential career path, below is a list of recommended gear to help get you ready to take professional-level images.

DSLR Camera
For high-resolution images, you’ll need to invest in a DSLR (digital single-lens reflex) camera of some kind. This will allow you to change lenses, control advanced composure settings like white balance, shutter speed, aperture, and ISO, and it will produce raw images that allow for a much greater level of control in post-production image editing.

Tripod
Detailed close-up shots of cannabis require physical stability of the camera. Even when using a professional-level DSLR equipped with an image-stabilizing lens, producing a blur-free, hand-held photograph is incredibly difficult. Keep a tripod on hand to eliminate blurring and to allow you to operate hands-free.

Supplemental Light
In order to create a dynamic composure, additional light is often required, especially for macro photography. For optimal control of the image, use supplemental lighting equipment such as flashes, strobes, or continuous lights.

Macro Lens

03.jpg


For extremely close, fine-detailed shots of cannabis, you will have to invest in a macro lens. These lenses allow you to produce vivid detail that is difficult to recreate with a wider lens.

Remote Shutter Control
A remote control for your shutter will eliminate shutter shake that occurs when you press the button on your camera. This will allow you to go hands-free and will greatly improve your ability to stabilize photographs, especially macros. Many DSLR cameras have Wi-Fi capabilities that let you control the shutter through your smartphone.

Recommended Settings for DSLR Cameras

DSLR cameras will give you much greater control over the composure of your image. Each situation will require a different setting on your camera, but below are some recommended settings to get you started working with cannabis as a subject.

Use Low Shutter Speeds for Tripod Shots
With a stabilized camera on a tripod, using a low shutter speed will let in more light and create brighter images by keeping the shutter open for longer. Since most cannabis-related images don’t require movement, this will help you use the maximum amount of available light to illuminate the details of your subject.

Adjust White Balance for the Light Spectrum
When shooting in gardens that contain yellow lights such as HPS, you will need to balance the light in your camera. Adjusting light balance to a “Tungsten” setting will help tremendously. For some images, post-production editing may be required for better light-balancing.

Increase the F-Stop for Macro
Setting the aperture can be complicated to master. To help understand aperture better, adjust it according to the focal distance to your subject. Since cannabis is highly contoured, close-up images will require a big, open F-stop to capture as much depth and detail as possible and to eliminate blur in the background and foreground of the image.

Always Aim for a Low ISO
As a general principle of photography, only increase the ISO in your DSLR if you absolutely need to. A higher ISO will add noise and graininess to your photos, which isn’t easily fixed in post-production.

The Art of Post-Production Editing

04.jpg


Post-production editing software is one of the best tools to clean up and organize your cannabis photographs. Even basic photo-editing software that comes with most computers will give you the ability to make many adjustments to your images. There are a lot of options available on the market, but it ultimately comes down to preference. Keep in mind that post-production editing can get very technical, and some of it will require a level of mastery that only comes with experience.

Whether you begin your cannabis photography journey with your smartphone or from behind the lens of a DSLR, there are limitless options for how to catalog your favorite aspects of cannabis in picture. Experimenting with different styles is key and it’s one of the most thrilling parts of your new hobby.
 
Daily Tips & Tricks
leafly-logo-redesign.png
By Leafly

5 Smartphone Hacks for Better Cannabis Photos


00.jpg
I really found this article easy to read and to remember!

We can all agree that cannabis is an absolutely beautiful plant. However, it can be difficult at times to capture that beauty through photography. Whether you’re a consumer who wants to share your gorgeous buds on social media or you’re a cannabis business wishing to showcase your inventory in the most appealing way possible, the quality of your photo will make a huge difference. But how can you get professional-looking results without having to invest in thousands of dollars of camera equipment?

Believe it or not, the technology we need to take better pictures of our cannabis is in our very hands. Our smartphones are perfectly equipped with the tools we need to get our trichomes sparkling in the spotlight. With the help of these five hacks, you can take your smartphone bud shots to the next level.

1 Stabilize Your Phone

00.jpg

There are several ways to prevent camera shake when taking pictures with your smartphone. The first is to invest in a tripod. There are plenty of inexpensive smartphone-specific tripod options available online; though if you don’t feel like shelling out the price for one, try using a kickstand or even propping/wedging your phone up in front of your subject. This will eliminate most of the camera shake, allowing for crisp and clean details to shine through in your photos.

2. Use Your Earbuds as a Remote Trigger

02.jpg


Using the touchscreen, or even a button, on your phone to take a photograph can create enough camera shake to compromise a photo. iPhone users, did you know that you can use the earbuds included with your phone as a remote trigger while taking photographs? The process is simple: Just plug your earbuds in and use the volume control buttons to take pictures while in the camera screen. Using both of these first tips together will ensure that your photos are tack sharp and free of blur.

3. Shoot in a Dedicated Photography App

03.jpg


There are a myriad of applications in the marketplace that will help you to edit photographs after you have taken them. But did you know that some applications can actually help give you even more control before your picture is even taken? While in most default camera screens you don’t have the option to adjust exposure settings such as shutter speed and ISO, these applications, like Manual for iPhone (pictured above), open up the controls back to you so that you can snap a pic of your perfect dab while also letting the perfect amount of light into your smartphone camera.

4. Use Soft Light

04.jpg

Try to stay away from your camera’s default flash setting. This flash will guarantee an overexposed and blown out final shot. When the only white you want to see in your shot is the head of your trichomes, it’s best to use softer light. Direct light is very harsh, casting nasty black shadows and overexposed patches where direct light hits your subject. To combat this, use indirect light, or bounce your light off a white surface. Also, try diffusing your light with a white, semi-opaque, surface like a paper towel, sheet, or some printer paper.

5. Consider Using a Macro Lens

05.jpg


A macro lens is fantastic in that it allows you to get extremely close to your cannabis, thus opening up an entirely new universe of colors and details. With a macro lens touting 15x or more magnification, you can cover an entire frame with just one trichome covered pistil. Some of the most creative cannabis shots utilize macro lenses. Luckily, today you can find a macro lens for your smartphone for for relatively cheap. If you do a simple search online, you will find a variety of options at virtually any price point. Don’t worry about dishing out mega bucks; you wont need to. The cheaper models work perfectly fine for taking bud shots.
 

Attachments

  • 01.jpg
    01.jpg
    196.8 KB · Views: 308
@DrCannaCanadian Replying here instead of the Mega Crop thread.

"I still need to look into farside05 's research on not using bloom nutes - that is going to be a paradigm shift for sure!"

The methodology of it can be summed up in a couple posts in my journal.

Post #2

Post #3

Post #22, the bloom booster link

For lack of better terminology, let's call Low N, High P, and Medium K, (ie 1-3-2 NPK) the "Old School" method. Popular nute companies that subscribe to this methodology would be Fox Farms, General Hydroponics, and Dyna Gro' Bloom. "New School" would be more of a 1-1-3 or 2-1-3 NPK depending more on what supplements, if any, you use. Advanced Nutrients, Greenleaf Nutrients, Dyna Gro's Foliage Pro, would be more of that approach. So combining base nutes and supplements from both sides of the aisle, so to speak, could prove challenging. You might come up with something closer to Jack's 10-10-10 by the time you are done. I like to use the Mr Miyagi philosophy from Karate Kid, "walk left side of road, safe, walk right side of road, safe, walk middle of the road, squish like grape".
 
Daily Tips & Tricks
syZ3LYfZ.jpg
By Royal Queen Seeds


Yellow Cannabis Leaves

It’s better to read this marijuana blog and not need it than to not read it and come undone in the grow room. Sometimes things go wrong in the cannabis garden. Even the best marijuana growers can run into trouble occasionally and yellow leaves are usually the first warning sign.

00.jpg
No grower wants to see yellow leaves. Withering plants in the grow op are a miserable sight. Unfortunately not every cannabis crop grows trouble free. This can be due to incalculable reasons. It can be anything from grower errors to invasive microorganisms. Of course, we cannot provide you with a surefire silver bullet solution for every potential cannabis plant malady. We’re cannabis writers, not clairvoyants.

But we certainly can help you. Specifically to correctly identify most of the common causes for yellow leaves. Moreover, we have included helpful tips to treat ailing plants. Plus simple pro tips and tricks. Any home grower can implement our advice to avoid cannabis plants' leaves turning yellow. Now let’s get into the specifics.


ACCURATE DIAGNOSIS

The very first step is accurate diagnosis. What is the cause of the yellow leaves spoiling your cannabis plants? Chlorosis in ordinary decent grower terms means loss of chlorophyll. In order to effectively apply treatment, you must know what you’re dealing with. Don’t jump to conclusions. Don’t panic. The leaves on your cannabis plants are like biological solar panels. They are essential to photosynthesis. Removing all the yellow leaves is not recommended surgery, especially for young plants. Correct identification of the source of the problem and swift remedial action can restore marijuana.

Senescence is when plants will naturally yellow off and die. During the final weeks of flowering do not be alarmed. Leaf drop and yellowing always increases. Flushing plants with pure water or a flushing solution at the end of bloom will also rid the medium of residual nutrients and often causes leaves to yellow.

COMMON CAUSES OF YELLOW LEAVES

The following is not a definitive list of the causes for chlorosis. It is such a common symptom, that sick plants display, we could write a book, but not today. That being said, we have focused on the most common causes for yellow leaves based on first hand pro grower experiences. If you are presently troubleshooting for a solution to chlorosis, read the next few sections carefully. Your crop could be riding on it.

THE MOST COMMON GROWER ERRORS

UNDER/OVERWATERING
01.jpg

Cannabis plants will only thrive with an effective wet-dry cycle. This means you must water the right amount at the right time, with every watering. So what's the best way to tell if your marijuana is thirsty? Lift up the containers when they are dry. Then again after watering, so you will know the difference.

Perhaps it’s not possible to easily lift plants? Then you can purchase a humidity meter to insert into the pot. Hydro growers need to ensure pumps, air stones, reservoirs and timers are set up correctly from the start of the grow. Check twice, and then check again.

TREATMENT: Monitor the plant's post feeding behaviour closely. Use one of the measures above to more accurately gauge when to water to prevent recurrence. Too much water can lead to root rot. Too little water will stunt growth. Keep a grow diary if you must and try to get into a routine as the grow progresses.


PH AND NUTRIENT LOCKOUT
07.jpg

Soil growers have the advantage of cultivating in a medium, that acts as a buffer for roots. Hydroponics and coco are not quite as forgiving to pH imbalances. Even soil growers need to at least come close to getting the ideal pH of 6.0-7.0 and maintain it, otherwise plants will suffer. 5.5 to 6.5 pH is generally agreed upon as the recommended range for hydro and coco. Yellow leaves can be a warning sign, that you don’t have your nutes dialled in and the pH is off.

Essentially when the pH of your nutrient solution strays above or below the particular sweet spot for your substrate, it prevents complete absorption of all the elements of the solution. Roots are starved of certain nutrients and micronutrients as the incorrect pH causes a lockout.

TREATMENT: Invest in a pH pen or cannabis fertilisers with pH-perfect solutions, that can auto adjust a wider pH range. Flush plants with pure water and then resume feeding with a light dialled in solution to suit your growing medium. Also, make sure that the base nutrients you use contain all of the essential microelements or you will have to add extra bottles of supplements to the budget.


OVERFERTILISATION/UNDERFERTILISATION
02.jpg
Again, plants need just the right nutrients at the right time. Read the dosage instructions on the label of every bottle of fertiliser before adding to water. Furthermore, we highly recommend you consult the website of the brand of nutrients you are using as most feature custom charts and feeding schedules.


LIGHT BURNS AND DEFICIENCIES
03.jpg

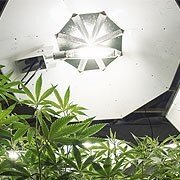
Indoor cannabis plants grown under artificial lights must be perfectly positioned and lamps must be in just the right distance above the canopy for best results. When lamps and reflectors are too close to the flowering tops, buds and leaves will be yellow and brown as the light is too intense. This is very much a top down problem.

In contrast, too little light is usually a problem, that is most evident from the bottom up. Light deficiency causes shaded leaves or leaves too far below the light penetration capability of the lamp to yellow and drop off.

TREATMENT: Make sure to hang your grow lights as per the manufacturer’s instructions. Adjust as plants progress and use a tape measure for precision. These days there are so many new grow light technologies on the market with their own nuances, you really must stick with the manufacturer’s guidelines to position the light in the sweet spot.

FORCES OF NATURE

COLD WEATHER
04.jpg

Temperatures below 10°C will cause the leaves of the majority of cannabis leaves to yellow. Some will even take on purple and bluish tones. Sure, this is a fantastic bonus in the final phase of bloom with some strains, but to be avoided early in the grow.

TREATMENT: Indoors simply turn up the heat or add more lights to the grow op and turn a negative into a bumper harvest. Outdoor growers might need to take plants inside at nighttime or at least invest in a basic DIY greenhouse.


HEAT WAVES
05.jpg

Heat waves can cause cannabis plants leaves to yellow and dry out indoors and outdoors. Temperatures above 28°C prevent cannabis plants from efficiently photosynthesising and cause buds to form more loosely and airy.

TREATMENT: Indoor growers need to turn up the air conditioning and ensure intake and outtake fans are powerful enough for the size of the grow room. Again, we strongly advise consulting the fan manufacturer’s website for performance specifications. Outdoors the best growers can do is construct a simple shade and hope the heatwave is short-lived.


PESTS AND PLAGUES
06.jpg

Bugs and nasty microorganisms can easily hitch a ride on your clothes, clones gifted from a pal or on a household pet and invade your grow op. Outdoors quadrupedal furry pests of all shapes and sizes must also be taken into consideration and regarded as hostiles.

TREATMENT: The cannabis growing area must be sealed off from intruders in so far as practicable indoors or outdoors. Naturally an outdoor grow is impossible to 100% quarantine, so you do what you can. Grow in a quiet sunny spot and use chicken wire to protect plants from nibblers like deer and rabbits.

Indoors you have far greater capacity to seal off the grow op. By using a grow tent, restricting entry strictly to you the grower exclusively and keeping basic hygienic practices, you should be able to keep your marijuana lush green and healthy.
 
Daily Tips & Tricks
syZ3LYfZ.jpg
By Royal Queen Seeds


What Cannabis Leaves Can Tell You

Every cannabis cultivator needs to be able to interpret the signals weed leaves send. The grower that can read cannabis leaves correctly will crop healthy plants with fantastic buds. Here is your go-to overview of the weed leaf.

00.jpg

FUNCTIONS OF THE WEED LEAF

Weed leaves are key components of the cannabis plant’s life support system. The green pigment chlorophyll allows leaves to act as solar panels for marijuana. Leaves are essential to photosynthesis. Moreover, the underside of leaves are covered in tiny stomata. These microscopic holes open and close like a door. Carbon dioxide goes in, oxygen and water goes out. Furthermore, leaves can also absorb nutrients to feed the cannabis plant, this is known as foliar feeding.

01.jpg


TYPES OF CANNABIS LEAVES

Three kinds of cannabis species are generally agreed upon. Although all three are often lumped together under the official classification of Cannabis sativa L., for practical purposes, it helps to make distinctions between sativa, indica, and ruderalis. That being said, most cannabis you encounter these days is a hybrid. Thus, what you will typically see in the grow-op are weed leaves that express a blend of genetic traits.

SATIVA
02.jpg

Sativa leaves are long and slender-fingered. Some can develop as many as 13 fingers. Usually, sativa plants will have a lighter, lime green shade. It is believed that the reduced chlorophyll is partly responsible for the longer flowering period of sativa strains.


INDICA
03.jpg

Indica leaves are short and wide, typically with 7-9 fat fingers. The heaviest indicas of Afghan origin can have oversized, extra-wide fan leaves. Indica leaves are a darker, deeper shade of green. The higher chlorophyll content is believed to accelerate the bloom cycle of indica varieties.

RUDERALIS
04.jpg

Ruderalis leaves are quite thin and only develop 3-5 slender fingers. Most growers describe them as comparable with the leaves of young sativa plants. Think of them as miniature sativa leaves with fewer fingers. These leaves are special as they have evolved to give autoflowering cannabis the ability to flower independent of the hours of light it receives.

LEAF MUTATIONS

Cannabis can display leaf mutations. Some of these mutations are initiated by breeders to better camouflage the plant and make it less identifiable as marijuana. Other times, mutations are a minor defect inherent to some strains. Apart from the common, gnarly-looking sets of leaves that appear on young plants, widespread leaf mutations with even numbers of fingers and ugly deformities are very rare. Excessive mutations are indicative of bunk genetics and poor breeding practices.

READING THE SIGNS
You don’t need to be a shaman or a tree-hugger to communicate with your cannabis plants. You just need to be informed. The leaves on your cannabis plants can send you an SOS, but you must have the knowledge to decode it and take appropriate measures to fix the problem.

05.jpg


HOW TO IDENTIFY PESTS
An eyeball inspection might be insufficient to accurately diagnose a possible pest infestation. Discolouration of leaves is not enough evidence to jump to conclusions. However, a thorough eyeball inspection will reveal some pests’ presence. Leaf miners will leave telltale tunnels as they eat their way through leaves. If you see white veins running through leaves, it’s time to get some neem oil.

A visual inspection using a pocket microscope will reveal the presence of other microbial nasties. Be on the lookout for eggs, larvae, fungal spores, and mould. Leaf septoria is caused by the fungus Septoria lycopersici. This particular invader is often misdiagnosed as one of many possible nutrient deficiencies. Yellow spots suddenly presenting on leaves early in flowering, followed by a rapid yellowing and browning of foliage can destroy the whole crop rapidly. There is no time to waste with misdiagnosis.

YELLOW LEAVES
Yellow leaves are a warning sign and a cry for help from the cannabis plant. Unfortunately, many nutrient deficiencies, over-fertilisation, and heat stress can cause leaves to yellow and wither. It’s so important to closely monitor your cannabis crop, be it indoors or outdoors. If you have been paying attention, you can take corrective action with more confidence diagnosing.

Fluctuations in pH are responsible for the majority of yellow leaves. When the water pH is outside of the optimal ranges for your growing medium, the roots cannot access all the nutrients they need. Nutrient lockout is perhaps the most common cause of yellow leaves in cannabis plants.

HOW TO USE THE WEED LEAF

Fan leaves have very low cannabinoid content and are best added to the compost heap for next season’s super soil mix. Sugar leaves, or the resinous trim leaf that a grower accumulates during the harvest process, is excellent raw material for homemade cannabis concentrates.

Dry those frosty trim leaves in a brown paper bag like you would popcorn buds. After a couple of weeks, put them in a Pyrex lunchbox and store them in the freezer until you decide on what kind of extract you want to make. Shakers can be filled with sugar leaves to extract pollen. You can also use isolator bags to make bubble hash; the choice is yours. With a little stoner ingenuity, leaf trim can be easily converted into top-shelf hash.
 
Daily Tips & Tricks
syZ3LYfZ.jpg
By Royal Queen Seeds


How Do You Prevent And Treat Nutrient Lockout In Cannabis?

Does your plant look limp and fragile? Are the leaves changing colour? This might not be a lack of nutrients, but the improper uptake of them. Read on so you’ll understand how to treat and prevent nutrient lockout.

00.jpg
So, you’ve been feeding your plant with all the necessary nutrients. You engage in proper watering practices and your lights are at an ideal distance from your cannabis plants. If, despite all this, your plant still looks sad and limp with discolouration in the foliage, you might be facing nutrient lockout. This condition has similar visual effects as a nutrient deficiency. Essentially, that is exactly what is happening. The necessary minerals are not being absorbed by your cannabis plant as the root zone is “locking” the nutrients out.

If you are certain your nutrient solution is not the problem, read on.

WHAT IT IS AND HOW IT HAPPENS

Nutrient lockout is when nutrient elements like magnesium, zinc, iron, and even potassium are present in the root zone, but your plant can’t absorb them. It can happen in all growing mediums, but it’s more likely to occur in soil, coco coir, or rockwool.

Nutrient lockout might be due to the oversaturation of chemical fertilizers with high a salt content. Sometimes, the excess of one nutrient may actually lock others out. This is a very common issue that many growers face. Another very popular issue that leads to nutrient lockout is the wrong pH value in the growing medium. An extremely acidic or alkaline medium will lock nutrients out. Make sure your pH level is within 6.0-6.5.

Once your plants are in nutrient lockout, you’ll have to act quickly. It’s important to reverse it in time to free the nutrients. If left untreated, nutrient lockout will turn into a nutrient deficiency and eventually kill your plant. To protect them, you’ll need to know how to identify nutrient lockout, as well as how to correct it. If you are not currently facing the issue, even better! Read on so you’ll know how to prevent it in the future.

IDENTIFYING IT
01.jpg

Identifying nutrient lockout can be difficult. Your cannabis plants may look underfed when the problem is actually something else.

Overfeeding, pH variations, or other stressful factors affecting the plant’s root zone may be the reason.

Cannabis plants are very fragile and require daily care in order to achieve a proper yield. Being interested in and worried about your plants is already half the battle of identifying a nutrient lockout.

This health issue will make plants look and feel weak. Growth will appear to be stagnated. You’ll be seeing yellowing in the leaves.

Left untreated, this yellow will turn brown and the leaves will curl up, looking burnt.


TREATING IT
02.jpg


One of the first things you should do is check if you’re dosing your nutrients properly. Before anything else, make sure you’re using the right quantities and the right combination of nutrients. This is more common with salt-based fertilizers as salt tends to build up, changing your medium’s pH. This is why adding more nutrients when you’ve identified a lockout in your plant won’t help.
If you’ve checked that your nutrient mixture is perfect, the next step is verifying that your pH is also on point. For this, you’ll have to flush your plant’s medium. Take the extra effort to dial down your grow room humidity to 49% on the day you flush. Flushing overwaters the root zone, which can harm the roots. Do this for one lights-on and one lights-off cycle.

Use fresh, pH-balanced water to flush your soil. For a hydroponic system, running a fresh solution through your setup will suffice. This excess water running through your medium will help break down the salt build-up, easing the nutrient uptake. Once this process is complete, you should immediately give your plant its appropriate share of nutrients and water solution. Before this, just make sure you allow the soil to dry out first. This is so the root zone can breathe, preventing root rot.

You can also try a pH-adjusting solution. These also work well with a nutrient lockout situation, but won’t wash away the salt build-up. We recommend flushing as this will work better in the long-run, preventing the reappearance of this problem later on.

PREVENTING IT NEXT TIME
03.jpg


When you face a problem with your cannabis plant, it’s always important to learn from the experience. Whether you’re able to solve it or not, knowing how to prevent a lockout in a future scenario is what distinguishes the men from the boy growers.

In order to keep plants at their ideal health, we would recommend routine flushes. At least once when moving into the flowering stage and again, about halfway through the flowering cycle.

It’s important to note that plants that have been pruned will require fewer nutrients. This makes sense, but it’s not something every grower thinks about. With fewer leaves, there is less mass for the plant to feed. Take this into consideration when pruning and feeding your marijuana plants.

If you’re planning to change up your nutrient and/or lighting regimen, do it slowly. Don’t ever make drastic changes. This will stress the plant. You’ll end up creating another problem when trying to fix one. Cannabis plants need time to properly adjust to new environments. In nature, a drastic change is unlikely to occur. When moving into vegetation and flowering stages, the lighting transition should take at least a week. Don’t change the nutrient levels when shifting to the flower room as this will slow the plant’s growth at a crucial time.

USING QUALITY PRODUCTS
04.jpg

Finally, something that should not go without mention is the importance of using quality supplements and organic fertilizers. As mentioned above, salt-based fertilizers motivate the accumulation of this in the root zone.

Salt, much like in humans, dehydrates the plant, preventing it from properly uptaking the good stuff. Using organic fertilizers does not mean that nutrient lockout is impossible, but it surely is less likely.

Now that you’re more informed, test out these recommendations for yourself. You’ll certainly find that some work better, or are at least easier to execute than others.

Only you will be able to fully assess what works best for your plants. We just hope this article can help you stay calm in a nutrient lockout situation, because it’s not irreversible.

Best of luck with your harvest!
 
Daily Tips & Tricks
syZ3LYfZ.jpg
By Royal Queen Seeds


How and When to Flush Marijuana Plants

Flushing the marijuana plants before harvest can make all the difference in the best bud, or horrible hash. This small task is simple and super easy to do. Just add water! Be very careful, as the timing of the flush can play a critical role in this process.

00.jpg

You have finally finished your grow, ending up with a beautiful plant covered in tremendous bud, now dried, cured and ready to go – yet something is not quite right. You can hardly get the stuff to burn, and when you take a hit, it feels like a mule kicked your lungs as you end up coughing for your life! The taste is harsh and disappointing. If this is a situation you have experienced, chances are your plants were not flushed properly before harvest.

This less than pleasant smoke is caused by nutrients and minerals used during growth still be present in the plant, altering the way it burns. Flushing removes these remaining nutrients, improving the quality of the experience. Fortunately, flushing your cannabis is an effortless and easy task, and will have you producing smooth and delightful bud in no time.

WHAT IS FLUSHING?

The act of flushing a plant is using plain water to actively remove any nutrients in the soil. A large amount of water is passed through the soil and drained away on a regular basis. Any minerals and nutrients present in the soil are washed away over time by the water, leaving the soil clean.

Why would you want to strip away all the minerals from the soil? Isn't this hurting your harvest? It actually helps your harvest a significant way. When the nutrients are removed from the soil, it forces your cannabis plant to use up any remaining nutrients still present in the plant. It is a lot like the human body. We take in a lot of food and, what we do not use is turned into fat. In extreme situations where food is scarce, the body relies on this stored fat for energy.

THE BEST TIME TO FLUSH YOUR CANNABIS

Flushing is usually commenced two weeks before harvest. If the plant has an eight-week flowering period, the flushing will need to take place six weeks after the start of the flowering stage. It is best to take a close look at the trichomes on your plant to assess when your cannabis is likely to be ready for harvest. If the tiny trichomes are just beginning to turn from clear, to a cloudy and milky colour, this could be a good indication that the plant can begin flushing. It should be timed so that the majority of trichomes will have fully changed to the desired colour for harvest after two weeks – this gets easier with experience, so stick with it!

Flushing can also be a good way to reset the soil while a plant is in the vegetative state. Sometime, growers will accidently overfeed their cannabis, causing the tips of the leaves to begin changing colour and shriveling. This is called “nutrient burn”. Flushing the soil can remove the excess nutrients, helping avert the problem. However, it is a drastic measure at this phase of growth, so be sure that the problem is nutrient burn, and not something else first.

01.jpg

Flushing isn’t exclusive to harvest time. The technique can also be used in the vegetative phase to remove excess nutrients from the soil. Sure, nutrients keep your plant healthy and ensure optimal yields, but too much can cause nutrient lockout—a state where plants can’t access nutrients.

Nutrient lockout can be caused by both salt buildup and incorrect pH levels. It can be solved by flushing affected plants with plain water. The fluids push nutrients out of the soil and wash away the buildup, allowing roots to once again freely uptake nutrients.

PREVENT NUTRIENT LOCKOUT BEFORE IT BECOMES AN ISSUE

Nutrient lockout can be an inconvenience at best and devastating at worst. As the old saying goes, prevention is better than a cure. It’s best to take steps to avoid nutrient lockout as opposed to tackling it later down the line.

Preventing nutrient lockout can be accomplished via routine flushing. By flushing your plants once before flowering begins and once halfway through flowering, you’ll minimise the chances of nutrient buildup.

ENZYMES TO THE RESCUE

After flushing to counter nutrient lockout or before harvest, you might still notice your plants are dark green in appearance—a sign of excess nutrients. In this case, some growers elect to add enzyme-rich formulas to the soil.

If you don’t remember anything from biology class, enzymes are proteins that catalyse reactions. They help to flush out the soil by breaking down starches, carbohydrates, and nutrients. There’s a variety of products on the market that contain effective enzyme formulas.

If water isn’t doing it for your plants, these small proteins will make lingering nutrients budge!

02.jpg


HOW TO PROPERLY FLUSH CANNABIS

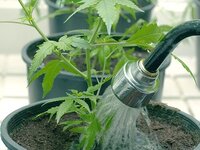
Flushing your cannabis plants is a straight forward process. Whenever you would normally feed, you flush instead. Untreated tap water is all you need to use for flushing, just be sure to make sure the pH is at a safe level for cannabis. Most well water contains a healthy pH level and will not need treatment, but if it is necessary for you to add treatment to adjust the pH of your flushing water, feel free to do so. The pH adjustments will be the only thing you will need to be concerned about.

Flood the soil with as much fresh water as it can hold. Leave this for a few minutes to allow all of the nutrients to be picked up, the flood the soil again to flush it all away from the plant. If you are indoors using pots, notice the colour of the water that is draining from the bottom of the pot. It will be stained and look dirty. This is where a TDS (total dissolved solids) meter will come in handy. If you were to collect and measure the TDS of the “drained off” water, it would be around the measurement of 1300ppm, which is pretty high. It is important to keep flushing the plant until this number drops to a level of 50ppm, or at least until it is close to matching the TDS of the fresh water that you are using to flush with. The colour of the draining water will lighten up and appear to be cleaner. You want to get as much of the dissolved minerals away from the plant as you can.

HOW TO FLUSH HYDROPONIC PLANTS

Flushing hydroponic plants is much easier than removing nutrients from a soil medium. Hydro growers can simply drain their system and replace the water with plain pH-balanced water instead.

Flushing hydroponic plants is also a much shorter process. Once the water supply has been switched out, hydro plants won’t have access to any external nutrients. Because of this, you’ll only need to flush plants for two days.

THE OUTCOME OF FLUSHING YOUR CANNABIS

After the bud is harvested, take the extra time to cure the bud to its highest potential. A proper cure will cut back even further on that harsh edge, removing aspects like excess chlorophyll. You will be amazed at the difference this small effort can do to your product. All of your hard work will show in that first inhale of that silky smooth smoke that hits the back of your throat as soft as honey. This is nature at its smoothest. You can increase the quality of your cannabis by just adding water!

WHEN TO AVOID FLUSHING YOUR PLANTS

The only time it’s recommended to avoid flushing is when you’re growing in an amended organic soil or super soil. This medium is carefully developed over time to harbour beneficial microorganisms such as bacteria and fungi. This delicate biodiversity can be washed away and damaged by flushing.

Then again, the lack of flushing shouldn’t be an issue as no synthetic or external nutrients are added to this medium. Instead, plants rely on microorganisms to break down organic matter and deliver it to the roots.

 
Daily Tips & Tricks
syZ3LYfZ.jpg
By Royal Queen Seeds


How To Use Cannabis Nutrients

Cannabis growers often add a lot of nutrients to their mix. However, doing so can sometimes cause more bad than good. We take a look at how to feed cannabis plants without overdoing it.

00.jpg
All the chemical elements plants need to live and flourish are naturally present in water, soil, and air. It is natural to want to add extra nutrients, with increasingly better mixes and formulas to take the most out of every single plant. People are often ready to spend lots of money on the most advanced nutrients, yet this is no guarantee of great results - sometimes it can make things worse. What kind of nutrients do cannabis plants really need, and how much?

Cannabis plants need nitrogen, phosphorous and potassium to grow and thrive (N, P, K are the symbols for these elements). These elements are not standalone in the growing mix, and are usually combined in more complex molecules that plants are able to absorb. Organic fertilizers contain N, P, K under more complex and natural molecular forms than the equivalent mineral ones.

Growing in soil is the simplest way to cultivate cannabis, as it can forgive feeding mistakes thanks to its buffering activity between chemicals and the roots system. Some growers like to pump as many nutrients into their plants as possible, and more. Others prefer to keep fertilizing to a minimum. While ensuring optimal nutrition will certainly help your cannabis grow as strong as it can be, getting too involved in the nutrition game can cause distraction in less experienced growers. The result is other environment parameters getting out of control, potentially putting plants’ health at risk.

THREE STAGES, THREE DIETS

Just like with animals, each stage of a plant’s life requires slightly different nutrients. When growing in a good and rich soil, no additional nutrients are needed during the seedling stage of a plant’s life. Just be sure pots are large enough to provide enough soil’s humidity and room for plant’s roots to grow freely.

When growing in artificial mediums that have no natural nutrients, root boosters and seedling nutrition can be used. Roots boosters contain enzymes, bacteria, and other compounds that encourage healthy root growth. Seedling nutrients contain a mix of the three main nutrients, usually in the correct percentage for sprouts. A similar nutritional effect would be obtained by feeding young plants with feed used during the vegetative stage, at one-quarter of the normal vegetative stage nutrient dose. Remember, unless it is a fertilizer specifically produced for cannabis, there is a good chance it will be too strong, and need reducing in dose.

During the vegetative growing phase, plants need high nitrogen and potassium levels, and a medium intake of phosphorous. As a general rule, the amount of phosphorous should be around half of nitrogen, while potassium levels can vary from one-third to half of nitrogen. In the flowering stage, nitrogen level must be drastically lowered, while increasing phosphorous and maintaining the same level of potassium used in vegetative stage. All commercial cannabis fertilizers are differentiated for grow and bloom phases according to these basic principles.

Switching to the proper nutrient mix when plants start flowering just means feeding them with a different NPK balance. Nitrogen, phosphorous, and potassium percentages are indicated on product labels with three numbers, along the lines of NPK 5-18-5 – with each number indicating the ratio of N, P and K respectively. The correct proportions of the three main elements are calculated by the manufacturer. Therefore, the grower just has to add water and stick to the right dosage.

In addition to the NPK variable mix, cannabis actually needs small quantities of secondary and micronutrients. Some of these are more important than others for plant’s health. Most are already present in a good soil mix, while others are often included in cannabis feed in addition to NPK. Specialist additives can also be bought, but this is only advisable for more experienced growers, as overfeeding can be detrimental.

00.jpg


UNDER AND OVER FEEDING

When growing cannabis, it is always better to be cautious than overzealous. A plant growing with just a little added nutrition will develop better yields than a plant growing in over-fertilized soil. Add nutrients to water only every other watering, and if you are in doubt about the doses, just cut them in half. These are the most simple and valid rules for feeding a cannabis plant.

Nutrient deficiencies and overdoses can be detected by a change in the plant’s appearance and colour. Many overfeeding symptoms have similar aspects to those of nutrient deficiency. The most evident signs of a nutrient unbalance are drooping and yellowing leaves, irregular leave shape or dimensions, brown spots, burnt edges. Yellowing leaves only signal a problem in the vegetative and early flowering stages of the cannabis plant life - it is normal when happening towards the end of the flowering stage. Of you want more info on nutrient problems and what they look like, check out our blog showcasing signs of deficiency.

If you find that you are not capable of fixing a problem through a correction in nutrition, flush the soil with pure water at a neutral pH for a few days, then start again with the nutrient mix at half dose. Remove the top few centimetres of soil which are likely full of excessive nutrients. This will give you a “clean slate”, but is a drastic measure.

Remember: if you seriously underfed, or overfed your cannabis, chances are they have been irreparably damaged in some way. They will take time to recover, and even then, your harvest will be reduced. If you work with fast-growing autoflowering strains, nutrient mistakes can seriously compromise your yield.

ADDITIONAL CONSIDERATIONS

pH is critical for a correct nutrients uptake by your cannabis. All fertilizers modify water and grow medium pH to some degree (some more than others), usually lowering it. A wrong pH level locks out nutrients from plants, thus causing an underfeeding situation even if you are adding the correct nutrient mix to water. As such, always keep a close eye on the pH of your grow, and adjust it accordingly with solutions relevant to your grow (such as pH Up or Down, or natural alternatives in an organic grow).

Nutrients are often stored within the cannabis plant itself after uptake. This can result in in a bad chemical taste in the final product. Most of growers stop fertilizing days or even weeks before harvest, and flush their soil to force the plants to use up these excess nutrients, resulting in a smoother smoke. You can learn more about this final flush, here.
 
Daily Tips & Tricks
syZ3LYfZ.jpg
By Royal Queen Seeds


How and When to Flush Marijuana Plants

Flushing the marijuana plants before harvest can make all the difference in the best bud, or horrible hash. This small task is simple and super easy to do. Just add water! Be very careful, as the timing of the flush can play a critical role in this process.

00.jpg

You have finally finished your grow, ending up with a beautiful plant covered in tremendous bud, now dried, cured and ready to go – yet something is not quite right. You can hardly get the stuff to burn, and when you take a hit, it feels like a mule kicked your lungs as you end up coughing for your life! The taste is harsh and disappointing. If this is a situation you have experienced, chances are your plants were not flushed properly before harvest.

This less than pleasant smoke is caused by nutrients and minerals used during growth still be present in the plant, altering the way it burns. Flushing removes these remaining nutrients, improving the quality of the experience. Fortunately, flushing your cannabis is an effortless and easy task, and will have you producing smooth and delightful bud in no time.

WHAT IS FLUSHING?

The act of flushing a plant is using plain water to actively remove any nutrients in the soil. A large amount of water is passed through the soil and drained away on a regular basis. Any minerals and nutrients present in the soil are washed away over time by the water, leaving the soil clean.

Why would you want to strip away all the minerals from the soil? Isn't this hurting your harvest? It actually helps your harvest a significant way. When the nutrients are removed from the soil, it forces your cannabis plant to use up any remaining nutrients still present in the plant. It is a lot like the human body. We take in a lot of food and, what we do not use is turned into fat. In extreme situations where food is scarce, the body relies on this stored fat for energy.

THE BEST TIME TO FLUSH YOUR CANNABIS

Flushing is usually commenced two weeks before harvest. If the plant has an eight-week flowering period, the flushing will need to take place six weeks after the start of the flowering stage. It is best to take a close look at the trichomes on your plant to assess when your cannabis is likely to be ready for harvest. If the tiny trichomes are just beginning to turn from clear, to a cloudy and milky colour, this could be a good indication that the plant can begin flushing. It should be timed so that the majority of trichomes will have fully changed to the desired colour for harvest after two weeks – this gets easier with experience, so stick with it!

Flushing can also be a good way to reset the soil while a plant is in the vegetative state. Sometime, growers will accidently overfeed their cannabis, causing the tips of the leaves to begin changing colour and shriveling. This is called “nutrient burn”. Flushing the soil can remove the excess nutrients, helping avert the problem. However, it is a drastic measure at this phase of growth, so be sure that the problem is nutrient burn, and not something else first.

01.jpg

Flushing isn’t exclusive to harvest time. The technique can also be used in the vegetative phase to remove excess nutrients from the soil. Sure, nutrients keep your plant healthy and ensure optimal yields, but too much can cause nutrient lockout—a state where plants can’t access nutrients.

Nutrient lockout can be caused by both salt buildup and incorrect pH levels. It can be solved by flushing affected plants with plain water. The fluids push nutrients out of the soil and wash away the buildup, allowing roots to once again freely uptake nutrients.

PREVENT NUTRIENT LOCKOUT BEFORE IT BECOMES AN ISSUE

Nutrient lockout can be an inconvenience at best and devastating at worst. As the old saying goes, prevention is better than a cure. It’s best to take steps to avoid nutrient lockout as opposed to tackling it later down the line.

Preventing nutrient lockout can be accomplished via routine flushing. By flushing your plants once before flowering begins and once halfway through flowering, you’ll minimise the chances of nutrient buildup.

ENZYMES TO THE RESCUE

After flushing to counter nutrient lockout or before harvest, you might still notice your plants are dark green in appearance—a sign of excess nutrients. In this case, some growers elect to add enzyme-rich formulas to the soil.

If you don’t remember anything from biology class, enzymes are proteins that catalyse reactions. They help to flush out the soil by breaking down starches, carbohydrates, and nutrients. There’s a variety of products on the market that contain effective enzyme formulas.

If water isn’t doing it for your plants, these small proteins will make lingering nutrients budge!

02.jpg


HOW TO PROPERLY FLUSH CANNABIS

Flushing your cannabis plants is a straight forward process. Whenever you would normally feed, you flush instead. Untreated tap water is all you need to use for flushing, just be sure to make sure the pH is at a safe level for cannabis. Most well water contains a healthy pH level and will not need treatment, but if it is necessary for you to add treatment to adjust the pH of your flushing water, feel free to do so. The pH adjustments will be the only thing you will need to be concerned about.

Flood the soil with as much fresh water as it can hold. Leave this for a few minutes to allow all of the nutrients to be picked up, the flood the soil again to flush it all away from the plant. If you are indoors using pots, notice the colour of the water that is draining from the bottom of the pot. It will be stained and look dirty. This is where a TDS (total dissolved solids) meter will come in handy. If you were to collect and measure the TDS of the “drained off” water, it would be around the measurement of 1300ppm, which is pretty high. It is important to keep flushing the plant until this number drops to a level of 50ppm, or at least until it is close to matching the TDS of the fresh water that you are using to flush with. The colour of the draining water will lighten up and appear to be cleaner. You want to get as much of the dissolved minerals away from the plant as you can.

HOW TO FLUSH HYDROPONIC PLANTS

Flushing hydroponic plants is much easier than removing nutrients from a soil medium. Hydro growers can simply drain their system and replace the water with plain pH-balanced water instead.

Flushing hydroponic plants is also a much shorter process. Once the water supply has been switched out, hydro plants won’t have access to any external nutrients. Because of this, you’ll only need to flush plants for two days.

THE OUTCOME OF FLUSHING YOUR CANNABIS

After the bud is harvested, take the extra time to cure the bud to its highest potential. A proper cure will cut back even further on that harsh edge, removing aspects like excess chlorophyll. You will be amazed at the difference this small effort can do to your product. All of your hard work will show in that first inhale of that silky smooth smoke that hits the back of your throat as soft as honey. This is nature at its smoothest. You can increase the quality of your cannabis by just adding water!

WHEN TO AVOID FLUSHING YOUR PLANTS

The only time it’s recommended to avoid flushing is when you’re growing in an amended organic soil or super soil. This medium is carefully developed over time to harbour beneficial microorganisms such as bacteria and fungi. This delicate biodiversity can be washed away and damaged by flushing.

Then again, the lack of flushing shouldn’t be an issue as no synthetic or external nutrients are added to this medium. Instead, plants rely on microorganisms to break down organic matter and deliver it to the roots.
Possibly Myth.
:passitleft:
 
Possibly Myth.
:passitleft:

Yep - I agree with you!

I definitely didn't agree with all the theory in that article, or even how they flush exactly - but it's okay as a general rule of thumb - and flushing to prevent nutrient lockout in soil is often important.
 
Daily Tips & Tricks
syZ3LYfZ.jpg
By Royal Queen Seeds


Defoliation – A High Risk Way To Increase Yield

Defoliation is a method to increase crop yield used by experienced growers. The idea is to help shape the plant with selective pruning. This focuses the energy of the plant on the best-placed buds. Warning: this is not a good idea for beginners. You have to know what you are doing.

00.jpg

Obviously, every grower wants to increase their yields. Growing cannabis is a labour of love, which is why cultivators want more of it! There are various common sense methods for maximising your crop. These include proper lighting. Nutrients are an essential part of the mix, of course. Watering is a crucial aspect of growing healthy, unstressed plants and temperature control is another given.

Essentially, creating the most stress-free environment is the goal of every grower. A healthy cannabis plant is a happy cannabis plant. And a happy cannabis plant produces the most amount of bud. That makes us growers very happy.

There is another way to increase the yield of your crop. It is a form of “stress,” but it produces positive results. However, it is not a method that you should rely on as a newbie. This is a procedure that should only be attempted by experienced growers. And while it has considerable upsides, the process also poses some real risks.

01.jpg


A CONTROVERSIAL METHOD

The first thing to mention here is that defoliation is a controversial method for increasing yield. There are experienced growers who swear by it and others who shy away.

In essence, defoliation involves removing the small leaves from the lower nodes of the plant as they grow. You need to do this gradually and gently. Stripping a young plant of too much too early is stressful, but the idea is to concentrate the plant’s attention on the upper-most or strategically located buds. When buds are more exposed to the light, they will grow more densely and increase your yield, sometimes dramatically.

Incidentally, cannabis is not the only crop this technique works on. It is also used successfully in other kinds of agriculture. In fact, cowpeas can experience increased yields up to 50% when defoliation is performed correctly.

Happy indeed is the canna-farmer who uses this technique so successfully!

02.jpg


HOW TO DEFOLIATE EFFECTIVELY

The idea here is to trick the plant. You do not want to stress it. You want it to feel loved, bathed and well groomed. This way, it literally feels ready to expand. This is a very good way to also encourage the full extension of branching.

The way to start is to first remove shabby leaves. Then it gets down to a bit of artistry. The idea is to remove the leaves that will impede bud growth. This also means removing upper leaves if they threaten to shade too much below. However, a lot of defoliation occurs on the bottom branches of the plant. Especially when growing indoors, the buds at the top of the canopy receive optimal light.

This pruning process will not only help shape the growing plant, but also promote dense and thick bud growth in all the right places.

There are many different techniques for shaping plants depending on the conditions of the grow operation. This is where experience comes in. Growing your plants on a southern, exposed slope is one of the other ways to assist this process. The pruning you would do here is partly determined by the grow environment. Outdoor crops are defoliated differently, of course. The only light source is the sun.

For most indoor growers, this means removing “distractions” lower down on the plant. This encourages the plant not to waste resources on a node which is only going to produce “popcorn” buds. These are buds that are loose and wispy. While they produce the same results as any other, they aren’t as preferable of a final product.

03.jpg


PRACTICE MAKES PERFECT

Again, defoliation is not a good idea for beginners. It is far more important to hone other aspects of your grow techniques first. Make sure you have a decent grow space. Water and feeding is really important. Of course the lights – both placement and timing – are a big part of making sure you have a successful grow.

Once you have mastered all of these other issues, turn your attention to sculpting and pruning your grow. Many people begin experimenting with what is commonly known as “lollypopping” as they improve their grow practice.
 
Daily Tips & Tricks
syZ3LYfZ.jpg
By Royal Queen Seeds


Use Schwazzing To Expose Your Buds To More Light

Schwazzing is a term used to describe an intense form of defoliation. The process involves removing many fan leaves from a plant, allowing much more light to pass through to bud sites.

00.jpg

If somebody told you to chop off the vast majority, or all, of your cannabis plant’s leaves in order to massively enhance yield, would you listen to them? Or would you merely disregard the claim as the suggestions of a mad man?

LESS LEAVES, GREAT YIELD

Well, the person in question might actually have a valid point. Something about severing off the fan leaves of your indoor crop during the flowering phase seems to rapidly ramp up the size and vigour of cannabis buds. Defoliation is the term usually assigned to the practice of clipping off a few leaves, but a new term has been developed for fully stripping a plant of its leaves, named “schwazzing”.

The term schwazzing was born out of a book named Three a Light, penned by author Joshua Haupt. The very concept of the book is the application of various growing methods in order to produce a mammoth 3 pounds (~1.4kg) of weed under a single grow light. Schwazzing is a training method featured within the book that's said to help growers achieve such barbaric yields.

Haupt compares schwazzing as kind of like going to the gym. In the gym, a muscle is beaten up and exposed to stress. Muscle fibres are torn and damaged, only to grow back stronger during the anabolic phase.

Weed plants respond in a similar way after such tough love. However, Haupt makes a point that after the gym, muscles will only respond well when fed adequately. This metaphor translates into the notion that plants must be given appropriate nutrients after the removal of their prized and precious leaves.

In the absence of pretty much all of its leaves, it may be the case that all of the plant’s energy, now spare, is distributed to the buds instead. This may explain the explosive growth of the buds when plants are subject to such methods.

01.jpg


WHEN TO SCHWAZZ

Schwazzing typically takes place twice within the grow cycle of a crop. The first bout occurs just before the flowering phase is initiated. The grower will remove the vast majority of fan leaves from plants, leaving them looking almost bare.

Although this might appear shocking and damaging, it is said to pay off further down the line. The photoperiod should then be changed to a 12 hours on, 12 hours off cycle in order to induce the flowering phase of the grow cycle.

The removal of such large amounts of leaves will expose bud sites to light that previously would have been obstructed by the canopy.

02.jpg


SCHWAZZ NUMBER 2

Schwazzing then takes place for a second time 20 days after the initiation of bloom, roughly ⅓ of the way through the flowering phase. During this time, new fan leaves will have grown back, and in doing so, will have started to once again form an obstructive canopy, preventing large amounts of light from directly stimulating the buds.

Many buds will be starting to form at this point, so it is a good time to start to trim away those fan leaves and expose the flowers to some strong light. After this point in the grow cycle, plants won’t be making many more leaves at all, so it’s important not to completely strip plants bare. Instead, let some leaves remain in order to fulfill their biological purpose, focussing mainly on removing large fan leaves that block a lot of light.
 
Daily Tips & Tricks
syZ3LYfZ.jpg
By Royal Queen Seeds


Why Soil Microbes Are Vital Within Your Cannabis Garden

Soil microbes are various different types of miniature creatures that live within the soil. Some of these creatures can form mutually beneficial relationships with plants that help to protect and boost their health. There is definitely an important place for these life forms within all cannabis gardens.

00.jpg

The term microbe is used to describe microscopic organisms that cannot be seen by the naked eye, such as forms of bacteria, viruses, and fungi. When it comes to soil and plant health, it appears microbes are absolutely key. Us humans sometimes like to take an isolationist approach to things, separating parts of nature from one another in order to obtain a greater understanding of their functions and characteristics.

However, in doing so, we often underestimate just how connected the web of life really is, and how organisms depend on each other and sometimes form vital symbiotic relationships to assist in one another’s survival.

This kind of symbiotic relationship very much exists within the soil between microorganisms and plants, and such interconnectedness can be utilised by cannabis growers in order to build healthy soils and to grow plants full of vitality.

This quote by soil microbiologist and soil biology researcher Dr. Elaine Ingham details the importance of healthy soils teeming with microorganisms, “If we want clean water, we have to get the biology back in our soils. If we want to grow and harvest crops, we have to build soil and fertility with time, not destroy it. The only way to reach these endpoints is to improve the life in the soil”.

PLANTS AND MICROBES: A SYMBIOTIC ALLIANCE

Although plants don’t have brains and, as far as we know (although we could be wrong), are not conscious, they do have chemical mechanisms that allow them to alter and shape their external environment, with a lot of this magic occuring within the soil. Sometimes, soil is seen as a mere source of nutrients for the plants that inhabit it, but it's actually been discovered that it is a complex and mind-blowing ecosystem buzzing with microbial life.

Plants and microbes aren’t just minding their own business within the soil environment, they actively interact and even work together to make life slightly easier and boost the chances of survival. Microbial activity can enhance the growth of plants by way of various mechanisms, including changing hormonal signalling, repelling or outcompeting pathogenic microbes, and boosting the bioavailability of nutrients.

01.jpg


NUTRIENT UPTAKE

All of these mechanisms are advantages to cannabis growers, especially those who are raising their crop outdoors where conditions are harsher and biodiversity is much, much greater. Most cannabis growers will be aware of the nutrients nitrogen, phosphorus, and potassium (NPK)—the three macronutrients required by plants in order to ensure healthy and proper growth.

Soil microbes can be of great assistance to plants in helping free up nutrients within soil to make them easier to absorb. Soil microbes can metabolise locked-up nutrients such as NPK, which are bound within inorganic molecules, and make them more available for plants to utilise.

Various microbes within the soil, such as some bacteria and fungi, have the ability to break down these forms of nutrients, and in doing so, release them into a form that plants can benefit from. It has been reported that these microbial allies are key drivers of plant growth within natural settings. It’s clear that both the indoor and outdoor cannabis grower could benefit massively from microbes within their soil.

HOW THE BOND IS MADE

This relationship is by no means all give and no take. The plants benefit from more access to vital nutrients, but the microbes also receive something in return. Plant roots release a variety of substances into the soil, called exudates. Some of these exudates include sugars, amino acids, and organic acids, which microbes can use as a source of nutrition.

These exudates effectively contribute to the establishment of the microbiome of roots. These nutrients may also attract pathogenic microbes, but some beneficial microbes even have defense mechanisms against these to offer in return.

02.jpg


MYCORRHIZAE

Perhaps the most interesting of all of the plant/microbe alliances is that of plants with fungi. A type of fungi, known as mycorrhizal fungi, are known to bind with plant roots. The underground portion of fungi, which can be seen as roots, are called mycelium. The mycelium of mycorrhizal fungi act as extensions of a plant’s roots, allowing it to absorb nutrients from a larger area than it could cover with its roots acting alone.

Mycorrhizal fungi form this alliance with plants by surviving off of sugary plant exudates. In return, the fungi provide additional moisture and nutrients gathered from the soil via the mycelium.

Mycorrhizal fungi are found in two primary types; ectomycorrhizae live on the outside of roots as sheaths, whereas endomycorrhizae actually live within the plant itself. As a cannabis grower looking to utilise the power of fungi to boost the nutrient uptake in your plants, you should be aware that the addition of excess fertilisers and the use of fungicides can damage and reduce the effectiveness of these organisms.

03.jpg


ROOT DEFENSE

Mycorrhizal fungi go above and beyond their ability to provide plants with additional nutrition. They can also act to protect plants against types of nematodes. Nematodes are microscopic worm-like creatures, with thousands of them occupying only a handful of soil. There are over 20,000 documented nematode species, making them the most numerically abundant animals on Earth.

Some nematodes may be beneficial to your cannabis plants, which we will explore later on. However, some of them can be rather detrimental. Plant-parasitic nematodes will feed on the roots of your cannabis plants, affecting their health and growing potential.

TYPES OF NEMATODES

Ectoparasitic nematodes are known to live within the rhizosphere (the zone of soil surrounding plant roots), where they feed upon the outer cells of roots. Endoparasitic nematodes actually enter the root itself to feed. These types of nematodes are known to cause damage to agricultural crops.

Fungal mycelium are made up of tiny separate strands known as hyphae. These small strands are known to be able to trap root-eating nematodes and help to prevent them from attacking the root systems of plants.

04.jpg


PREDATORY NEMATODES

Not all nematodes are a threat to your cannabis crop. In fact, some types of nematodes, known as predatory nematodes, can act as security teams to your plants. Predatory nematodes feed on other rhizome-dwelling soil microorganisms, including those pesky and cannabis-root-munching plant-parasitic nematodes. Not only this, but these beneficial nematodes also release nutrients in plant-available forms, so in a way, they also help to keep a grower’s plants well-fed and healthy.

Most predatory nematodes belong to four different taxonomic groups. Mononchid nematodes possess an oral cavity which is often equipped with either a single tooth, numerous large teeth, several small grasping teeth, or all of these, which they use to puncture their prey. Dorylaimid nematodes possess what is known as a odontostyle, which can be described as a needle-like tooth. They use this to take down and feed upon prey organisms, and in doing so, help to minimise numbers of cannabis munchers within the rhizosphere.

There are two other types of predatory nematodes. Diplogasterid nematodes have been found to possess smaller oral cavities, also armed with teeth. They are generally found in large numbers, dwelling in decomposing organic manure with life cycles of between 8–15 days. Finally, aphelenchid nematodes possess a needle-like stylet that they utilise to penetrate prey nematodes and inject them with paralysing digestive enzymes. They then proceed to feast upon the contents of their prey’s body.

INTRODUCING NEMATODES

Sure, these nematodes act in ferocious ways, but they certainly help to protect your cannabis plants against high numbers of undesirable residents within your soil.

When looking to introduce predatory nematodes into your cannabis garden, be sure to do so either in the late afternoon or evening; this will help to avoid exposing them to direct sunlight, which may kill them off. They should be stored in the fridge until the grower decides to apply them. The soil should be slightly wet before introducing them, and should be watered after application.

Add them directly under the plants you wish to protect, as opposed to throughout the entirety of the soil. The simplest way of applying nematodes is to mix them with the correct amount of water as displayed upon the instructions of the product you choose to use. This can then be sprinkled directly onto the soil.

05.jpg


There are various methods that cannabis growers can use to enhance the numbers of beneficial microbes within their soil to boost plant health and possibly even the quality and quantity of yield when harvest time comes round.

CREATE AND APPLY COMPOST

One way of doing this is to create and apply a high-quality compost. Composting is actually a process carried out by our microorganism allies. They work to break down organic material such as food waste, weeds, and other garden discards into high-quality and nutrient-rich soil.

Be sure to add good amounts of green material such as grass clipping, leaves, and fruits and vegetables to your compost, along with brown materials such as prunings, wood chips, and straw. Compost heaps need to be turned in order for air to access all parts of the heap to help break down the materials.

Adding this compost into your soil will help provide beneficial microbes and lots of health-giving nutrients. This can help cannabis growers cut back on or even cease adding synthetic products and fertilisers to their soil.

06.jpg


USE COMPOST TEAS

Compost teas are an excellent and natural way to provide potent mixtures of essential nutrients to your cannabis crop. Compost teas can be made using a large variety of organic matter. These teas have been shown to boost the nutritional quality and even taste of vegetables, so who knows what it can achieve in terms of the quality of cannabis!

Starting material such as plant matter and worm castings are added to water, where they are brewed over a period of time. There is a split in whether aerobic (with oxygen) or anaerobic (without oxygen) brewing is more beneficial. However, aerobic-brewed tea that is created using a pump is said to increase the number of beneficial microbes. Once brewed, this tea can be poured around your target plants.

NO-TILL

Tilling is an agricultural and gardening method that is used to prepare soil for future crops. However, this action has been shown to be detrimental to soil health, contribute to soil erosion, and release large amounts of carbon dioxide into an atmosphere already experiencing excess amounts of the gas. Tilling has also been associated with the loss of microbial life within soil.

The constant annual tilling of soil involves the turning of the topsoil (top 5 or so centimetres). When this occurs, the humus, soil rich in organic matter, is exposed to the elements, damaging the rich microbial life that inhabits it and disturbing natural processes.

No-till gardening simply refers to not disturbing this delicate habitat via tilling. This method can help to maintain the constant increase of organic matter in the soil as the years go by. This build-up ultimately leads to healthier soil and more nutritious plants.

AVOID PESTICIDE USE

Pesticides are often used in industrial agriculture and by non-organic growers as a chemical way to deal with unwanted pests. Though they may be effective in this sense, use of these chemicals has been shown to sustain massive negative effects upon human and environmental health. Pesticides are associated with various health conditions, and easily find their way into water systems where they can harm wildlife.

Not only do pesticides kill unwanted pests, but they also negatively affect beneficial soil microorganisms, and in doing so, halt or decrease the amazing work they do within soils. For example, nitrogen-fixing and phosphorus-solubilising microorganisms have been observed to become inactive in soils contaminated with pesticides.
 
Daily Tips & Tricks
syZ3LYfZ.jpg
By Royal Queen Seeds


How To Avoid The Threat Of Cannabis Light Pollution

For cannabis cultivators, particularly those who grow in a greenhouse, light pollution can be a big problem. In some cases, it can derail an entire grow. Here's how to decrease the likelihood of light pollution ruining your crop.

00.jpg
Outdoor planting season has finally arrived! This is the time of year when cannabis growers are looking for suitable spots in their gardens or on their balconies to take advantage of the warmer temperatures and bright sun for their plants. With cultivators getting hyped about finally being able to grow outdoors (and many likely having spent a small fortune on seeds, substrates, and fertilizers), one no-less important factor is often forgotten: light pollution. Light pollution can be a real danger to your crops by interrupting its all-important dark cycle.

THE IMPORTANCE OF PHOTOPERIOD

As photoperiod plants, cannabis relies on a light-dark cycle to decide when to make the switch from vegetative growth to flowering. Simply put, when the duration of daylight hours naturally decreases at the end of summer, your plants will sense the change in seasons and focus all their energy on making great, big buds. In the Northern Hemisphere, days progressively grow shorter after the summer solstice, with flowering initiating somewhere around August.

One issue with growing photoperiod cannabis strains is that the dark phase really cannot be interrupted. Unfortunately, light pollution from artificial lights, such as street lights, can be enough to really throw a wrench in your operation. Depending on the frequency and severity of the light pollution, the stress can cause plants to revert back to the veg phase, or to become intersex. This means they will start to produce pollen and grow seedy buds as a male plant would. Not ideal for the average home grower.

01.jpg


When you’re scouting for a good spot to plant outdoors, always take light pollution into account. To be sure you’ve found a suitable location, you will of course have to wait until it gets dark to see if there’s anything that could possibly contribute to a disturbance in the dark cycle. Obvious culprits like our street light example are easy to spot, but others may not be so obvious.

If you're not sure whether it's really dark enough for your plants, there’s a trick you can use: once it’s dark, visit your location and take a magazine with you. Open it up and see if you can read some of the larger headers and descriptions. If you can still read without a problem, the spot may not be ideal. Of course, many growers only have so many options for places to grow. One thing that microgrowers can benefit from is planting in pots. Having the ability to move containers around as needed can be quite helpful in this scenario.

LIGHT POLLUTION AND GROWING IN A GREENHOUSE

A greenhouse is designed for your plants to take advantage of the “big bright light in the sky”. It combines the benefits of growing outdoors, with its abundance of natural sunlight, with the increased control of an indoor grow. However, light pollution can still be a problem for greenhouse grows, since you can’t simply flick a switch on and off to control the lights as you would indoors. Once again, you are at risk of light pollution from various sources. And because you can’t usually transport a greenhouse, you must find a way to work with what you have.

02.jpg


BLACKOUT SYSTEMS

One way to do this, depending on the size of your greenhouse, is to use blackout systems. This is somewhat of a catch-all for numerous techniques, but it generally involves using a mechanical system that moves a large sheet or some type of awning to block unwanted light. Just like your grow lights, your blackout system should preferably be connected to a timer. This way, you can give your plants an undisturbed 12 hours of night.

AUTOFLOWERING CANNABIS: IF YOU CAN’T ESCAPE LIGHT POLLUTION

Autoflowering cannabis strains, which flower based on age rather than on light-dark cycle, are ideal for those who simply cannot escape the reality of light pollution. Although autoflowering varieties have long been thought of as “inferior” cannabis, the innovative new strains available are impressive specimens that rival photoperiod cultivars. Of course, their biggest benefit is the fact that you don’t have to stay up all night wondering if your plants are being stressed by light pollution. Most autoflowering varieties will vegetate for around 4 weeks, after which they will begin to flower. That’s just what they do.
 
Daily Tips & Tricks
syZ3LYfZ.jpg
By Royal Queen Seeds


The Importance Of The Dark Cycle In Cannabis Cultivation

Cannabis is a short day plant. That’s because the dark cycle dictates the pace of growth for photoperiod marijuana. There are thousands of blogs about lighting and a dearth concerning the dark cycle; so we’ve gone Darth Vader and invite you to join us on the dark side of sinsemilla.

00.jpg


PHOTOSYNTHESIS & RESPIRATION

When cannabis plants, like other green plants, are in the light—be it sunlight or artificial light—they are photosynthesising. This is how they convert light into energy and release oxygen. They are also respiring. That’s right, contrary to the misinformation circulating elsewhere, plants, like all other aerobic organisms, are respiring all the time. We stop when we die, and we die if we stop. Cannabis plants are just producing a surplus of oxygen during the daytime.

During the dark cycle, cannabis plants are not photosynthesising, and continue to respire at a constant rate; they do not just begin to respire when the lights go out. The Calvin Cycle, which is light-independent, processes all that stored up solar energy into carbohydrates. Roots are also respiring, so it’s very important to grow in well-aerated substrates. Take advantage of air pots to keep your medium oxygen-rich.

PHOTOPERIOD CANNABIS

Photoperiod cannabis is sensitive to changes in the hours of daylight it receives. In fact, photoperiod cannabis strains cannot transition from vegetative growth to flowering without long nights. 12 or more hours of darkness is the biological trigger for photoperiod cannabis to bloom. Outdoors, as the nights grow longer incrementally from the summer solstice onward, some strains can even begin flowering when receiving 14 hours of sunlight.

01.jpg


AUTOFLOWERING CANNABIS

Only autoflowering seeds have a predetermined post-germination life cycle. The autoflowering trait is believed to be an adaptation to the almost continuous 24 hours of sunlight unique to Siberia. True autoflowering varieties will start to bloom after about 30 days of vegetative growth.

VEGETATIVE GROWTH: 18-6 OR 24-0?

Photoperiod cannabis strains can essentially be kept in vegetative growth indefinitely, so long as they receive 14+ hours of light per day. The debate on what is the optimal light-dark schedule for vegging cannabis rages on. That being said, most indoor growers will agree that somewhere between 18–24 hours per day is perfect. Outdoor growers get started in spring/summer to make the most of the long days too.

The 24-0 schedule might speed up the vegetative growth process some. The downside is the higher power bills. 18-6 is more common because it’s a closer match for long summer days and a little cheaper. Higher success rates with cuttings on an 18-6 light-dark cycle than those receiving 24-0 is the only substantial difference we have discovered from our own experiments.

02.jpg


ALTERNATIVE: 6-2?

Currently trending is the new 6-2 alternative vegetative growth lighting schedule. Three of these light-dark cycles per 24-hour period means the cannabis plant receives the same total 18 hours of light and 6 hours of darkness as a conventional 18-6. Moreover, this is a viable option as photoperiod cannabis needs a continuous 12 hours of darkness to bloom. The thinking being, those brief 2-hour intervals of darkness give the plant a chance to rest and process CO₂ more effectively. Also, 6-2 avoids light saturation and is potentially a more effective light-dark cycle for photosynthesis.

FLOWERING: 12-12, THE INDOOR GROWER SOP

12-12, the even split of 12 hours of light and 12 hours of darkness, only occurs naturally close to the equator. Indoor growers rely on timers to artificially dial in this light-dark cycle. During the day or lights-on period, two receptors, phytochrome red and phytochrome far-red, are in balance. In darkness, the far-red change into red. It’s the increase in red that triggers flowering. Many growers leave plants in complete darkness for 36 hours before commencing 12-12 to ensure a high phytochrome red ratio.

However, even if you grow a photoperiod strain from seed with a 12-12 schedule, it will take 3–4 weeks before buds begin to develop. Photoperiod cannabis is an annual plant. Marijuana can survive with as few as 8 hours per day, and flowering photoperiod plants can even be re-vegged. The switch can really be flipped back to vegetative growth with the resumption of longer days.

03.jpg


PITCH BLACK, DO NOT DISTURB

Interruptions to sunlight come in the form of clouds. Cannabis plants can handle this. But anything short of a pitch black dark cycle with no light pollution for the duration will suffice for photoperiod strains. Light leaking into the grow-op when the grow lights are off will stress plants and disrupt flowering. This can stress a female plant into an intersex plant. Street lighting can confuse outdoor photoperiod cannabis plants and prevent them from flowering. Only a green bulb can be used if you must tend to plants or enter the garden during the dark cycle.

Grow tents and grow rooms need to be checked for cracks and tears. Greenhouses can be covered to make sure nighttime is completely dark as long as it needs to be. It doesn’t take much to patch a hole or buy a light-proof tarp. But interruptions to the dark cycle during flowering could cost you a whole harvest.

DO AUTOFLOWERING CANNABIS PLANTS NEED A DARK CYCLE?

The short answer is yes with an “if”, and no with a “but”. If you want the highest potency and maximum yield, we suggest adopting either an 18-6 or 20-4 light-dark cycle. But should you run lights 24-0 indoors, your plants and all of your equipment like fans will be pushed to the limit as well. So far, 24-0 auto crops have failed to outperform those cultivated with dark cycles of 4–6 hours. There really is power on the dark side of the force.
 
Daily Tips & Tricks
syZ3LYfZ.jpg
By Royal Queen Seeds


Boron Deficiency In Cannabis Plants

Modern cannabis nutrients perform very well for pretty much everyone. If things do go wrong and your marijuana looks sick, it could be a boron deficiency. Find out the basics about deficiencies in the cannabis plant from the pros at RQS.

00.jpg
HOW TO IDENTIFY?

Boron is an essential micronutrient in all plants. It supplies structural integrity for cell walls, helps maintain the plasma membrane and promotes the health of other metabolic pathways. Insoluble boron plays a major role in plant integrity. Soluble boron is more likely the culprit for overdoses; however, soluble boron is the source for insoluble boron used in plant cells.

Boron is fixed once it is taken up by the plant, so a boron deficiency only occurs in new growth. Nitrogen, calcium and other essential plant nutrients work in concert with boron to ensure plant health. Plants may display a number of deficiency symptoms if there is a lack of boron. For example, grey or brown dry spots may occur that look similar to signs of a calcium deficiency, only the spots are larger. Similarly, purple stems can be a symptom of cold, nitrogen toxicity or boron deficiency. Only with boron, stems become much more soft.

A boron deficiency can drastically affect the quality of your plants. The follow may result from such an occurrence:
  • Inhibits turgor. Plants will lose their lushness. This is easily observed in marijuana as the plant is universally admired for vibrant growth.
  • Reduces fertility. Less pollen is produced, which also encourages sterility. Calyxes become underdeveloped and bracts, which are modified leaves, will show symptoms such as small, dead, brown spots.
  • Affects vegetative and reproductive growth. Overall growth at all stages can be affected. Vegetation is stunted and growth is slowed. Flower development, both male and female, is severely compromised.
  • Can kill the meristems. These are plant tissues which contain undifferentiated cells that are essential for plant growth.
01.jpg


SYMPTOMS

Boron deficiencies usually occur when a plant is underwatered or subjected to low humidity. Boron deficiencies can mimic calcium deficiencies as both elements rely on each other to maintain overall plant health.

The following are symptoms of boron deficiencies:
  • New vegetative growth that is twisted and burnt unfolds and expands more slowly. New growth eventually dies and falls off, effectively topping the plant. New side shoots lack vigour, curl and turn grey or brown.
  • New growth is thick and the tips seem clustered, rather than expanding and growing taller. The primary tip leaf cluster may be vivid green.
  • Sugar leaves will no longer "reach for the light." Because boron is essential for cell strength, the whole plant will eventually droop and collapse instead of fall over.
  • Leaf stems and branches appear soft and lacklustre and may even turn purple. Essential metabolic functions are interrupted with a boron deficiency and the whole plant suffers.
  • Slowed root growth. Eventually, main roots will die off and secondary roots will be stunted and swollen. This makes them prone to bacterial infections and rot.
  • Small brown spots surrounded by dried tissue expand across the whole leaf. Eventually, the leaf will crumble away.
  • Main stalks and branches appear rough and brittle and can become hollow.
02.jpg

PREVENTION

To help prevent a boron deficiency:

  • Make sure plants do not dry out too often.
  • Don't over-fertilise! This will cause nutrient lockout.
  • Make sure the humidity is above 25%. A humidifier or dehumidifier is always a good idea when growing indoors.
  • Always use cannabis-specific nutrients with the necessary cross-section of elements.
  • Soil growers should use a comprehensive, well drained soil.

TREATMENT

In the unlikely event of a boron deficiency:

  • Apply a mix of 1 teaspoon boric acid to 4 litres of water to the affected plants. Results will be noticeable overnight.
  • When plants show positive reactions, flush with clean water or a commercial marijuana tonic and begin normal nutrient routine.
Boron is found in most tap water, so those growers using very filtered or RO water are most at risk. With all deficiencies, make sure you have tested the basics first. That means water quality. Test the pH. Depending on how you measure dissolved solids, check the EC or ppm. These two primary water conditions can imitate many deficiencies in the cannabis plant. Once you are satisfied with your water, it is time to start hunting for the real culprits.
 
Daily Tips & Tricks
syZ3LYfZ.jpg
By Royal Queen Seeds


Calcium Deficiency In Cannabis Plants

Cannabis relies on the complex interaction of many compounds to ensure healthy growth. Calcium deficiency can slow vegetative and reproductive growth. Identifying and correcting issues like this is all part of becoming a master grower.

00.jpg


HOW TO IDENTIFY?

Calcium is an essential compound used to aid plant growth all throughout its life. It is necessary for proper germination and early root development, right on through to flowering and healthy maturation. Calcium helps ensure cell vitality and strong plant formation. It also helps maintain healthy root growth, protein and vitamin synthesis and the proper absorption of potassium.

Calcium is necessary for transpiration and nutrient uptake. It is a requisite for photosynthesis and helps plants resist heat stress. It guarantees the healthy functioning of hair roots and leaf stomata. Calcium is semi-fixed. It remains in the cell walls until there is extreme deficiency, in which case it becomes soluble again. This can be observed when leaves in the middle of the plant and older growth begin to be affected.

A calcium deficiency in cannabis plants is less common in outdoor soil grows than hydroponic or neutral-medium indoor grows. A calcium deficiency will:
  • Inhibit nutrient uptake at the roots. Calcium aids in the decomposition of organic matter at the root zone, facilitating nutrient absorption.
  • Impede flower growth during peak florescence. Cannabis uses extra calcium in the middle of the flowering process. Depending on species, this can be from three to six weeks into flowering.
  • Cause nutrient lockout. Poor functioning roots means poor nutrient uptake. The plant may display several types of nutrient problems when this happens.
  • Cause plants to lose vitality and wilt. Calcium is essential for general plant health and stress resistance.

01.jpg


CALCIUM DEFICIENCY SYMPTOMS

Calcium acts in concert with other important compounds to ensure overall plant health and vitality. A lack of calcium can mimic other deficiencies since the plant's ability to maintain essential biological functions is compromised.

The following represent symptoms of a calcium deficiency:
  • New growth at the top of the plant is primarily affected.
  • Young growth slows, new leaves curl. Fresh growth is twisted and dies off quickly. Young shoots are purple or yellow.
  • The root system is compromised so fewer nutrients will be absorbed. Overall growth slows and plants lose their lustre.
  • Flower growth severely affected, especially at peak florescence. Young calyces are crinkled, distorted and don't fill out.
  • Large, light brown necrotic spots form on leaves. Leaf edges mottle and turn brown. Leaves become yellow as the problem advances.
  • Branches are weak and break easily. Stalks may become hollow and rot inside.
  • Plants do not respond well to heat.
  • Roots become brown and are susceptible to slimy root rot and other pathogens.

CALCIUM & OUTDOOR GROWING

Growing outdoors in soil generally allows for a greater margin of error with many nutrient problems. Unmodified acidic soils like those found in pinewoods can leach calcium, but proper attention can prevent calcium issues. Modify the soil with garden lime, dolomite, powdered bones, crushed eggshells or fish meal. Good quality compost is always a must.

There is little chance of a calcium deficiency growing outdoors in pots or growbags. Contemporary soil mixes usually have a complete spectrum of vital nutrients for the life of the plant. Organic growers will have no-till winter companion plants rehabilitating the soil for the new season.

Tomatoes are another plant notorious for their calcium demands. An old gardener’s trick is to dig a hole deeper than what is needed for the transplant. Put two fish heads and a palmful of garden lime in the bottom and water in. Backfill with soil, then plant the seedling as normal. Your plants will boom, then bloom.

02.jpg


CALCIUM & INDOOR GROWING

Soil: Avoid calcium deficiency from the outset with good soil selection. Make your own soil or buy a commercial mix with plenty of calcium for the life of the plant. If on that rare occasion a calcium deficiency is identified, there are a number of ways to rectify the problem:
  1. Add dolomitic lime or garden lime and water in. This will also help stabilise pH in the long-term.
  2. Add a commercial calcium-magnesium solution, calcium acetate or calcium-magnesium acetate for a rapid calcium boost.
  3. Add liquid calcium, liquid lime or a teaspoon of hydrated lime dissolved in four litres of water.
  4. Check pH after treatment to make sure it is still between 6.2 and 7.
Neutral mediums & hydro: Calcium problems are far more likely when variables in nutrients and the grow environment aren't buffered by active soil. Most water contains calcium, so little is added to commercial nutrient solutions. If a deficiency develops:
  1. Make a mixture of one teaspoon hydrated lime to four litres of water and water in.
  2. Use a commercial calcium booster or liquid lime.
If your water is 150ppm (EC 0.3), then there is little risk of calcium deficiency. Using unmodified RO or distilled water can strip calcium from plants. Before making a nutrient solution, add two parts calcium to one part magnesium to the water until the ppm reading is at least 150-200 (EC 0.3-0.4).

Water is one of the most important factors when growing cannabis. Always check the water before making any decisions. Fluctuations in pH can mimic many plant deficiencies and is the primary problem where plant health is concerned. Bad pH requires flushing the plants with clean water.
 
Back
Top Bottom