How I Train
Previously I've done tutorials around the following:
Germinating -
Topping -
Transplanting
I thought it made sense to put together some of my thoughts around training.
Let me start by saying there’s no right way nor wrong way to train. Training is all about what works for you, getting you what you need. With that in mind, it’s impossible to do it “wrong”. I would only encourage people to experiment and find out what works for them. If someone finds something they think might work better, I would encourage sharing. We all get better by experimenting and sharing our outcomes, and no one is ever in the wrong when they’re trying something new in the benefit of themselves and perhaps even the community!
This guide, then, is the summary of my experimentation and what works for me. I’ve taken 3 sets of plants through veg and tried all sorts of training methods to find out what I like best. This distils that experimentation down into what I’ve had my best success with.
Also,
WARNING that there are some old shots from previous grows with blurple light peppered in here. If this is a problem, let me know (PM is fine) and I'll resave and reupload them without the blurple. It'll take me some extra time and I wanted to get this up, but I want anyone and everyone to be able to read this as needed.
Training goals
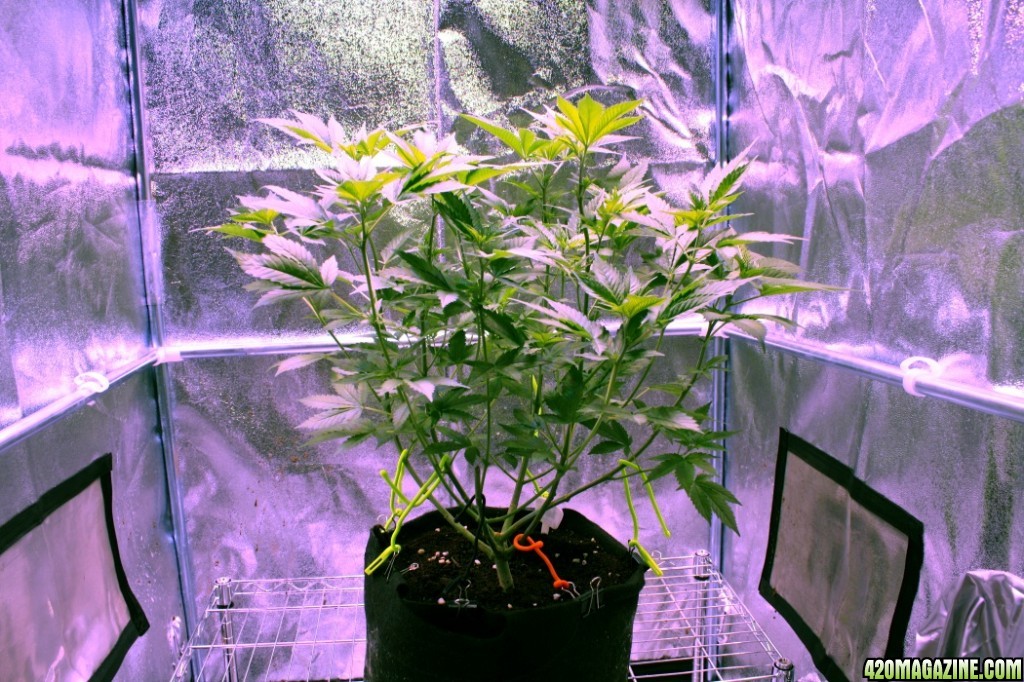
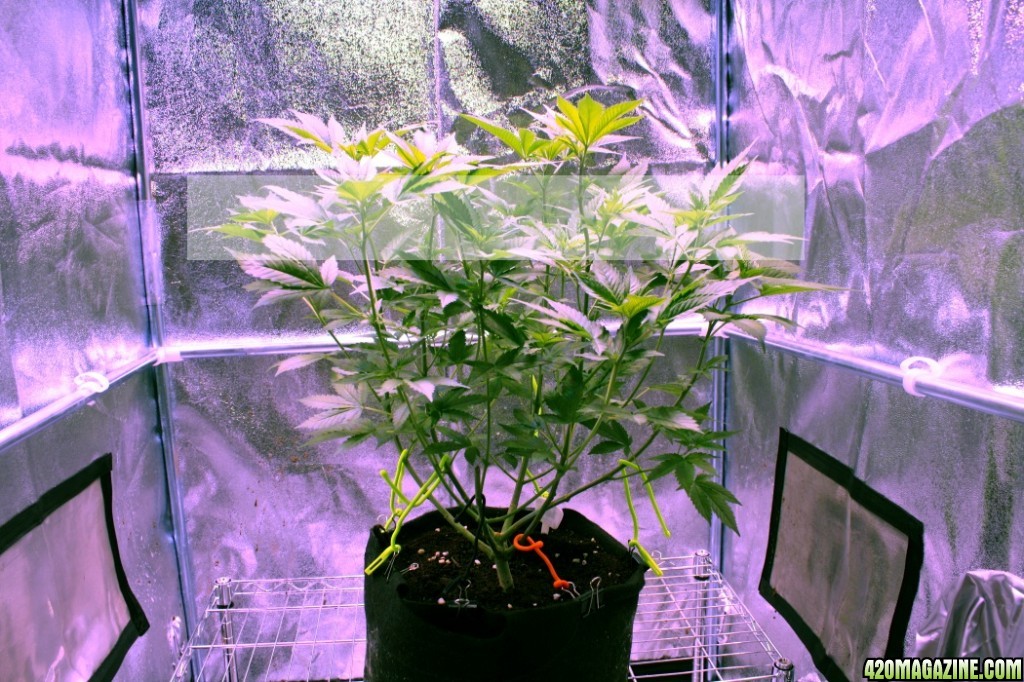
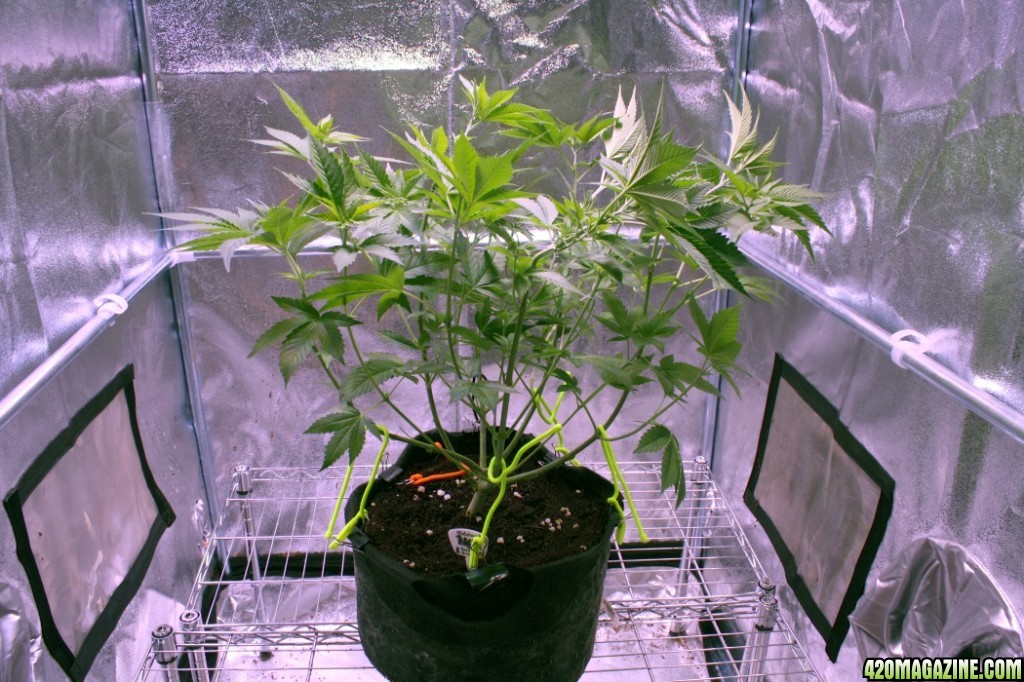
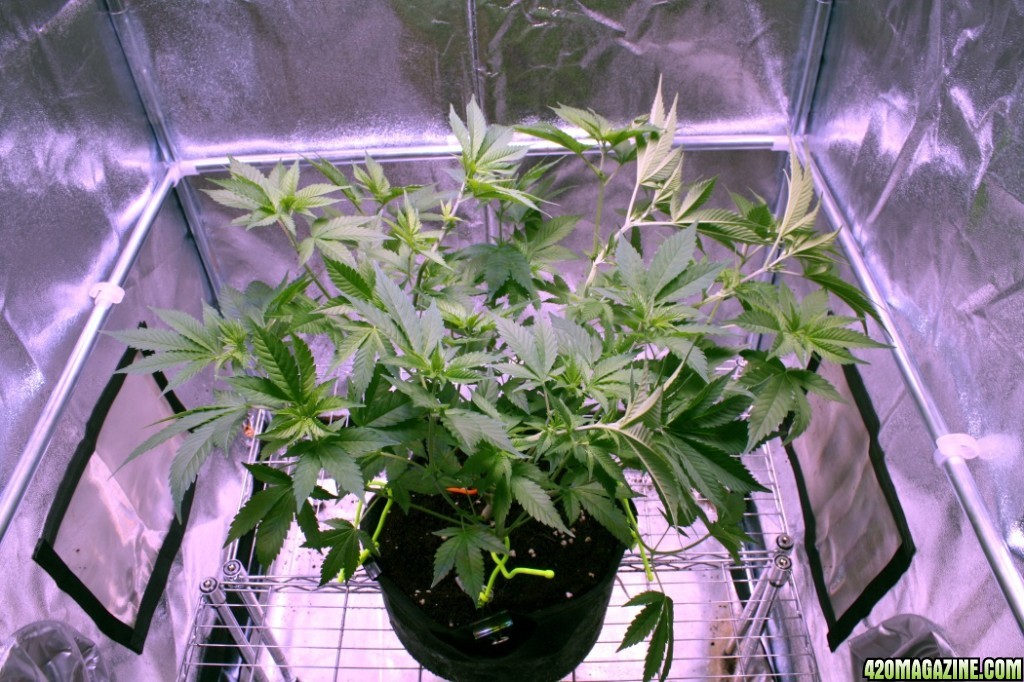
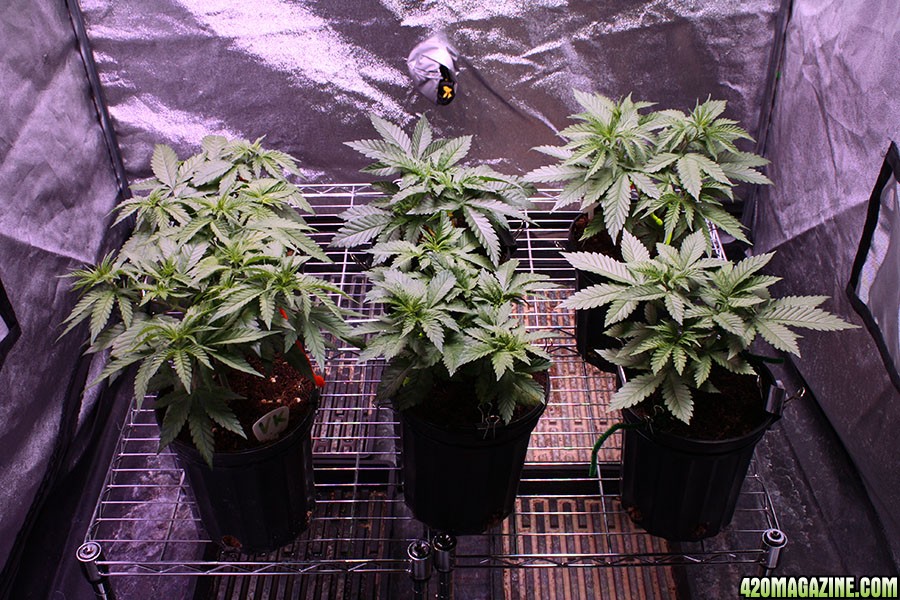
I have found that the best way to maximize the quality of my grow is to prioritize getting tops to the canopy, and to minimize lower growth where the light can’t hit and have the same effect. As such, my overall goal is maximizing tops to the canopy, and my methods are intended to support that goal. I could use a SCROG, but I like the easier access and ability to move things around that I retain by not using a net. Ultimately I want my plant to be approximately bowl shaped, with stems radiating out from the main trunk and up to the canopy. I think of it like a menorah (hopefully that’s not offensive).
This Royal Critical from the fall should give a good idea of my desired shape going into flower.
To achieve this shape, my preferred method is a combination of topping, LST, and defoliation I’ll describe below.
Training Methods I Use
Topping: In my experience, topping is the best way to get the shape I prefer, with many tops in the canopy. That’s the why. I touch on when and how I top in the timeline below and in the guide I posted previously (scroll up - 420mag doesn't allow for nice inline links, so I won't insert it again!).
LST by hand: Before the seedlings are mature enough to use actual training tools, I give them gentle LST using my fingertips. If a growth tip is large enough to be manipulated but still too delicate for ties, I’ll manipulate it to a certain direction (usually gently pushing down and away from the main stem, towards the fan beneath it). I do this gently and repeatedly. It’s not that I’m trying to hold it into place as it grows, which is what tying it down does, but rather I’m trying to give it early signals as to the direction it’s new growth should grow. I find this surprisingly effective in helping get the shape I want - it’s as if it starts the growth in the direction I like and sets me up for formal training. A perfect example of when I find this useful is immediately after topping - I find the top remaining node can sometimes have its tops shoot straight up and quickly get woody, making them rigid and easy to snap. I’ll start this gentle LST within a day of the topping, and this will prevent or limit that effect.
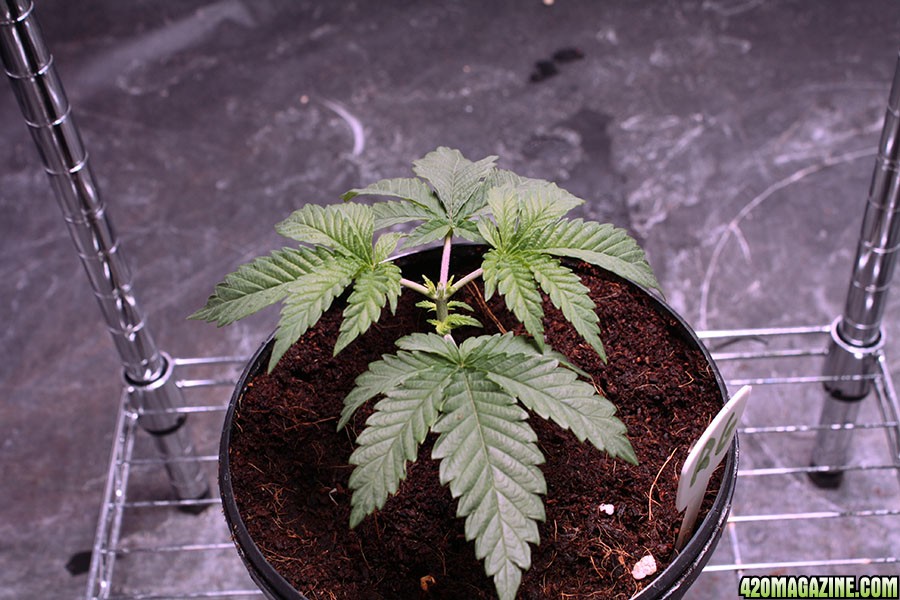
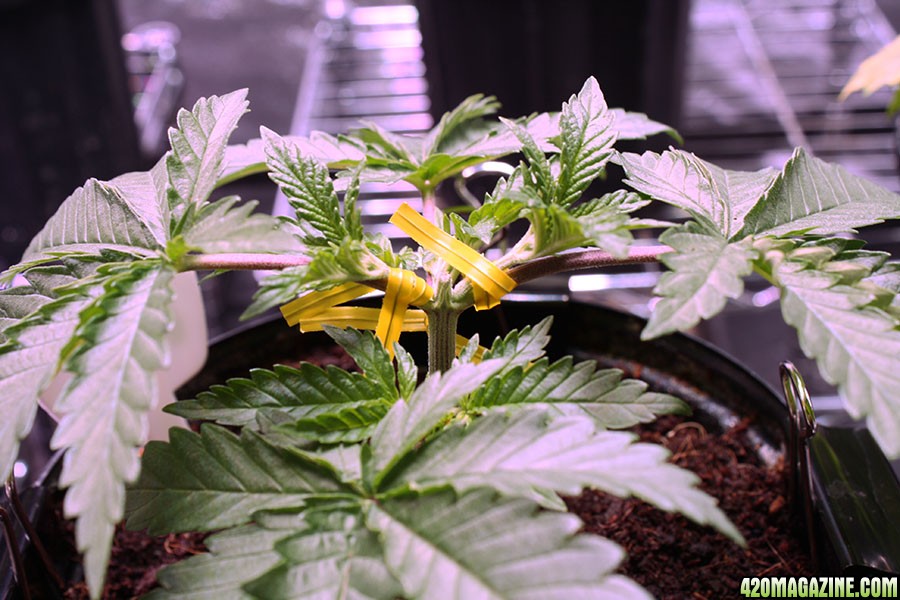
This Royal Gorilla is too immature yet in its growth for me to manipulate - even touching with my fingers, I'd better be careful. As it starts to recover, I'll manipulate with my fingers until it's ready for ties.
LST using tools: Once the seedling is at the point where it can handle formal LST with tools, usually around its 4th week, I’ll start in with tying it up to get the shape I’m looking for. This is the real training work that gives it the shape I’m looking for in time. I’ve described more about the tools and timeline below, but effectively in my case this comes around the halfway point or at the end of the plant’s 4th week, once it has recovered from topping and transplant. Once I know the plant is growing well I do not hesitate to start training. In fact, at this point, I’ll check my training every day so that I adjust to changes with the plant. The fast growth means LST should be reset frequently.
The Royal Gorilla above was ready for ties at about the 18th or 19th, which was 24/25V. I'll show more shots of the plants with various ties on further down rather than repeating them here. They should illustrate what is ready for what type of training.
Defoliation: I’m a strong believer in slow, gradual defoliation from the point at which the plant is ready, instead of large rounds of defoliation that stress the plant. This is a preference thing from my experience doing both and I certainly wouldn’t fault anyone for taking a different approach from me. But in my experience, gradual defoliation limits stress on the plant, while also allowing for tops that might not otherwise get the light they need get light on them early, improving their chances to be viable tops in my canopy.
I'll likely do a separate post about defoliation in time to better illustrate how I defoliate. It's worth calling out on its own as it's a scary topic for a first time grower.
Higher stress training by hand: I’ve only used supercropping to a minimal extent, but I often use gentler bends of the stems to slow their individual growth and keep them in line with the canopy - like “supercropping lite”. Supercropping looks for you to bend until you essentially break the membrane without snapping the branch. It then diverts resources to recover and takes on a new shape. I don’t bend to the point of the break when I do this type of training. Once my canopy is established, some time around week 5, I’ll then switch to maintaining the canopy. My ties can generally come off at this point. From here, I’ll be moving stems around and bending them down and to the sides to shape the canopy as I like it. Day over day the bent stems will have less downtime and recover quicker, meaning less overall stress on the plant but still getting the effect of the individual stems coming into line with the canopy. The end result should be an even canopy but continued strong, mature growth of the plant with minimal stress.
Here are a few shots of the Violator Kush I grew in the fall to illustrate. This is pulled directly out of my last journal but pasted in here in its entirety to illustrate what I mean. Here's where we start, with a Violator Kush plant that didn't get as much training as I'd like and that I was hoping to improve before flip.
I thought as well that I could improve the canopy a little. I'll illustrate my thinking here. I saw the canopy at two levels. A top level…
And a lower level…
So, with some gentle but firm bending of the higher tops, I was able to make the canopy become more uniform.
These tops will recover before lights out at 2:00, but the process of bending will slow their growth enough, and start them from a slightly lower point, that it gives the canopy below better exposure to the light and brings them in line with one another.
Tools I Use
These first few bulleted items are my training workhorses. I’ve included some other training tools below as well. In all cases, be careful not to cut into and damage your plants, or to put your training tool over new growth, inadvertently stunting growth. I like to put the tether points directly below a node, where it will hold the shape well for the stem but not interfere with growth of the node.
Fold back clips: These are the anchors of my training regimen. I love these because they’re pot-independent - I can use them on any style of pot without issues, whether fabric or plastic. I attach these to the sides of the pot and then use them to anchor the ties I use for training. I’ve tried putting all kinds of training implements directly into the coco, but they simply do not hold into the correct position when directly in coco. They might seem snug when you first set them in wet coco, but once that coco dries a little, they aren’t as nicely fit as they were initially, and your training doesn’t stay in the position you intended. Fold back clips remove that potential completely and guarantee your toes hold their position, and can be used with virtually any type of ties.
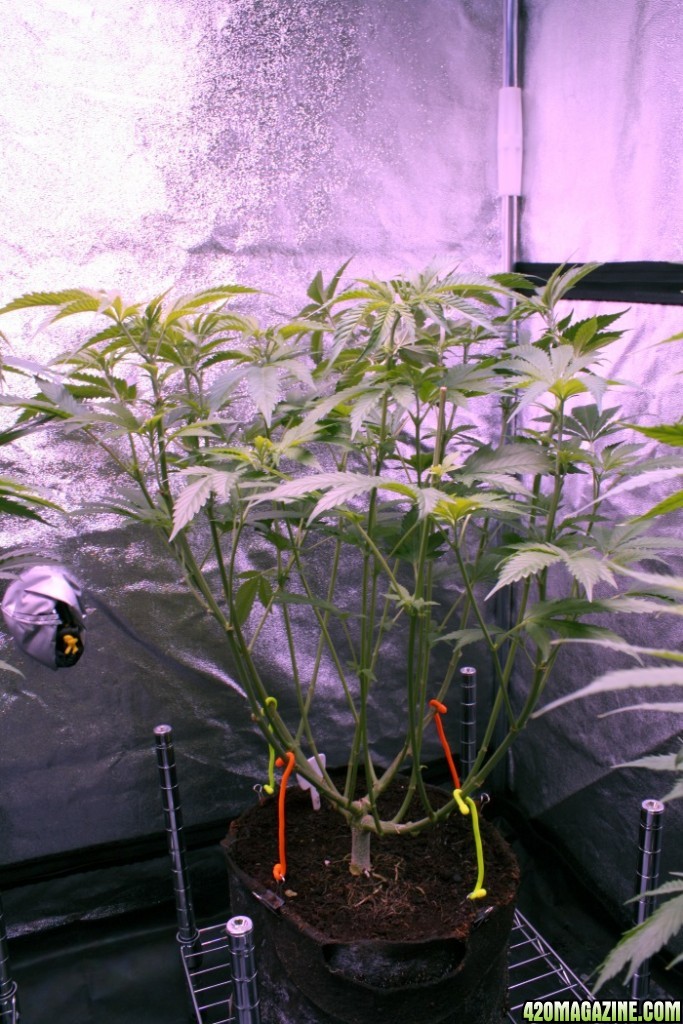
This White Widow training shot illustrates well my use of fold back clips - I position them where I want then thread my ties through for a mobile yet stable base for my training.
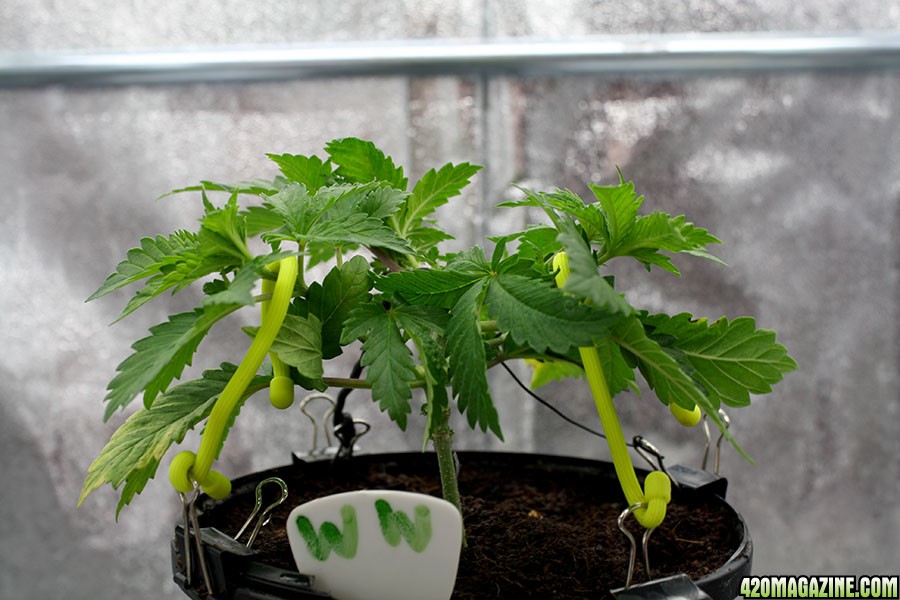
Sandwich wraps: These smaller wire ties are ideal for attaching growth to fan leaves. I often use this as the first training step on plants, as it’s a great way to prevent a plant that gets woody quickly from shooting 2 woody stems straight up after being topped, without putting too much strain on the plant itself.
This example is that same Royal Gorilla from above a couple of days later, when I'm more comfortable attaching ties to the new growth but nervous about overdoing it.
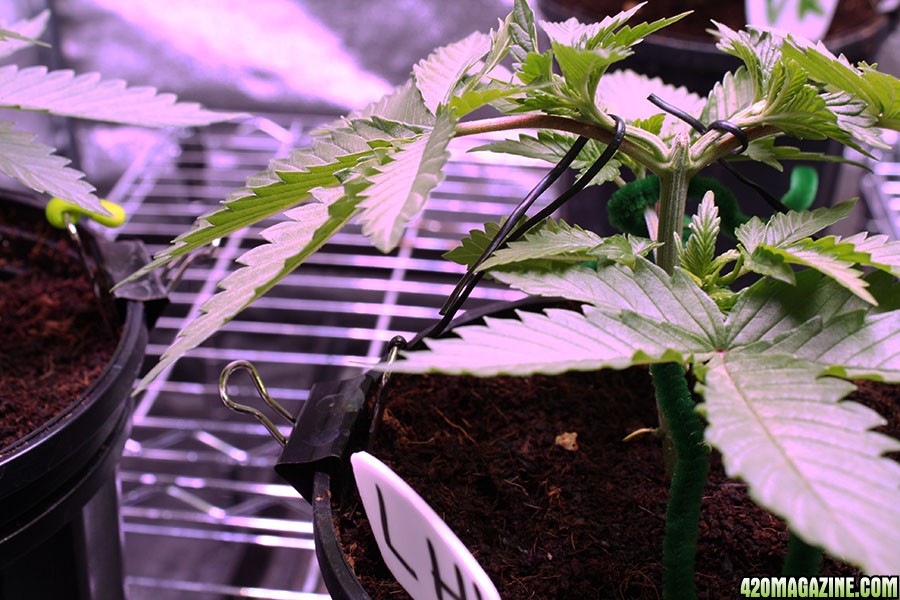
Plastic wire ties: I’m referring here to the type of ties you get on plastic baggies when you buy a new piece of shiny equipment or toy. I’ve been collecting these for the last year+ for use in training. I like these because they hold their form well on soft, new growth, but aren’t hard or heavy, meaning less training mistakes on sensitive newer growth. I use these as the first training tool on most plants.
In this shot, my Liberty Haze 1 is ready for training and rather than going with the sandwich ties propped onto the fans, I go straight to the wire ties. It's a judgment call for me. I've shown how the wire tie connects to the fold back clip to stay in place.
Standard wire ties: By these I mean store-bought wire ties, heavier ties covered in rubber or plastic. I buy mine at Lee Valley Tools, which should be useful to any Canadians reading, but I’m sure there are options at home hardware retailers as well. These are heavier both in weight and in wire density, meaning they hold a shape far better, but are far more potentially damaging to the plant. As such they should be used with caution. My #1 tip - get the wire into the shape you want BEFORE putting it around plant growth. If you put it around and stem and then bend it into the shape you like, a simple mistake could damage the plant significantly.
In this first example, I've put them on Liberty Haze 2 on the top, given that the top branches are gaining some thickness. Be careful doing this, but given that these ties are superior, you'll find once you're comfortable your tend to go with the better ties.
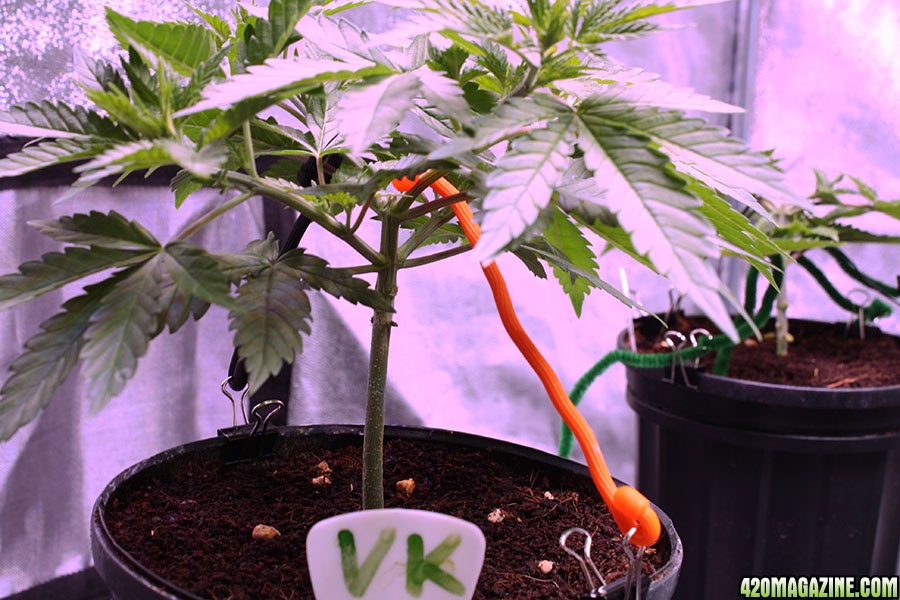
This second shot shows a far more mature Violator Kush with a tie tethered on. This maturity level is ideal for these ties. I'm using it to keep an already woody, stiff stem angled down so that it sets in that position.
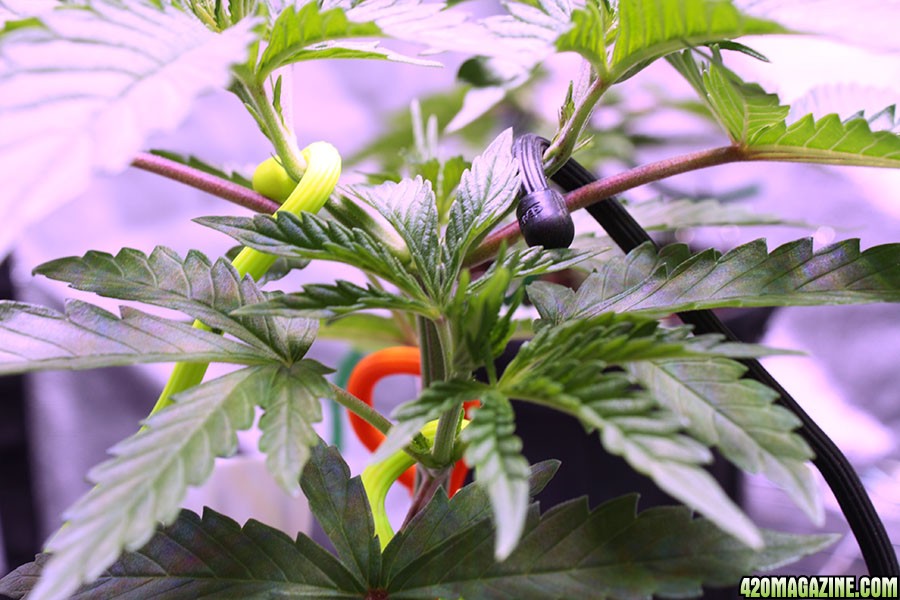
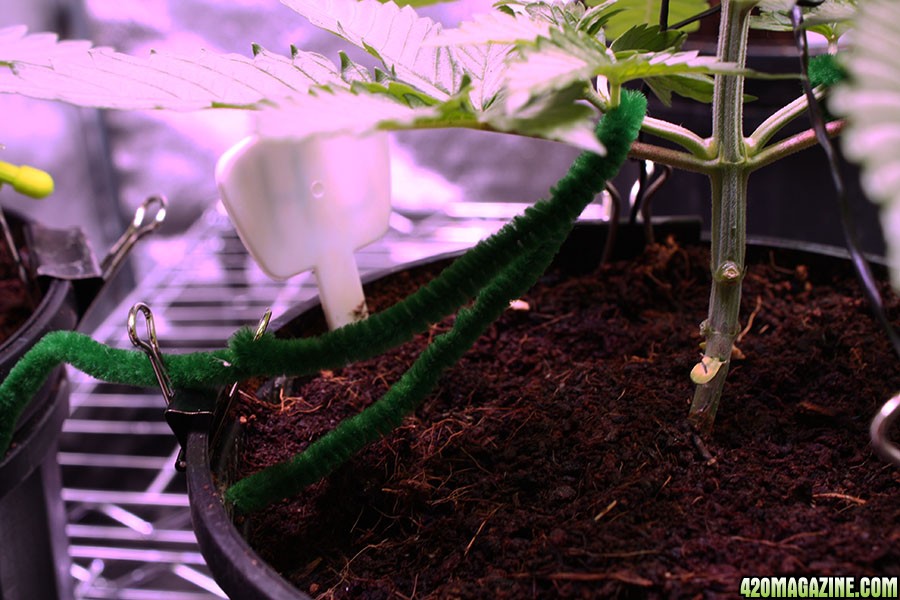
Pipe cleaners: These are surprisingly versatile. They’re a bit more of a pain than the small plastic ties because of the length, and because the fibres catch dust and particles from the pot and get dirty. But similarly to those small ties they’re fairly gentle on the plant and well suited to work with a less mature plant. They’re also easily bent and anchored and can be used on more mature growth in a pinch. I just worry about the wire cutting into the plant if left too long.
Here's them in use on my Liberty Haze.
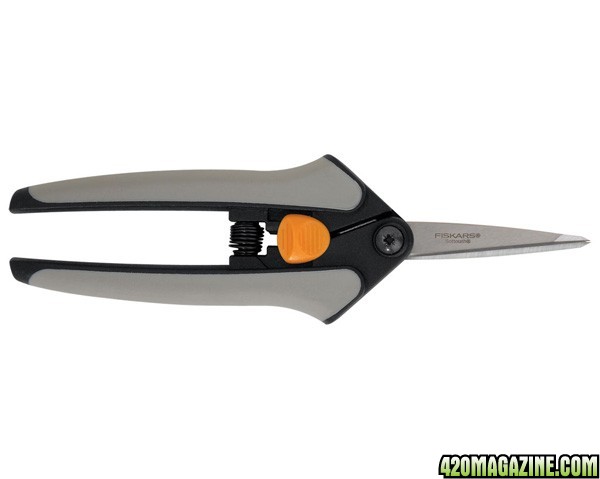
Trimming shears: I use the Fiskars 9921 Pruning Shear to trim my plants when I harvest, and I use the same shears for work in veg - specifically, topping and defoliation. These are a vital tool in the overall grow from start to finish. Any scissors should do, but these are sharp, precise, and easy to use. And they’re great for trimming buds because they aren’t strenuous to use over time. But we’ll come back to trimming later.
I’ve tried other tools with less frequency or in some cases less success.
Bamboo shoots are great for giving something onto which to anchor since they can be pushed deep into the coco. The problem with something like wire ties inserted superficially into coco is that they don’t hold their place. I’d use them for late flower for support, but would look to
plant yo-yos for the same effect next time.
Plant ties (soft plastic ribbon) can be convenient for tying branches to one another or onto bamboo without damaging them, but otherwise I found their usage limited. Sandwich wraps were in my experience easier to put into position as no tying was required.
Training Timeline
This is a rough guide to when I train. This works for the timing I like, but another timing might work better for you. I’d suggest using this as a guideline only and experimenting to see what works best for you.
Week 0-3 - Let the seedling establish
In my experience it takes about 3 weeks for a seedling to be ready for next steps in training. During those first 3 weeks I focus on giving my plant everything it needs to be growing quickly. Your goal quite simply is a fast start, setting you up for success in training with fast, healthy growth.
Week 3 completion - Top the seedling
See my previously linked guide for more details. Basically, I’m looking for a plant that is showing fast growth and has established 5-6 nodes. You’ll have your bottom single fans, the first set of true leaves the seed produced (not the tiny pair of cotyledons - these should have new tops growing at their base) and the second set, likely 3-point fans and their associated new tops. Then you’ll have 3-4 nodes of alternating growth above those. I like to clean off those first 2 nodes, leave nodes 3 and 4 (both the fans and the new tops) and top above node 4.
Week 3 - Pot up
You can do this before topping if you prefer. I like to do it after I’ve topped, so that once transplanted the roots are off to the races in their new homes. I wait a couple of days after topping when it’s clear the plant is thriving again. Better to wait too long and transplant a plant itching for more space than too early and need more recovery time for a plant that isn’t ready.
Week 4 - Start training
I look at it in stages, according to how I’ve laid out my use of ties. Too immature, I’ll use my hands only. Mature enough for ties, I’ll start with the smallest wire ties, and move up accordingly.
Week 5 - Adaptation
Different plants will respond differently, so being flexible in how you train and envisioning the end goal is important. Some plants might need their ties adjusted daily as new growth comes in. My Liberty Haze is a good example of this - each day the ties need to be moved to be placed correctly once again. Others might even be able to have ties removed. Violator Kush grows very straight once trained and once the direction was set, didn’t need its ties. I also incorporate defoliation as needed. Envisioning the end goal is very helpful for making defoliation decisions. I tend to keep a few things in mind - is this fan leaf blocking new growth that will reach the canopy? If yes, then it should probably go. Will this fan leaf or top reach the canopy itself? If not, then it should probably go. If you know what you want your canopy to look like, and this is tough to envision your first time through, your defoliation decisions are all about achieving that canopy. Perhaps I’ll do a defoliation guide to help.
Some additional questions?
When should I stop training?
Stop when your goals are met. If you have the shape you want, it’s time to stop. But never feel like you have to stop and put it aside. As long as the plant is pushing out veg growth, until approximately flower week 3 finishes, you can use most training safely. You might see something not quite right and make a small point in time adjustment to fix it. Moving branches to expose light, using ties to hold positions in place, etc. - this type of non-stressful training can occur at any time.
Can I train in flower?
Yes! But be careful. Veg growth will effectively end once week 3 closes. Any training method requiring recovery via new veg growth is possible as long as that veg growth continues, but once it stops, your window has closed. Take supercropping as an example. Supercropping is effective during stretch (first 21 days of flower approximately). But try supercropping after stretch is done, and you might end up with a broken stem that doesn’t recover.
What should I watch out for?
Pushing too hard on delicate stems. The stems can take a lot of abuse but there’s a fine line. Always push into position with your fingers first so that you have tactile feedback, and put training implements into place rather than pushing down using your training implement (which has no tactile feedback). If ever in doubt just wait.
Leaving ties in place too long. You’ll get woody branches quicker than you might expect, and those are difficult to train and easier to snap. Be nimble and move the training tools around when you need to, and avoid letting the plant get set into shape earlier than you like.
Defoliating too much at once. When in doubt, stop. If you have a big job, break it up over a series of nights. Defoliation can stop your plant dead in its tracks, so until you have a feel for it, err on the side of too little.
What other training methods would you recommend?
This is my preferred approach. I have tried “standard” topping, to the 3rd node, both with and without cleaning the growth underneath. I’ve tried 4th and all below kept in place. I’ve tried the standard “Christmas tree” without training. I’ve tried topping with minimal LST. I’ve tried training a stem around the pot. And I’ve tried “mainlining” or “manifolding”. My opinion is that working with the 3rd and 4th node is the best approach. Leaving the plant alone doesn’t get the shape I want. Leaving additional growth below node 3 results in weak stems at the canopy with weak growth off of those stems. I felt the energy was better used on stems from the 3rd and 4th node base. Removing the 4th node felt wasteful as it forms a strong node complementary to the 3rd. Mainlining results in good structure, bus is perhaps unnecessarily long in veg, and is difficult with a stretchy plant. Overall, this is the approach I’m most comfortable with based on experience.
As always, if you have any questions about anything I do, please ask and I’ll be happy to help. And if you have feedback or additional comments, feel free to add them or comment on my approach. Remember, what’s right is what works best for you!
 (about the clone shipper thingy parts)
 (about the clone shipper thingy parts)


 how exciting, I'll be interested in the pink Kush as I have a bean! Also the chemdawg, blue dream and the G13-skunk