Cape Mountainside Bay Garden: Transkei Sativa Soil Grow

You definitely can, I buy mine in 25kg bags at the feed store as well lol soak them in water so they swell up, then use a rake to break them up and mix into your soil, BUT, they need about a month to “cook” otherwise as the microbes break them down, they will rob your plant of much needed nitrogen
 
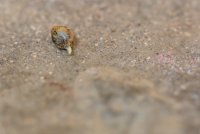
The other two seeds have popped. They are Holly and Polly respectively. Now I have Molly, Holly and Polly. They are in polystyrene cups, in untreated soil.

Germination:
TK1 Molly - 2 days
TK2 Holly - 3 days (faster than Polly)
TK3 Polly - 3 days
 

Attachments

  • DSC_1084-Edit.jpg
    DSC_1084-Edit.jpg
    474.4 KB · Views: 46
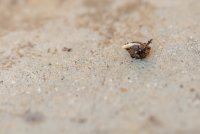
  • DSC_1092-Edit.jpg
    DSC_1092-Edit.jpg
    468.5 KB · Views: 47
Thanks CADBOY. I must figure out how I can get closer to the seed with my lens so that I can fill the frame. I have lens envy when I see some of the photos posted on Instagram, of trichomes and other detail lol.

Try putting a magnifying glass in front of your lenses, it will get much closer. Lots of people do that for photos of tricombs ect
 
Very cool to see you back Carmen!!! :yahoo:
hope you have been keeping well!!
where did your photo of the month title go? Didn’t you win one before you left?
Howdy BLS :) Thanks! Good to see you too.
I don't know what happened with that photo of the month. I spoke to Teddy about it because I wanted to know if I could get my prize, but the sponsors don't ship to SA. Also, I didn't know about it until after I got back from my break, which meant that everyone had moved on by then. I had my nickname changed briefly for security concerns and it was just never meant to be lol. I will enter some new pics as I go, just for the glory :slide:
It’s really good to see your doing well!! Yeah @Dkmg01 was going through the same problem I it’s getting prizes shipped to him. He was able to get the 420 swag from 420 but none of the other prizes...
 
Hello Carman, that's a beautiful retainer wall garden spot. I'm sure you'll get plenty of help with your in the ground grow here. I'm jumping on this train. I'd like to watch your progress. Good luck
 
Hello Carman, that's a beautiful retainer wall garden spot. I'm sure you'll get plenty of help with your in the ground grow here. I'm jumping on this train. I'd like to watch your progress. Good luck
Awesome, Yay! Welcome Jim. Thanks and I hope you enjoy the joy ride. :passitleft:
 
Happy Monday everyone. I have been doing some homework on my ideas for soil amendments. I have discovered that bokashi leachate may be relatively useless at carrying nutes, as the bokashi does not break down the organic matter, but pickles it. Perhaps its only real function is to keep the organic kitchen waste from smelling inside the house. I stand corrected if anyone else has some insight but this is the article I read bokashi processes and nutes.
@CADBOY I did a site search for Mycorrhizae fungus and didn't find a recipe, but I found this, and I want to make the Mycorrhizae before I transplant to the ground. I have time. I need to know how to determine whether or not a plant is infected so that I can harvest it for inoculation. The method here is pretty straightforward How to inoculate seedlings with Mycorrhizae from a nearby plant.
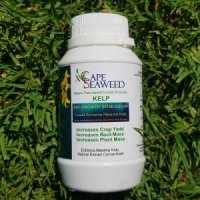
I am thinking of doing the following.... mixing a solution of kelp juice and Lactobascillus to feed 3 times a week, and then feed with a solution of worm castings and chicken manure on the other days. This soil I am working with is dark and loamy, so I am not sure that additional biomass is necessary. What do you think @The Celt?
In other news, the first cotyledons are starting to burst out of the seeds. That makes it 2 / 3 days to germination and 2 days to sprout.
 
Given you are half a world away, and I have never been there, I don‘t know what you would have for natural soils and flora, but there is an easy way to get Mycos and other beneficial micros in your soil.

If you have forests nearby, take a container into the forest with you and gather some soil (handful from different spots), leave litter, roll a fallen tree over so you can access the rot and soil underneath and take a handful of what you find there. Lastly, pull up a few small but older plants (roots and all) and throw them in your bucket too.

All these things will have beneficial: bacteria, fungus, nematodes and some mycorrhiza in it that will inoculate your soil and multiply as they break down the organics. The plants you pull, lay them out to dry. As the roots die, if they have mycorrhizae (which they likely will), it will die with the roots but will form spores before it dies. You can break the dried roots up, put some in your soil and also a bit in each hole before you plant. As the roots from you plant come in contact with these spores they will inoculate the roots.

Most of these micros we add to our soil are easy to get in the wild, but most people either don‘t have access (city folk) or can’t be bothered to go out and collect it :rofl:

On another note, after you harvest your plants, leave the roots in the soil and let them die and decompose there, all the mycorrhizae that had infected your roots will die off forming spores again for the next plant that comes along :)
I am sure I don't need to go far. I will walk up the mountain and do a recce, thank you! :passitleft:
 
Hey, @MrX I have been revisiting my previous journal and I missed sending you an invite to this one, my new journal. I'd be really chuffed if you would join me on my soil journey. My conditions are all changed for this grow. I can't remember what you said needs to happen with borehole water. It was really nice meeting and chatting in my 2019 grow, and I do hope you'll pop in here too :) :passitleft:
 
Note To Self: - Bug Spray with Bicarb
I tried to find my recipe from last season. I had perfected a bug wash. It was quite slimy and I hand washed the foliage whenever there was a problem. I now read that it can be used to prevent bugs too. I think I added Marigold and / or Penny Royal essential oil, chili and onion, olive oil and kasteel. I applied bicarb solution to the leaves separately, but this guide advises mixing the bicarb in with the rest and applying regularly.
 
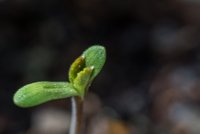
Good morning Molly. Five days from seed to sprout.
Holly and Polly look like they will pop their cotyledons later today or tomorrow.
 

Attachments

  • DSC_1159-2.jpg
    DSC_1159-2.jpg
    270.7 KB · Views: 44
NOTE TO SELF:
I don't have the space or the terrain for Hugelkultur which was a suggestion for my grow. I don't have access to the space or ingredients for making living organic soil (LOS) as per the Clackmas Coots Living Organic Soil Mix (suggestions from @Nunyabiz). I am going to trust that the mountain has made a magical organic fynbos soil, rich in whatever the plants will need. I will possibly add some bokashi bran when I plant, but I need more info. I will inoculate with mycorrhizae harvested from further up the mountain in fynbos roots. I will feed with solutions that contain kelp juice, Lactobacillus, castings and chicken manure, as well as a sprout tea (containing alfalfa), and monitor that. If I need more I will come back to the drawing board for nutes. That soil is dark and loamy and so far it has held water so well that my sprouts have only needed a tablespoon of water each in the styro cups (holes in bottoms to drain) in 3 days. I think that given the fact that the gardens are in the retaining wall on the mountain slope, the rock underneath the soil will be a source of moisture from mountain run-off too. The same water from a borehole will do the rest.

Thoughts please anyone. @Lerugged , I hope you will be around soon as I could really do with your input here. You know our conditions like the back of your hand.

Update on the gals - Molly looks like a pretty 4 prong star, Holly has spread her cotyledons and Polly has popped hers and will open out in the morning I expect.
 
Hahaha I know that feeling!! Or I guess I should say I knew that feeling... hasn’t happened in over 13 years lol
I have the month end blues and my stash is turning to crumbs lol.

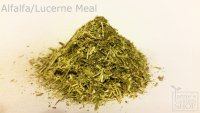
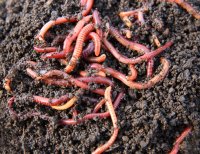
I am also looking at Jamie's Garden Shop online and he has everything I need and the prices are reasonable. Oh, he doesn't have any bokashi, so that I will source elsewhere. @The Celt He has alfalfa meal! So that is back on the list. Please tell me how much I should use per litre of soil, and is this what I must do? Dig my hole for my plant, put a cup (is that the correct amount) of bokashi in the bottom of the hole and then mix the alfalfa in with the natural soil and put it back in to wait for planting. If it needs to cook for a month then will I be ok as the sprouts will probably take a few weeks to be ready to go into the ground? Oh, there is also this. If I use part vermicompost in my soil will it take the place of later needing to feed with a castings solution? Jamie's has most of the usual amendments, so if I need more I can get.
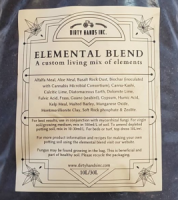
There is also this Elemental Blend.... is it necessary do you think?
With the worm manure, do I still need to use chicken manure or chicken manure solution?

DIY Bokashi Bran - Is this a mission to make? Should I rather buy it ready made?
 

Attachments

  • alfalfa-lucerne-meal.jpg
    alfalfa-lucerne-meal.jpg
    844.6 KB · Views: 45
  • worms.jpg
    worms.jpg
    597.1 KB · Views: 38
  • xCape-kelp-extract-300x300.jpg
    xCape-kelp-extract-300x300.jpg
    75.8 KB · Views: 43
  • elemental-blend-267x300.png
    elemental-blend-267x300.png
    141.7 KB · Views: 44
Back
Top Bottom