IndyRacerNick
Well-Known Member
This is my first grow. I hope this turns out, I totally think I am prepared and welcome you all on my journey towards rewards or experience!
I am growing 2 autoflower strains which makes for a quick grow when compared to photo's.
[table="width: 600, class: grid, align: center"]
[tr]
[td]
 [/td]
[/td]
[/tr]
[/table]
SEED INFORMATION
[table="width: 600, class: grid, align: center"]
[tr]
[td]Seed: Cheese Autoflower Fem (Canuck Seeds)[/td]
[td]Seed: Tutankhamon Autoflower Fem (Pyramid Seeds)[/td]
[/tr]
[tr]
[td]Seed Bank: True North Seed Bank[/td]
[td]Seed Bank: True North Seed Bank[/td]
[/tr]
[tr]
[td]Variety: Indica/Sativa[/td]
[td]Variety: Mostly Indica[/td]
[/tr]
[tr]
[td]Flowering Type: Autoflower[/td]
[td]Flowering Type: Autoflower[/td]
[/tr]
[tr]
[td]Flowering Time: 8 Weeks (estimated)[/td]
[td]Flowering Time: 65 Days (estimated)[/td]
[/tr]
[tr]
[td]Yield: 650 g/600 WTT HPS[/td]
[td]Yield: 550 g/m2[/td]
[/tr]
[tr]
[td]THC: 22%+[/td]
[td]THC: 25%+[/td]
[/tr]
[/table]
[tr]
[td]Grow Tent[/td]
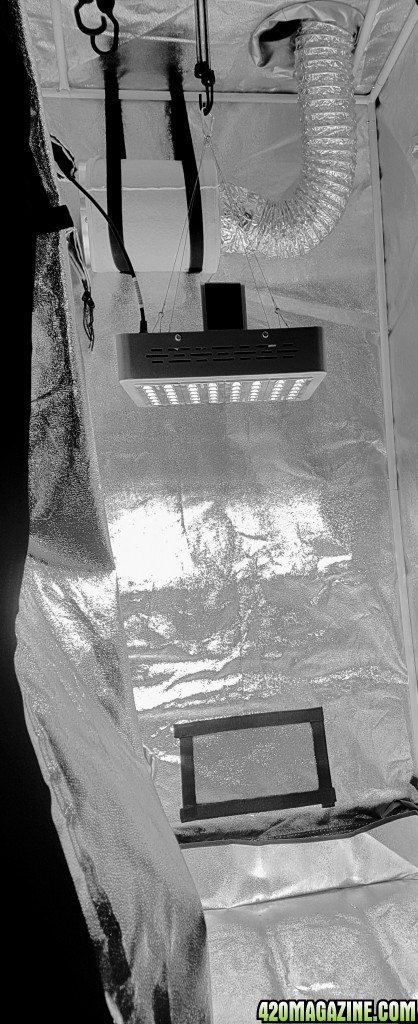
[td]2.5’ X 2.5’ X 5.5’
3 X Bottom Air vents
1 X Top Exhaust/Inline Vent
1 X Hole for feeding cables (Closed off currently)
2 X Air Vents for Exhaust on sides (Designed for lamps)
1 X Door Window[/td]
[/tr]
[tr]
[td]Exhaust[/td]
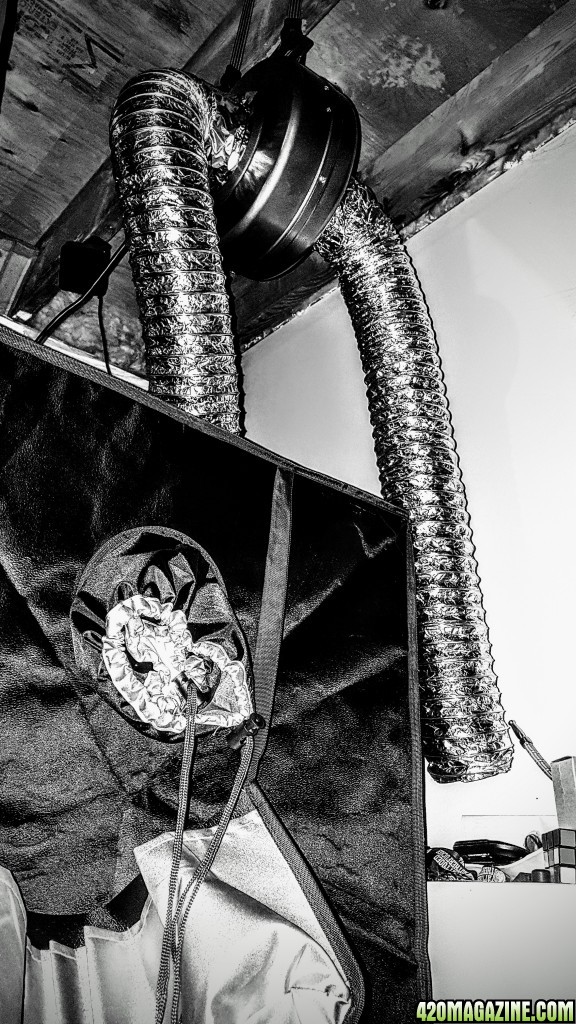
[td]1 X 4” iPower inline exhaust
@175 CFM[/td]
[/tr]
[tr]
[td]Carbon Filter[/td]
[td]iPower Carbon Filter Odor Control
Australian RC 412 Activated Carbon
1050+ IAV Australia Charcoal
Pre Filter Attached
Dimensions: 20.3 x 20.3 x 33 cm
Weight: 2.7 Kg[/td]
[/tr]
[tr]
[td]Fan Speed Adjuster[/td]
[td]Active Air Fan Speed Adjuster for ducting exhaust speed[/td]
[/tr]
[tr]
[td]Light[/td]
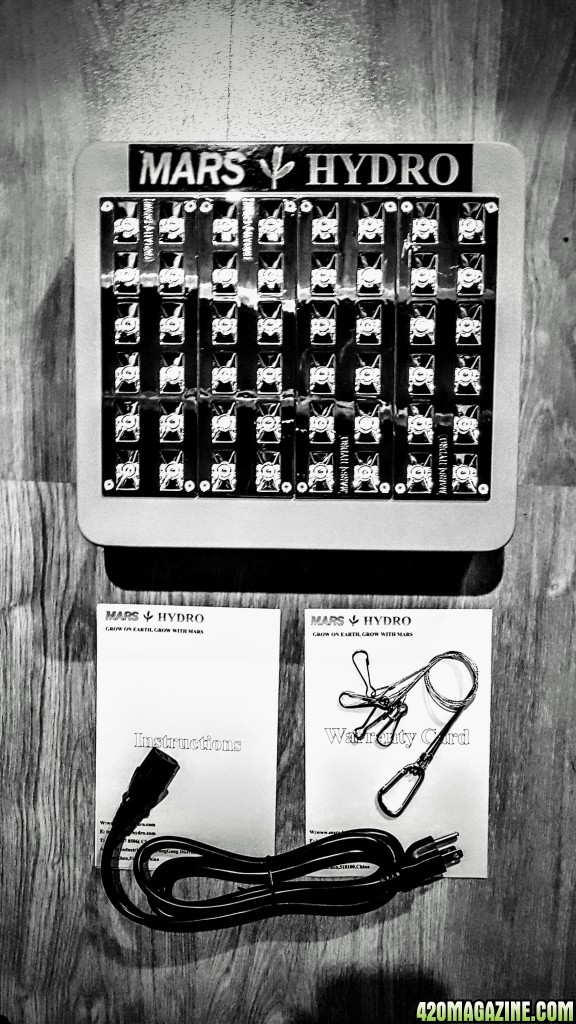
[td]Mars Hydro 240WTT LED light 430nm - 730nm range + 1 Infrared light[/td]
[/tr]
[tr]
[td]Pots Used[/td]
[td]2 X 5 US GAL bucket[/td]
[/tr]
[tr]
[td]Potting Soil[/td]
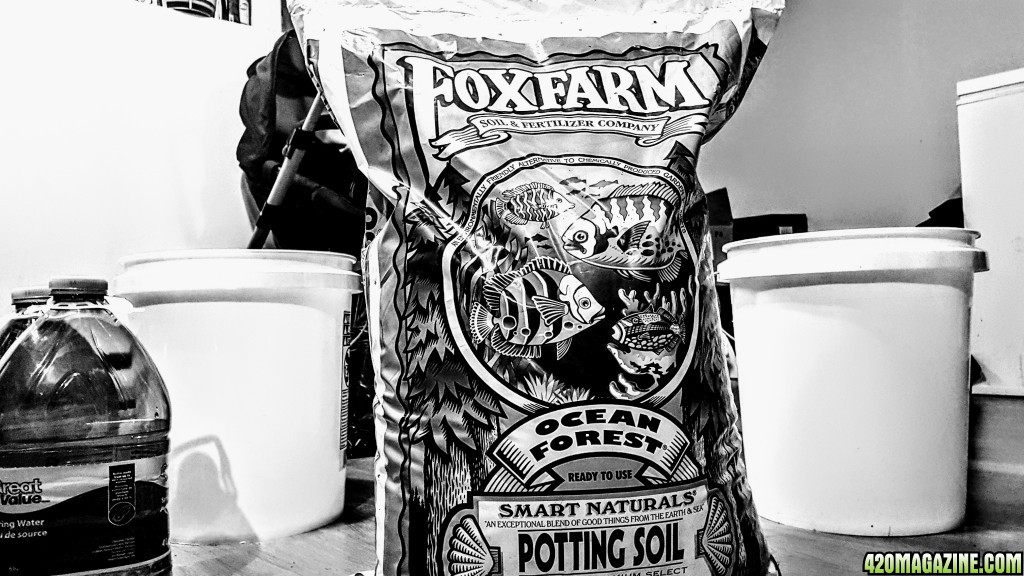
[td]Fox Farms Ocean Forest Potting Soil[/td]
[/tr]
[tr]
[td]Nutents[/td]
[td]Advanced Nutrients pH perfect (Micro, Grow, Bloom) @ 1L per bottle[/td]
[/tr]
[tr]
[td]Water[/td]
[td]4L Jugs of Distilled Ozonated Water (pH @ 7.5 before adjusting)[/td]
[/tr]
[tr]
[td]pH tester[/td]
[td]Etekcity pH Tester[/td]
[/tr]
[tr]
[td]pH Adjuster[/td]
[td]Distilled room temperature White Vinegar[/td]
[/tr]
[tr]
[td]RH/Humidity[/td]
[td]AcuRite Indoor humidity & temperature monitor[/td]
[/tr]
[tr]
[td]Internal Ventilation[/td]
[td]2 X 6” Clip on fans[/td]
[/tr]
[tr]
[td]Light Adjuster[/td]
[td]Rope Ratchet for adjusting the height of LED lights[/td]
[/tr]
[/table]
[table="width: 600, class: grid, align: center"]
[tr]
[td]
 [/td]
[/td]
[td]
 [/td]
[/td]
[td]
 [/td]
[/td]
[/tr]
[/table]
[tr]
[td]Germination Start Date[/td]
[td]April 20, 2017[/td]
[/tr]
[tr]
[td]Germination Start Time[/td]
[td]3:00 PM[/td]
[/tr]
[tr]
[td]Germination Method[/td]
[td]Paper Towel between 2 plates[/td]
[/tr]
[tr]
[td]Germination Method # 2[/td]
[td]Placed seeds in glass of water[/td]
[/tr]
[/table]
[table="width: 600, class: grid, align: center"]
[tr]
[td]
 [/td]
[/td]
[/tr]
[tr]
[td]
 [/td]
[/td]
[/tr]
[tr]
[td]
 [/td]
[/td]
[/tr]
[/table]
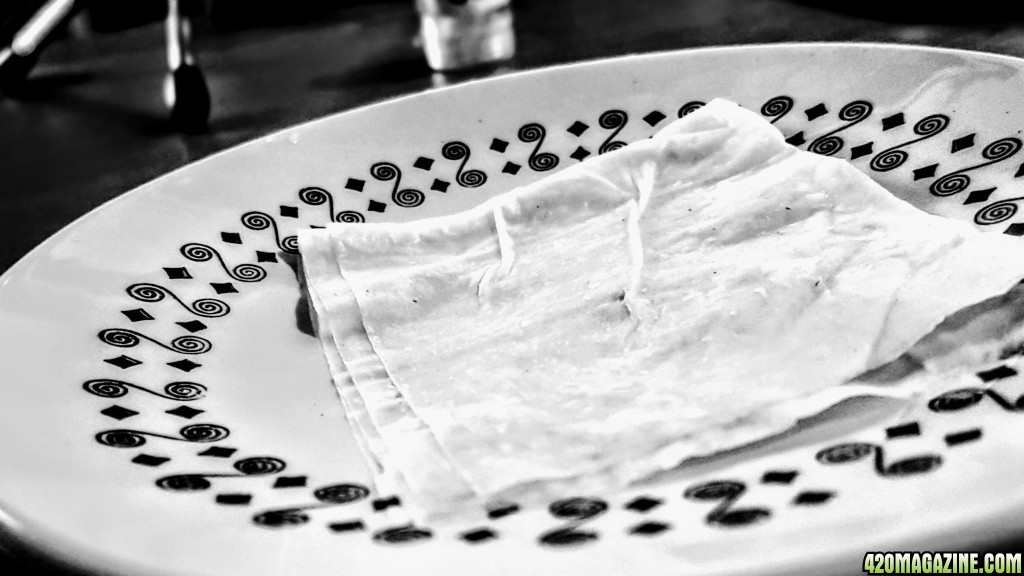
When I started germination, I used the paper towel method. I got a paper towel and made it wet, removed excess water, and ended with a nice and damp cloth. I placed the seed in the middle of the damp cloth and folded it over the top.This was not working or it was working very slow. I had moved the seeds to a glass of water where they sank, and a tap root was exposed, where the seeds were then transferred to moist paper towel again for the final stages of germination
April 20, 2017 - Germination Update
Germination Environment @ 3:00 PM April 19, 2017:
I never liked the temp going below 20 for the germination environment. It recorded the low on my monitor as 19 C with 23% Humidity. I have adjusted the germination environment 6 hours ago (4:00PM) and with the changes both conditions increased by 5.
April 20, 2017 - Germination Update
Current Germination Environment @ 10:12PM April 20, 2017
Current Germination Environment @ 1:30PM April 21, 2017
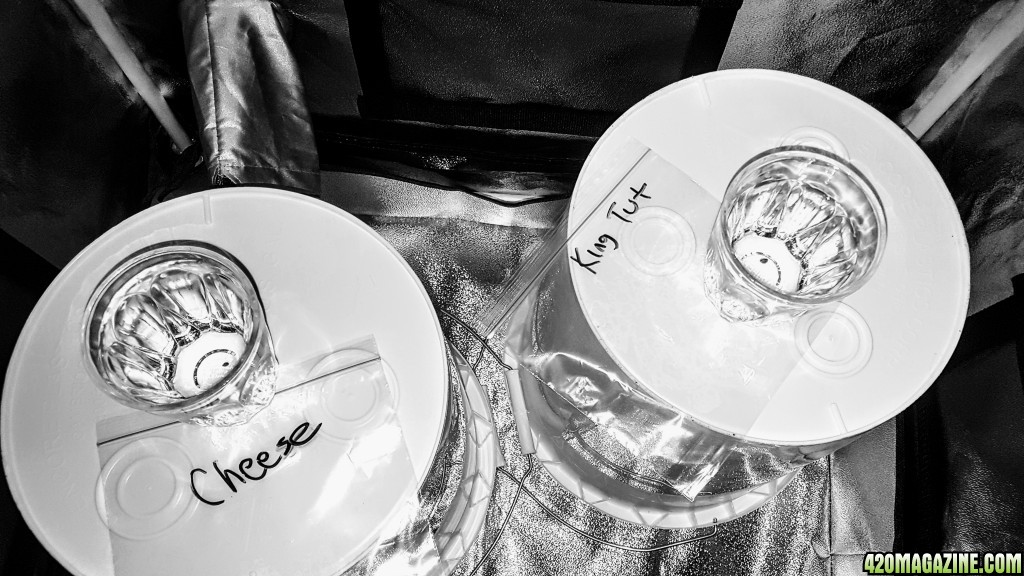
Added Ozonated Distilled room temperature water to 2 glasses. I placed each seed in its own glass. As soon as I placed the seeds into the glass the sank to the bottom upon entry. This is a great sign which means things are happening, just slower than I have expected, but its life and I am not GOD so I can’t control the timeline, just hoping to speed it up.
Glasses are placed inside the grow room and lights are ON hoping to generate some more heat inside there. Was not told to turn lights off so I will try this way and hope I get some signs of a cracked seed or roots later this evening
Seeds were placed in the water 1:40PM and will be there for no longer than 24 hours
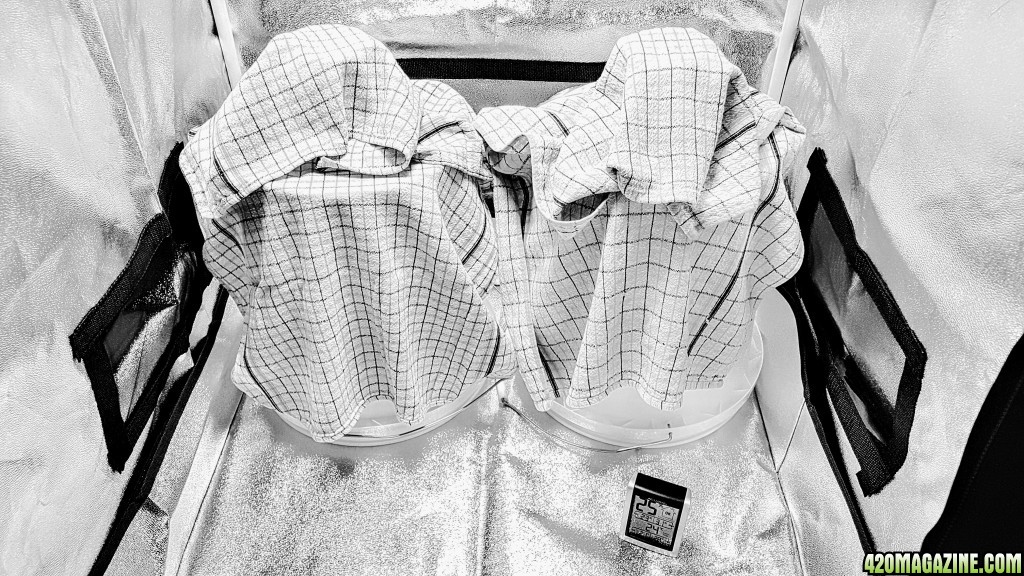
Glasses were covered with cloth so there was no direct light on the seeds.
April 21, 2017 - Germination Update
Current Germination Environment @ 1:40PM April 21, 2017
[table="width: 600, class: grid, align: center"]
[tr]
[td]
 [/td]
[/td]
[/tr]
[/table]
[table="width: 600, class: grid, align: center"]
[tr]
[td]
 [/td]
[/td]
[/tr]
[/table]
April 21, 2017 - Germination Update
Current Germination Environment @ 7:40PM April 21, 2017
The humidity is something I would like to see increase. I know once the plant starts growing it will/should cause humidity in the growing environment. I flicked the switch and turned on the flower LEDs within the light system to add more temperature to the room.
April 22, 2017 - Germination Update
Current Germination Environment @ 5:30PM April 22, 2017
Current results show that both seeds have cracked and that the tap root is no longer looking like a hair and more like what one would expect when germinating seeds.
Steps taken today for the seeds
[tr]
[td]Sanitize Grow Room[/td]
[td]DONE[/td]
[/tr]
[tr]
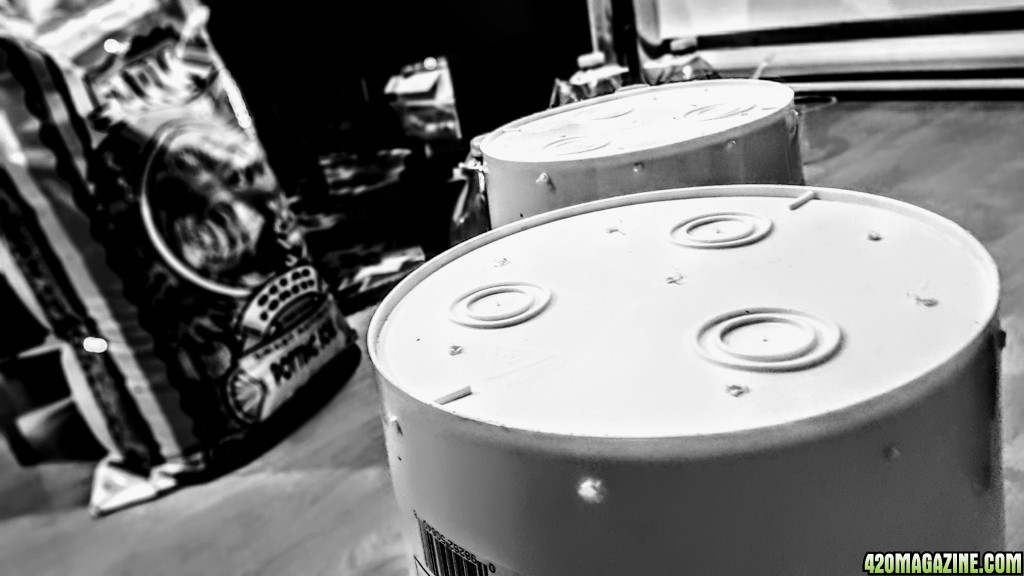
[td]Prepare pots (5 Gallon buckets) - Drill holes for drainage on bottom, and a couple at the bottom base for air[/td]
[td]DONE[/td]
[/tr]
[tr]
[td]Turn all equipment on in grow room to check for issues or malfunctions[/td]
[td]DONE[/td]
[/tr]
[tr]
[td]Double check airflow and be sure there are NO leaks coming from the carbon filter of ducting tube.
*If there are leaks in the airflow system, this will be corrected with ducting tape (foil tape)[/td]
[td]DONE[/td]
[/tr]
[tr]
[td]Adjust LED Grow light to correct size for seedling stage[/td]
[td]DONE[/td]
[/tr]
[tr]
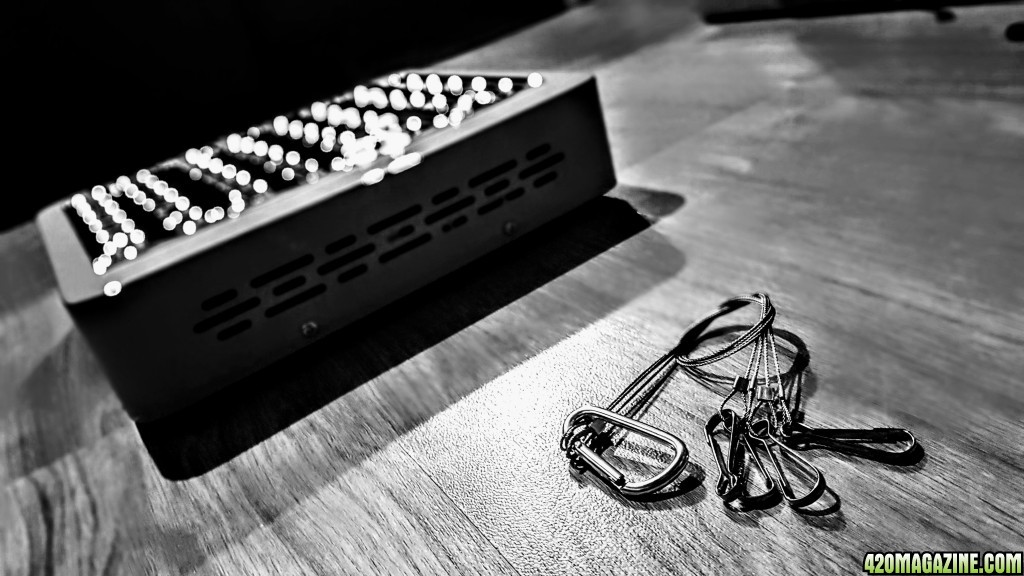
[td]Close tent with only the LED lights and 2 clip on fans running to help set the temperature of the environment for immediate planting. Carbon filter fan is not running yet[/td]
[td]DONE[/td]
[/tr]
[/table]
[table="width: 600, class: grid, align: center"]
[tr]
[td]
 [/td]
[/td]
[/tr]
[tr]
[td]
 [/td]
[/td]
[/tr]
[tr]
[td]
 [/td]
[/td]
[/tr]
[/table]
April 23, 2017 - Planting Update
Current Germination Environment @ 6:00PM April 23, 2017
When checking this evening I noticed the CHEESE strain was lacking some moisture on the paper towel. I added some and then I did prep for final transfer to their homes. Letting paper towel dry and have the tap root come in contact is not something to laugh about, keep it moist!
[table="width: 600, class: grid, align: center"]
[tr]
[td]
 [/td]
[/td]
[/tr]
[tr]
[td]
 [/td]
[/td]
[/tr]
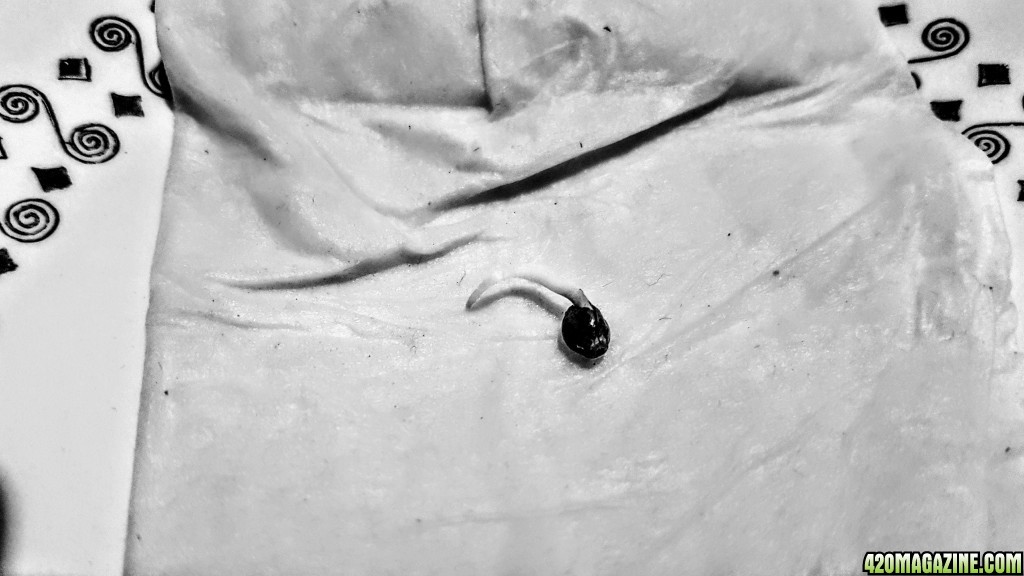
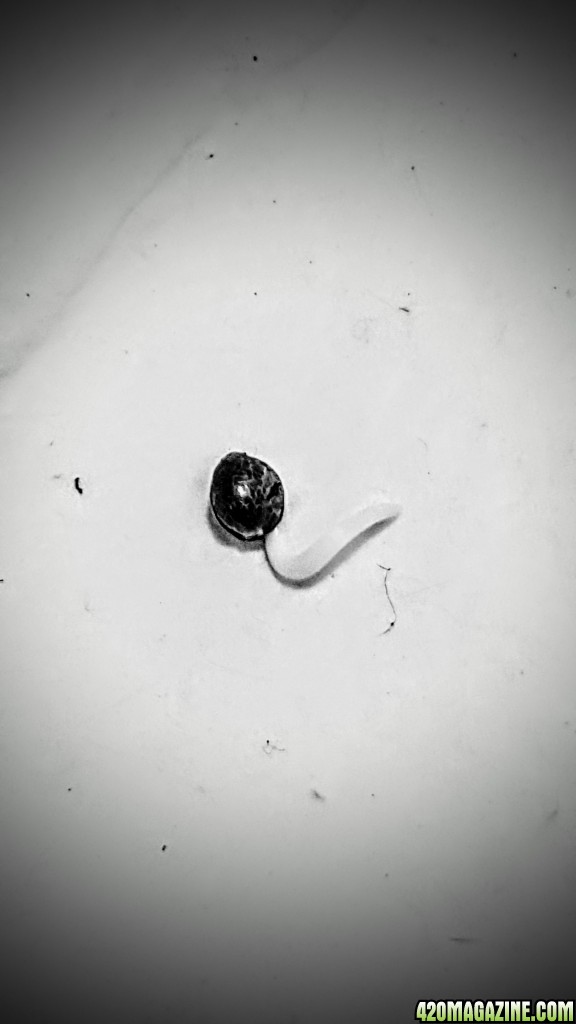
Looking at the images above, Cheese and King Tut (Tutankhamon), has really shown a lot of life and are ready to be placed in their homes. Towels are moist and the tap root is getting very long. This is officially going to be day 1 of week 1. But before I can say this is the start, there are a few things I need to take care of before planting starts.
Instead of using tap water, I opted to try the distilled ozonated water from Walmart. These jugs come in 4L sizes are are about 0.80c per bottle. Not a bad trade off considering the water has been through an ozonated cycle.
I have tested the water from the bottles and I was getting a reading of 7.1, still too high for my liking. I have already invested money in more important things required for this project, and would rather not have to purchase the PH DOWN solutions available. I need to make my water more acidic, so I opted for distilled pure white vinegar.
I added 1.5 Tbsp per 4L of water which is just over 1 gallon. So I can safely say a safe dosage of 1.5 Tbsp per gallon will get you where you need to be.
I added the vinegar and gave the 4 liters a good shake. After testing again, our pH level was now sitting at a 6.32. I had a feeling that the pH will increase over the days where it was not placed into any soil and was just sitting there for maintaining room temperatures.
Now today I took out the pH tester out and tested the exact same water before placing it into the soil. I know the pH should change once it is in the soil, but I want to get a fresh reading of the water I'm working with before watering the soil.
[table="width: 300, class: grid, align: center"]
[tr]
[td]
 [/td]
[/td]
[/tr]
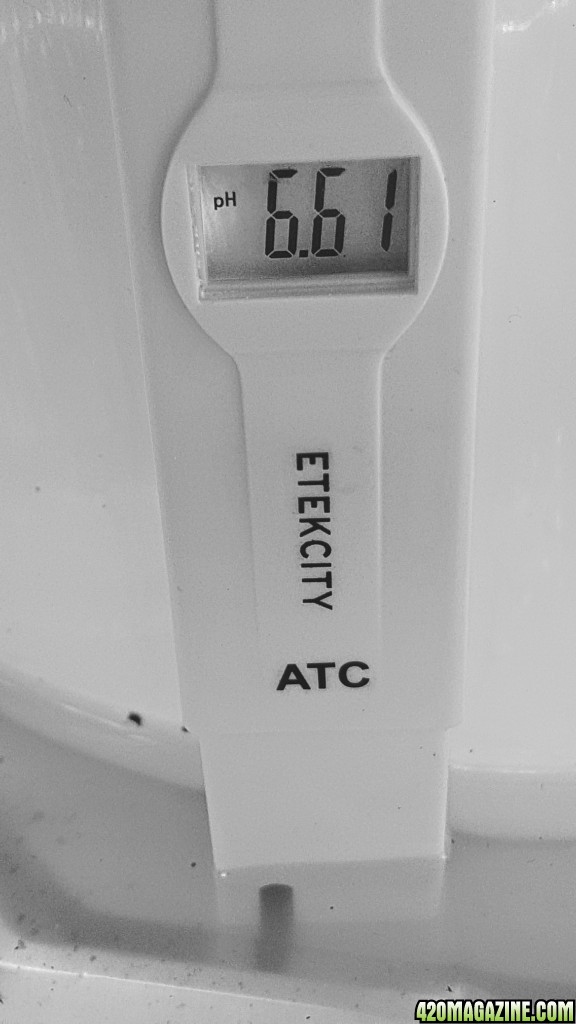
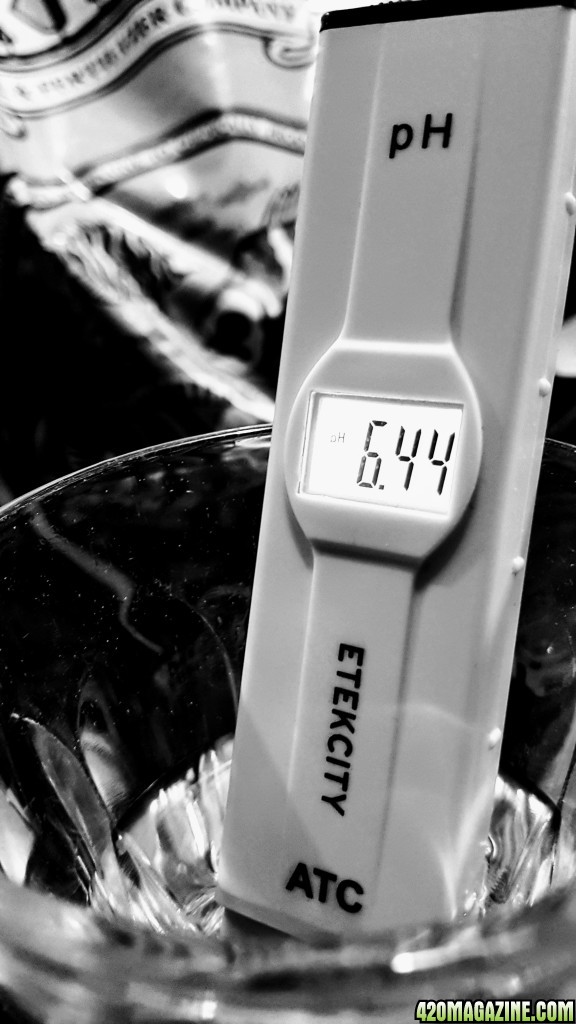
We are in business!!! I have a pH reading of 6.44 from the water which was originally reading pH 6.32 from 5 days ago. I am happy with this number, this pH will be fine.
*Note: I am only going to be adjusting the pH of my water for the first 3-5 weeks. Once I start introducing nutrients to the plant, the pH balance will adjust automatically. This is done from the formula used in Advanced Nutrients PH Perfect Technology. I will be testing this formulated system with my water and checking the pH after to verify its results. Still waiting on delivery of the Advanced Nutrients Micro/Grow/Bloom. Update will be available once items are delivered.
*Note: DO NOT place your germinated seeds in dry soil and then water. The water can push the seeds further down in the soil which can cause the seed to not grow at all or take a very long time to break the surface of the soil. ALWAYS water your soil first to make it moist before planting your germinated seeds!
Setup & Water
I used a total of 3 Liters of water give or take per bucket. This allowed for both buckets to give me a nice runoff, but not too much runoff to waste water.
After this runoff had happened, I decided to test the pH of our water after it was filtered through the soil
[/B]
[table="width: 600, class: grid, align: center"]
[tr]
[td]
 [/td]
[/td]
[/tr]
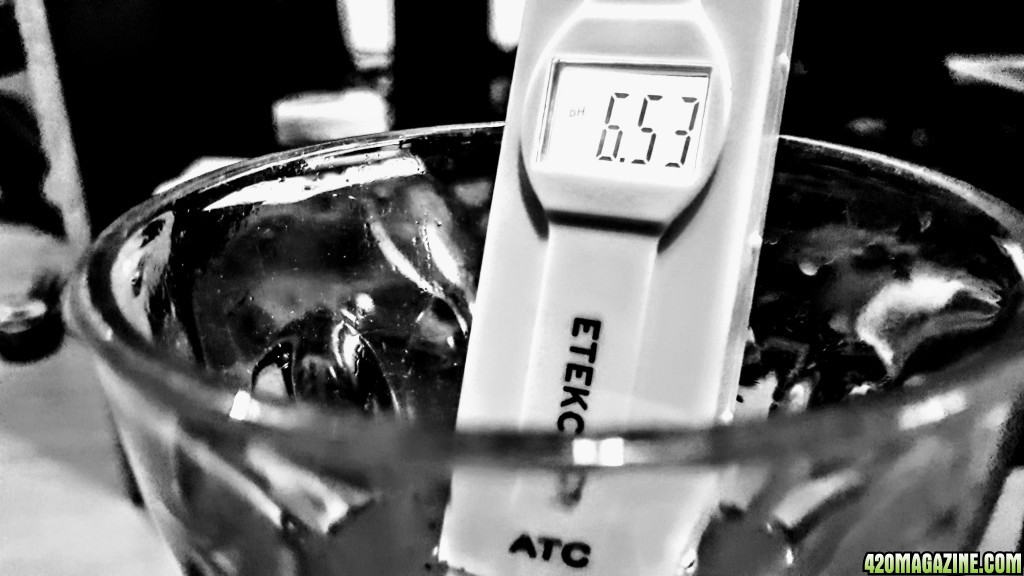
After I collected some water in the trays, I transferred that collection to a glass and did another test of our pH. Using the pH reader, I stirred the water for a couple seconds, placed the tester into the water and got a reading of 6.53. This makes me happy. I know I have a great foundation of soil and a pH level that is not overkill for the first few weeks of growth
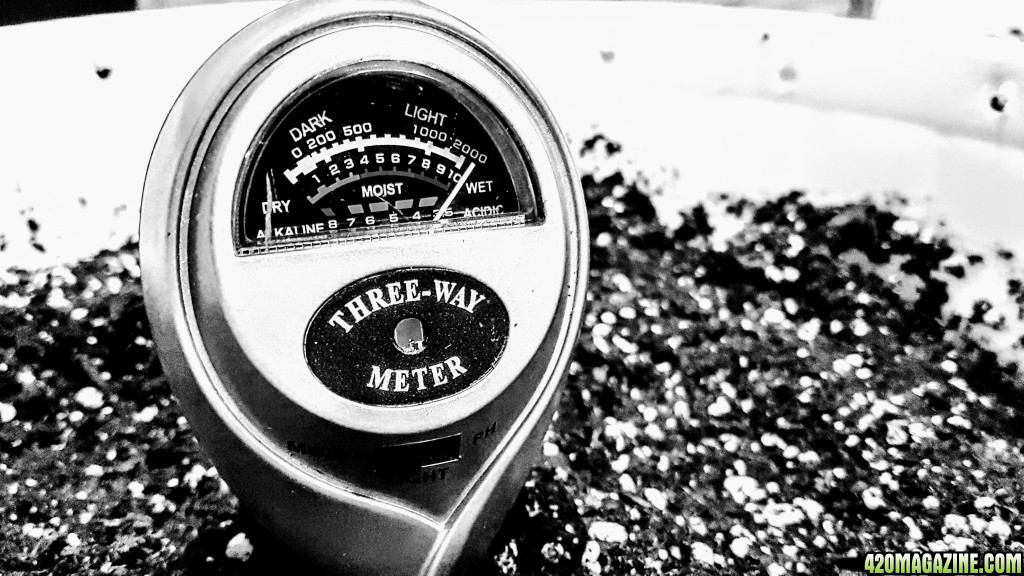
I left the soil for about 15 to 20 minutes to be sure there wasn't a huge runoff happening that I may have to clean up. Runoff had slowed down quite a bit and I then decided to use my 3 in 1 tester to see how our meter was reading our moisture level
[table="width: 600, class: grid, align: center"]
[tr]
[td]
 [/td]
[/td]
[/tr]
Soil is nice and wet from top to bottom. Now before I make the final transfer I will be using this meter to give us a pH reading. It is not a digital meter, but if everything has gone as good as it has so far, the meter should give us a reading of a very pleasant pH level
[table="width: 600, class: grid, align: center"]
[tr]
[td]
 [/td]
[/td]
[/tr]
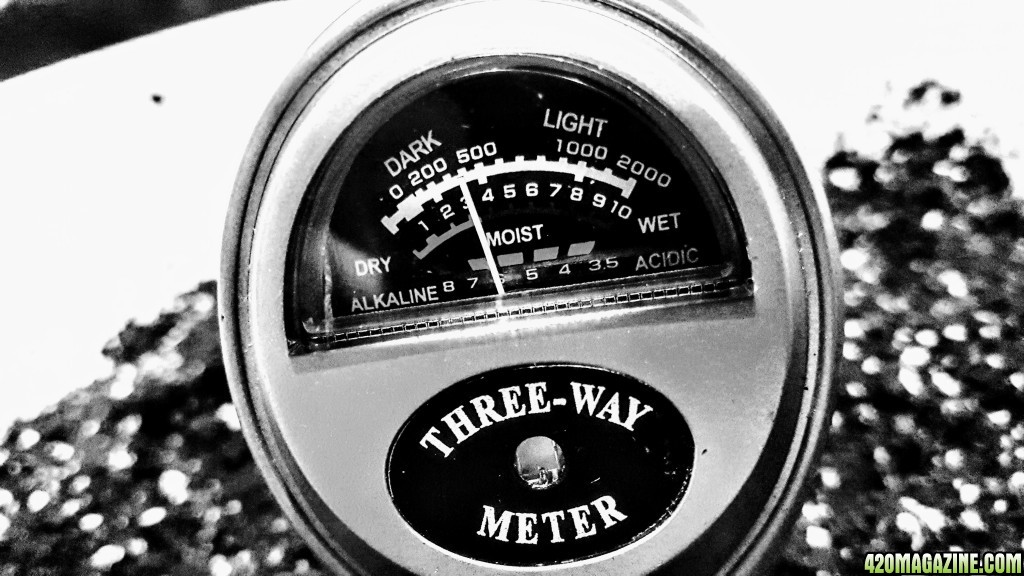
The meter is give a reading of above 6.0 but not passing 6.5, as water is making its way through the soil is soaking up, the pH levels are adjusting to a nice number for our grow.
The seeds have been planted into the soil about ¼ to ½ of an inch deep. Everything in the grow tent is in full force and turned on, now I just have to wait it out and be sure our top soil remains moist over the next few days while our stem breaches the soil.
April 24, 2017 - Planting Update
Current Germination Environment @ 6:00PM April 24, 2017
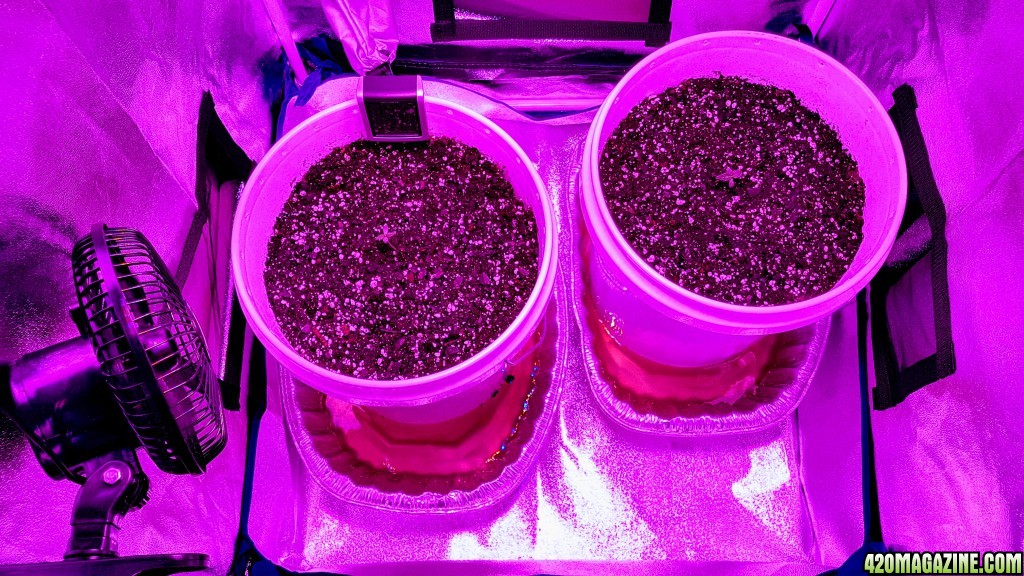
I have purchased a water bottle sprayer and filled it up with our pH water and lightly misted the top of the soil with this water just to be sure it remained moist and to help the seed sprout through the soil.
Spraying 2 times a day for the first couple days until I see growth where I will then cut back watering to our 2-3 day schedule or as needed
[table="width: 600, class: grid, align: center"]
[tr]
[td]
 [/td]
[/td]
[/tr]
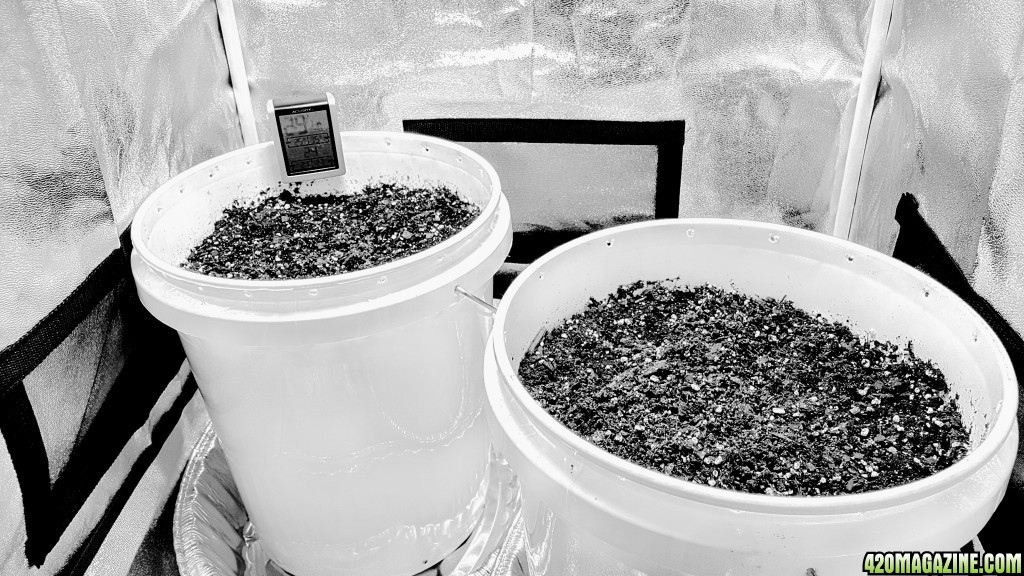
*NOTE: Notice the tops of the buckets have several holes going along the rim. I have placed these there in advanced. I will be performing LST (Low Stress Training) on both plants as soon as I am able to. You will see this step later once I get there, but the idea saves me the time and work of having to drill holes with the plant growing inside.
April 25, 2017 - Seedling Update @ 2:50PM
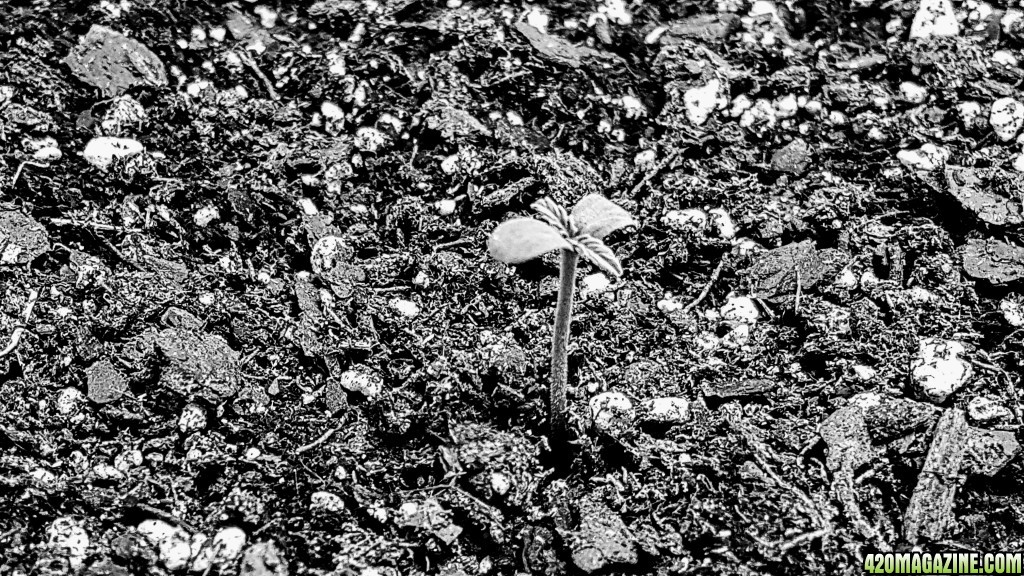
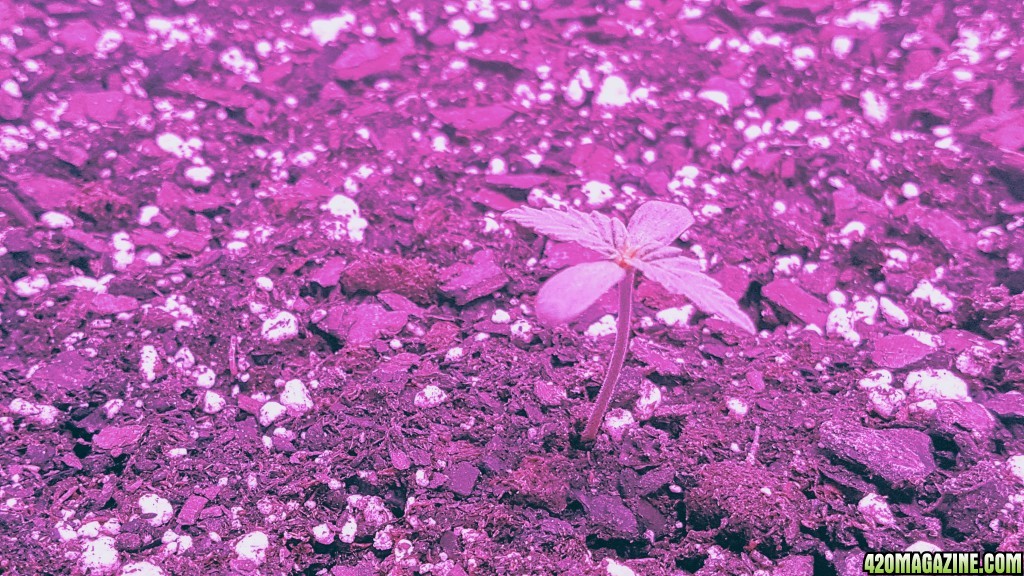
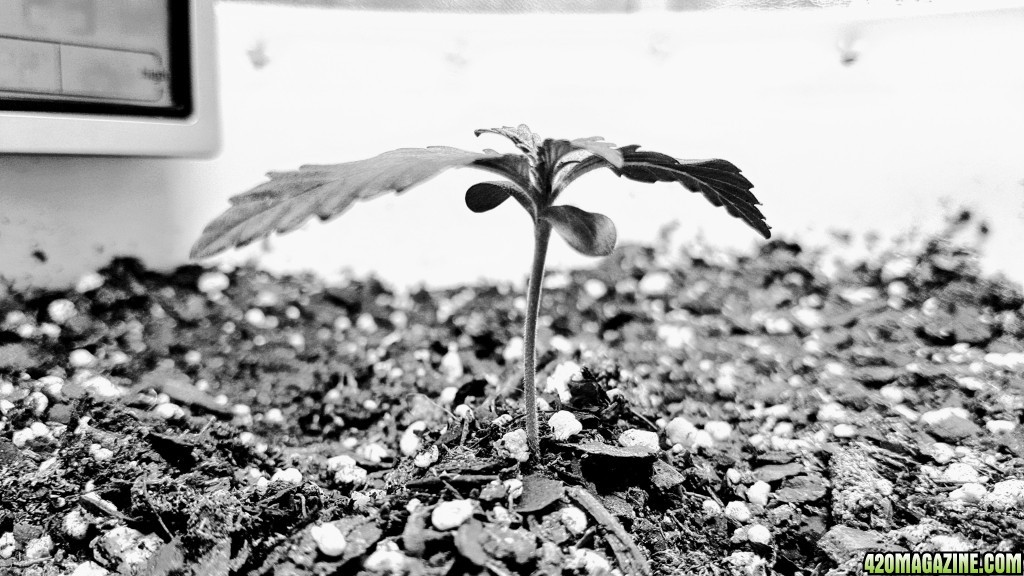
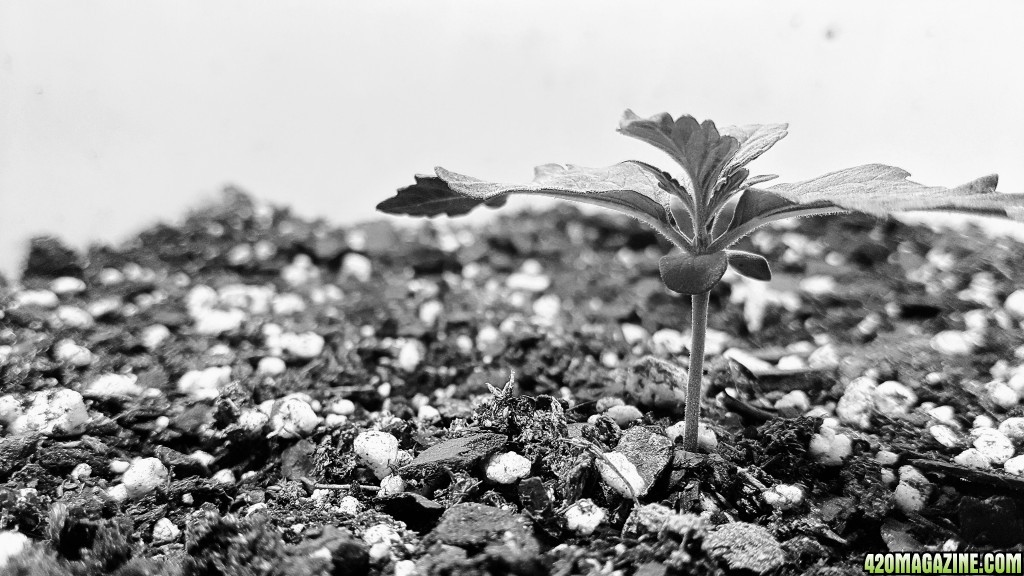
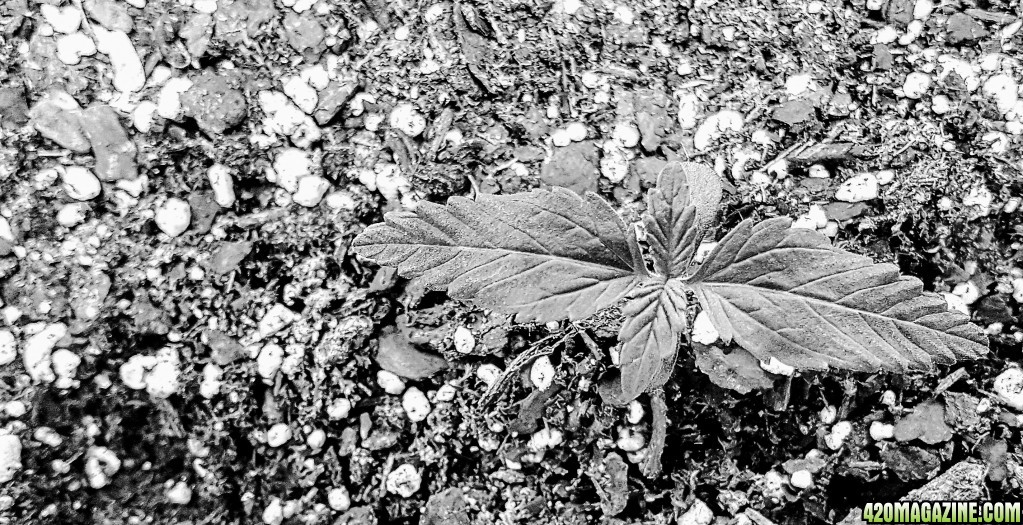
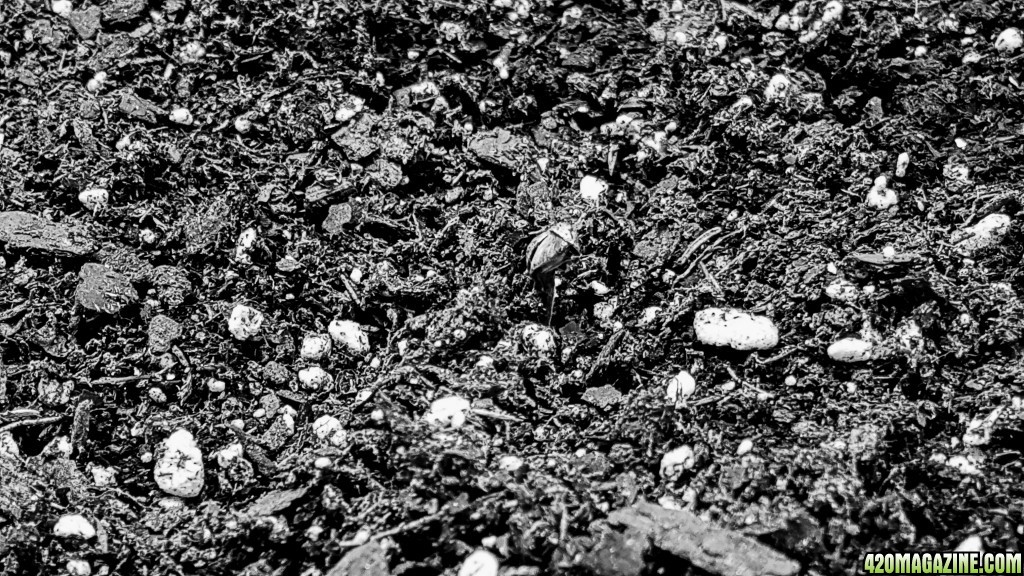
There has been more action happening in the tent overnight. One of my seeds finally broke through the soil. There is no signs of leaves, looks to me either the seed shell is off the plant now with the leaves just needing to unfold. This strain is Tutankhamon which I am most excited about. There has been no sign of activity or breaching of the soil from the Cheese strain yet.
The leaves just done seem to be a good shape, and after looking more closely it is the SEED SHELL that is still attached.
Not sure if I need to remove this or not, I can see a little green from the leaf inside but the shell of the seed is still attached and roughly 50% off...back to doing more reading on this topic
[table="width: 600, class: grid, align: center"]
[tr]
[td]
 [/td]
[/td]
[/tr]
[/table]
April 25, 2017 - Seedling Update - 3:00PM
There has been more action happening in the tent overnight. One of my seeds finally broke through the soil. There is no signs of leaves, looks to me either the seed shell is stuck to the leaves. This strain is Tutankhamon which I am most excited about. There has been no sign of activity or breaching of the soil from the Cheese strain yet.
Seed: Tutankhamon @ 3PM
I have reached out to the forums on here and added a video (see below) of what I was observing. I removed the shell after spraying a few times to moisten the seed cap to prevent any damage to growth. I was able to remove with a pair of tweezers safely, clean, and no damage. From what I was told, we should be good to go here as long as I dont let the top dry out and let the leaves get away from the goo that is visible.
Cheese Seed @ 3PM
The cheese seed was still showing no signs of breaching the soil as of 3:00 PM. The humidity is low in my tent, it is probably due to the season and where I live up north in Canada. Was told by some growers on here it is better to have a lower humidity than a high humidity and I would be fine with growing in 30% and once the plant grows it will give more humidity to the grow room.
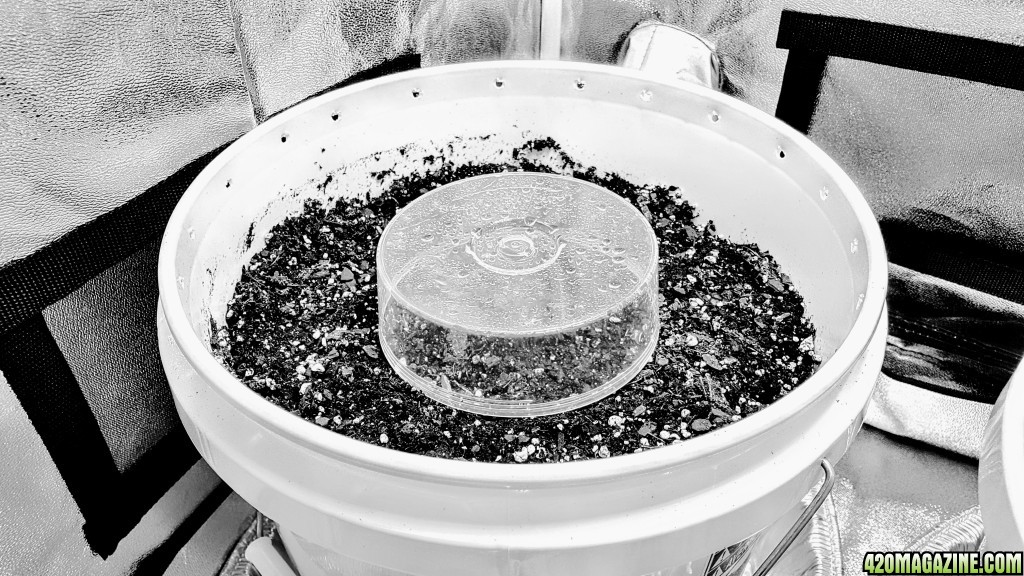
I decided to make a dome. I have read about domes to help trap the humidity in during the stage where it is needed the most.This was a quick DIY fix I came up with rather quickly. I had no 2L bottles or anything laying around.
I used a blank CD Cover & Water
I took the spray bottle to the inside of the CD cover. Before doing any of this I sterilized the cover in soap and water to prevent any germs from getting into the tent, and the CD cover was laying around for quite some time, so better safe than sorry.
@ 3:00PM I placed the CD Cover over the middle of the pot as shown below
[table="width: 600, class: grid, align: center"]
[tr]
[td]
 [/td]
[/td]
[/tr]
[/table]
April 25, 2017 - Seedling Update - 8:00PM
Seed: Tutankhamon @ 8PM
Checking in on our babies and oh boy has a lot happened in 5 hours. The Tutankhamon Seed i still in same condition and I would hope the leaves will open up soon.
Seed: CHEESE @ 8PM
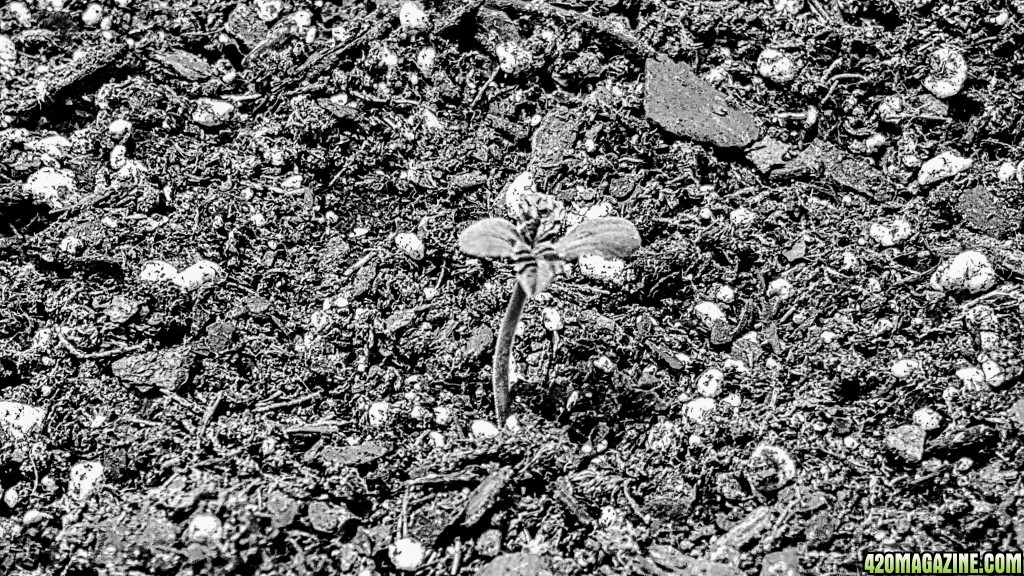
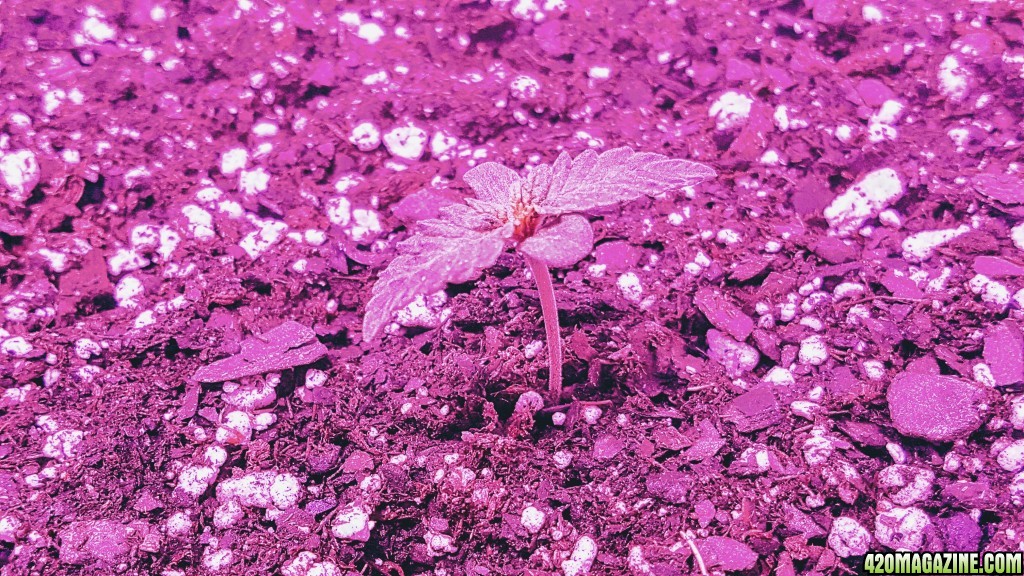
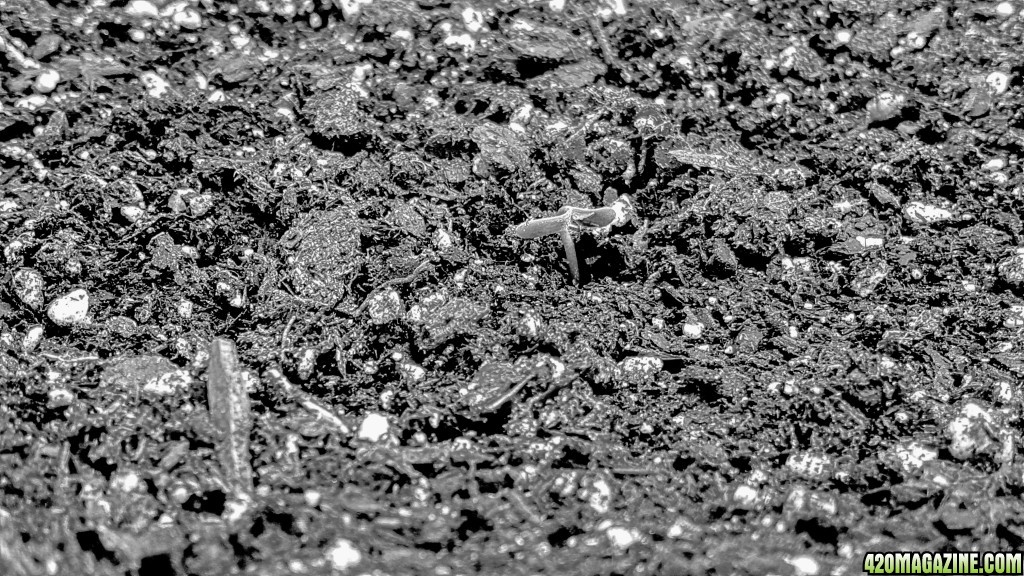
Good news here! It only took a couple hours after making this humidity dome, and when I removed the dome I have a stem out of the soil with 2 nice leaves touching the soil. The leaves are probably touching the soil because I had the dome over it to help increase humidity. The dome is now removed and the leaves can now get the correct light they need. I would expect to see the leaves straight up in a few hours or by tomorrow at the latest
[table="width: 600, class: grid, align: center"]
[tr]
[td]
 [/td]
[/td]
[/tr]
[/table]
[tr]
[td]WEEK 1[/td]
[td]DAY 1[/td]
[td]DAY 2[/td]
[td]DAY 3[/td]
[td]DAY 4[/td]
[td]DAY 5[/td]
[td]DAY 6[/td]
[td]DAY 7[/td]
[/tr]
[tr]
[td]WATER[/td]
[td]3L[/td]
[td]-[/td]
[td][/td]
[td][/td]
[td][/td]
[td][/td]
[td][/td]
[/tr]
[tr]
[td]Spray[/td]
[td]Mist spray
twice a day[/td]
[td]Mist spray
twice a day[/td]
[td][/td]
[td][/td]
[td][/td]
[td][/td]
[td][/td]
[/tr]
[/table]
[tr]
[td]WEEK 1[/td]
[td]DAY 1[/td]
[td]DAY 2[/td]
[td]DAY 3[/td]
[td]DAY 4[/td]
[td]DAY 5[/td]
[td]DAY 6[/td]
[td]DAY 7[/td]
[/tr]
[tr]
[td]Temperature[/td]
[td]25°C[/td]
[td]25°C[/td]
[td][/td]
[td][/td]
[td][/td]
[td][/td]
[td][/td]
[/tr]
[tr]
[td]Humidity[/td]
[td]30%[/td]
[td]31%[/td]
[td][/td]
[td][/td]
[td][/td]
[td][/td]
[td][/td]
[/tr]
[tr]
[td]Moisture[/td]
[td]Moist[/td]
[td]Moist[/td]
[td][/td]
[td][/td]
[td][/td]
[td][/td]
[td][/td]
[/tr]
[tr]
[td]pH[/td]
[td]6.2 - 6.5[/td]
[td]6.3[/td]
[td][/td]
[td][/td]
[td][/td]
[td][/td]
[td][/td]
[/tr]
[/table]
I am growing 2 autoflower strains which makes for a quick grow when compared to photo's.
[table="width: 600, class: grid, align: center"]
[tr]
[td]

SEED INFORMATION
[table="width: 600, class: grid, align: center"]
[tr]
[td]Seed: Cheese Autoflower Fem (Canuck Seeds)[/td]
[td]Seed: Tutankhamon Autoflower Fem (Pyramid Seeds)[/td]
[/tr]
[tr]
[td]Seed Bank: True North Seed Bank[/td]
[td]Seed Bank: True North Seed Bank[/td]
[/tr]
[tr]
[td]Variety: Indica/Sativa[/td]
[td]Variety: Mostly Indica[/td]
[/tr]
[tr]
[td]Flowering Type: Autoflower[/td]
[td]Flowering Type: Autoflower[/td]
[/tr]
[tr]
[td]Flowering Time: 8 Weeks (estimated)[/td]
[td]Flowering Time: 65 Days (estimated)[/td]
[/tr]
[tr]
[td]Yield: 650 g/600 WTT HPS[/td]
[td]Yield: 550 g/m2[/td]
[/tr]
[tr]
[td]THC: 22%+[/td]
[td]THC: 25%+[/td]
[/tr]
[/table]
Grow Room Setup
[table="width: 600, class: grid, align: center"][tr]
[td]Grow Tent[/td]
[td]2.5’ X 2.5’ X 5.5’
3 X Bottom Air vents
1 X Top Exhaust/Inline Vent
1 X Hole for feeding cables (Closed off currently)
2 X Air Vents for Exhaust on sides (Designed for lamps)
1 X Door Window[/td]
[/tr]
[tr]
[td]Exhaust[/td]
[td]1 X 4” iPower inline exhaust
@175 CFM[/td]
[/tr]
[tr]
[td]Carbon Filter[/td]
[td]iPower Carbon Filter Odor Control
Australian RC 412 Activated Carbon
1050+ IAV Australia Charcoal
Pre Filter Attached
Dimensions: 20.3 x 20.3 x 33 cm
Weight: 2.7 Kg[/td]
[/tr]
[tr]
[td]Fan Speed Adjuster[/td]
[td]Active Air Fan Speed Adjuster for ducting exhaust speed[/td]
[/tr]
[tr]
[td]Light[/td]
[td]Mars Hydro 240WTT LED light 430nm - 730nm range + 1 Infrared light[/td]
[/tr]
[tr]
[td]Pots Used[/td]
[td]2 X 5 US GAL bucket[/td]
[/tr]
[tr]
[td]Potting Soil[/td]
[td]Fox Farms Ocean Forest Potting Soil[/td]
[/tr]
[tr]
[td]Nutents[/td]
[td]Advanced Nutrients pH perfect (Micro, Grow, Bloom) @ 1L per bottle[/td]
[/tr]
[tr]
[td]Water[/td]
[td]4L Jugs of Distilled Ozonated Water (pH @ 7.5 before adjusting)[/td]
[/tr]
[tr]
[td]pH tester[/td]
[td]Etekcity pH Tester[/td]
[/tr]
[tr]
[td]pH Adjuster[/td]
[td]Distilled room temperature White Vinegar[/td]
[/tr]
[tr]
[td]RH/Humidity[/td]
[td]AcuRite Indoor humidity & temperature monitor[/td]
[/tr]
[tr]
[td]Internal Ventilation[/td]
[td]2 X 6” Clip on fans[/td]
[/tr]
[tr]
[td]Light Adjuster[/td]
[td]Rope Ratchet for adjusting the height of LED lights[/td]
[/tr]
[/table]
[table="width: 600, class: grid, align: center"]
[tr]
[td]

[td]

[td]

[/tr]
[/table]
Germination Method
[table="width: 600, class: grid, align: center"][tr]
[td]Germination Start Date[/td]
[td]April 20, 2017[/td]
[/tr]
[tr]
[td]Germination Start Time[/td]
[td]3:00 PM[/td]
[/tr]
[tr]
[td]Germination Method[/td]
[td]Paper Towel between 2 plates[/td]
[/tr]
[tr]
[td]Germination Method # 2[/td]
[td]Placed seeds in glass of water[/td]
[/tr]
[/table]
[table="width: 600, class: grid, align: center"]
[tr]
[td]

[/tr]
[tr]
[td]

[/tr]
[tr]
[td]

[/tr]
[/table]
When I started germination, I used the paper towel method. I got a paper towel and made it wet, removed excess water, and ended with a nice and damp cloth. I placed the seed in the middle of the damp cloth and folded it over the top.This was not working or it was working very slow. I had moved the seeds to a glass of water where they sank, and a tap root was exposed, where the seeds were then transferred to moist paper towel again for the final stages of germination
April 20, 2017 - Germination Update
Germination Environment @ 3:00 PM April 19, 2017:
- Grow tent (2.3’ X 2.3’ X 5.3’)
- Exhaust Fan = ON
- Lights = OFF
- ALL Air Vents = OPEN
- TEMP: 20°C
- Humidity: 23%
- Paper Towel = Moist
- SEED STATUS = NO ROOT
I never liked the temp going below 20 for the germination environment. It recorded the low on my monitor as 19 C with 23% Humidity. I have adjusted the germination environment 6 hours ago (4:00PM) and with the changes both conditions increased by 5.
April 20, 2017 - Germination Update
Current Germination Environment @ 10:12PM April 20, 2017
- Exhaust Fan = OFF
- Lights = ON
- ALL Air Vents = CLOSED
- Temperature: 25°C
- Humidity: 28%
- Paper Towel: Moist
- SEED STATUS = NO ROOT
Current Germination Environment @ 1:30PM April 21, 2017
- Exhaust Fan = OFF
- Lights = ON
- ALL Air Vents = CLOSED
- Temperature: 22°C
- Humidity: 30%
- Paper Towel: Moist
- SEED STATUS = NO ROOT
Added Ozonated Distilled room temperature water to 2 glasses. I placed each seed in its own glass. As soon as I placed the seeds into the glass the sank to the bottom upon entry. This is a great sign which means things are happening, just slower than I have expected, but its life and I am not GOD so I can’t control the timeline, just hoping to speed it up.
Glasses are placed inside the grow room and lights are ON hoping to generate some more heat inside there. Was not told to turn lights off so I will try this way and hope I get some signs of a cracked seed or roots later this evening
Seeds were placed in the water 1:40PM and will be there for no longer than 24 hours
Glasses were covered with cloth so there was no direct light on the seeds.
April 21, 2017 - Germination Update
Current Germination Environment @ 1:40PM April 21, 2017
- Exhaust Fan = OFF
- Lights = ON
- ALL Air Vents = CLOSED
- Temperature: 22°C
- Humidity: 30%
- 2 Glasses (1 seed per glass due to different strains) - Both seeds have sank to bottom of glass upon entry. Seeds probably slightly cracked or opened from paper towel method the past 48 hours but show no visible opening or cracks.
- SEED STATUS = NO ROOT
[table="width: 600, class: grid, align: center"]
[tr]
[td]

[/tr]
[/table]
[table="width: 600, class: grid, align: center"]
[tr]
[td]

[/tr]
[/table]
April 21, 2017 - Germination Update
Current Germination Environment @ 7:40PM April 21, 2017
- Exhaust Fan = OFF
- Lights = ON
- Air Vents = BOTTOM 2 VENTS OPEN
- 2 Clip On Fans = HIGH SPEED
- Temperature: 24°C
- Humidity: 25%
- SEED STATUS = CRACKED SEED
The humidity is something I would like to see increase. I know once the plant starts growing it will/should cause humidity in the growing environment. I flicked the switch and turned on the flower LEDs within the light system to add more temperature to the room.
April 22, 2017 - Germination Update
Current Germination Environment @ 5:30PM April 22, 2017
- Exhaust Fan = OFF
- Lights = OFF
- Air Vents = BOTTOM 2 VENTS OPEN
- 2 Clip On Fans = OFF
- Temperature: 25°C
- Humidity: 30%
- SEED STATUS = CRACKED SEED - Visible tap root on both seeds
Current results show that both seeds have cracked and that the tap root is no longer looking like a hair and more like what one would expect when germinating seeds.
Steps taken today for the seeds
- Remove seeds from water (28 hours in water)
- Placed seeds on moist paper towel between plates and stored on ledge. Will check for moisture. If dry, I will spray them to keep the moisture on towels
CHECKLIST FOR April 22, 2017
[table="width: 400, class: grid, align: center"][tr]
[td]Sanitize Grow Room[/td]
[td]DONE[/td]
[/tr]
[tr]
[td]Prepare pots (5 Gallon buckets) - Drill holes for drainage on bottom, and a couple at the bottom base for air[/td]
[td]DONE[/td]
[/tr]
[tr]
[td]Turn all equipment on in grow room to check for issues or malfunctions[/td]
[td]DONE[/td]
[/tr]
[tr]
[td]Double check airflow and be sure there are NO leaks coming from the carbon filter of ducting tube.
*If there are leaks in the airflow system, this will be corrected with ducting tape (foil tape)[/td]
[td]DONE[/td]
[/tr]
[tr]
[td]Adjust LED Grow light to correct size for seedling stage[/td]
[td]DONE[/td]
[/tr]
[tr]
[td]Close tent with only the LED lights and 2 clip on fans running to help set the temperature of the environment for immediate planting. Carbon filter fan is not running yet[/td]
[td]DONE[/td]
[/tr]
[/table]
[table="width: 600, class: grid, align: center"]
[tr]
[td]

[/tr]
[tr]
[td]

[/tr]
[tr]
[td]

[/tr]
[/table]
April 23, 2017 - Planting Update
Current Germination Environment @ 6:00PM April 23, 2017
- Exhaust Fan = ON
- Lights = ON
- ALL Air Vents = OPEN
- Temperature: 27°C
- Humidity: 30%
- Paper Towel: Moist
- SEED STATUS = PLANTED
When checking this evening I noticed the CHEESE strain was lacking some moisture on the paper towel. I added some and then I did prep for final transfer to their homes. Letting paper towel dry and have the tap root come in contact is not something to laugh about, keep it moist!
[table="width: 600, class: grid, align: center"]
[tr]
[td]

[/tr]
(Tutankhamon Germination)
[tr]
[td]

[/tr]
(Cheese Germination)
[/table]Looking at the images above, Cheese and King Tut (Tutankhamon), has really shown a lot of life and are ready to be placed in their homes. Towels are moist and the tap root is getting very long. This is officially going to be day 1 of week 1. But before I can say this is the start, there are a few things I need to take care of before planting starts.
TEST pH OF WATER - April 24, 2017
Before I plant, I want to be sure that the pH of our water is still within a safe range for our babies. I had already pH’d the water several days before. I have tried normal distilled tap water, and the pH level was reading 7.7 which is excellent drinking water, but no so much for growing anything. Instead of using tap water, I opted to try the distilled ozonated water from Walmart. These jugs come in 4L sizes are are about 0.80c per bottle. Not a bad trade off considering the water has been through an ozonated cycle.
I have tested the water from the bottles and I was getting a reading of 7.1, still too high for my liking. I have already invested money in more important things required for this project, and would rather not have to purchase the PH DOWN solutions available. I need to make my water more acidic, so I opted for distilled pure white vinegar.
I added 1.5 Tbsp per 4L of water which is just over 1 gallon. So I can safely say a safe dosage of 1.5 Tbsp per gallon will get you where you need to be.
I added the vinegar and gave the 4 liters a good shake. After testing again, our pH level was now sitting at a 6.32. I had a feeling that the pH will increase over the days where it was not placed into any soil and was just sitting there for maintaining room temperatures.
Now today I took out the pH tester out and tested the exact same water before placing it into the soil. I know the pH should change once it is in the soil, but I want to get a fresh reading of the water I'm working with before watering the soil.
[table="width: 300, class: grid, align: center"]
[tr]
[td]

[/tr]
(pH of water is now 6.44 - Increase of 0.12)
[/table]We are in business!!! I have a pH reading of 6.44 from the water which was originally reading pH 6.32 from 5 days ago. I am happy with this number, this pH will be fine.
*Note: I am only going to be adjusting the pH of my water for the first 3-5 weeks. Once I start introducing nutrients to the plant, the pH balance will adjust automatically. This is done from the formula used in Advanced Nutrients PH Perfect Technology. I will be testing this formulated system with my water and checking the pH after to verify its results. Still waiting on delivery of the Advanced Nutrients Micro/Grow/Bloom. Update will be available once items are delivered.
HOW MUCH WATER IS NEEDED?
Next thing I am doing is trying to figure out how much water is needed during to completely soak our soil.*Note: DO NOT place your germinated seeds in dry soil and then water. The water can push the seeds further down in the soil which can cause the seed to not grow at all or take a very long time to break the surface of the soil. ALWAYS water your soil first to make it moist before planting your germinated seeds!
Setup & Water
- Fill up 2 X 5 Gallon Buckets with Fox Farms Ocean Forest Potting Soil a couple inches just before the rim of the bucket
- Place bucket in trays to collect water
- Add pH’d water until there is some runoff
I used a total of 3 Liters of water give or take per bucket. This allowed for both buckets to give me a nice runoff, but not too much runoff to waste water.
After this runoff had happened, I decided to test the pH of our water after it was filtered through the soil
[/B]
[table="width: 600, class: grid, align: center"]
[tr]
[td]

[/tr]
(pH results of soil runoff)
[/table]After I collected some water in the trays, I transferred that collection to a glass and did another test of our pH. Using the pH reader, I stirred the water for a couple seconds, placed the tester into the water and got a reading of 6.53. This makes me happy. I know I have a great foundation of soil and a pH level that is not overkill for the first few weeks of growth
I left the soil for about 15 to 20 minutes to be sure there wasn't a huge runoff happening that I may have to clean up. Runoff had slowed down quite a bit and I then decided to use my 3 in 1 tester to see how our meter was reading our moisture level
[table="width: 600, class: grid, align: center"]
[tr]
[td]

[/tr]
(Moisture reading of soil)
[/table]Soil is nice and wet from top to bottom. Now before I make the final transfer I will be using this meter to give us a pH reading. It is not a digital meter, but if everything has gone as good as it has so far, the meter should give us a reading of a very pleasant pH level
[table="width: 600, class: grid, align: center"]
[tr]
[td]

[/tr]
(pH level of our soil and water working together)
[/table]The meter is give a reading of above 6.0 but not passing 6.5, as water is making its way through the soil is soaking up, the pH levels are adjusting to a nice number for our grow.
The seeds have been planted into the soil about ¼ to ½ of an inch deep. Everything in the grow tent is in full force and turned on, now I just have to wait it out and be sure our top soil remains moist over the next few days while our stem breaches the soil.
April 24, 2017 - Planting Update
Current Germination Environment @ 6:00PM April 24, 2017
- Exhaust Fan = ON
- Lights = ON
- ALL Air Vents = OPEN
- Temperature: 25°C
- Humidity: 30%
- SEED STATUS = PLANTED
- Stem Status = NO VISIBLE STEMS YET
I have purchased a water bottle sprayer and filled it up with our pH water and lightly misted the top of the soil with this water just to be sure it remained moist and to help the seed sprout through the soil.
Spraying 2 times a day for the first couple days until I see growth where I will then cut back watering to our 2-3 day schedule or as needed
[table="width: 600, class: grid, align: center"]
[tr]
[td]

[/tr]
(Left - Cheese Autoflower Feminized - Right - Tutankhamon Autoflower Feminized)
[/table]*NOTE: Notice the tops of the buckets have several holes going along the rim. I have placed these there in advanced. I will be performing LST (Low Stress Training) on both plants as soon as I am able to. You will see this step later once I get there, but the idea saves me the time and work of having to drill holes with the plant growing inside.
April 25, 2017 - Seedling Update @ 2:50PM
There has been more action happening in the tent overnight. One of my seeds finally broke through the soil. There is no signs of leaves, looks to me either the seed shell is off the plant now with the leaves just needing to unfold. This strain is Tutankhamon which I am most excited about. There has been no sign of activity or breaching of the soil from the Cheese strain yet.
The leaves just done seem to be a good shape, and after looking more closely it is the SEED SHELL that is still attached.
Not sure if I need to remove this or not, I can see a little green from the leaf inside but the shell of the seed is still attached and roughly 50% off...back to doing more reading on this topic
[table="width: 600, class: grid, align: center"]
[tr]
[td]

[/tr]
[/table]
April 25, 2017 - Seedling Update - 3:00PM
There has been more action happening in the tent overnight. One of my seeds finally broke through the soil. There is no signs of leaves, looks to me either the seed shell is stuck to the leaves. This strain is Tutankhamon which I am most excited about. There has been no sign of activity or breaching of the soil from the Cheese strain yet.
Seed: Tutankhamon @ 3PM
I have reached out to the forums on here and added a video (see below) of what I was observing. I removed the shell after spraying a few times to moisten the seed cap to prevent any damage to growth. I was able to remove with a pair of tweezers safely, clean, and no damage. From what I was told, we should be good to go here as long as I dont let the top dry out and let the leaves get away from the goo that is visible.
Cheese Seed @ 3PM
The cheese seed was still showing no signs of breaching the soil as of 3:00 PM. The humidity is low in my tent, it is probably due to the season and where I live up north in Canada. Was told by some growers on here it is better to have a lower humidity than a high humidity and I would be fine with growing in 30% and once the plant grows it will give more humidity to the grow room.
I decided to make a dome. I have read about domes to help trap the humidity in during the stage where it is needed the most.This was a quick DIY fix I came up with rather quickly. I had no 2L bottles or anything laying around.
I used a blank CD Cover & Water
I took the spray bottle to the inside of the CD cover. Before doing any of this I sterilized the cover in soap and water to prevent any germs from getting into the tent, and the CD cover was laying around for quite some time, so better safe than sorry.
@ 3:00PM I placed the CD Cover over the middle of the pot as shown below
[table="width: 600, class: grid, align: center"]
[tr]
[td]

[/tr]
[/table]
April 25, 2017 - Seedling Update - 8:00PM
Seed: Tutankhamon @ 8PM
Checking in on our babies and oh boy has a lot happened in 5 hours. The Tutankhamon Seed i still in same condition and I would hope the leaves will open up soon.
Seed: CHEESE @ 8PM
Good news here! It only took a couple hours after making this humidity dome, and when I removed the dome I have a stem out of the soil with 2 nice leaves touching the soil. The leaves are probably touching the soil because I had the dome over it to help increase humidity. The dome is now removed and the leaves can now get the correct light they need. I would expect to see the leaves straight up in a few hours or by tomorrow at the latest
[table="width: 600, class: grid, align: center"]
[tr]
[td]

[/tr]
[/table]
WATERING SCHEDULE & ENVIRONMENT CONDITIONS
(Table is per bucket - NO nutrients added WATER ONLY @ pH 6.5 per every 4L of water)
[table="width: 720, class: grid, align: center"][tr]
[td]WEEK 1[/td]
[td]DAY 1[/td]
[td]DAY 2[/td]
[td]DAY 3[/td]
[td]DAY 4[/td]
[td]DAY 5[/td]
[td]DAY 6[/td]
[td]DAY 7[/td]
[/tr]
[tr]
[td]WATER[/td]
[td]3L[/td]
[td]-[/td]
[td][/td]
[td][/td]
[td][/td]
[td][/td]
[td][/td]
[/tr]
[tr]
[td]Spray[/td]
[td]Mist spray
twice a day[/td]
[td]Mist spray
twice a day[/td]
[td][/td]
[td][/td]
[td][/td]
[td][/td]
[td][/td]
[/tr]
[/table]
(Temperature and Humidity numbers logged at time of feeding or daily checkup @ 6PM)
[table="width: 720, class: grid, align: center"][tr]
[td]WEEK 1[/td]
[td]DAY 1[/td]
[td]DAY 2[/td]
[td]DAY 3[/td]
[td]DAY 4[/td]
[td]DAY 5[/td]
[td]DAY 6[/td]
[td]DAY 7[/td]
[/tr]
[tr]
[td]Temperature[/td]
[td]25°C[/td]
[td]25°C[/td]
[td][/td]
[td][/td]
[td][/td]
[td][/td]
[td][/td]
[/tr]
[tr]
[td]Humidity[/td]
[td]30%[/td]
[td]31%[/td]
[td][/td]
[td][/td]
[td][/td]
[td][/td]
[td][/td]
[/tr]
[tr]
[td]Moisture[/td]
[td]Moist[/td]
[td]Moist[/td]
[td][/td]
[td][/td]
[td][/td]
[td][/td]
[td][/td]
[/tr]
[tr]
[td]pH[/td]
[td]6.2 - 6.5[/td]
[td]6.3[/td]
[td][/td]
[td][/td]
[td][/td]
[td][/td]
[td][/td]
[/tr]
[/table]


