SWICK Watering Systems: Letting The Plant Water Itself

PeeJay, the deeper the perlite the longer in between refilling. You can fill them to the very top. The perlite won't blow away.

Gotcha. I'll top them up as soon as it gets light outside. I have already hydrated perlite in the two extra SWICKS so it won't even be a chore.
 
I like the idea of checking out the flipflop from regular to SWICK... Not sure if that will happen since the more variables the harder it is to keep track of what is going on.

I'd do the repotting SWICK vs non-SWICK comparison myself, but I'm not a consistent grower adept at watering, so it wouldn't prove much.

I will be practising my early watering skills on small pot plants by taking two clones per plant and trying to raise a non-SWICK clone with the SWICK clone as a genetic backup. I'll start as soon as I get my spider mite invasion firmly under control.
 
I never followed up on this re: my vacation. I ended up going with Blumats for my big girls (worked great), but had a few clones and a bunch of other plants that got the SWICK treatment.

DSC_0003_12.JPG


Unfortunately no pics of clones but a giant basil plant in its own tray, plus pepper seedlings and my son's precious marigold in a bigger starter tray. Thanks to this thread, everything survived 7 days alone and could have gone longer.

I'm debating putting my next round on a SWICK bed due to the pains of hand watering the back plants in a scrogged-out closet. The Blumats seemed very finicky and I preferred the certainty of doing it by hand for my first grow after many years, but they served their purpose. Either way, I'd have to top feed the nutes. I'll be keeping my eye on this thread and the many journals for ideas. :rasta:
 
PeeJay has been running a side-by-side of root development on a SWICK vs the traditional wet/dry cycling. I believe these results are important for us. Although I believe there is a place for the SWICK I also believe we want to encourage massive fine root hair development in the early stages of plant development. I work in living soils, as do most of you. We need those massive root balls to give our beauties every advantage.

Although I don't believe that this is all of the story, I believe this is an important part of our learning curve. I have a thriving no-till on its third cycle that's been sitting non-stop on its SWICK since a month into its first run, and the produce I've harvested from that pot is too-quality. Obviously, there's more going on here than the simple chemistry of soil exchanges.

I'm going to repost what PeeJay put up today and follow it with the beginning to the discussion that's just beginning.

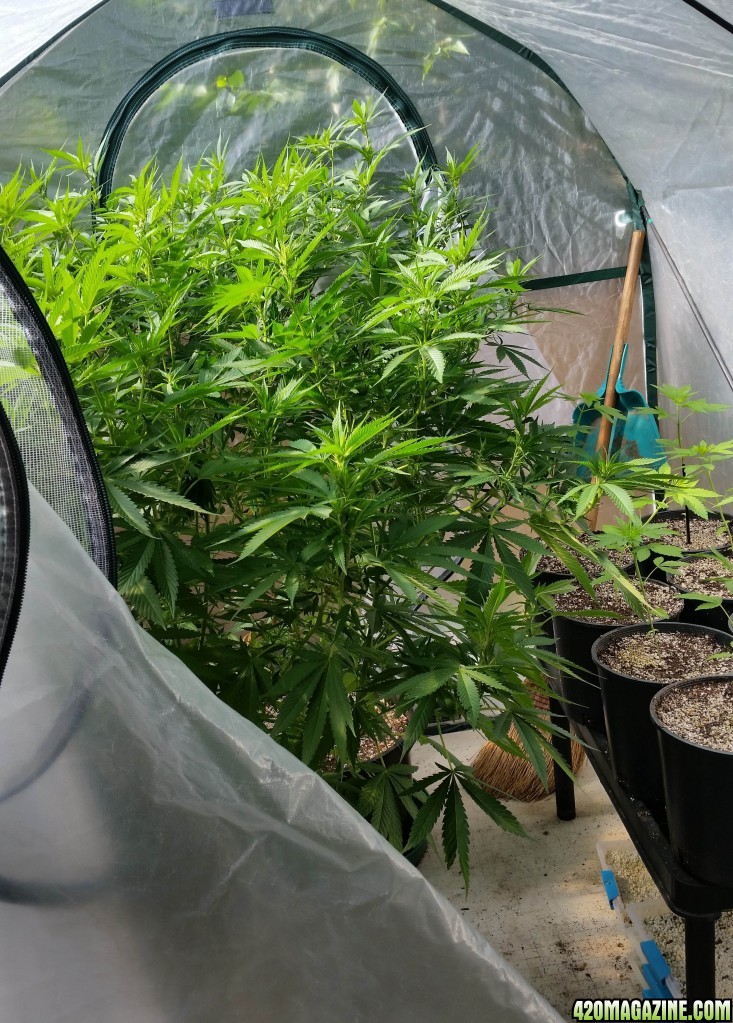
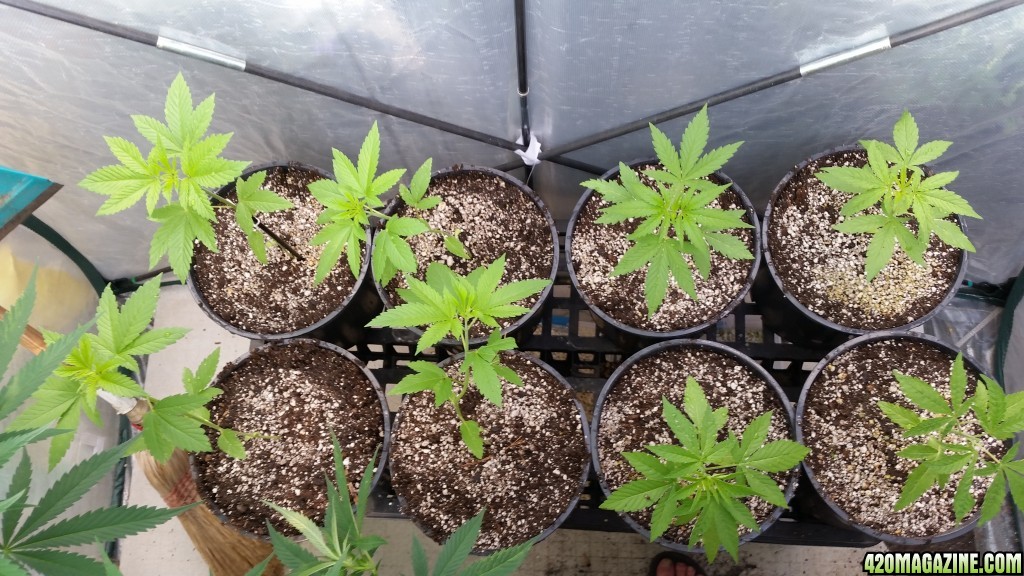
The SWICK side-by-side has come to an end. This has nothing to do with deciding that SWICK is no good. It has to do with space! The DarkStar and Sage'n Sour are going crazy in stretch. The idea of getting in there to check on 16 plants was kind of scary. I culled the four weakest Panama and Chitral. Now there are 8 in 2 gallon cans of PJ v2.01. You can see from this picture how tight space is getting. I had to up-can. The plants are ready for food. There is no way I was fitting 16 2 gallon pots in there. In fact, there was no way I was fitting 4 of the 8 that remain in SWICK trays. Oh well...

20150728_092217.jpg


Even though conditions in the greenhouse have been rough (temps well over 100 in there for a couple of hours a day and RH in the teens) growth all around is not bad for 19-22 days. If anything I would say the SWICK slightly outperformed traditional water. Four Chitral on the left, four Panama on the right.

20150728_083627.jpg


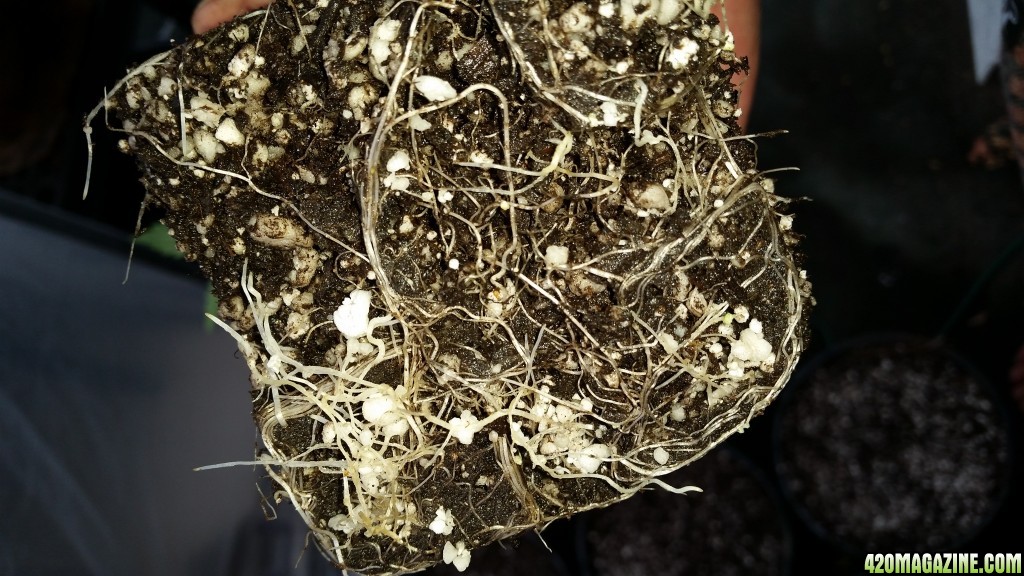
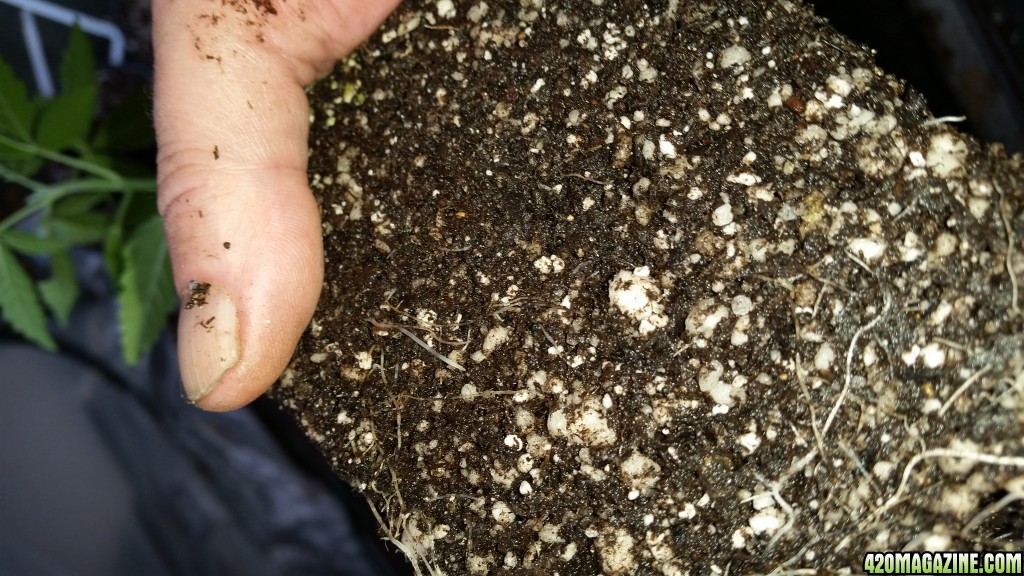
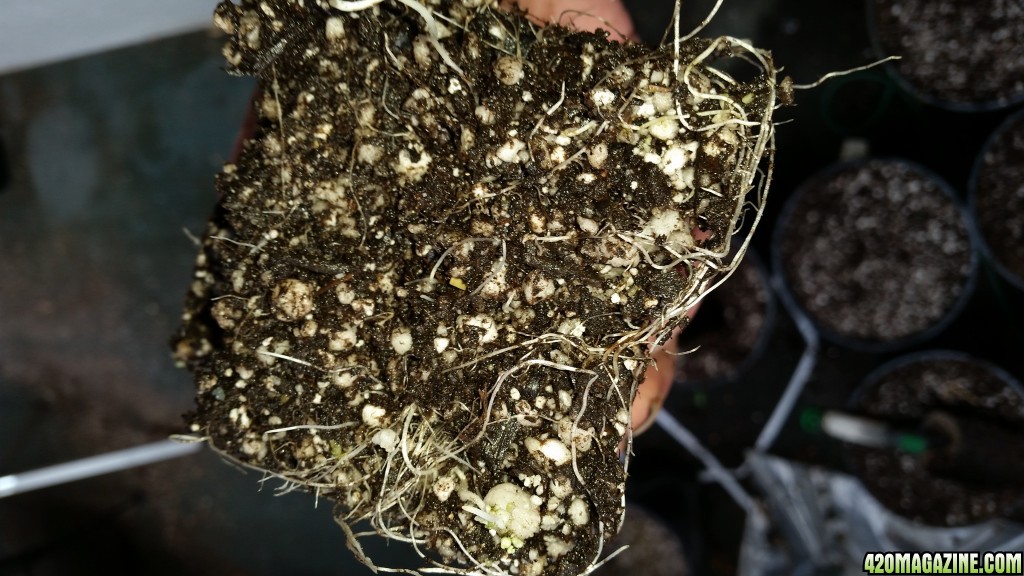
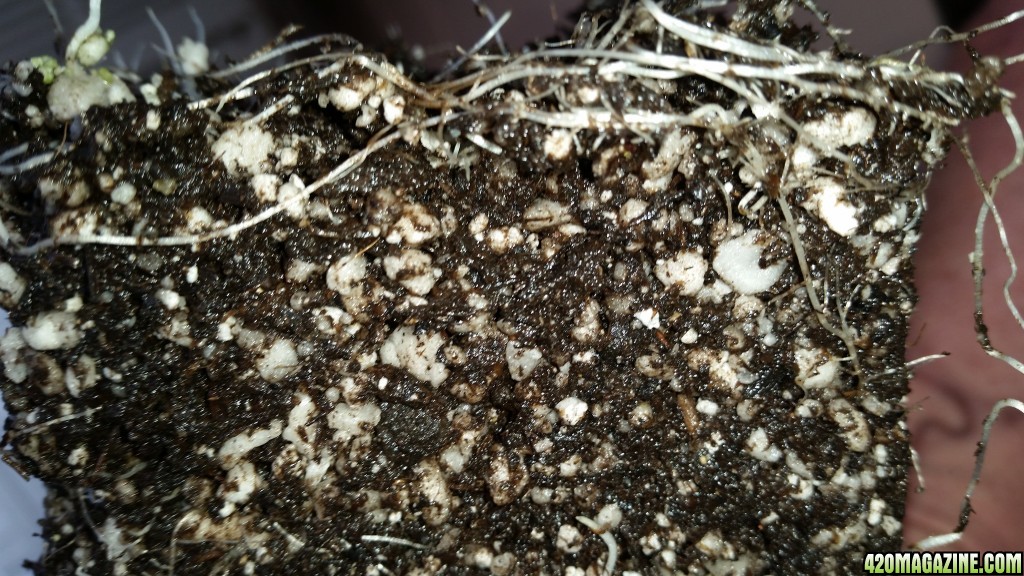
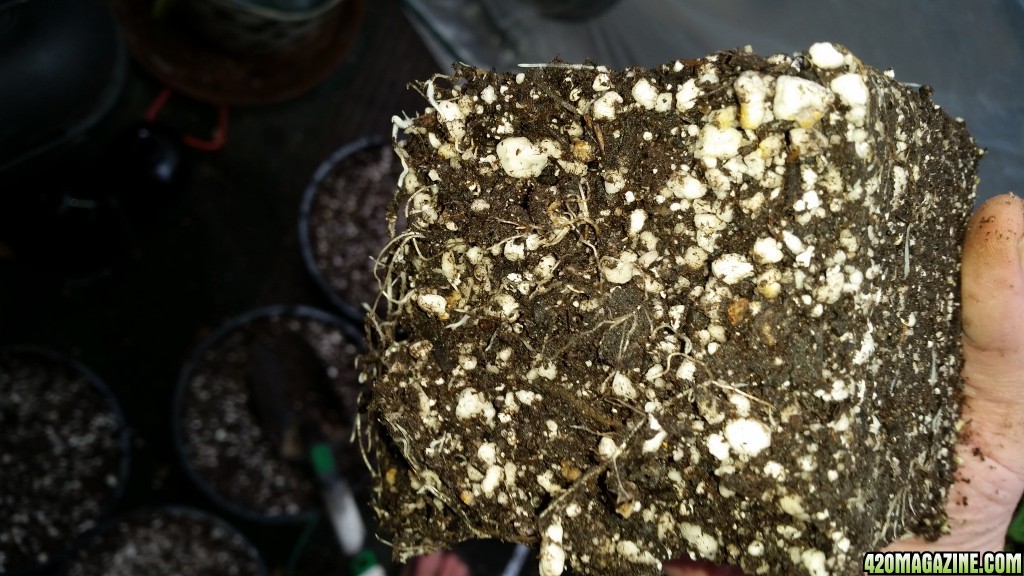
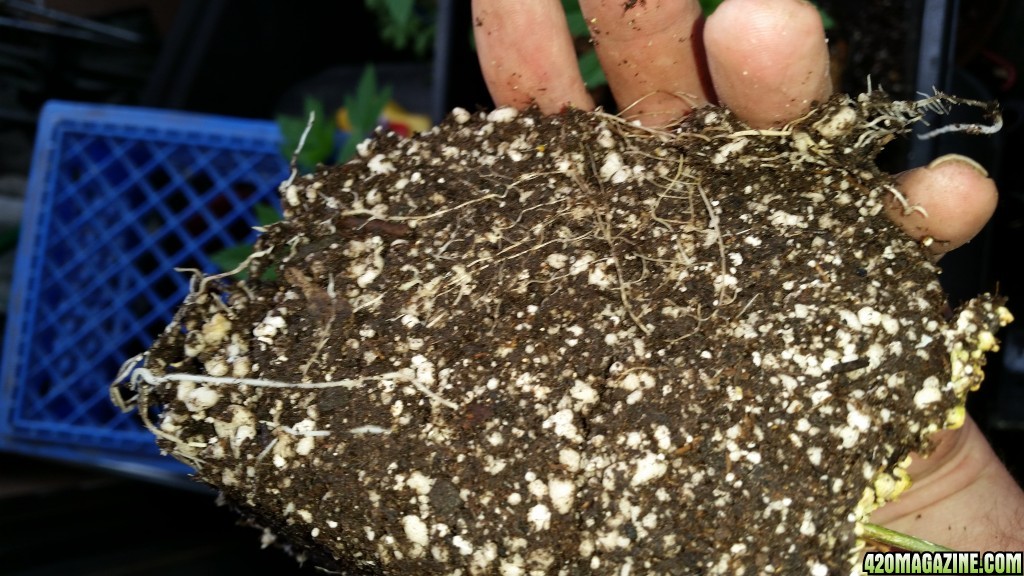
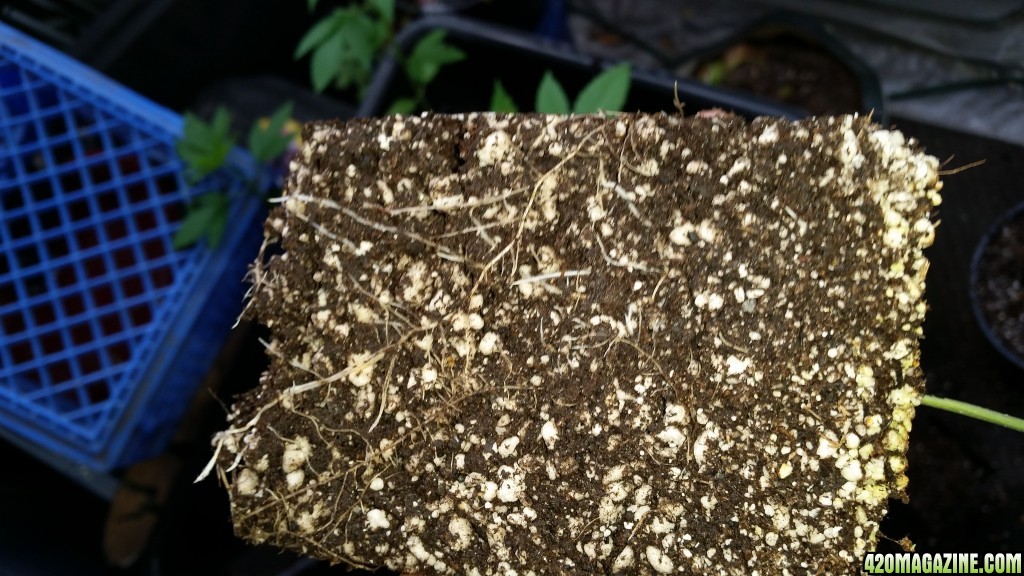
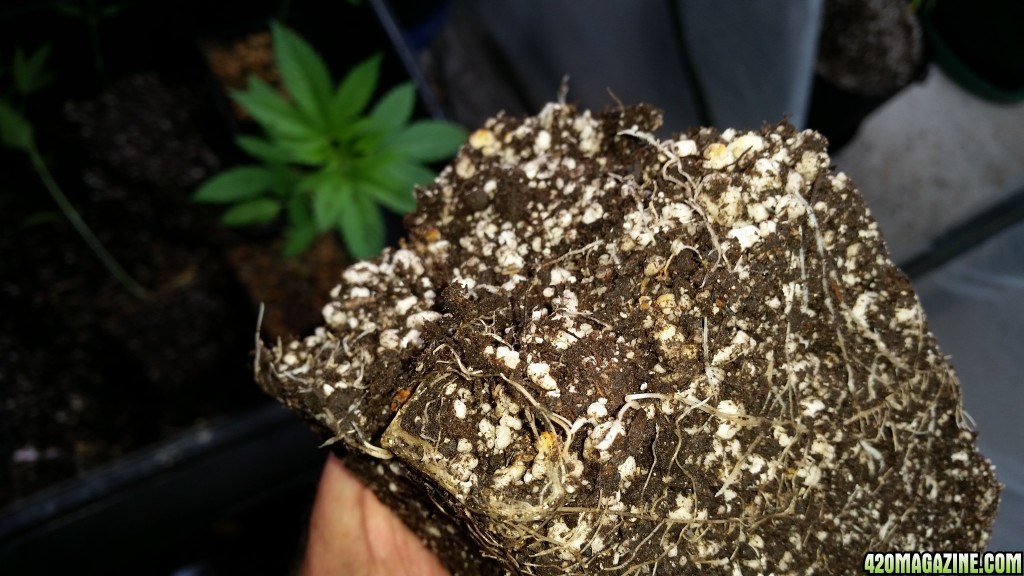
Looking at roots during transplant was as expected. Roots in the SWICK pots were bunched at the bottom and were not well distributed compared to the traditionally watered pots.

SWICK from the bottom:

20150728_075545.jpg


SWICK side:

20150728_075552.jpg


More SWICK

Bottom

20150728_080007.jpg


Side

20150728_080014.jpg


Traditionally watered:

20150728_080832.jpg


20150728_081702.jpg


20150728_082021.jpg


20150728_082027.jpg


Those aren't great pictures. Juggling root balls and the camera is not easy. Anyway there is a much more developed web of fine roots; hence a better soil/plant interface in the traditionally watered plants. I have no idea if this even matters moving forward and we are never going to know.

:smokin2::rofl:
 
The beginning of the discussion

Thanks for the documented side-by-side, PeeJay! :thumb:

It's startling how educational a simple experiment can be. I never really thought about incremental root development - the hourly/daily growth - before. Seeing examples of that growth is So instructive! Since we're feeding from the soil biota and not directly, we want lots of surface area, lots of fine roots. To get that, we have to have more uniformity in soil moisture than the Swick provides. It would seem that Swick has the advantage there, but unfortunately the lowest soil layer stays wet, encouraging roots to settle in and grow, impeding lateral growth. Foliage does better at the expense of root development.

Very interesting. :hmmm:

I'm also curious about aeration, a subject that almost never comes up in the forums. I've always erred to the dry side when caring for potted plants and even those in beds, because it's fairly easy to add more water, and hard to take it out, AND because while you wait for the soil to dry, the roots are choking to death - double trouble. :cheesygrinsmiley: I've never killed a plant by parching it, but many houseplants have died from soggy soil. So ... what about the role of aeration? Our lil soil beasties thrive on it, don't they? They don't really love water - it's a thick humid soil atmosphere that they love. The chemical reactions require available gasses, so they need to be able to freely burble and osmose throughout the soil.

Parch-and-Drench watering allows portions of the soil to get mortally dry, so it definitely has its downside, but it seems like Swick has one, too. Actually ... Swick would be better for bloom, when the roots are already established and the plant simply needs a steady source of water ... :hmmm:

I don't have any definitive answers, Gray. I perceive a general lack of understanding about soil biota hereabouts. One of the things that happens in waterlogged soil is denitrification.

Basically as microbial action breaks down organic material it deaminates protiens removing the amino groups and converting them to ammonia (NH3). NH3 is a gas and will dissipate from dry soil in a hurry and out into the atmosphere. However, in moist or wet soil it becomes solubalized and makes ammonium ions (NH4+). NH3 + H2O -> NH4+ + OH- .

Next, organisms like Nitrosomas convert the NH4+ to NO2- (nitrite). Organisms like Nitrobacter convert NO2- into NO3- (nitrate) . These microorganisms get their energy from oxidizing the nitrogenous compounds.

The plant would love to be able to use NH4+ to create build it's proteins but the ions are typically tightly bound to negative charges in the soil. NO3-, however, with it's negative charge is easily transported across the cell membrane and into the plant. Nitrate is fully oxidized and is really the only form of nitrogen that plants take up in appreciable amounts.

In order for the oxidation reactions to take place there needs to be an electron acceptor and in this case it is oxgen. Waterlogged soils contain little or no free oxygen. When there is no oxygen then the pathway from NH3+ to the NO3- is disrupted. To make matters worse there are anerobic bacteria in the soil that like to use NO3- as an electron acceptor. They take the NO3- -> NO2- -> N2O ->N2 and it is lost from the soil and into the atmosphere. When you let the soil dry appreciably it is hell on the anaerobes that do this reaction. In a continuously wet environment they thrive.

The nitrogen cycle from organic material requires both a wet and dry conditions. Wet conditions to solubalize the NH3 and dry conditions to facilitate the oxidation into usable NH3-. When a plant gets at least a modest wet dry cycle the correct conditions are available for both sets of reactions to take place as the soil slowly dries out from the bottom to the top.

If you'd like to follow the discussion on your own you can link to it here:

PeeJay's Neophyte Breeding Adventure
 
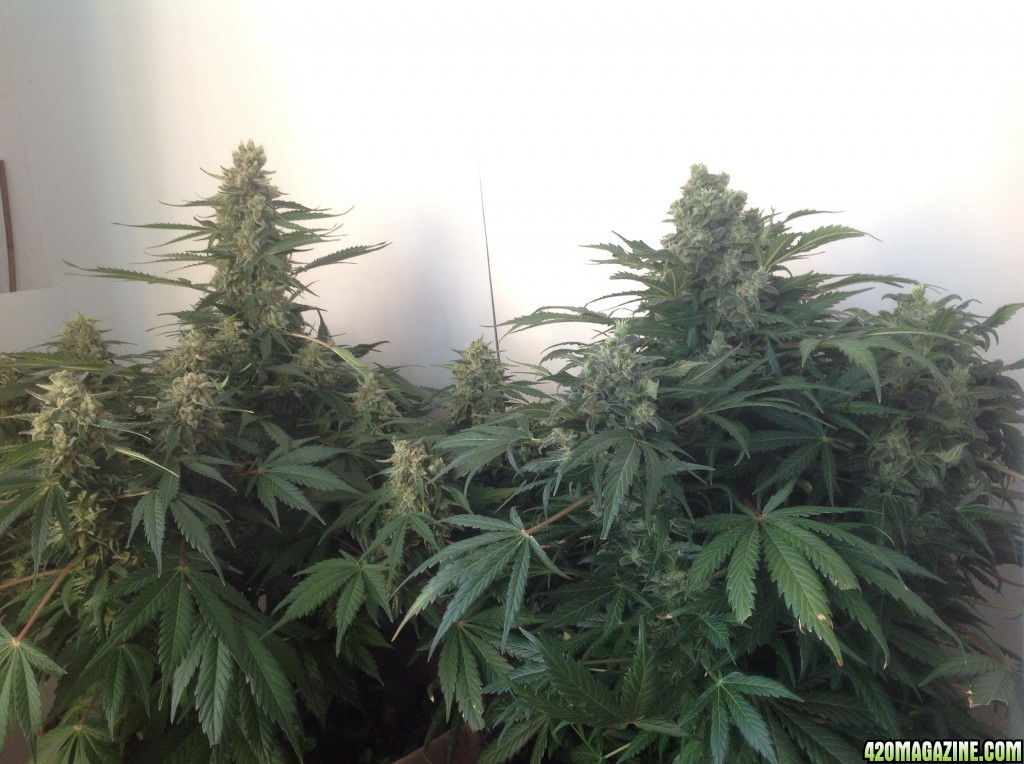
To keep the perspective here, these were my first grow. These two monster bushes were placed on a SWICK at about one month in and left from then on. It may be that the root development was already established, though I can tell you that as a novice gardener I never let them get to the wilted stage.

image20143.jpg


These are healthy, happy plants that rewarded me with 4.5 ounces between them of superior pot. Beyond superior IMHO. So there is a place for this tool, but it's beginning to look like that place begins after the plant has developed some serious fine root hairs to give it the best possible interface with the soil.

Let the discussion continue.
 
Thanks for sharing this. Giving this method a try from seed to finish.

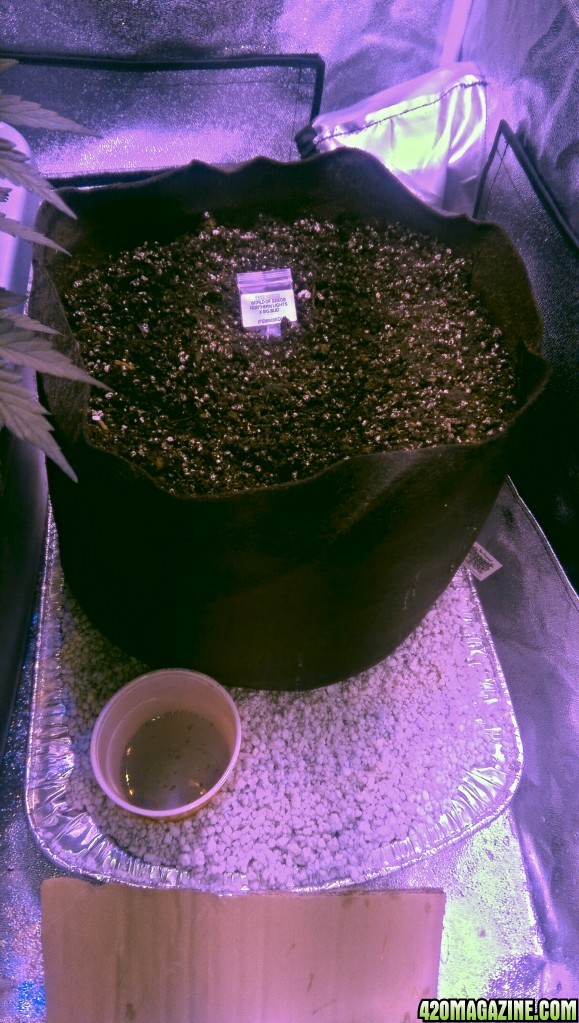
One thing I noticed. I tried putting dry soil on the wet perlite and gave it 12 hours with less than 1/4 inch decrease in water level and soil still very dry. I then manually watered the soil with about a gallon, not enough to completely saturate the soil, then 12 more hours later the water level was down another inch and a half.

IMG_20150801_110450.jpg
 
Thanks for sharing this. Giving this method a try from seed to finish.

One thing I noticed. I tried putting dry soil on the wet perlite and gave it 12 hours with less than 1/4 inch decrease in water level and soil still very dry. I then manually watered the soil with about a gallon, not enough to completely saturate the soil, then 12 more hours later the water level was down another inch and a half.

Makes sense. Dry soil does not absorb water as quickly as moist soil.

I had not thought about dry soil, because I always mix the soil ingredients dry, then mix in water to make it soil. I store the soil moist and always water before planting seeds or placing soil in a pot. Dry is for ingredients: moist is for usable soil.

Radogast, how do you store your moist soil and keep from getting mildew or mold on it? I've had this problem with storing my own.
Would appreciate any input on where you store it etc.

:circle-of-love:
 
Radogast, how do you store your moist soil and keep from getting mildew or mold on it? I've had this problem with storing my own.
Would appreciate any input on where you store it etc.

:circle-of-love:

I store the soil ingredients dry, so when storing the moist soil I am actually cooking the soil.

I find it smells when covered or too wet, so I have stored build-a-soil CC-mix uncovered in half full 10 gallon fabric pots for up to 3 months and routinley leave up to 4 gallons of seedling mix in a solid bottom 10 gallon plastic pot (hanging horse feeder) for months, using it up as needed.

The Lobster Compost I am adding as a dry ingredient comes in plastic bags and is not fully dry. I have stored other bagged compost in sheds for years. This lobster compost has benn stored in the basement since April with no smell or bug issues.

I have finished cooking soil in fabric pots on a SWICK, but that is usually high rent real estate :)

Thank you so much. I think my problem was covering it, although I thought I had left enough room for air. I'm just going to leave the cover off completely for future mixes.

:circle-of-love:
 
Thank you so much. I think my problem was covering it, although I thought I had left enough room for air. I'm just going to leave the cover off completely for future mixes.

:circle-of-love:

Canna, is what you're seeing a white, fluffy mold? If so, that's beneficial mold. It's a sign that your soil is alive.
 
SWICK Update

Just thought I'd drop by and showcase some photos of Papaya #1 and its rootball. Raised on a SWICK most of its life and occasionally allowed to dry out. Even in full flower, I could leave for 4-days without worry that my plants would dry out.

Papaya #1 before getting the axe.
IMG_74882.JPG


The rootball. Notice the fine hairs throughout. I can grab the stem, turn the rootball upside-down and shake vigorously without loosing more than a few tiny chunks of dirt.
IMG_7503_2_.JPG
IMG_75031.JPG


Overall, I'm very pleased with the root system and how the SWICK performed. I must re-iterate that I allowed the SWICK reservoir to dry out several times in veg to encourage the roots to branch out in search of water. I'll definitely be employing the SWICK system in most of my future grows.

:Namaste:
 
I could kiss you, my favorite Mysterious Man. :kisstwo: :Love:

My big pot is a no-till, as you well know, so I've never pulled the football to check. This made me smile.

Fantastic specimen you grew there MysterySeeds. :bravo:
 
I get my rootballs looking like that too by repotting from a 2 oz starter pot then 3" square pot then 1/2 gal, 1 gal and final 4gal. At every repot I saw the bottom inch off the rootball with a breadknife and shave down the sides to get rid of any long stringy roots and force them all to branch out like the plant does when it's topped.

Seeds started in large pots send a tap root deep down and branch out from there leaving much of the top half of the rootball devoid of roots. Clones already have roots headed in all directions and tend to branch out better on their own. Those fabric grow bags and airpots with all the little conical holes in the sides air-prune the root tips to do a good job of filling the rootball with feeder roots.

L8r
 
Back
Top Bottom