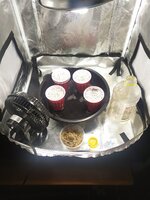
Hempy Solo Cup Germination
You’ll need:
I use a leather awl to poke the hole and then cut a circle with scissors. You can also burn a hole, but that wasn’t an option for me.
I have disposable pipette a for filling capsules. They come in handy here too.
I keep a glass of clean water to rinse the pipette, emptying right down the drain each time so I don’t pollute the rinse water
On Felipe’s advice, drop that seed pointed end up to help the emerging seedling shake off the cap.
Leave the heating pad on 24 hours a day until you have a sprout.
Autos get transplanted the day they lift their heads from the perlite. Photos are left to grow past the outer edges of the cup before transplanting, our next tutorial.
On Felipe’s advice, drop that seed pointed end up to help the emerging seedling shake off the cap.
You’ll need:
- perlite (I prefer coarse)
- strainer you’re rinse perlite
- water for diluted nutrients
- 2 Solo cups (I like the 16 oz size)
- lid for Solo cup
- drip saucer to place under cup
I use a leather awl to poke the hole and then cut a circle with scissors. You can also burn a hole, but that wasn’t an option for me.
I have disposable pipette a for filling capsules. They come in handy here too.
I keep a glass of clean water to rinse the pipette, emptying right down the drain each time so I don’t pollute the rinse water
On Felipe’s advice, drop that seed pointed end up to help the emerging seedling shake off the cap.

Leave the heating pad on 24 hours a day until you have a sprout.
Autos get transplanted the day they lift their heads from the perlite. Photos are left to grow past the outer edges of the cup before transplanting, our next tutorial.
On Felipe’s advice, drop that seed pointed end up to help the emerging seedling shake off the cap.


