Goldbud420
New Member
Hey everybody,
This is my second grow journal, second go round with Blue Planet Nutrients, second go round with the lovely White Russian.
This time, I'm trying aeroponics. Rather than dump hundreds of dollars on a turnkey system, I decided to build my own (for ~$150-200).
For the aeroponic tubes, I used 6" pvc. To save on costs, I used the sewer and drain grade, which is lighter, and ran me ~$15 for 10 ft. I got two 10 ft. sections from a local irrigation supply store to make three 42" tubes. I also got 6 end caps, which cost about 7 bucks a piece, and twenty 3.9 gal/hr misters with barbed ends suitable for drip irrigation systems at 57 cents a pop.
I cut the pvc to 42" lengths using a hacksaw, and sanded the cut ends well to remove any pvc fragments. Every pvc cut I make throughout the construction is also well sanded; I want to try to eliminate any loose pvc that could possibly clog my misters.
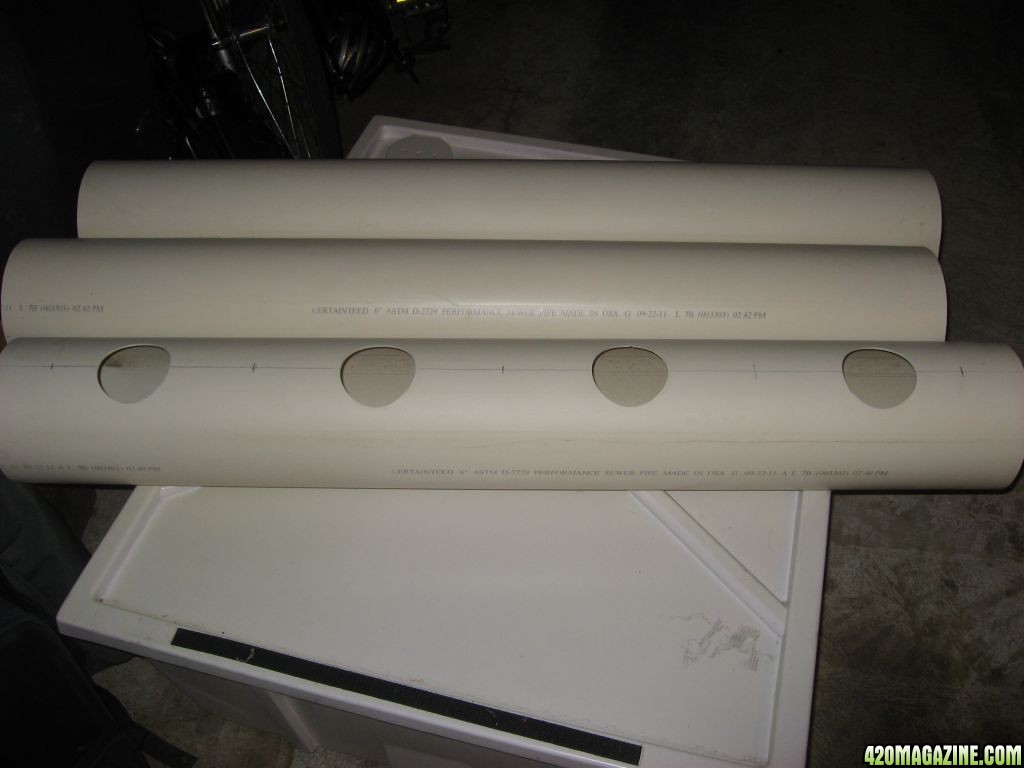
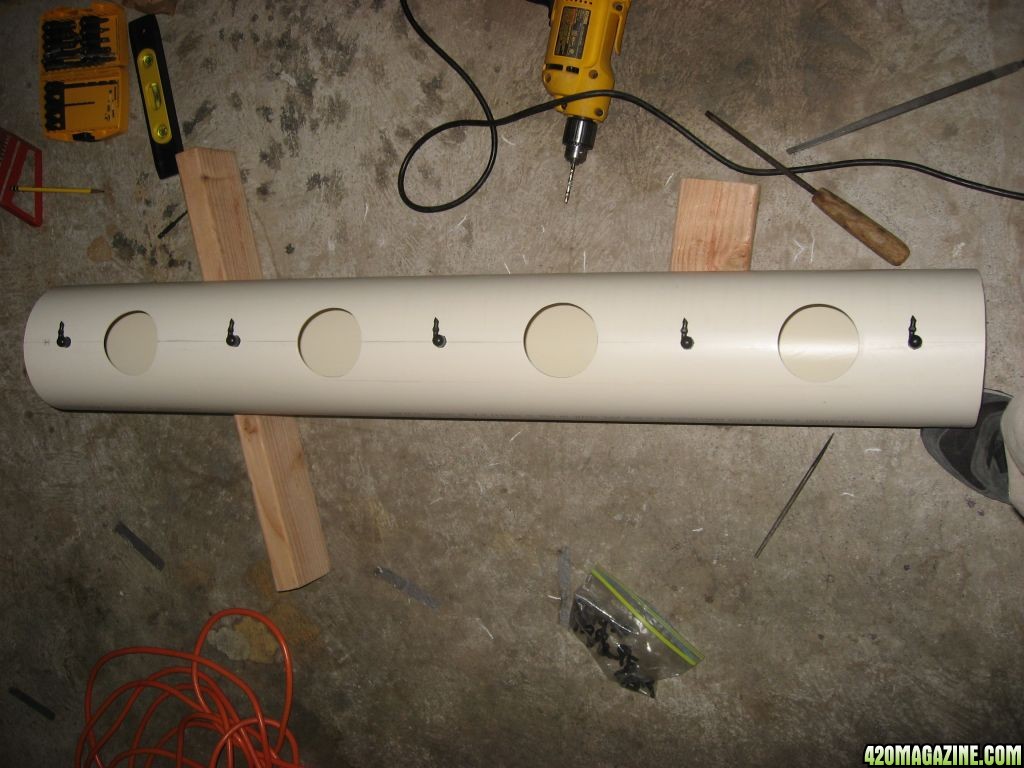
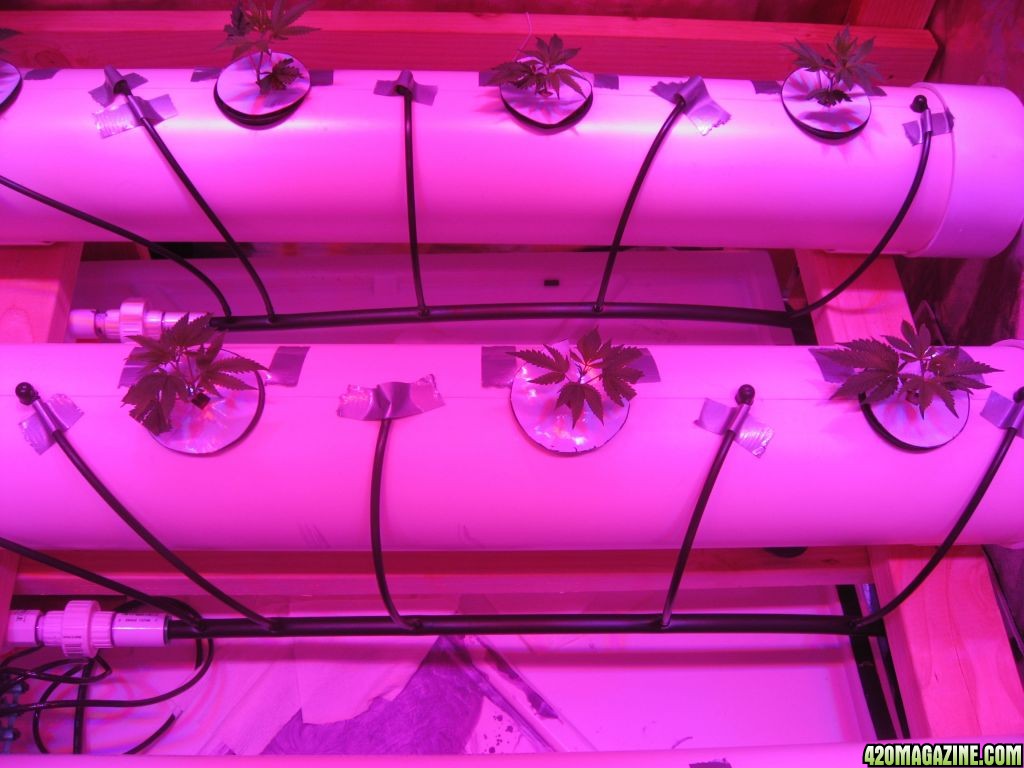
Next, using a 3" hole saw, I drilled 4 sites per tube in a line along one side. I centered the sites by the following measurements: the end sites are centered 6" from the ends, and the interior sites are centered 10" from the centers of the end sites, so each site is equally spaced from one another. Of course, I sanded the holes well. It looks like this.
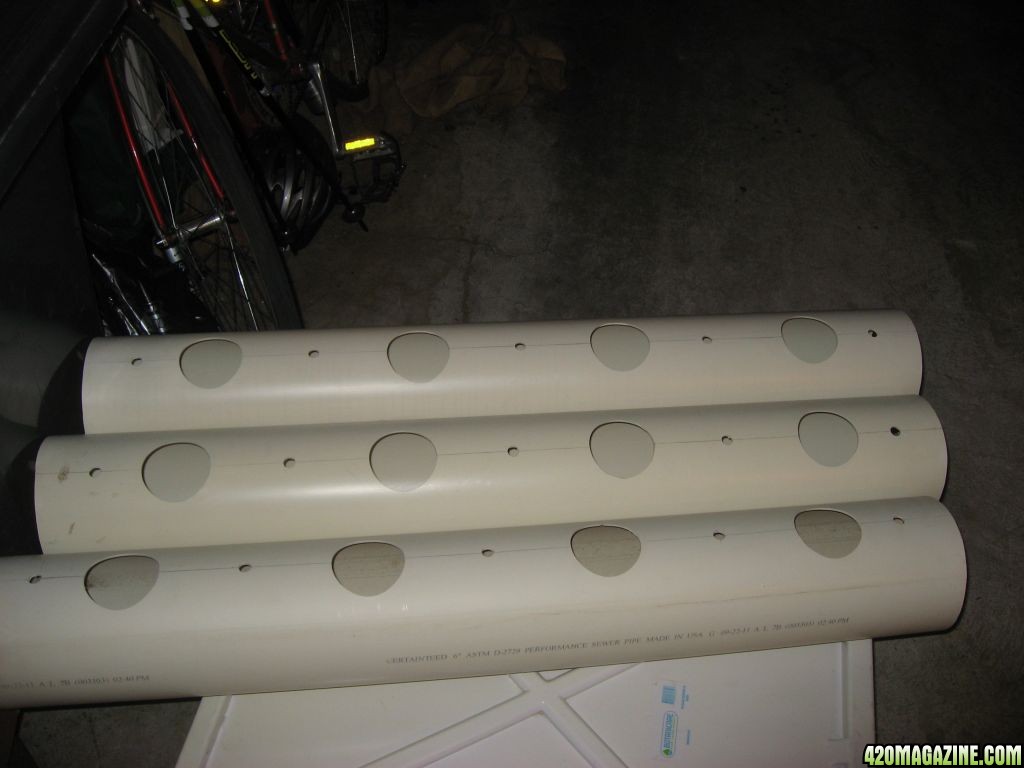
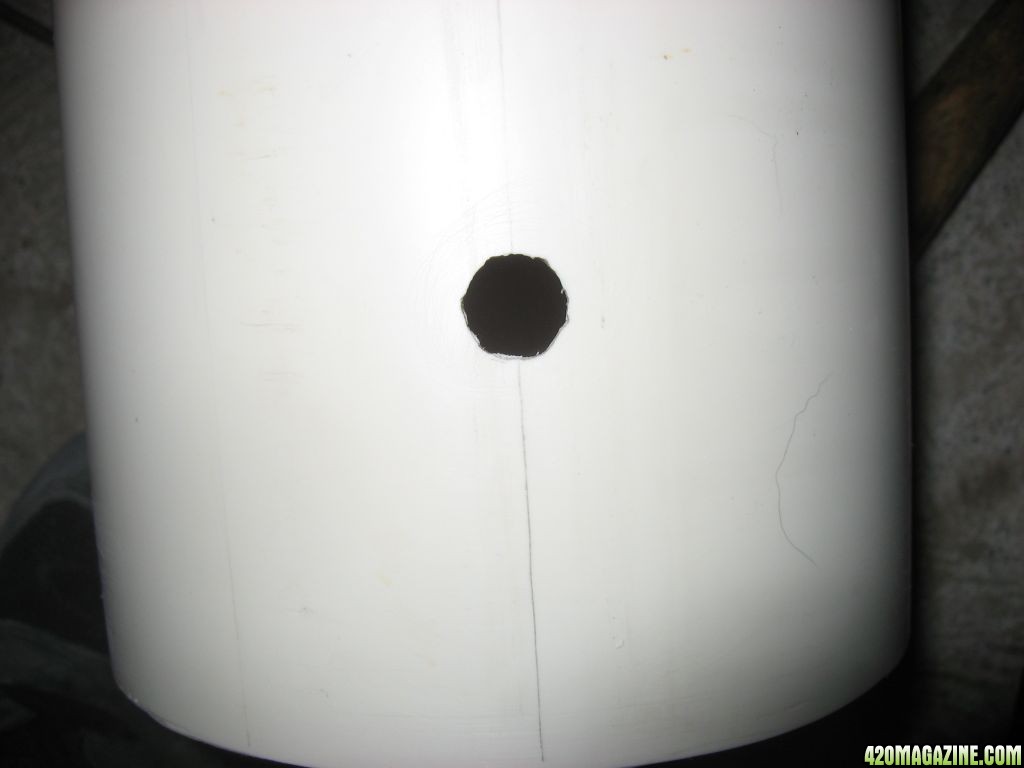
I put 5 mister sites per tube; they are centered at 3.5" between the sites, and 2.5" from the ends of the tubes. I used a 1/2" wood borer drill bit, but I suppose any 1/2" bit would be fine. Next, as the head of the mister is hexagonal, I "hexed" out the hole using a square file so the mister could be wedged in. Again, I sanded, but I tried not to overdo it because I wanted to keep the fit snug. And voila, the tube construction is complete!
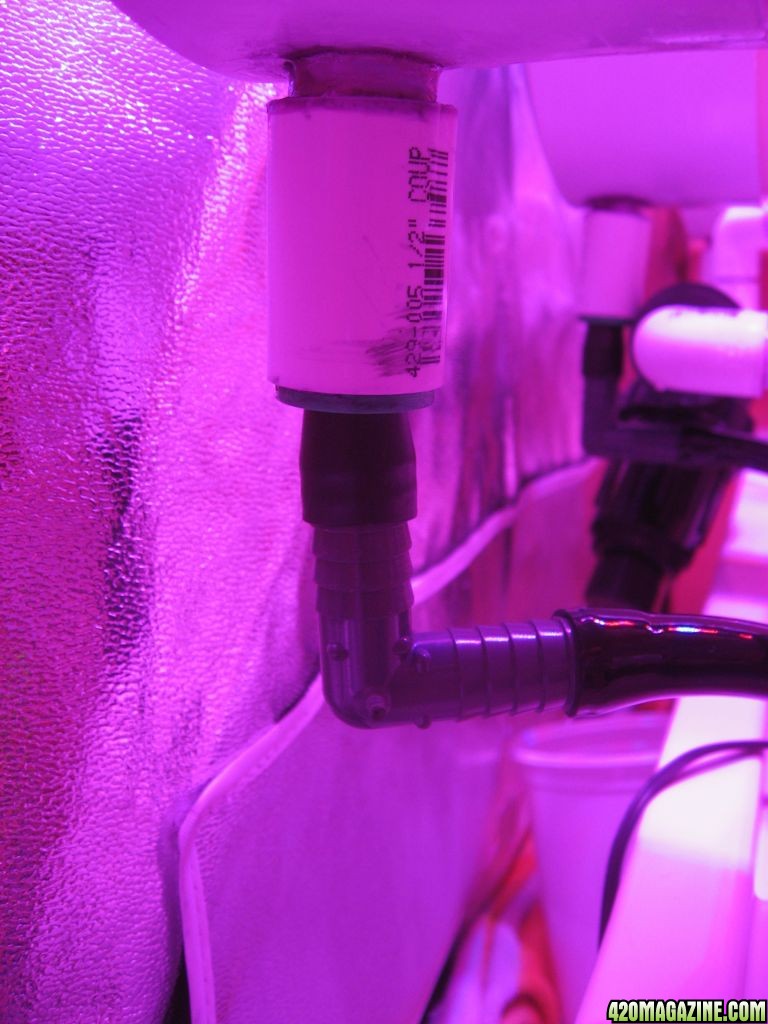
Next, I prepared three of the end caps to accommodate the drains for each pipe. I drilled holes in the sides of the caps using a 13/16" wood borer, and sanded it to clean it up. Then, I attached each to a 1.25" piece of 1/2" pvc to a coupler using purple primer and pvc glue. A half inch pvc to drip converter was glued into the other end of the coupler. The free end of the pvc fits tightly into the drilled hole in the end cap, and is glued into place.
To connect the drain to the res (a 40 gal Botanicare), I inserted a compression elbow into the end of a ~2" length of 1/2" poly tubing (for drip irrigation), and inserted the other end into the pvc to drip converter. On the other end of the compression elbow, I put ~8" of 1/2" line to run back to the res (once the end cap is in place).
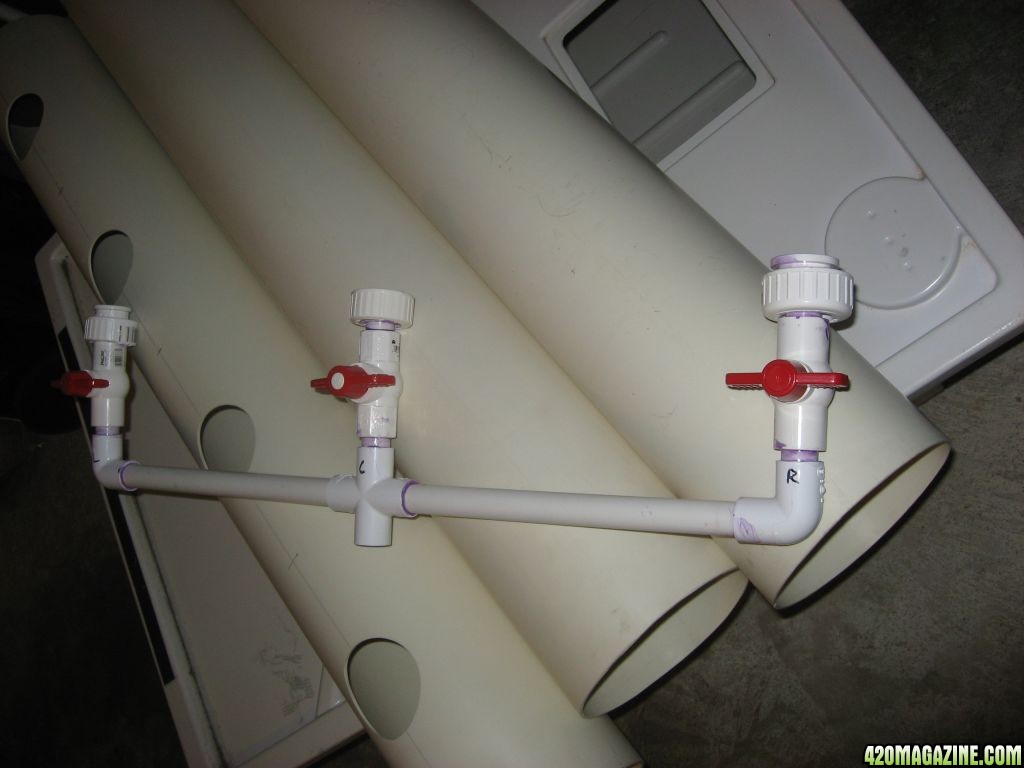
For the feeder lines, I used 1/2" poly tubing (the kind used for drip irrigation). The spacing and construction of the feeder lines will be different for everybody depending on your space, so I won't go into great detail here, except for a few points which I think are key. If anybody wants any details on measurements, just let me know.
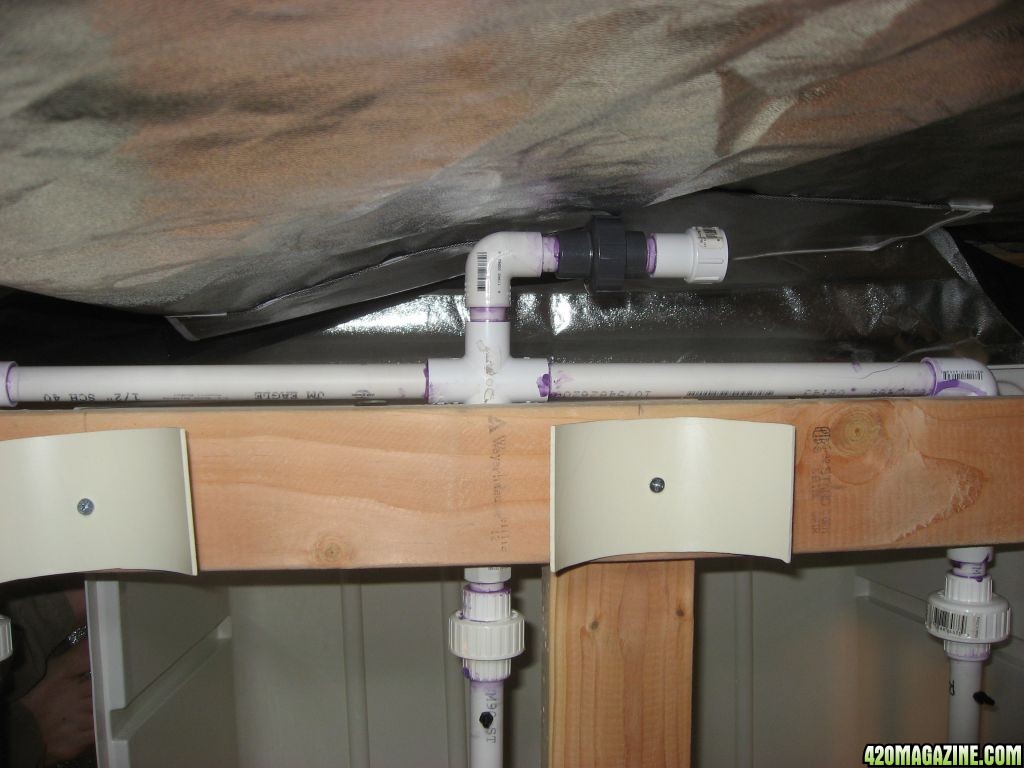
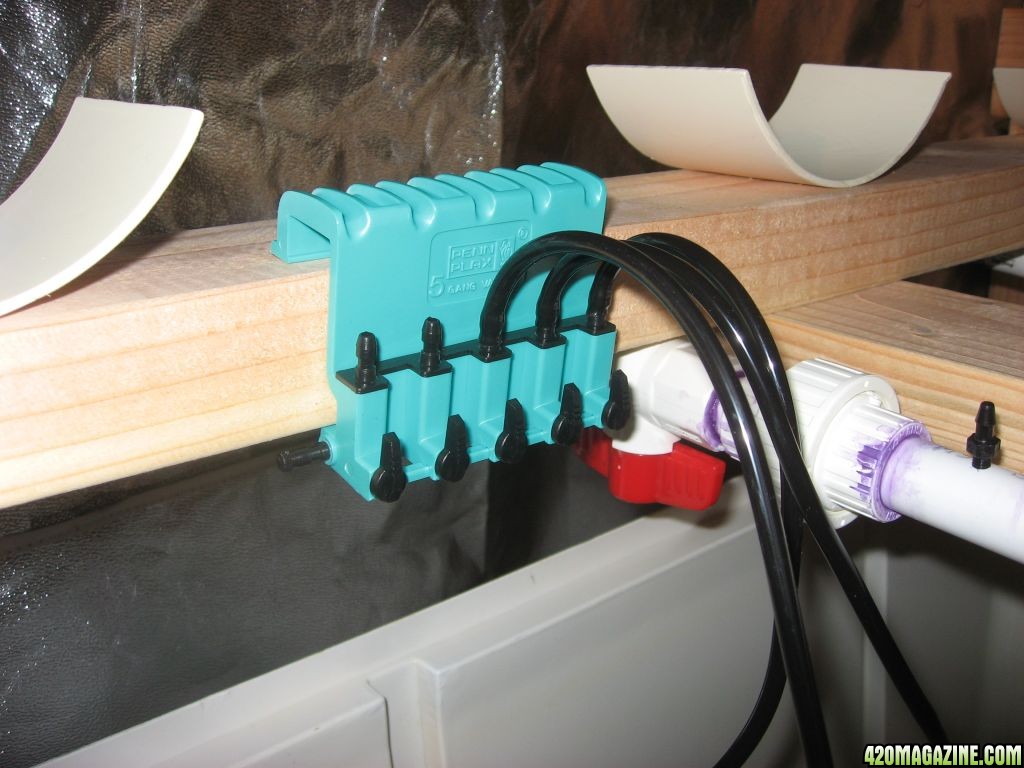
Construct a manifold from which to run your feeder tubes. By using valves and unions, you can turn off feeder arms if a repair is needed on any of the misters or tubes, and you can remove the arms if necessary. All other junctions are glued together (except large tube end caps) with purple pvc primer and pvc cement, so having unions is critical if you wish to disassemble the feeding rack.
To attach the feeder arms to the misters, I used 1/4" drip line. The barbed end of the mister is inserted into one end of a length of tube, and the other end is attached to a 1/4" barbed connector. One end is inserted into the line the same as the mister, and the other end inserts into a hole punched in the 1/2" poly tube. As there are 5 misters per tube, there are 5 holes punched along each length of poly.
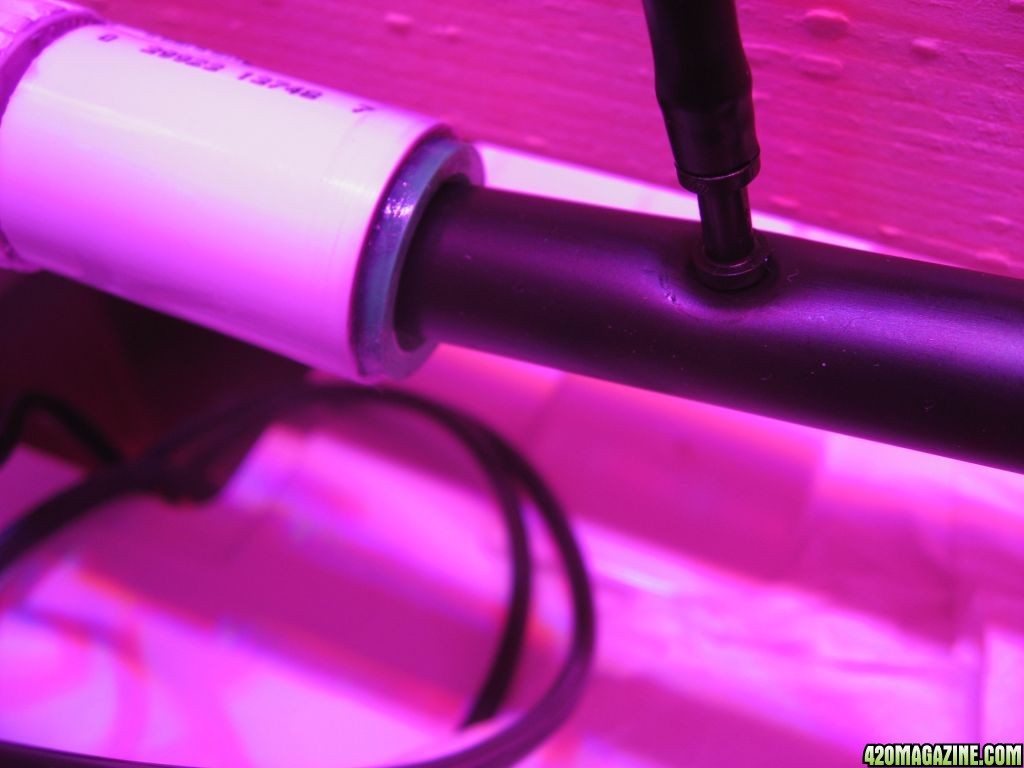
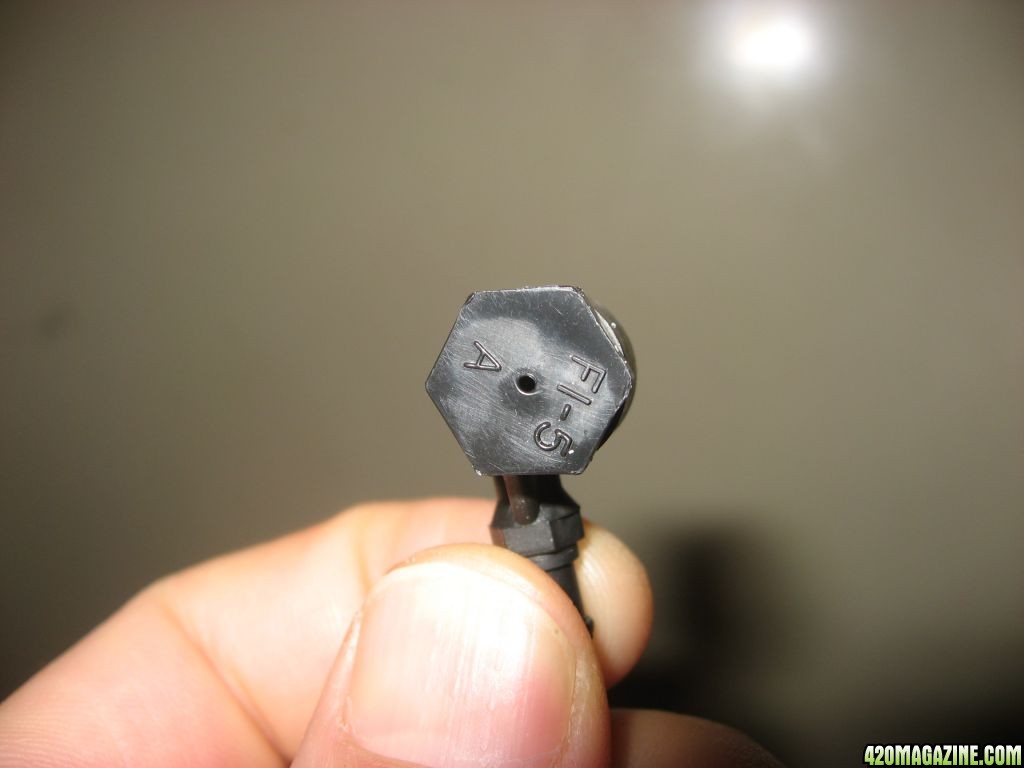
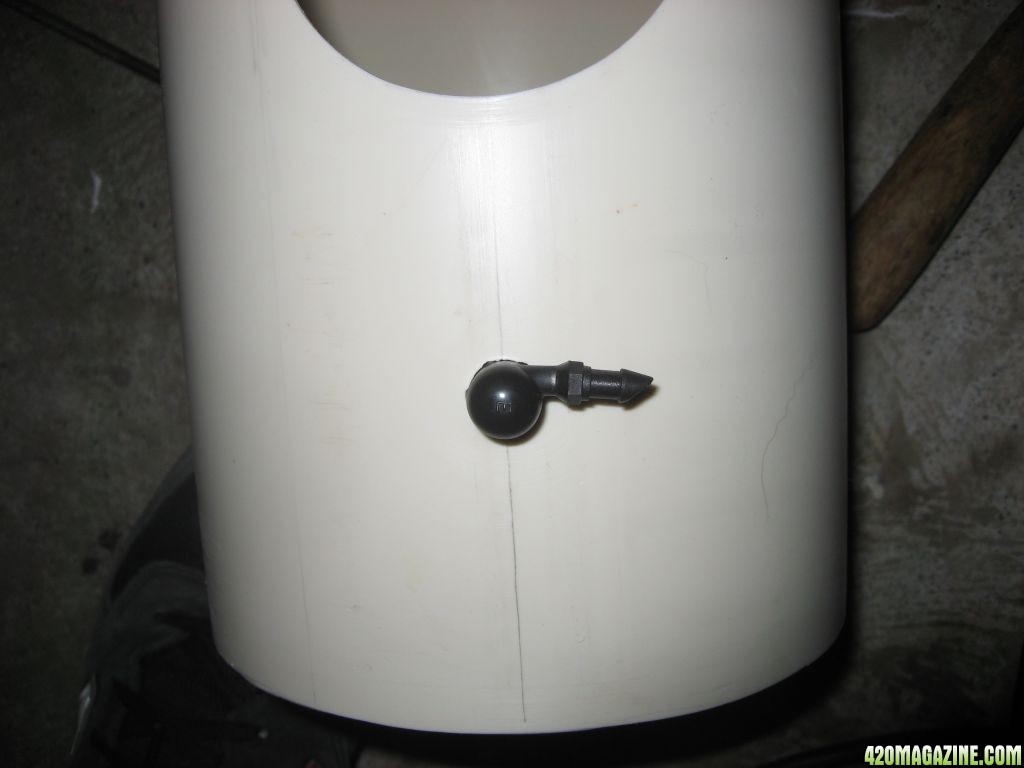
Close-up of a mister
Now to attach the manifold to the pump. Again, this will vary for everybody, but the key points are to use a filter and perhaps to have another union to facilitate filter housing removal and disassembly of the feeding rack. I use a "Y" filter, and it is attached to a 1/6 hp Wayne Submersible pump (3000 gph).
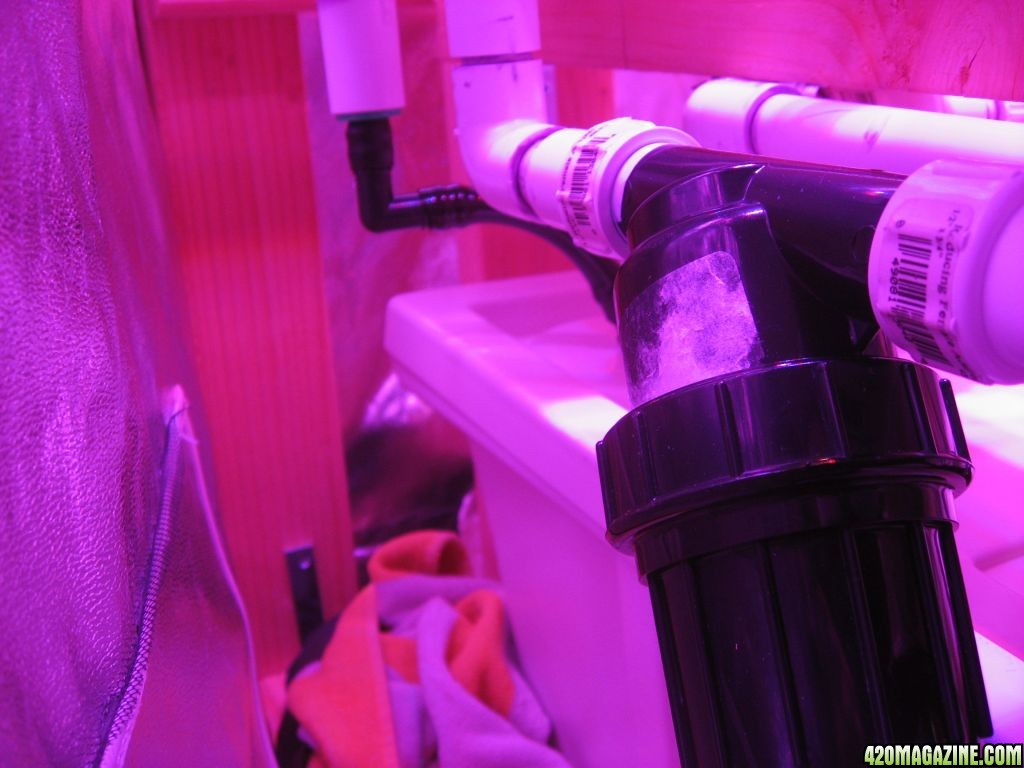
That is the crux of it. Attach all of the end caps, make sure the misters are in place, and its good to go.
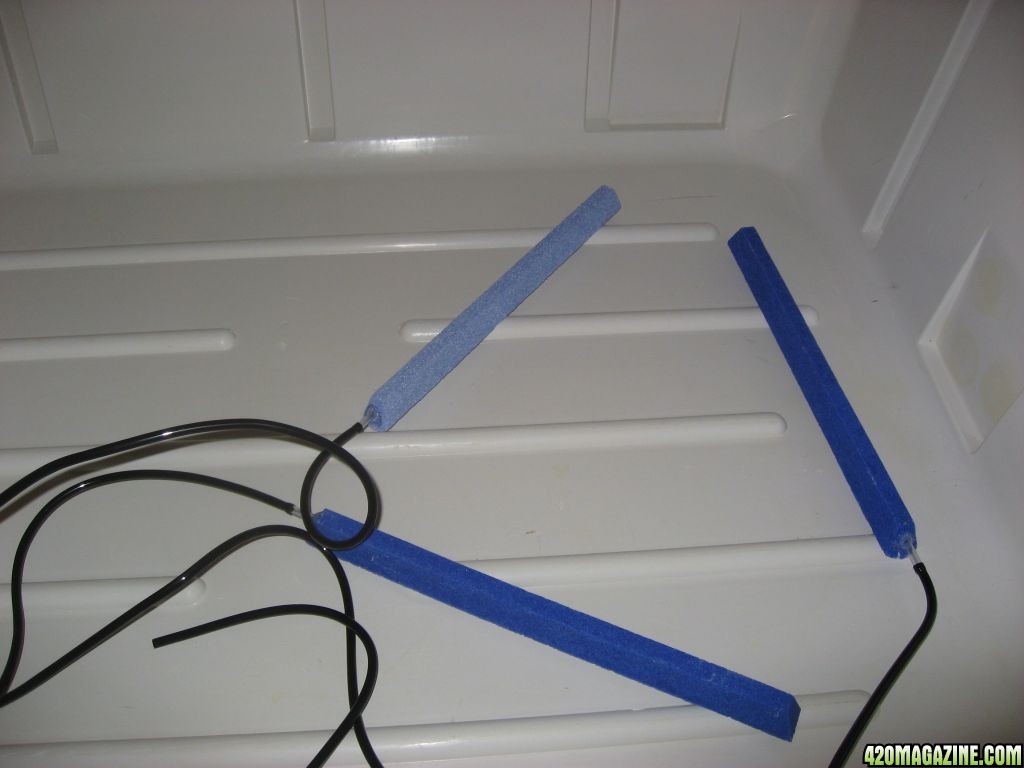
Also, set up some airstones so the res is good and oxygenated.
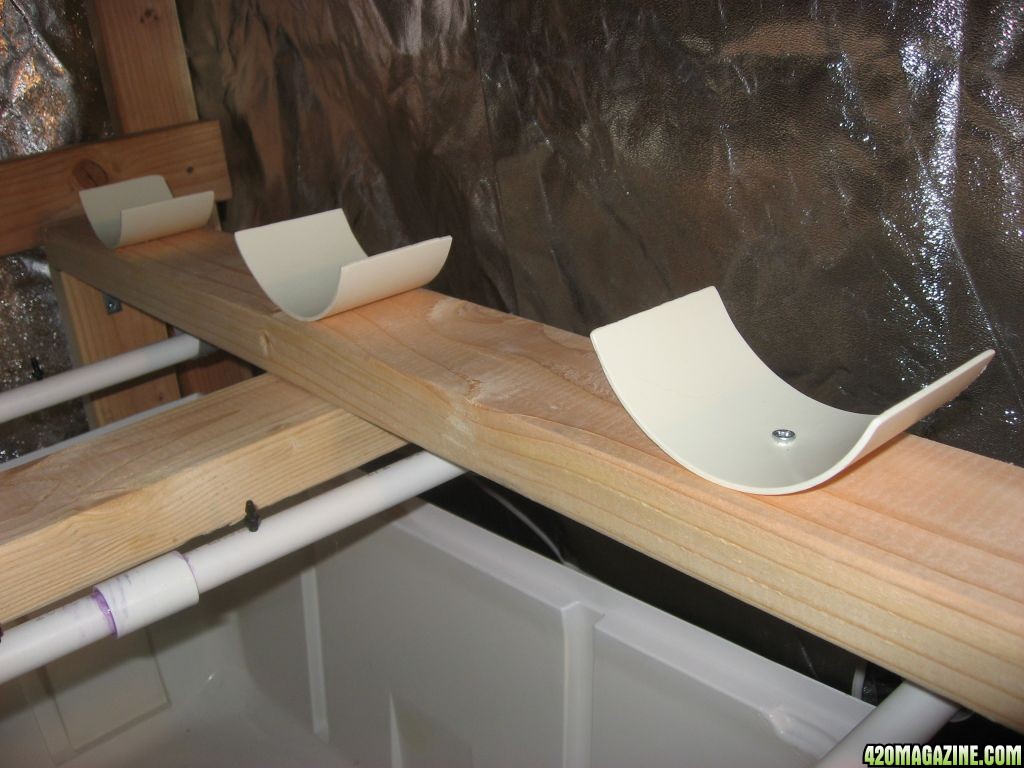
I cut excess 6" pvc in thirds lengthwise to serve as mounts for the aerotubes
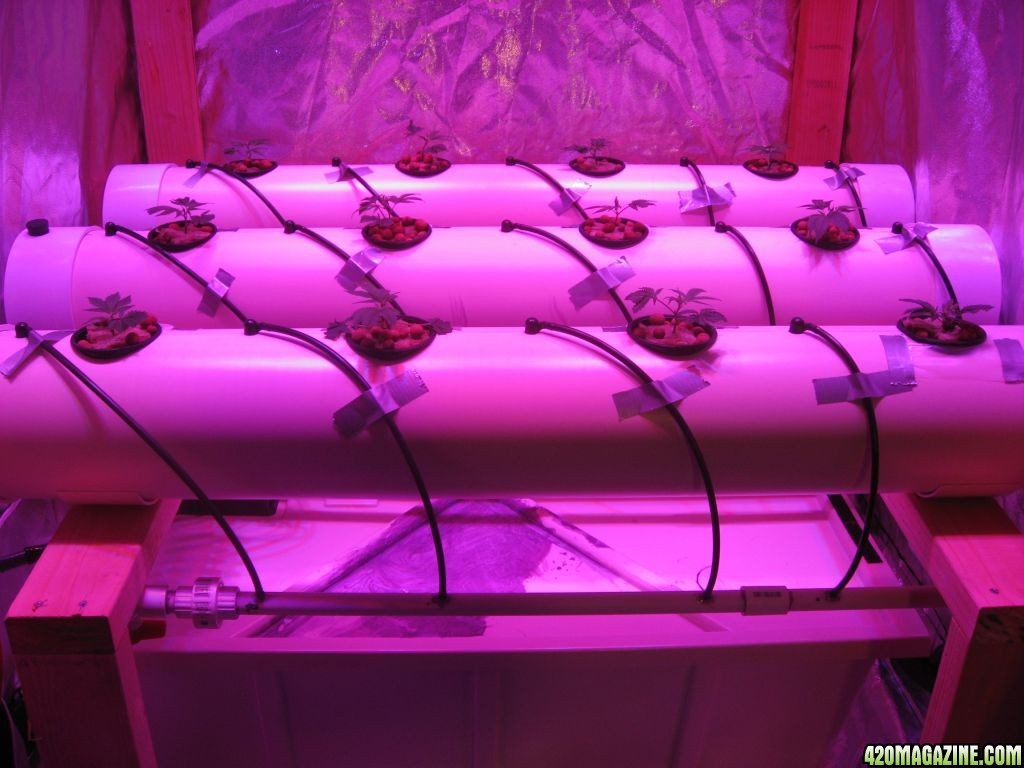
I've planted up some White Russian clones into 3" net pots, filling out the pot with hydroton. Because of the curvature of the 6" pvc, the pots are a bit wobbly, so I stretched some plastic film over ~1/3 of the hole and duct taped it in place, so the pot fits tightly into the hole.
I've been feeding the clones at 5 mL/gallon each of BPN's Grow, Micro, and Bloom, so I mixed up the res at those volumes. Currently, I've got the res filled to 30 gallons. After adjusting the pH to 5.5, the nutrient strength is 510 ppm. I am running four 100w Diamond Series Lights from Advanced LED. I have the lights ~30" above the plants, and I am only using the "veg" band at this time.
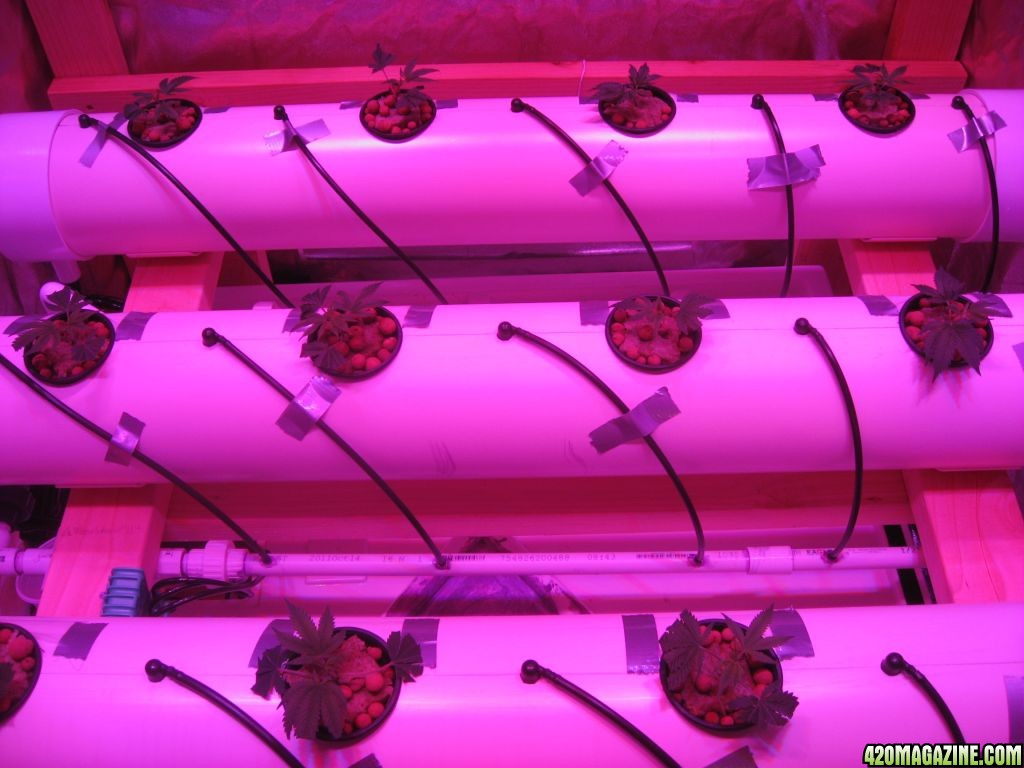
I think that's all for now. If anyone has any questions, or if I've left out crucial info, just let me know.
Thanks, and stay tuned.
This is my second grow journal, second go round with Blue Planet Nutrients, second go round with the lovely White Russian.
This time, I'm trying aeroponics. Rather than dump hundreds of dollars on a turnkey system, I decided to build my own (for ~$150-200).
For the aeroponic tubes, I used 6" pvc. To save on costs, I used the sewer and drain grade, which is lighter, and ran me ~$15 for 10 ft. I got two 10 ft. sections from a local irrigation supply store to make three 42" tubes. I also got 6 end caps, which cost about 7 bucks a piece, and twenty 3.9 gal/hr misters with barbed ends suitable for drip irrigation systems at 57 cents a pop.
I cut the pvc to 42" lengths using a hacksaw, and sanded the cut ends well to remove any pvc fragments. Every pvc cut I make throughout the construction is also well sanded; I want to try to eliminate any loose pvc that could possibly clog my misters.
Next, using a 3" hole saw, I drilled 4 sites per tube in a line along one side. I centered the sites by the following measurements: the end sites are centered 6" from the ends, and the interior sites are centered 10" from the centers of the end sites, so each site is equally spaced from one another. Of course, I sanded the holes well. It looks like this.
I put 5 mister sites per tube; they are centered at 3.5" between the sites, and 2.5" from the ends of the tubes. I used a 1/2" wood borer drill bit, but I suppose any 1/2" bit would be fine. Next, as the head of the mister is hexagonal, I "hexed" out the hole using a square file so the mister could be wedged in. Again, I sanded, but I tried not to overdo it because I wanted to keep the fit snug. And voila, the tube construction is complete!
Next, I prepared three of the end caps to accommodate the drains for each pipe. I drilled holes in the sides of the caps using a 13/16" wood borer, and sanded it to clean it up. Then, I attached each to a 1.25" piece of 1/2" pvc to a coupler using purple primer and pvc glue. A half inch pvc to drip converter was glued into the other end of the coupler. The free end of the pvc fits tightly into the drilled hole in the end cap, and is glued into place.
To connect the drain to the res (a 40 gal Botanicare), I inserted a compression elbow into the end of a ~2" length of 1/2" poly tubing (for drip irrigation), and inserted the other end into the pvc to drip converter. On the other end of the compression elbow, I put ~8" of 1/2" line to run back to the res (once the end cap is in place).
For the feeder lines, I used 1/2" poly tubing (the kind used for drip irrigation). The spacing and construction of the feeder lines will be different for everybody depending on your space, so I won't go into great detail here, except for a few points which I think are key. If anybody wants any details on measurements, just let me know.
Construct a manifold from which to run your feeder tubes. By using valves and unions, you can turn off feeder arms if a repair is needed on any of the misters or tubes, and you can remove the arms if necessary. All other junctions are glued together (except large tube end caps) with purple pvc primer and pvc cement, so having unions is critical if you wish to disassemble the feeding rack.
To attach the feeder arms to the misters, I used 1/4" drip line. The barbed end of the mister is inserted into one end of a length of tube, and the other end is attached to a 1/4" barbed connector. One end is inserted into the line the same as the mister, and the other end inserts into a hole punched in the 1/2" poly tube. As there are 5 misters per tube, there are 5 holes punched along each length of poly.
Close-up of a mister
Now to attach the manifold to the pump. Again, this will vary for everybody, but the key points are to use a filter and perhaps to have another union to facilitate filter housing removal and disassembly of the feeding rack. I use a "Y" filter, and it is attached to a 1/6 hp Wayne Submersible pump (3000 gph).
That is the crux of it. Attach all of the end caps, make sure the misters are in place, and its good to go.
Also, set up some airstones so the res is good and oxygenated.
I cut excess 6" pvc in thirds lengthwise to serve as mounts for the aerotubes
I've planted up some White Russian clones into 3" net pots, filling out the pot with hydroton. Because of the curvature of the 6" pvc, the pots are a bit wobbly, so I stretched some plastic film over ~1/3 of the hole and duct taped it in place, so the pot fits tightly into the hole.
I've been feeding the clones at 5 mL/gallon each of BPN's Grow, Micro, and Bloom, so I mixed up the res at those volumes. Currently, I've got the res filled to 30 gallons. After adjusting the pH to 5.5, the nutrient strength is 510 ppm. I am running four 100w Diamond Series Lights from Advanced LED. I have the lights ~30" above the plants, and I am only using the "veg" band at this time.
I think that's all for now. If anyone has any questions, or if I've left out crucial info, just let me know.
Thanks, and stay tuned.


