DIY Ghetto-Fab Chiller under $20

eScott

New Member
So i recently had a situation where my room temp was spot-on but a new all-black propagator res had nute temps shooting into the high 80's-90's :hmmm:
I couldn't really quit my job to stay home and swap out frozen water bottles every 1.3 hours so I took my usual $20 spending cash to wally world and used other parts I had on hand to build a chiller for the res with less than $20.
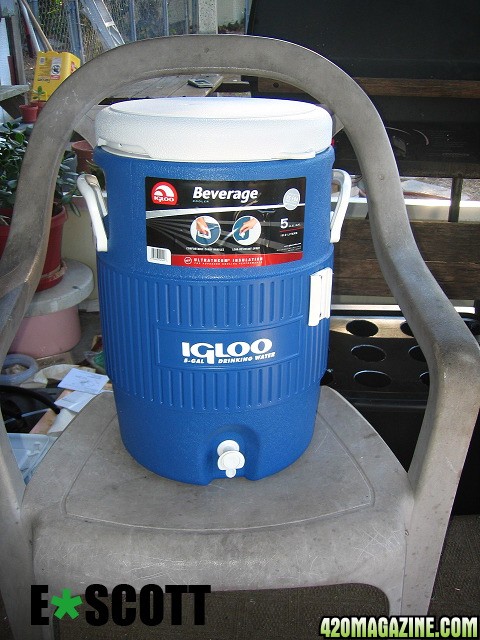
The first thing you'll need is one of these coolers. compare prices at wally world. h.d., etc.
090511-184856-01.JPG


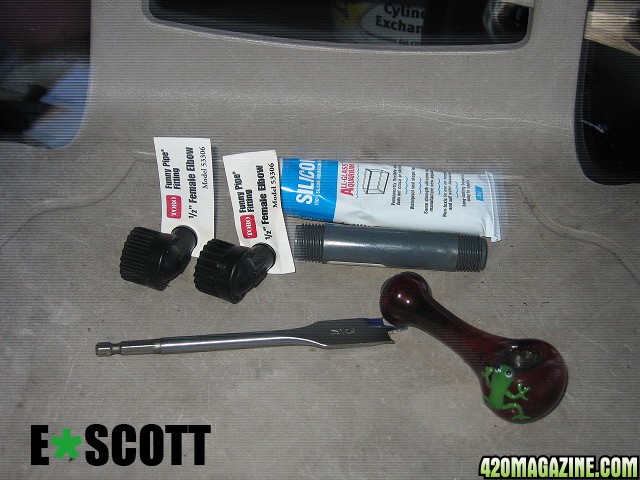
In addition to that sucker you'll need a sampling of 1/2" barb fittings, 1/2" tubing and nipples (tee hee). I had them laying around but they could be had new and still likely meet the $20 budget.
090511-185509-01.JPG


Shown above is some of what you'll need.
a 3'4 drill bit
Black aquarium silicone. Doesn't have to be be black, it's what I had.
FOUR 1/2" threaded to 1/2" barbed elbows. TOROs funny-pipe fittings work great.
TWO 1/2 threaded risers with the length being long enough for the thickness of your cooler.
10ft or more of 1/2" tubing
Hits from the treefrog pipe optional

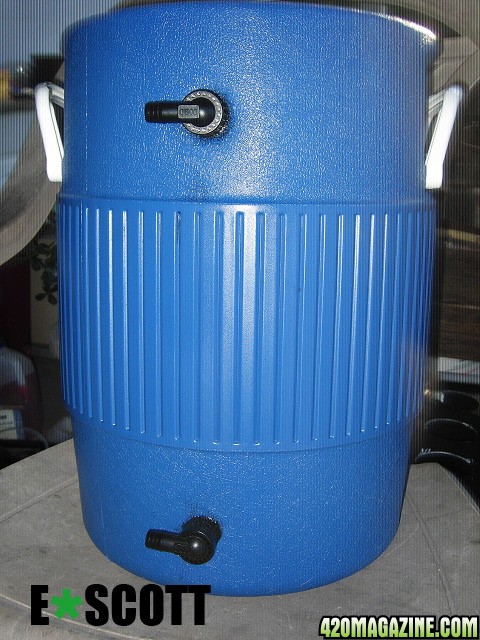
First thing we need is and IN and and OUT as shown here. I put one at the very bottom and one at the top. take into consideration how deep the lid seats or you wont be able to close it
090511-190048-01.JPG


Drill your two holes with the 3/4" drillbit.
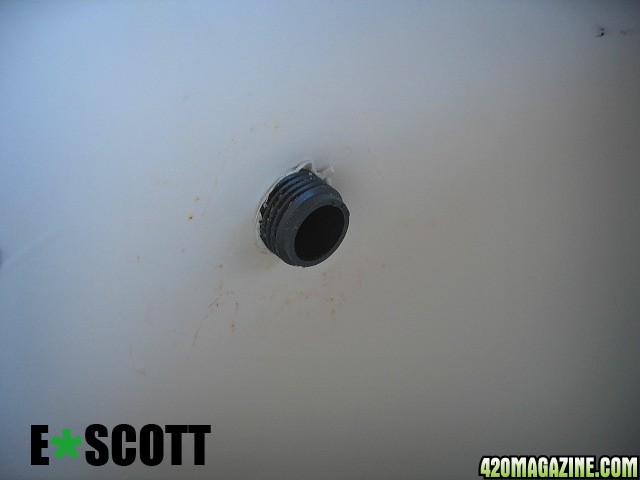
Here's a few detail shots showing the nipples snugly fitting through the holes inside and out.
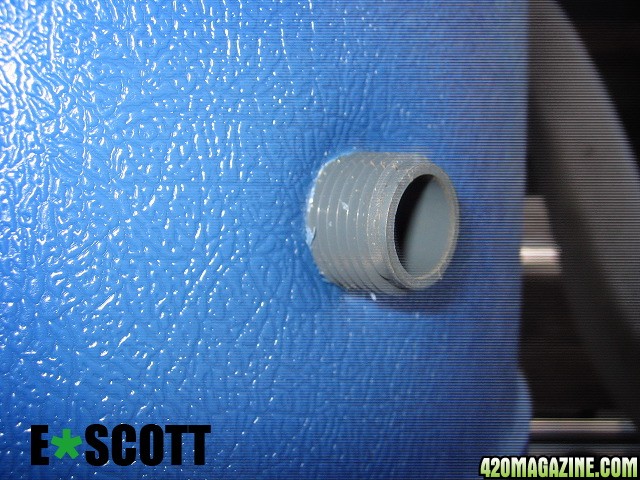
090511-184944-01.JPG


090511-184956-01.JPG


I wasn't sure if I'd get a good seal on the outside texture with an o-ring so I used the silicone as a thread sealant. coated all the threads before assembling the elbows
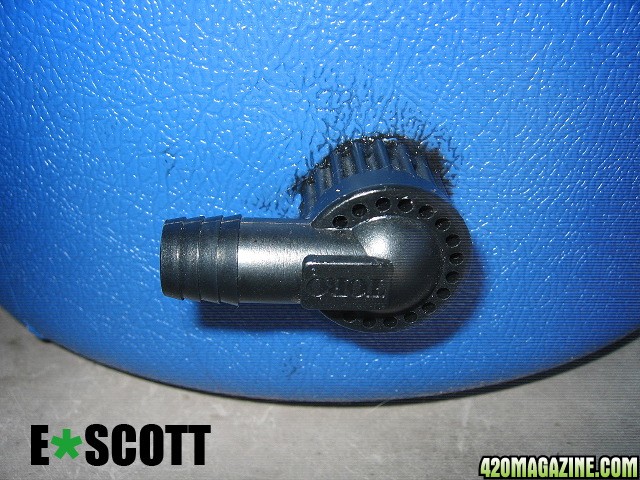
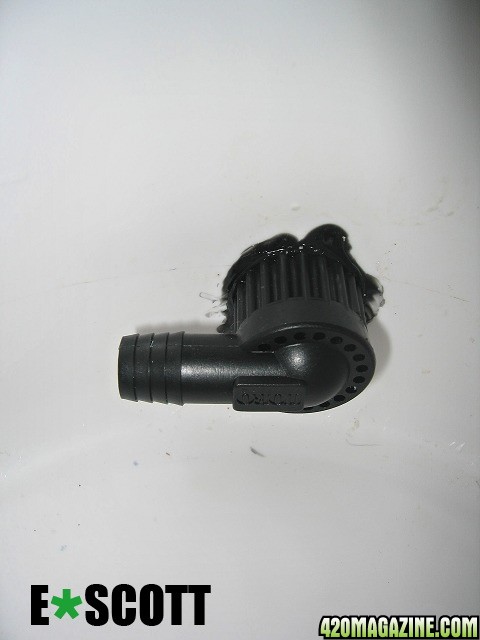
090511-185046-01.JPG


090511-185031-01.JPG


090511-185101-01.JPG


The elbows finished inside. Notice the opposite directions. you're going to have a spiral of hose inside the cooler so one will need to face left, one right

090511-190107-01.JPG


Wind your length of 1/2" hose inside from bottom to top in a coil pushing against the cooler. 10ft is good, 20 ft would've been better.

Here's my interior after sealing the hose into place and a couple coats of white plastic spraypaint to give it the "fridge look" lol

090511_033615-01.JPG


This is powered by a small pump I have for draining res's. Any small pump is good. The idea is to let the nutes flow through the chiller as slow as possible, accelerating cooling. a small aquarium powerhead would work fine. The only time in hydro where smaller is OK lol

Just drop the pump into your res, connect to the top fitting. connect the bottom to drain back in your res, fill with ice and top of with cold water.
Obviously this works best away from the heat of your grow area. as long as there is no big uphill pumping you can put this outside your closet or in an insulated area.

If it starts chilling too much, just use more water/less ice.
Once a day maintenance and it works so much better than frozen bottles after every damn sitcom.

Thoughts?

:grinjoint:
 
So i recently had a situation where my room temp was spot-on but a new all-black propagator res had nute temps shooting into the high 80's-90's :hmmm:
I couldn't really quit my job to stay home and swap out frozen water bottles every 1.3 hours so I took my usual $20 spending cash to wally world and used other parts I had on hand to build a chiller for the res with less than $20.
The first thing you'll need is one of these coolers. compare prices at wally world. h.d., etc.

090511-184856-01.JPG


In addition to that sucker you'll need a sampling of 1/2" barb fittings, 1/2" tubing and nipples (tee hee). I had them laying around but they could be had new and still likely meet the $20 budget.

090511-185509-01.JPG


Shown above is some of what you'll need.
a 3'4 drill bit
Black aquarium silicone. Doesn't have to be be black, it's what I had.
FOUR 1/2" threaded to 1/2" barbed elbows. TOROs funny-pipe fittings work great.
TWO 1/2 threaded risers with the length being long enough for the thickness of your cooler.
10ft or more of 1/2" tubing
Hits from the treefrog pipe optional

First thing we need is and IN and and OUT as shown here. I put one at the very bottom and one at the top. take into consideration how deep the lid seats or you wont be able to close it

090511-190048-01.JPG


Drill your two holes with the 3/4" drillbit.
Here's a few detail shots showing the nipples snugly fitting through the holes inside and out.

090511-184944-01.JPG


090511-184956-01.JPG


I wasn't sure if I'd get a good seal on the outside texture with an o-ring so I used the silicone as a thread sealant. coated all the threads before assembling the elbows
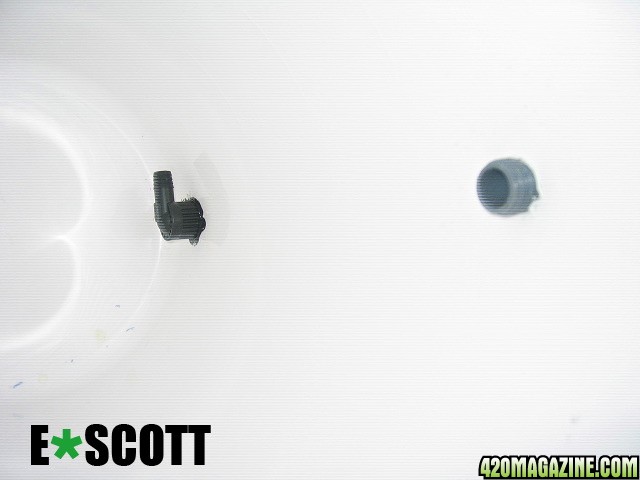
090511-185046-01.JPG


090511-185031-01.JPG


090511-185101-01.JPG


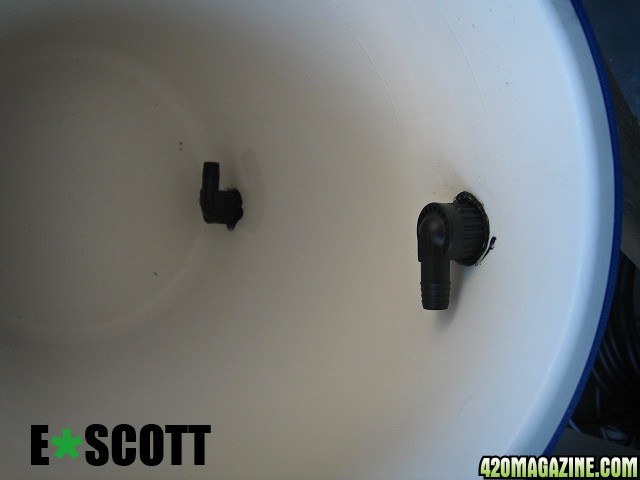
The elbows finished inside. Notice the opposite directions. you're going to have a spiral of hose inside the cooler so one will need to face left, one right
090511-190107-01.JPG


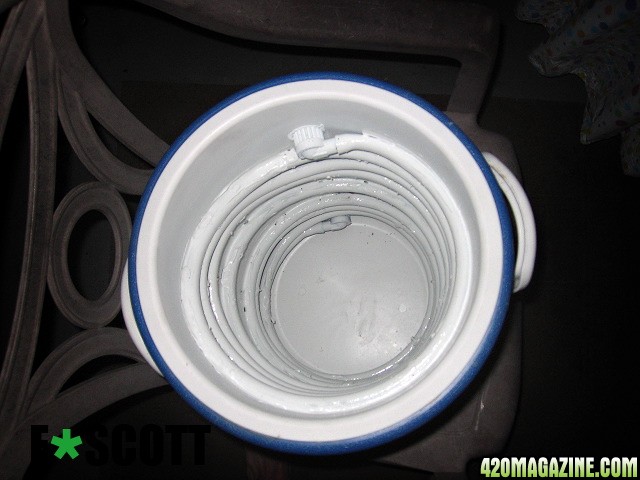
Wind your length of 1/2" hose inside from bottom to top in a coil pushing against the cooler. 10ft is good, 20 ft would've been better.

Here's my interior after sealing the hose into place and a couple coats of white plastic spraypaint to give it the "fridge look" lol
090511_033615-01.JPG


This is powered by a small pump I have for draining res's. Any small pump is good. The idea is to let the nutes flow through the chiller as slow as possible, accelerating cooling. a small aquarium powerhead would work fine. The only time in hydro where smaller is OK lol

Just drop the pump into your res, connect to the top fitting. connect the bottom to drain back in your res, fill with ice and top of with cold water.
Obviously this works best away from the heat of your grow area. as long as there is no big uphill pumping you can put this outside your closet or in an insulated area.

If it starts chilling too much, just use more water/less ice.
Once a day maintenance and it works so much better than frozen bottles after every damn sitcom.

Thoughts?

:grinjoint:


Looks real nice man. Thanks for sharing...

Quick thought though.. Wouldnt using plastic and coating that plastic take away from the conductive properties we would seek in an application like this?

Would it be more beneficial to somehow run flexy copper tubing or are we coming outside the "ghetto fab" realm lol?

Have you put it to use yet? What type of temp differences do you see? How often are you finding you need to replace the ice?

Super clean work too man big props on the craftsmenship. Glad to have you here contributing. :peace:
 
Thoughts?

Excellent post dude!

I'm lucky in that my DWC grow is in a nice cool basement and my nute temp stays at 68F without cooling but my buddy could sure use one of these. He's running an ebb and flow grow in a spare room on the main floor and even with lots of ventilation has a hard time keeping nute temps down. He's out of town quite a bit but his GF could take care of the chiller.

It's quite similar to the condensor I built using a 2lb, (1 kilo), coffee can with a coil of copper tubing inside sized to take a 2L pop bottle of frozen salted water. I use it to distill camp stove gas to make petroleum ether or concentrate vodka for tinctures. A restaurant sized pickle jar in a stock pot of water on a hot-plate is my boiler. I need a better boiler tho as the last time I made a batch I heated a little too fast and the jar broke. I was trying to make pure alcohol from RV anti freeze. I used 3/16 copper tube but am making a new one with 3/8 as the boiler was bumping quite a bit.

Once again, excellent post!
 
Nice and neat set up. I did the same exact thing several years ago but used a square ice chest. I too used plastic tubing and ran it through the wall into and out of my nft reservoir. It was much easier to add ice with the exterior chiller but still required daily attention. So I eventually went back to coir and soil growing.
 
Drill hole into fridge. Run copper tubing from reservoir pump into fridge, coil it into a large bowl of water in the fridge, back into reservoir.
 
I used 2 liter bottles frozen. Every 4 hours or so I'd check them and swap tham out with other frozen ones if needed. I think I only needed 4 bottles total too keep the reservoir at about 68. Another tip is to cover your internal reservoir with something like astro foil to insulate it a little from the heat. Astro foil is basically nothing but mylar covered bubble wrap. Most DIY stores sell it as water heater blankets/insulation etc.
 
I was just thinking of doing that... but I had not thought of the bowl of water. Thanks Tsoul!

Air-to-(liquid-filled-)Cu seemed rather inefficient as far as transfer of heat without fabricating some sort of heat-exchanger out of an old heater core or intercooler.

A large bowl of water that the coiled Cu was placed in seemed like a (crude) form of heat-exchanger. Although something with fins or other surface area would of course be better.

A bowl of water in the fridge seemed like it would be better than a bowl of ice in the freezer as the water would surround the coil. And due to the difference in thermal characteristics.

I guess if someone had lots of heat they could mix something into the water that would keep it from freezing and place the bowl of "water" into the freezer.

Would be a quick thing to remove it from the refrigerator and insert a couple of sets of flat rubber plugs into the holes (inside & out), dump the water & throw the bowl in the sink, and toss the coil of Cu into the big mess of junk on the workbench too.

eScott, thanks for sharing your idea. Looks quick and easy to construct.
 
Another suggestion:

I saved about 3 degrees this way:

My reservoir is right next to my AC unit. I have a small recirculating pump to keep the water moving in my res. I connected 1/2" plastic pipe (funny pipe) and ran a length of it inside the AC housing where the fan blows the cool air. I had to put down a little chicken wire so that the hose did not get into the fan.

Essentially as the cold air is blowing out of the AC unit, it cools down the water in the funny pipe, and saves me about 2-3f degrees.

Cheers
 
I think you might find the ice will melt dude, you also mite have better things to do than stand there feeding your res ice all day....like maybe smoken some sticky bud. Enjoy.
 
Another suggestion:

I saved about 3 degrees this way:

My reservoir is right next to my AC unit. I have a small recirculating pump to keep the water moving in my res. I connected 1/2" plastic pipe (funny pipe) and ran a length of it inside the AC housing where the fan blows the cool air. I had to put down a little chicken wire so that the hose did not get into the fan.

Essentially as the cold air is blowing out of the AC unit, it cools down the water in the funny pipe, and saves me about 2-3f degrees.

Cheers

Clever.......:slide:
 
Air-to-(liquid-filled-)Cu seemed rather inefficient as far as transfer of heat without fabricating some sort of heat-exchanger out of an old heater core or intercooler.

A large bowl of water that the coiled Cu was placed in seemed like a (crude) form of heat-exchanger. Although something with fins or other surface area would of course be better.

you beat me to it, exactly what i was thinking... this takes me back to my PC overclocking/cooling days.

was thinking the same about using an old heater core


also i would say that the white paint would insulate the warm water in the copper line or hose a small bit and keep it from cooling it most efficiently (not that it wont work that way) also i would say have the copper line about an inch away from the cooler walls all around (to maximize surface area to be cooled) and wind the coil tighter from the middle of the cooler to the bottom (cooler water will sink) this way you can get that water to travel the greater bit of its journey in the coldest part of the cooler

or even take an old heater core, build a baffle around it and screw it to a box fan, might knock off a couple deg that way

just saying this to give ideas on maybe easily improving the design if you want. i have no res to cool so im not even gonna try building one lol
good luck
 
i tried it and it leaked, i have to hone my skills more. i think ill just put both in and out on top and snake the hose under the water. what do you think
 
Drill hole into fridge. Run copper tubing from reservoir pump into fridge, coil it into a large bowl of water in the fridge, back into reservoir.

Why not just put the whole reservoir into an old fridge bought at a garage sale, set up kind of like a Keg-O-Rator. Temps could be dialed in and there is less surface area for heat to leak in. Scour Craigslist for a while and a good candidate should pop up.

Yeah, I know it would be more than $20 bucks, but should be had for less than $100
 
Back
Top Bottom