Cloning From Flowering Plants - The ABC's

gairbud

New Member
"how to clone flowering plants and why. cube method in mini greenhouse."
1.29.2013 this is a step by step in progress journal. comments are welcome.
Snip your selected clone/s from either a top or a side branch. For this example tops were used as they stretched allot in the current garden and leaf burn from lighting was happening .The clones were taken and trimmed and placed in water from reservoir with a root hormone solution. Take the clones the normal way. snip on an angle and trim a node of the branches.
DSC0007413.JPG

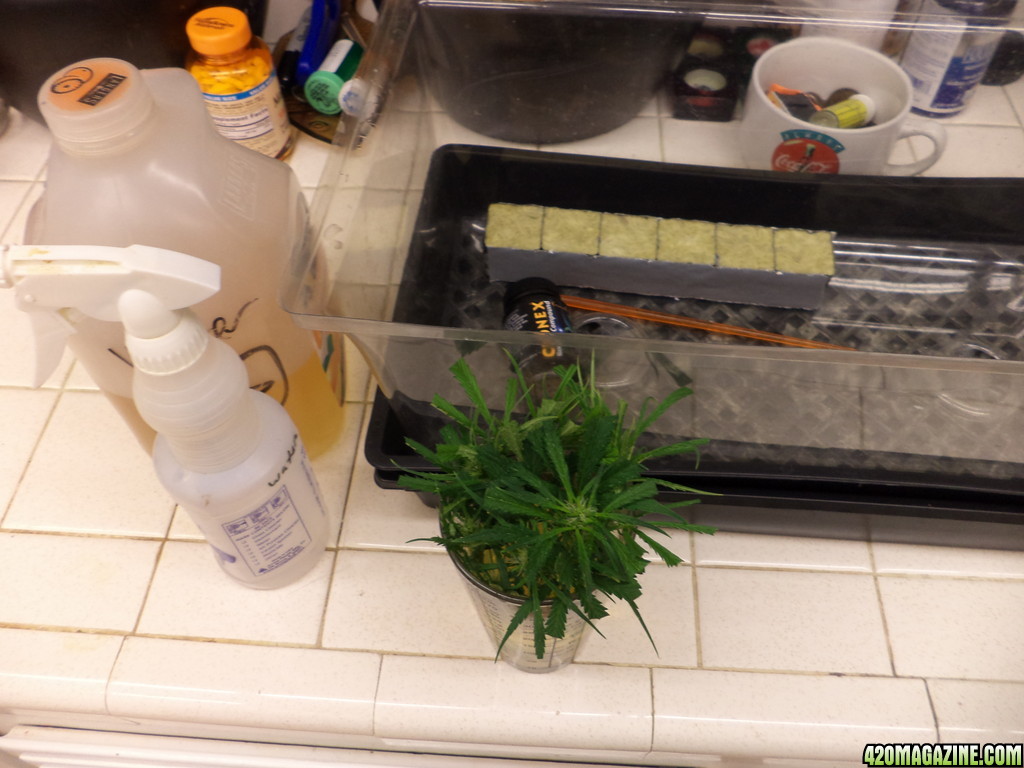
Clones ,tools and things ya need. snipper. trays/mini greenhouse[you can use cups too],poker ,cubes ,cup , water holder , water sprayer ,root tone of some kind . clonex will be for dipping.
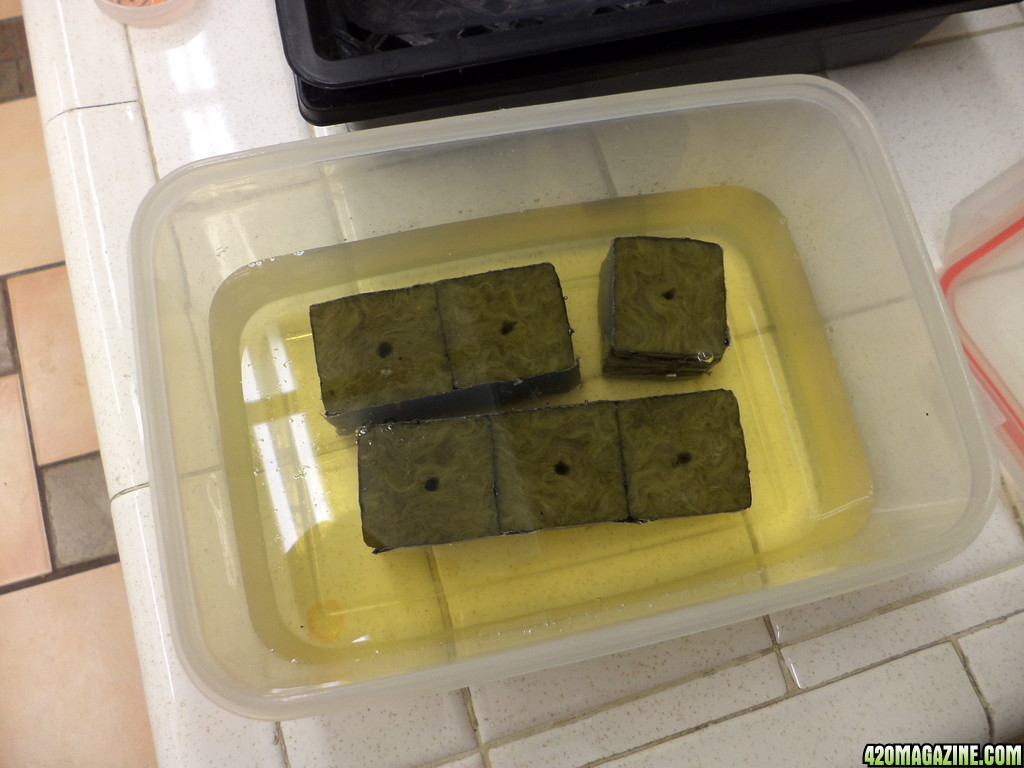
I use reservoir water at 1/2 and tap at 1/2 to soak the cubes in. soak for 1 to 3 hrs.
when wet poke hole all the way thru each cube.
DSC0007515.JPG

there is no hurry in this method as the clones are in water and will survive and possibly live and root right there. but we are going to use cubes in this example.
 
I'll be watching to see how long it takes to get it to root and reveg. I took some cutting on the 5th from a plant the day
of harvest. Got 4 to root and only one has pushed out a new branch so far.
 
if you have some leaf that is green on a harvested plant you can rejuve her ... see pic
colo_005.JPG
harvested plant.
mother_plant_full_veiw.JPG
veg after 3weeks.you can see the big stem in middle lower part of pic.
 
sometimes flower clones dont take but some do.
10_5_12_002.JPG
10_5_12_001.JPG
that is one plant from a flowered clone. ill add the clone pic soon.
 
clone_room3.JPG
the one next to just below the valve is the same plant above and my profile pic. the back sides of the plant were trelissed.
 
you can see in the picture the very small one and then 2 spaces left and right the 2 more plants. 5 clones from the same plant taken the same time were all in there. 2 died.[the 2 spaces. 2 did great and the one small one i never thought to use so i planted it outside and as you can see it took off after 1 week. the big plant in the back is a blue dream from a clone and clone and clone. was not from a mother plant was from a friend who sells clones at dispensory and that strain suffered from clone burn out from clones. the mother still produces great clones but clones of clones of that strain suffer from clone burn out i mention this to the grower and he discontinued selling clone of clones and only sells clones from the mother and is keeping tract if the burnout may eventually happen to her. so far dozens of generations have no decline but he experimented with clone of clones and indeed found out that the strain will suffer from clone burnout from clones. this has happened to me before and when i told him he didnt beleaive me at first till he smoked the bud. then decided to experiment and wala i was proven right. he has now read and studied alot about clone burnout and has found this can happen to both clone of clones and mothers after several generations of mother clones and clone of clones. he is very carefull now and has replaced a few customers clones for free as some said they weren't as good.
 
a few hrs latter.
Now the cubes are ready. dip and insert them in the cubes and place in tray of minigreenhouse. note a small part of stem protrudes thru the bottom.
DSC0007610.JPG
DSC0007812.JPG
DSC0007710.JPG


a small amount of water and clonex mixed is added to the bottom. and the plants get 1 fine mist only. I mist the clear lid only during the entire process when needed. if I notice a smell I mist with a white vinegar and water solution.
DSC000794.JPG

a small amount of clonex and water mixed and poured into tray just in the bottom. will be watering the bottom with a veg style fert organic diluted to 1/10 of recomended serving. lol. and a combonation of water/nute and foilier spay will be used as they will need some as they draw from the leaf. sometimes i need to prop them up as well. right now they been put back into the grow room where 12/12 light is present and to the side of the main crop where some shade and less light is present. pics when the grow room daylight cycle starts latter tonight. :)
 
nutes being used on clones the floranova as a foilier spay with the sticky as a surface tension breaker[wetting agent] and the organic 16-0-0 for watering the root area at 1/10 the recomendation. same for seedlings too.
DSC000879.JPG
DSC0008810.JPG
they getting stronger , not flimsy , thats a good sign.will take the stakes out soon.
 
IMG_060117.JPG
last year clones of bluecronic[ie.greencrack] examle of diy cloner to veg state grow cabinet all in one hydro setup under led grow panels . perfect size for a 12/12 operating system.
 
IMG_059919.JPG
lab 2 , 12/12 grow from bluecronic clones done 100% in the supercloset.
i had alot of grows of the bc strain as i was testing nute products for manufactuer sales reps who provided all the nutes. 2 kinds were tested under 2 diferent lighting setups.for 4 grows total done 5 times.for about 4# of top buds smoke.
gneral hydroponics and foxfarm were tested. both reveiws i gave almost = ratings. you cant go wrong with either so buy whats cheepist availble to you. on the top 5 scale of best nutes you can use for either hydro or soil or any combo is this. #1 humboldt products by far the best in the industry[but pricy$$$$] #2 blue planet products take a strong 2nd place and are easy to use the 2 part system as stand alone without their inhancement products. and tied for #3 is anything chemical or organic by foxfarm or general hydroponics. cheep and easy to use all their product lines. one note here. the gh flower formula is better then the foxfarm by a noticable difference. and the finishing products are koolbloom by gh and biestie bloom and cha ching by fox farm. koolbloom is slightly better for last 4 weeks as an addition but donot use in the last week before harvest. this stuff is strong. the super closet and the diy grows were done from 2011 to 2012 uder 18 months. and i still did master kush nirvana, og kush master from the valley boys[og designers thanks guys :)],aurora nirvana and widowlicious my strain[studio 54] during that time indoors.
 
2.3.13 2 plants have recovered and have roots and the other 4 still strugleing but not dieing. changed the tray water after cleaning.
 
3 for sure have roots and the 4th one not doing well but till it gives up its ghost i take care of her.
will be transplanting the 3 into the mother ship phototron this week end and remove to the other room for 10 days of vegging then back on flowering.
 
putting them in the phototron. a few days from transplant ill move the phtotron to the other room for 10 day 16hron 8 off till i see new growth. then back to 12/12 as the stretch will take them where needed. i expect 1 to do great and the other 2 are up in the air. would of put them outside as they would be fine there except too cold.
pt110.JPG
pt21.JPG
pt31.JPG
pt41.JPG
pt51.JPG
pt61.JPG

phototrons are great for the light medical user and the small eaasy way to grow the entire system is self contained with easy to follow directions and can be continous grow rejuve and bud the same plants over and over. when i first started growing indoors i surounded the room with t8 floresents and hanging t8 fixtures then around 1983 i read an article in high times and seen the add for phototrons and thought wow thats just a small version of what i am doing now so i bought one. sold it years latter and grew pounds and pounds with it. and a few years ago about 5 i got another for my mother ship to keep favorites alive for breeding and cloneing the breeds and i have 2 super closets too. they are all 12/12 for the most part. and i experiment all the time. lots of fun the cool thing is 2 of my patients want me to do a special grow of stuff for them and are buying me another phototron so ill have 2 to run their stuff in every 7 weeks buds buds buds for them. :)
 
Back
Top Bottom