420
Founder
Welcome to the step by step guide to the 420 Magazine Photo Gallery.
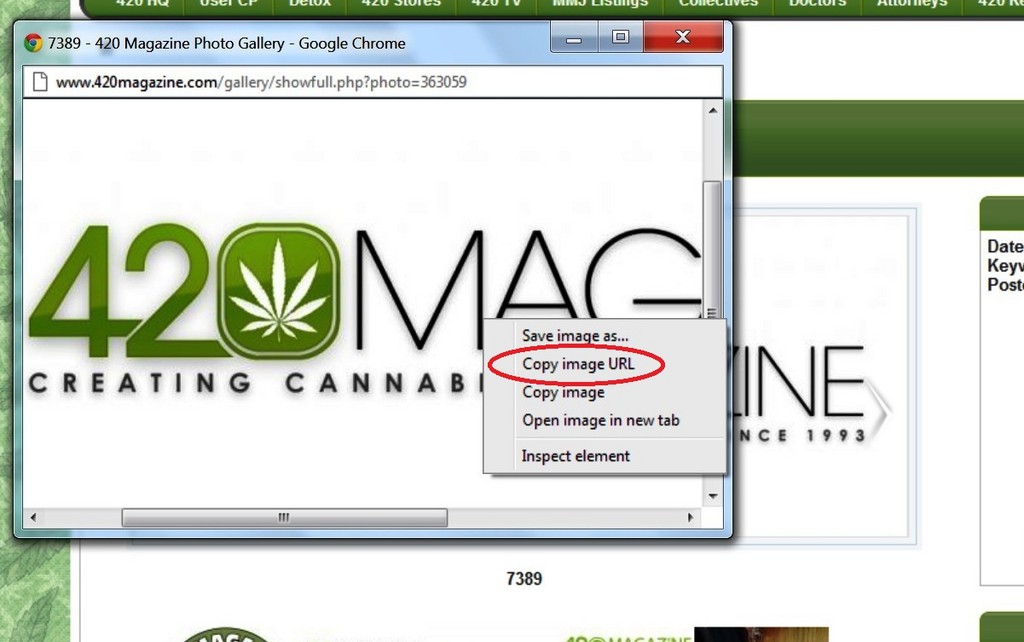
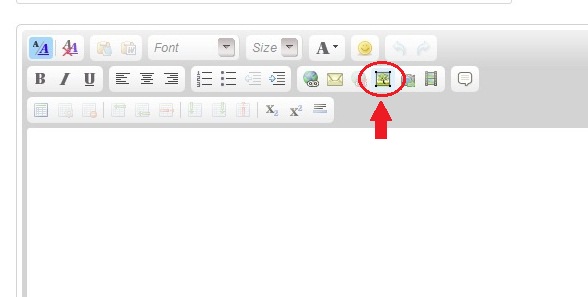
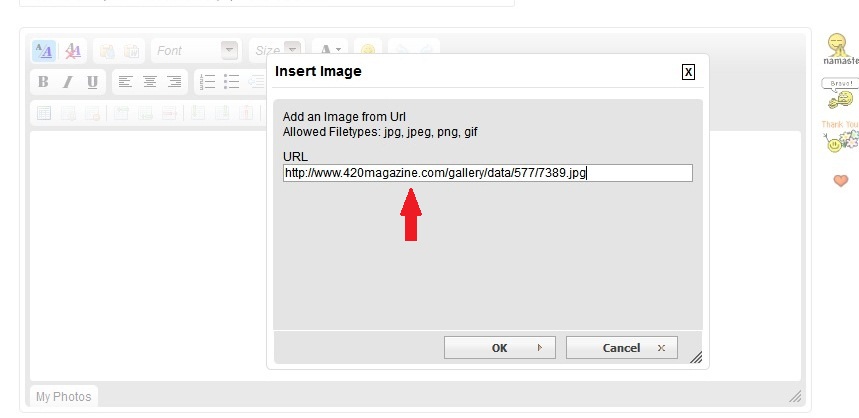
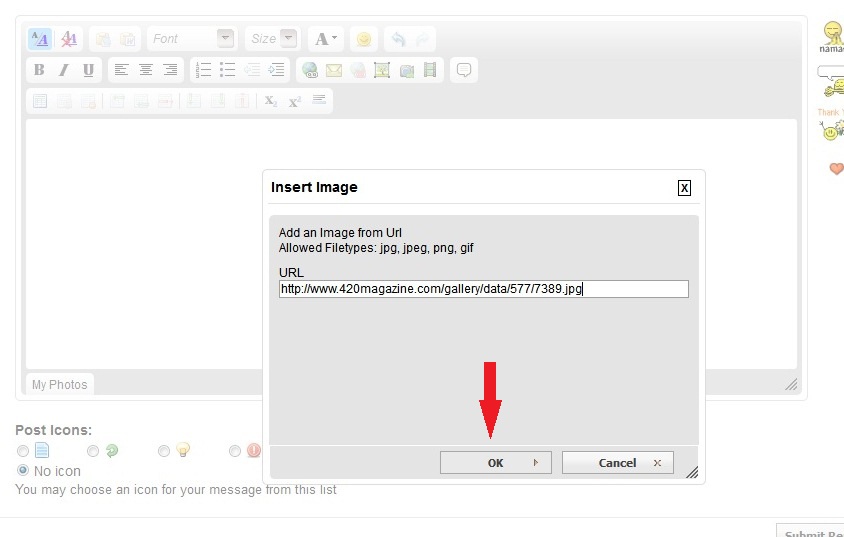
We use a photo gallery for this forum to keep images organized and easy to access, while maintaining an archive for our readers to learn from. Our Posting Guidelines require all photos to be uploaded to our gallery before being posted. This is because off-site links can be deleted or moved outside of our control, leaving 420 Magazine with dead links and an untidy forum. The process is easy once you get the hang of it. First you upload the photo to the appropriate sub-gallery, then you can view it directly or embed it in a thread. If you still need help, please feel free to send an email to support@420magazine.com
Our photo gallery is only for Cannabis, Hemp and directly related images.
If a photograph is watermarked, in order to standardize and preserve the look of our website for many years to come, please place the watermark anywhere except the bottom right hand corner. This is where the 420 Magazine watermark will appear on uploading which will therefore mask any other image.
Photos of anyone looking even remotely like a minor will be deleted without warning.
Non-420 photos may only be uploaded to our "Off-Topic" photo gallery. Please note these photos must be appropriate and otherwise conform to our off topic photo tutorial and guideline.
RESIZING PHOTOS
To start off, you need to make sure your pictures are the correct format.
Our gallery accepts jpg, jpeg, gif, png file formats.
Photo size must not exceed 10MB.
If your photos are larger than 10MB:
Adobe Photoshop, Aperture and Microsoft Office Picture Manager can resize your photos.
If you don’t have any of these programs, here are some links to free online photo resizing tools:
Free Online Picture Resizer - Crop and Resize photos online for free
Online Image Resizer - Resize digital photo, images or pictures online
Resize Images online
Resize Images Online at ResizePic
UPLOADING PHOTOS
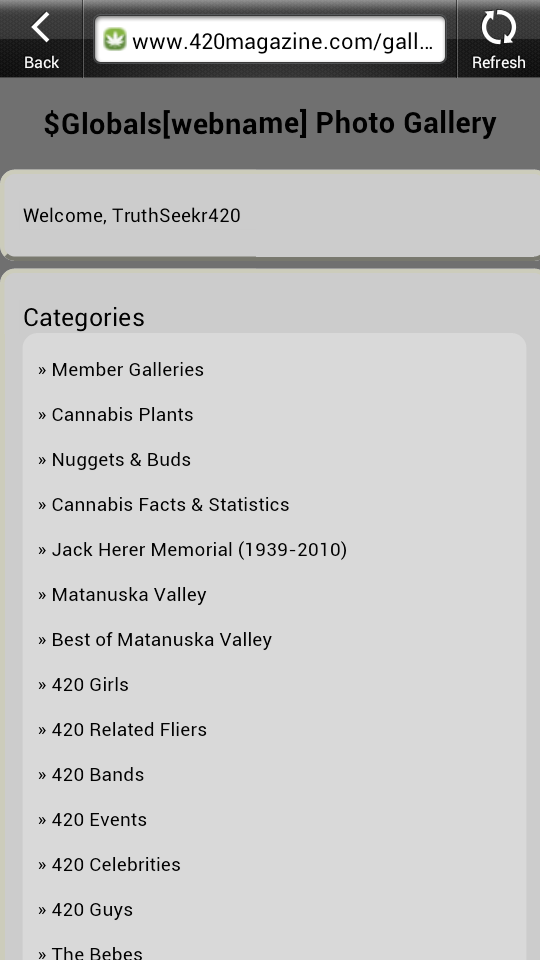
Click on the Gallery button from the drop down menu that can be found at the top of any 420 Magazine page.

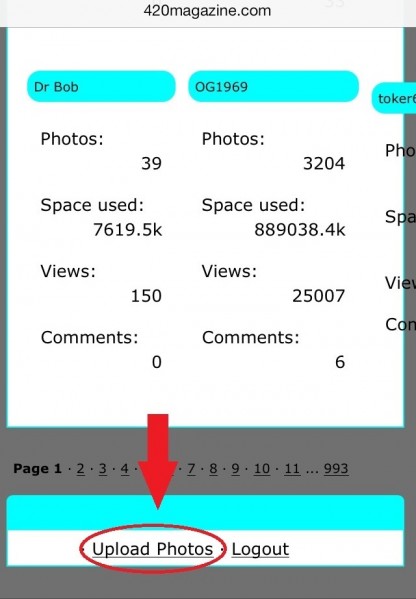
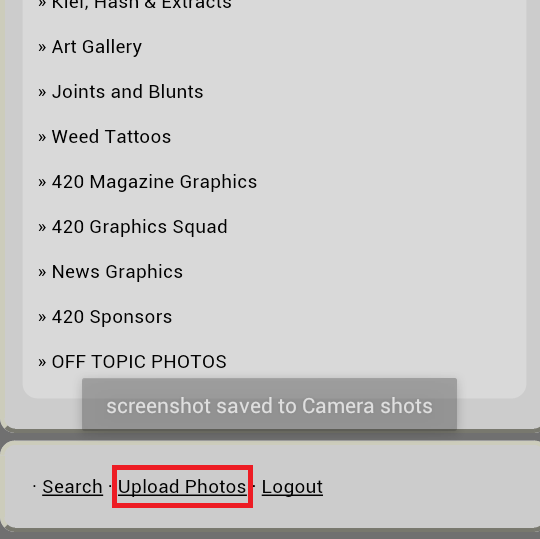
When the gallery main page opens, click on the 'Upload Photos' button.
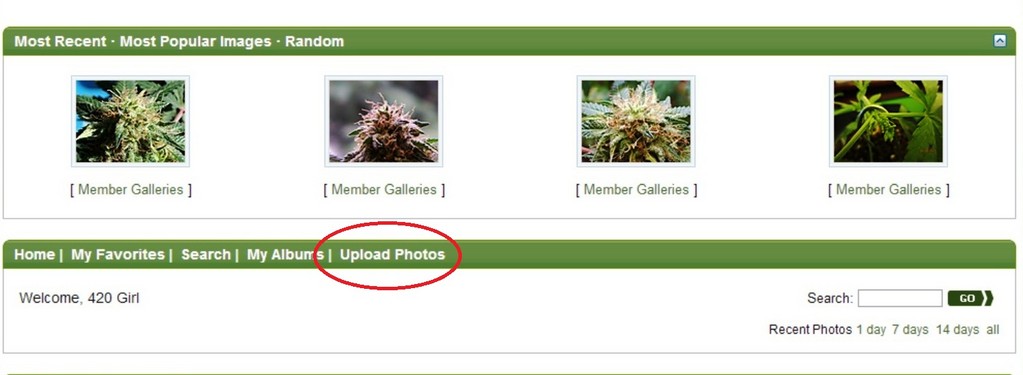
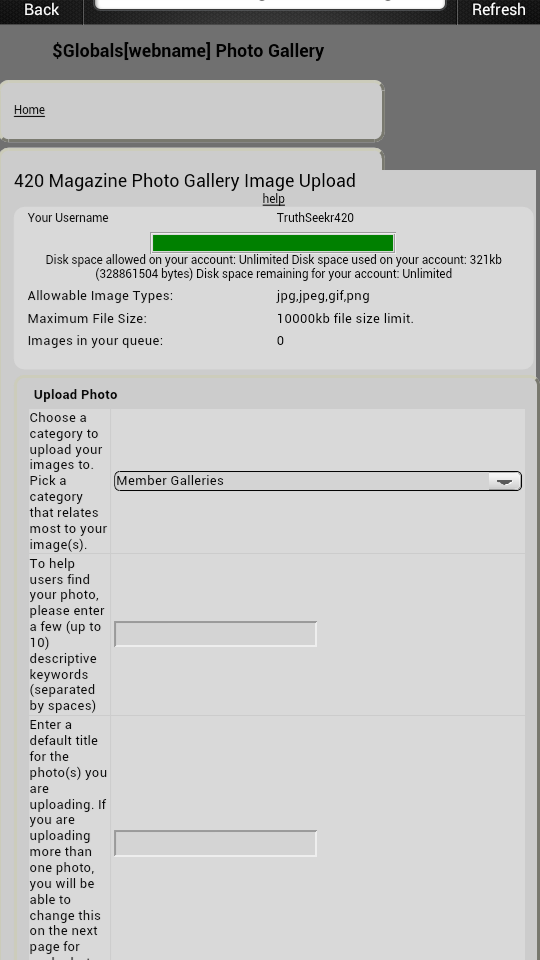
When the 'Photo Upload' window opens you'll have four things to do.
First, choose the category you want your picture in.
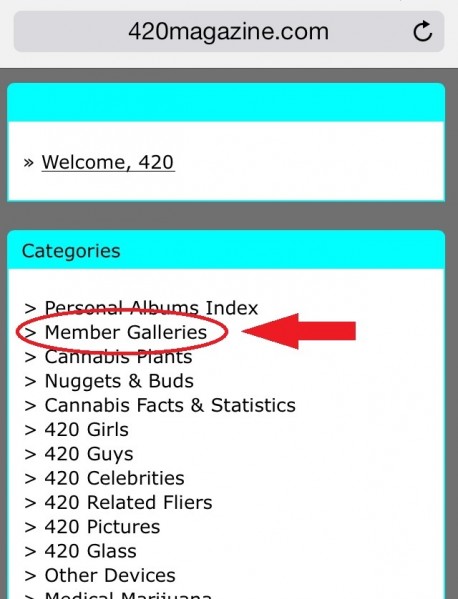
Note: When you click on the 'Upload Photos' button within a specific gallery, that gallery will be used as the category in which to store your pictures. Otherwise the default option will be "Members Galleries" as shown below.

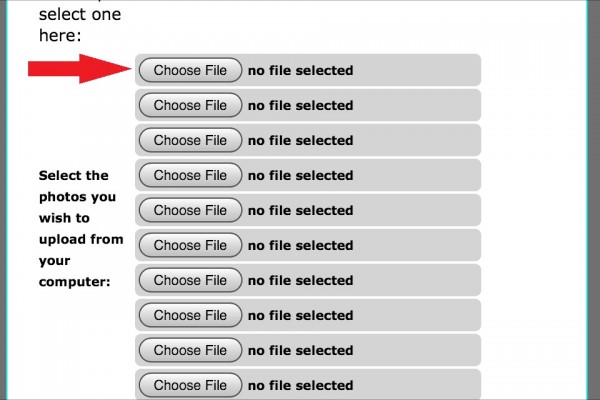
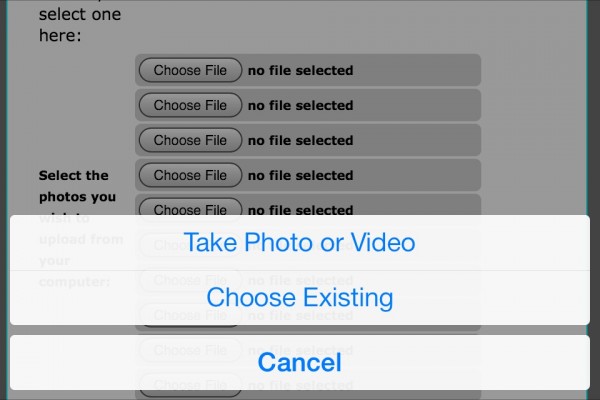
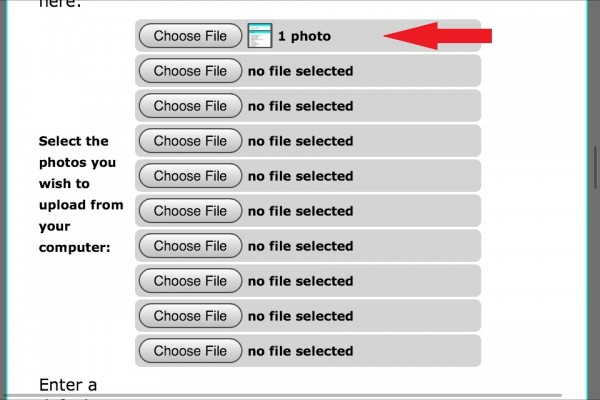
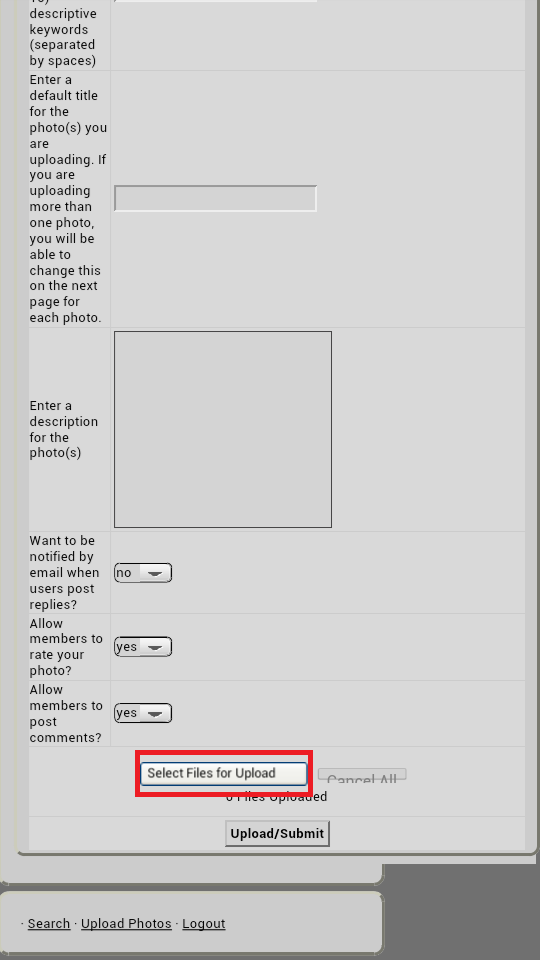
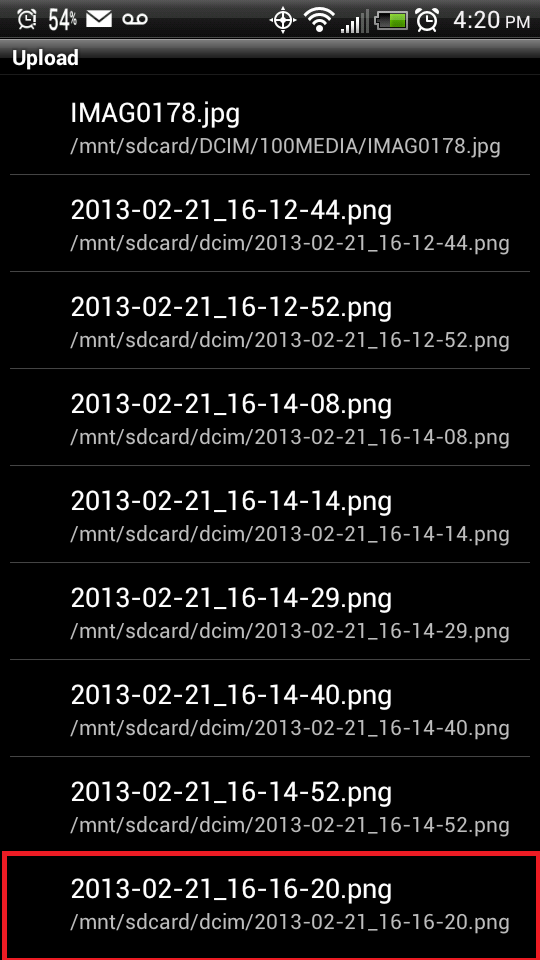
Second, click on the button that says, "Select Files for Upload" to gain access to your computers image gallery where you'll select your picture for uploading.

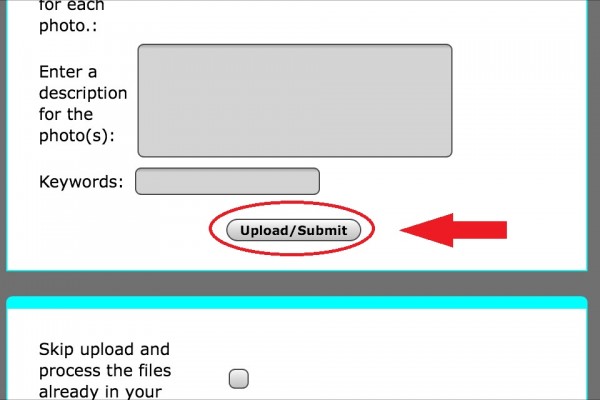
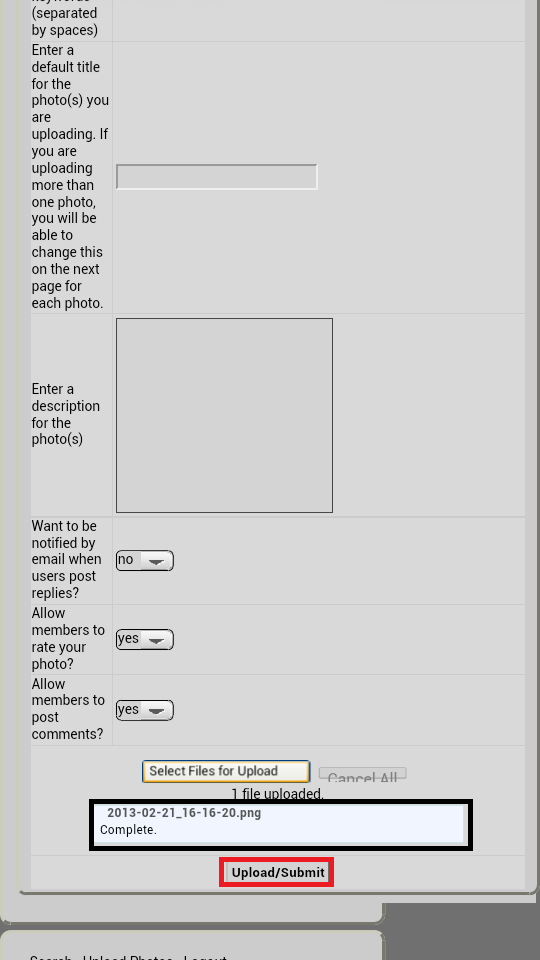
Third, click the 'Upload/Submit' button to begin upload process.

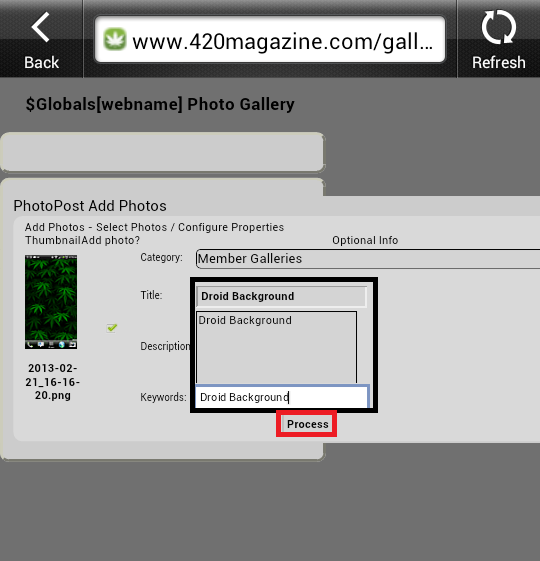
Fourth, once you get to the photo processing page, click the "Process" button. It's important that you complete this final step. Your photo(s) will not upload correctly unless you do.
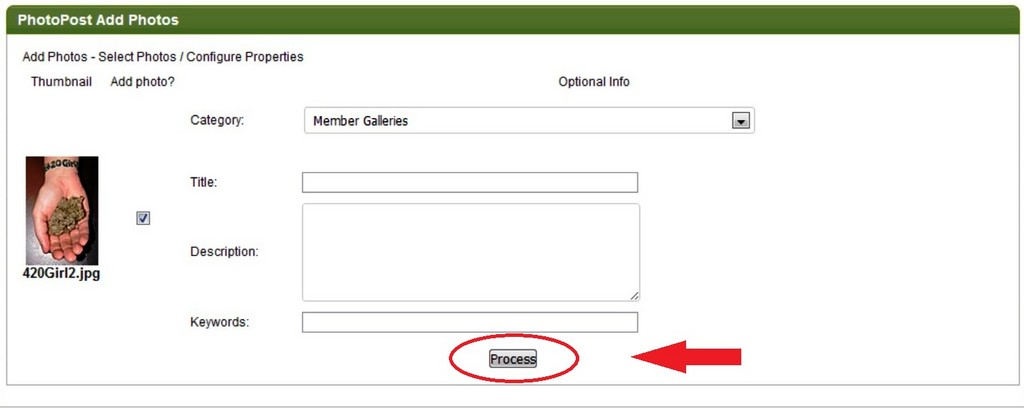
TIP: Insert your pics in the proper categories. Buds into 'Buds' category, Plants in 'Plants', etc. All of those images will then appear in your own 'Members Gallery' automatically as well as being available in their proper categories where most gallery gazers tend to look.
If you have any problems try the process again carefully.
If you're still having trouble, please contact The 420 Staff for further assistance.

We use a photo gallery for this forum to keep images organized and easy to access, while maintaining an archive for our readers to learn from. Our Posting Guidelines require all photos to be uploaded to our gallery before being posted. This is because off-site links can be deleted or moved outside of our control, leaving 420 Magazine with dead links and an untidy forum. The process is easy once you get the hang of it. First you upload the photo to the appropriate sub-gallery, then you can view it directly or embed it in a thread. If you still need help, please feel free to send an email to support@420magazine.com
Our photo gallery is only for Cannabis, Hemp and directly related images.
If a photograph is watermarked, in order to standardize and preserve the look of our website for many years to come, please place the watermark anywhere except the bottom right hand corner. This is where the 420 Magazine watermark will appear on uploading which will therefore mask any other image.
Photos of anyone looking even remotely like a minor will be deleted without warning.
Non-420 photos may only be uploaded to our "Off-Topic" photo gallery. Please note these photos must be appropriate and otherwise conform to our off topic photo tutorial and guideline.
RESIZING PHOTOS
To start off, you need to make sure your pictures are the correct format.
Our gallery accepts jpg, jpeg, gif, png file formats.
Photo size must not exceed 10MB.
If your photos are larger than 10MB:
Adobe Photoshop, Aperture and Microsoft Office Picture Manager can resize your photos.
If you don’t have any of these programs, here are some links to free online photo resizing tools:
Free Online Picture Resizer - Crop and Resize photos online for free
Online Image Resizer - Resize digital photo, images or pictures online
Resize Images online
Resize Images Online at ResizePic
UPLOADING PHOTOS
Click on the Gallery button from the drop down menu that can be found at the top of any 420 Magazine page.

When the gallery main page opens, click on the 'Upload Photos' button.

When the 'Photo Upload' window opens you'll have four things to do.
First, choose the category you want your picture in.
Note: When you click on the 'Upload Photos' button within a specific gallery, that gallery will be used as the category in which to store your pictures. Otherwise the default option will be "Members Galleries" as shown below.

Second, click on the button that says, "Select Files for Upload" to gain access to your computers image gallery where you'll select your picture for uploading.

Third, click the 'Upload/Submit' button to begin upload process.

Fourth, once you get to the photo processing page, click the "Process" button. It's important that you complete this final step. Your photo(s) will not upload correctly unless you do.

TIP: Insert your pics in the proper categories. Buds into 'Buds' category, Plants in 'Plants', etc. All of those images will then appear in your own 'Members Gallery' automatically as well as being available in their proper categories where most gallery gazers tend to look.
If you have any problems try the process again carefully.
If you're still having trouble, please contact The 420 Staff for further assistance.


