Goldengoose7;1337873 said:How to Top Your Plant and Clone the Tip!
A photo guide to topping your Cannabis plant and cloning the growing tip at the same time!
While everyone loves the look of a Cannabis plant in its natural state, the ultimate goal is to produce as much quality bud per square foot of space as possible!
One of the oldest gardening tricks in the book is the technique of removing the growing tip of the plant in order to force the secondary branches to develop more rapidly and increase the number of growing tips from one to sometimes as many as five depending on the plant and the strain.
When used on Cannabis, the plant puts all of its growing energy into the remaining upper branches and does indeed begin to create multiple main growing tips instead of just the original one. You can use this technique multiple times to turn your previously VERTICAL creeping vine, into a dense bushy looking hedge covered with growing tips!
You want to do this at least FOUR WEEKS BEFORE FLOWERING! Why? You need to allow enough time for the emerging new growing tips to develop and mature before being exposed to the 12/12 flowering light cycle. 4 weeks is about the right amount of time for this to take place.
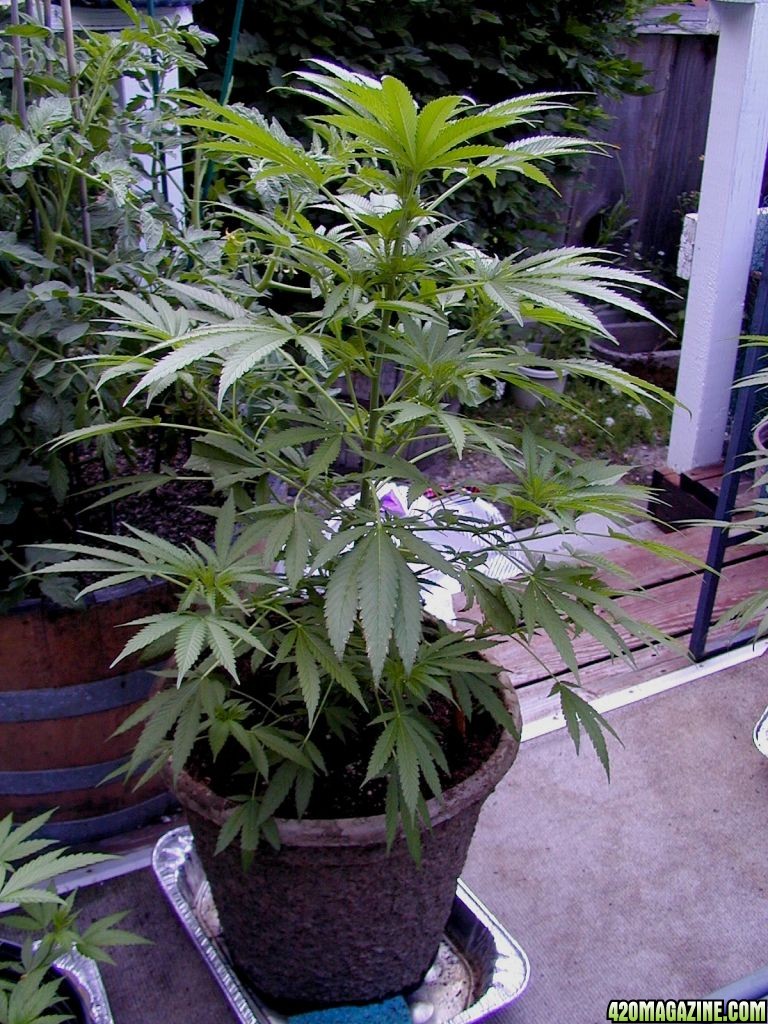
For our little DEMO we are going to use one of our Grand Daddy Purple clones that are now heading into their sixth week of veg.
NOTE: While this cloning process can be done using traditional Rockwool and cloning gel; Due to the larger size of the cutting and its more demanding need for fluids and a balanced PH level, a cloning machine is recommended for best results.
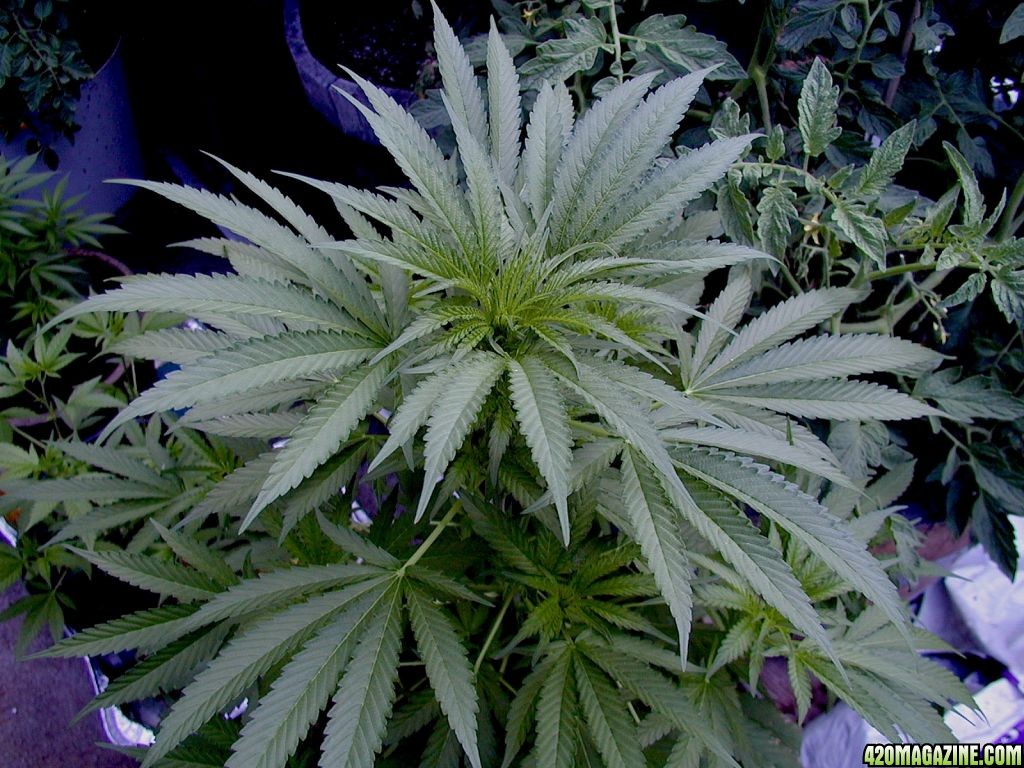
GDP #3 Measures 37" tall from base of stalk to the top of the growing tip
WAIT!
Before taking the scissors to your plant, you need to prepare your cloner! Fill the reservoir with fresh RO or comparable water. Add 40 ml of Clonex Cloning Solution per gallon to your reservoir. Mix thoroughly and run your pump for about an hour. Check PH and adjust to approx 5.2 to 5.6.
NOTE: If you are using some other brand of cloning solution, strain it through a fine mesh screen to remove any sand or grit that may be in the liquid. Clonex is generally free of these impurities, but I filter it through a mesh screen anyway. Don't want our jets getting plugged up with guck! Monitor water temp and try to get it to stabilize at around 72 degrees F.
Now that you have the cloner all ready to go, lets head over to the plant you plan to top!
The first step is to pick the best place to CUT the tip off the main plant. You want at least TWO nodes to be available BELOW the surface of the growth medium for the future clone, and the remaining plant needs two strong secondary branches as close to the cut as possible. Plants in the 4 to 6 week of veg growth range are the best candidates for this procedure.
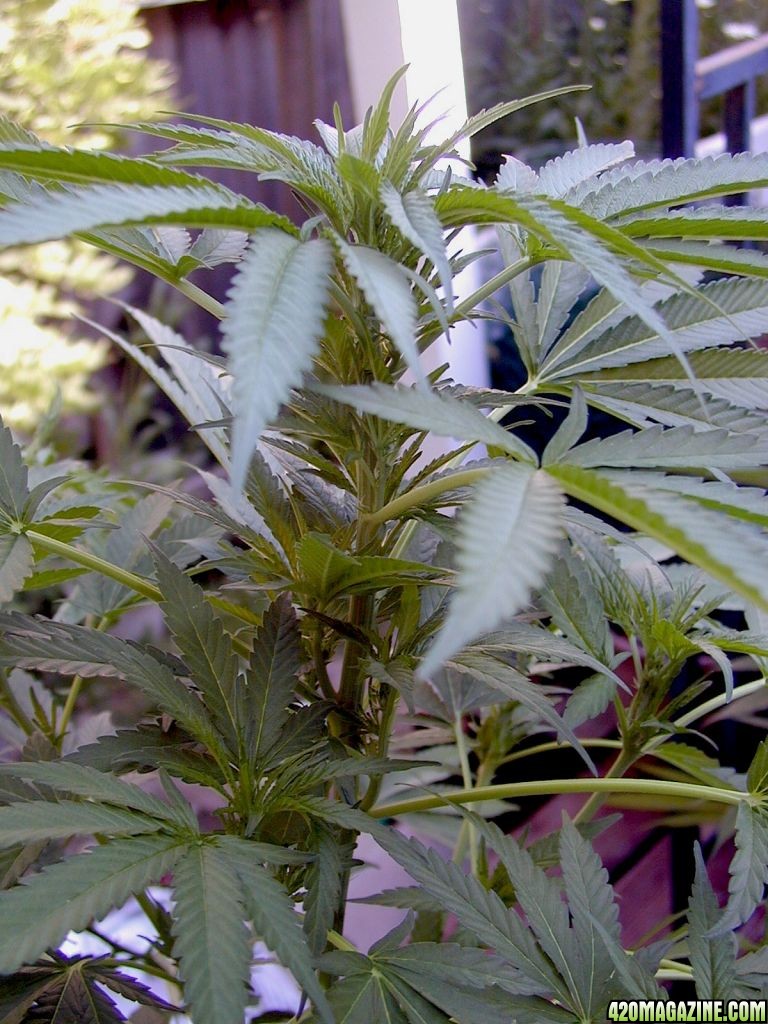
The cut is made!
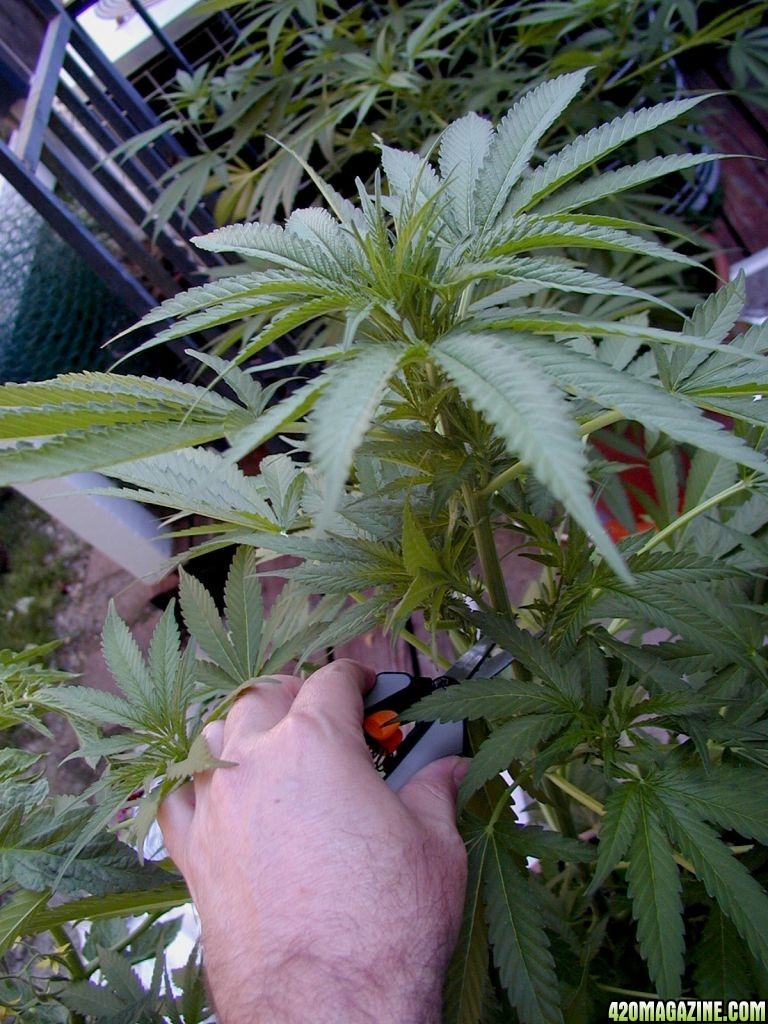
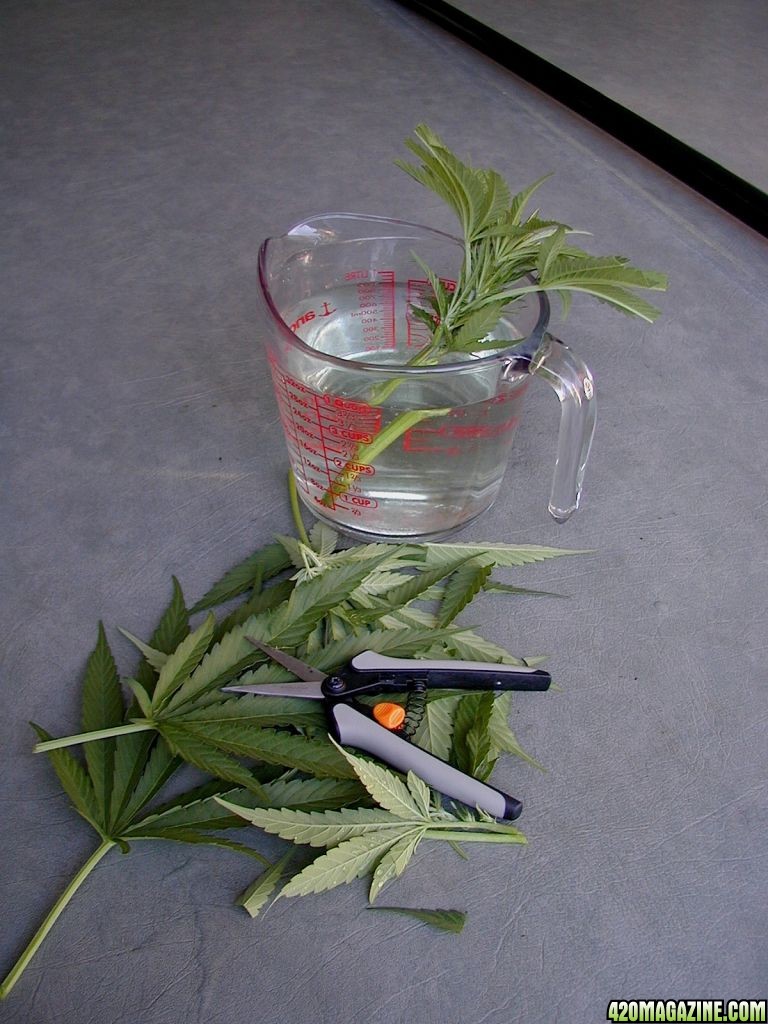
Place cutting immediately into a container of PH balanced water containing Vitamin B1 Transplant Solution. This helps reduce transplant shock and in this case, helps prepare the cutting to accept the cloning gel and nutrient enriched cloning machine solution.
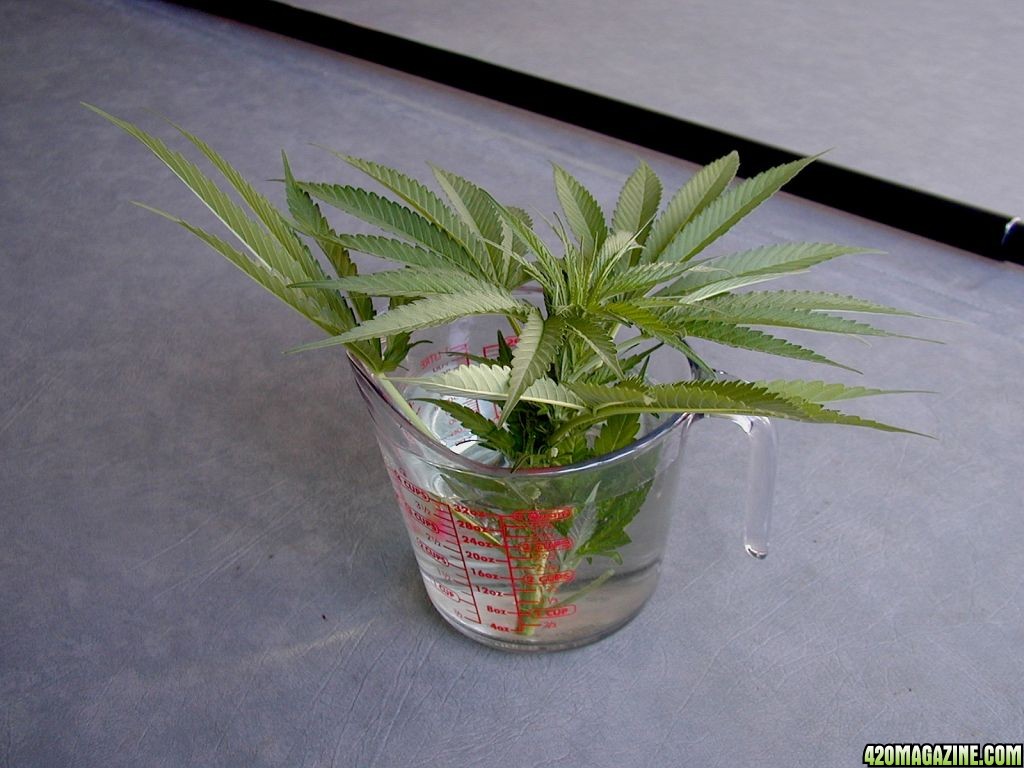
The Bulk of the fan leaves are cut away. You don't want any serious transpiration going on since our little friend has no roots to supply all that growth right now!
The main plant AFTER Topping
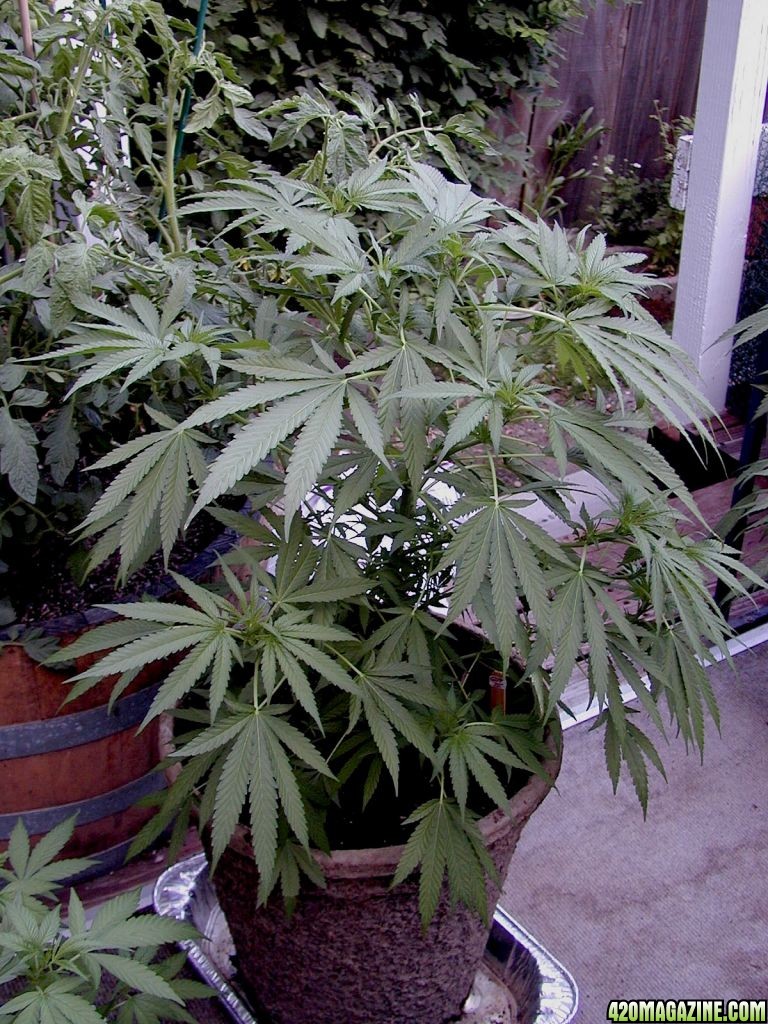
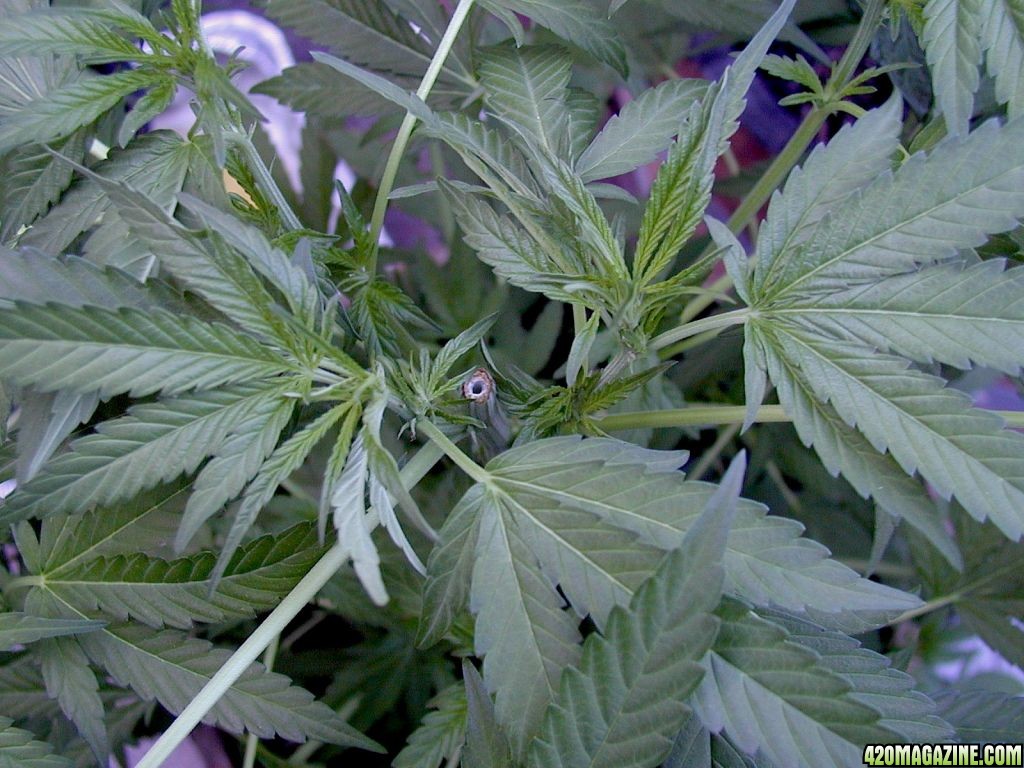
Two new growing tips will emerge on each side of this cut, and all branches below will also increase their development energy into additional growing tips
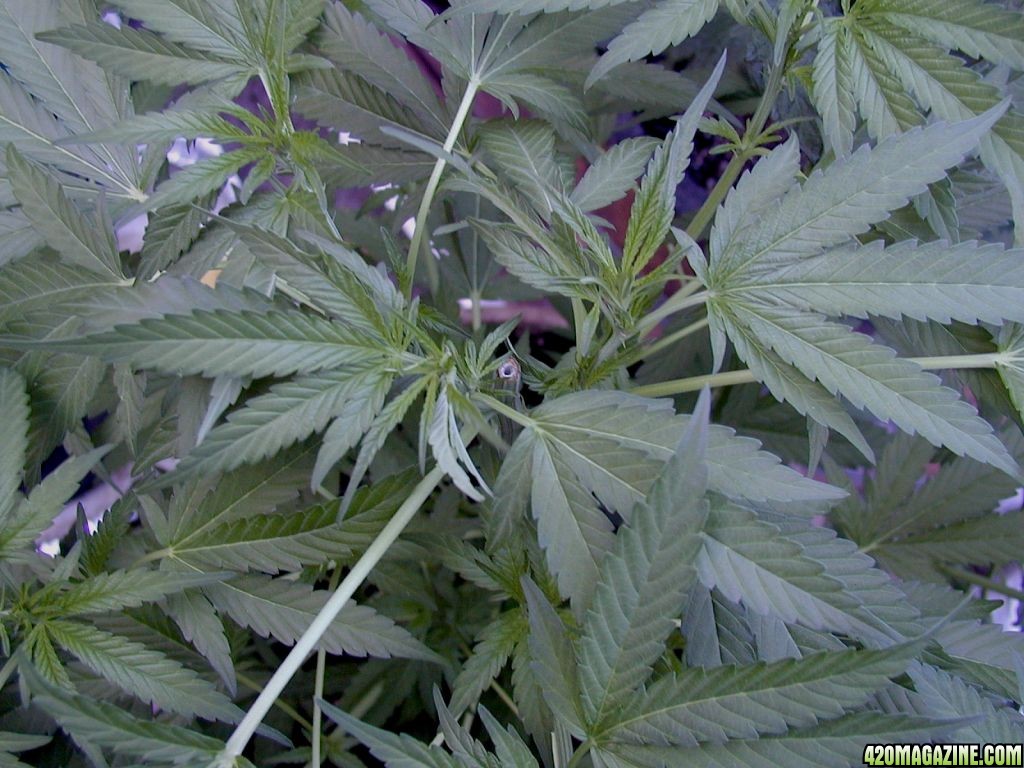
Now... Back to the Cloning!
Having travelled to the cloning machine room, the base of the growing tip is shown here. Notice the two nodes that will be UNDER the cloning collar and provide the primary source for future root development.
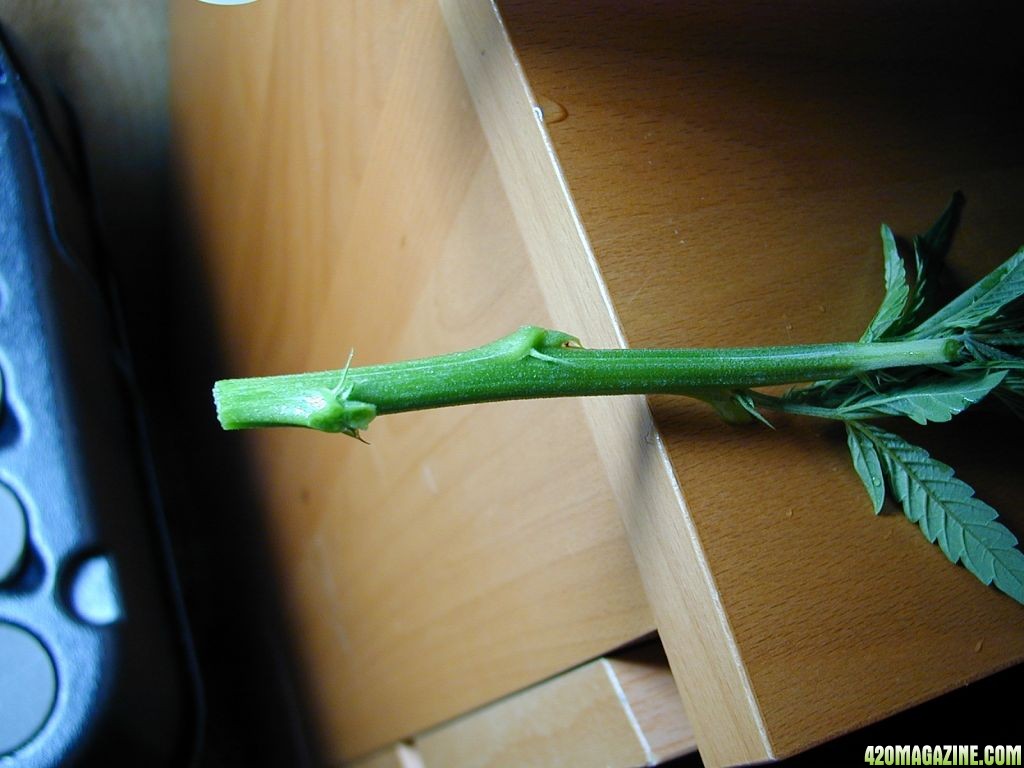
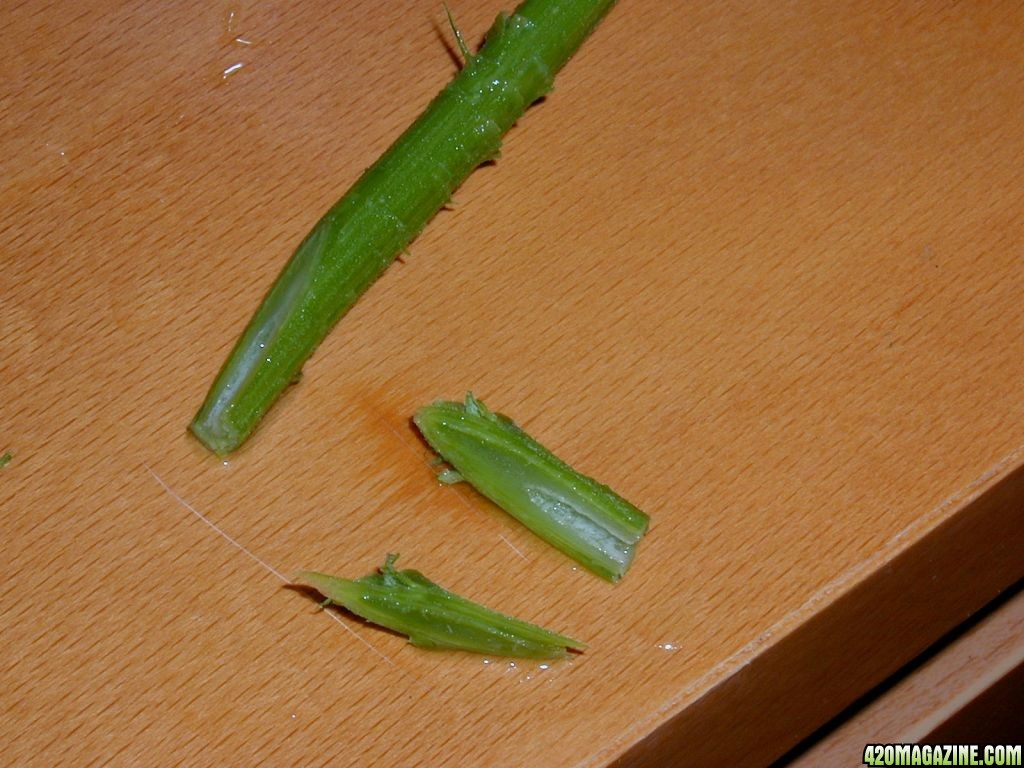
The next step is to take a sterilized razor blade or Xacto knife and slice through the nodes that will now be hosting the root growth when the time comes. By cutting half the node off, you expose more of the tissues to the cloning gel and cloning solution. After enough time has passed, the root spikes will emerge from these two nodes first. We have also put cuts down the stem and scraped them with the knife to expose more tissue around the nodes to the rooting hormone in the cloner's reservoir.
Next we pour a small amount of cloning gel into a narrow glass container to allow us to dip and swirl our cutting around in the gel. This is done to maximize exposure of all future root surfaces to the rooting hormone in the gel. Leave the cutting emersed in this gel for about 10 minutes.
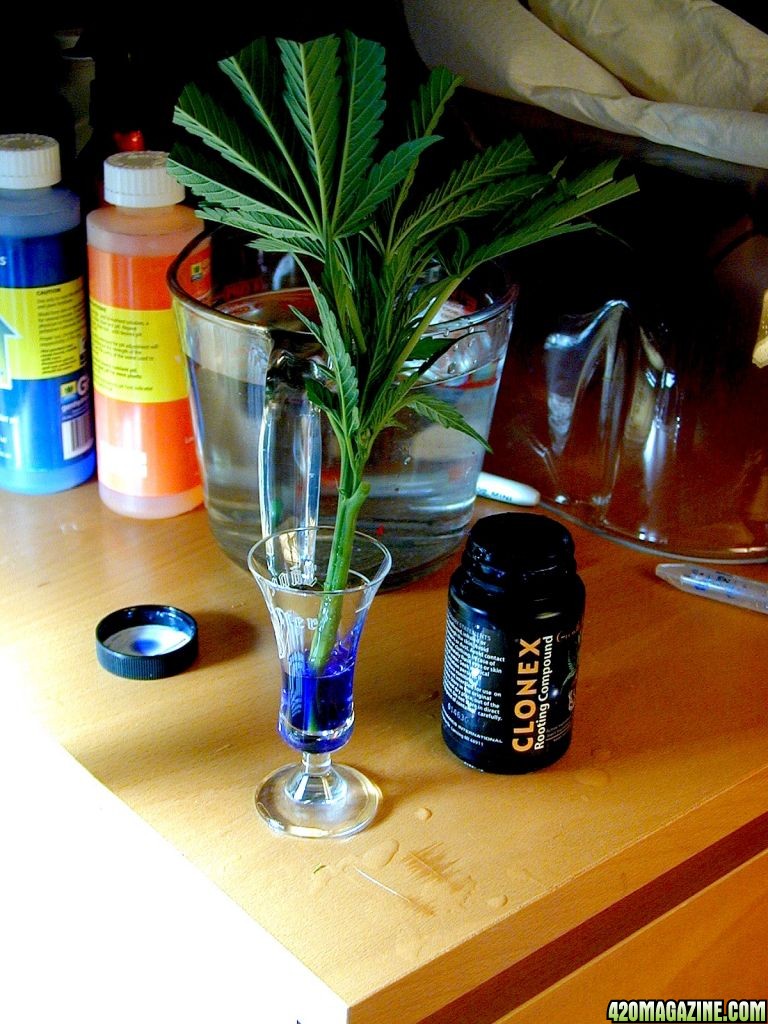
After the cutting has been thoroughly coated in the gel and allowed to rest in it, you can insert the cutting into a clean cloning collar and then into the cloner.
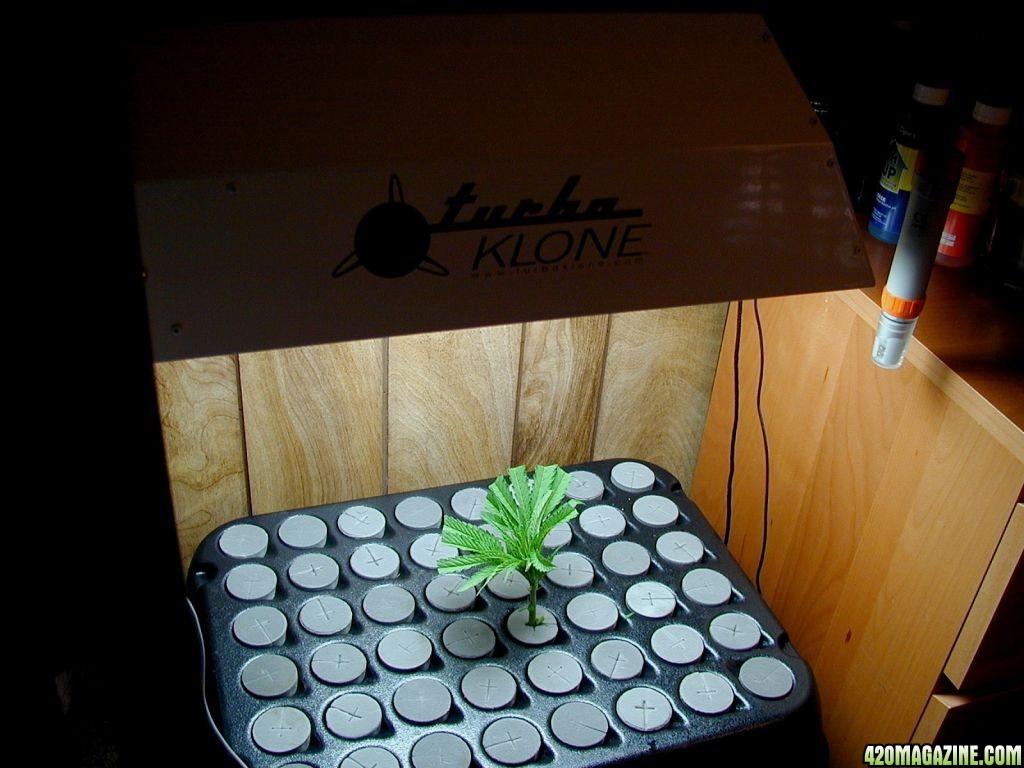
WAIT!
Do not turn on the cloner's pump just yet! You want to let the cutting sit for another 10 minutes to absorb more of the hormone into its tissues. Once that pump comes on, the bulk of the concetrated hormone in the gel will get washed off by your cloner's jets!
In addition to the cloning gel, we have added 180 ml (40 ml per gallon) of Clonex cloning solution to the 4.5 gallons of PH balanced water in the T48's reservoir. The more cuttings you place into the cloner, the more cloning gel will get washed into the water and mixed into it, thus adding to the nutrients being sprayed at your cutting's future root nodes! When running the T48 at capacity for example, there would be plenty of hormone in the water from all the washed off cloning gel. However, with smaller sessions like this, you need to boost your reservoir with additional cloning solution. We will also be adding 3.5 ml of Home and Garden "Roots Excelerator" to the reservoir as soon as root buds begin to appear. (Around day 8-10)
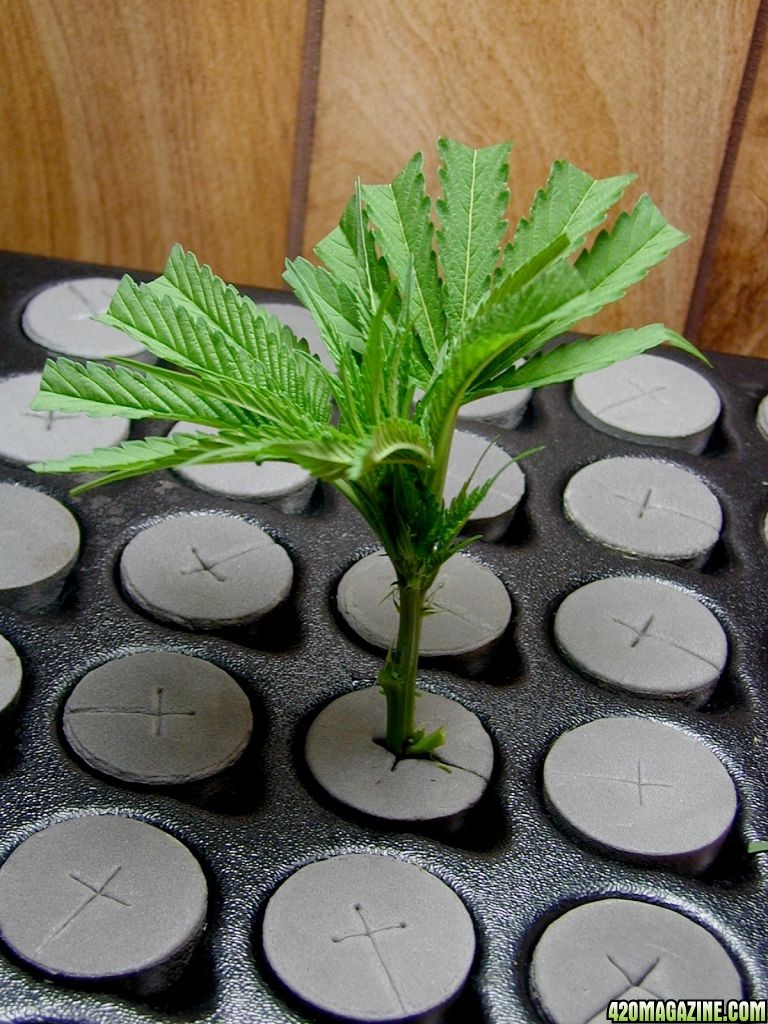
After the additional 10 minutes have elapsed, turn on the cloner's pump and activate your lighting system! Depending on your cloning location, you may need to place a humidity dome over the cutting for the first 24-48 hours to avoid it drying out. Don't subject the cutting to fans or any high amount of air circulation for the first few days either.
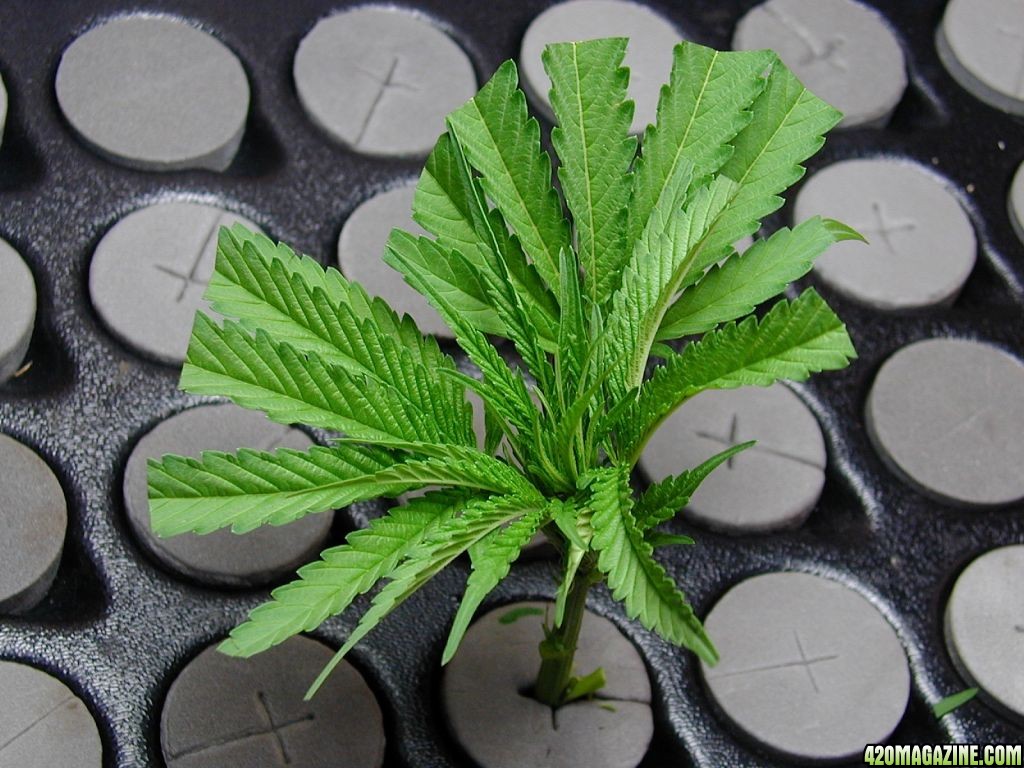
You're Done!
Well... Not really, but you are done for now!
It needs to be mentioned that growing tips can be a bit tougher to root than typical cuttings, so don't be discouraged if you need to run your cloner longer than the amount of time you normally do. The roots will come!
NOTE: If you are running a timer with your cloner, I suggest letting the pump run for at least 40 minutes on with a maximum off time of 2 minutes. This will give the cutting a good supply of water and cloning nutrients, while still allowing a little time for gas exchange during the off period. After the first 24 hours, you can reduce the pump on time to between 1-5 minutes, and increase the off time to around 4 minutes for the duration of the cloning session.
One more thing...
This lonely growing tip will soon have some company! Tomorrow we will be adding some Blue Cheese and GDP cuttings to the cloner and begin our next Turbo Klone run! You can follow along and watch our progress via our journal linked below in my sig!
Hope to see you there!
Cheers.
Navigation
Install the app
How to install the app on iOS
How To Use Progressive Web App aka PWA On 420 Magazine Forum
Note: This feature may not be available in some browsers.
More options
You are using an out of date browser. It may not display this or other websites correctly.
You should upgrade or use an alternative browser.
You should upgrade or use an alternative browser.
How to Top Your Plant and Clone the Tip!
- Author Curly Beaver
- Create date
Goldengoose7;1337873 said:
Blog entry information
More entries in Member Blogs
-
Is Cannabis Market Transforming into a Fast-Moving Consumer Goods (FMCG) Sector?Traditionally, the global cannabis consumption market was viewed mainly as a raw material...
-
The Rise of Skate Vape: A New Design Trend in Cannabis ConsumptionAs the cannabis vaping market continues to evolve, new product trends are emerging that push the...
-
Why the Vape with Screen is Gaining Popularity in Cannabis?The cannabis vaporizer industry is evolving rapidly, and one trend that has gained significant...
-
How to Choose the Right Cannabis Vape with A Screen for YouAs the cannabis industry rapidly evolves, the competition among suppliers has intensified...
-
Why Are More Cannabis Brands Introducing Vapes with Screen Display?As the cannabis industry rapidly evolves, the competition among suppliers has intensified...


