Making your own Lactobacillus Serum

The deeper I get into my studies of organic gardening, the more I find that we can do in our home gardens to greatly enhance our end results. Many of us know about compost teas, and have developed recipes for seedlings and clones, vegging plants, flowering plants and late flowering plants. We have learned to culture and grow the microorganisms that are beneficial to our plants, and we have learned to use AACT (actively aerated compost teas) to get the most water soluble nutrients as we can from our raw materials.

Compost teas only go so far however, and no matter the recipe, our teas still can not produce certain amino acids, auxins, vitamins and other things out of our raw materials. This requires many organic gardeners to still rely on products like Liquid Karma, Big Bloom, CalMag and others, to provide these vital elements to our plants. It turns out that only by fermentation, can many of the real nutrients be released from many of the raw materials we use in our teas and have in our kitchens. Fermentation unlocks these nutrients into a usable form, just like the microherd does when they ingest them, but faster... and under OUR control.

It turns out that this fermentation process must not be overlooked by the new organic farmer.

Fermented Plant Extracts open up many exciting things we can do for our plants, naturally. Over the next couple of months I plan on making my own Fish Hydrolysate from fish caught locally, Liquid Karma equivalent made from fruits and vegetables, a Calcium Phosphorus supplement, an Immunoboost inoculant, a Bloom Fertilizer and a Beneficial Indigenous Microorganisms(BIM) mix to add to my teas and waterings.

The first step to getting all this going is to create the main workhorse of the group, a Lactobacillus Serum that can be used in the creation all the others. This ridiculously easy to produce inoculant is very expensive in the stores, and it is just as ridiculously easy and cheap to produce.

Lactobacillus, and many other organisms can be attracted from the air by using a high carbohydrate wash. The beneficial organisms can be easily separated out, cultured and produced into a strong concentrate that has a long shelf life and will be diluted 20:1 for use in the garden, eventually at 1 tablespoon / gallon.

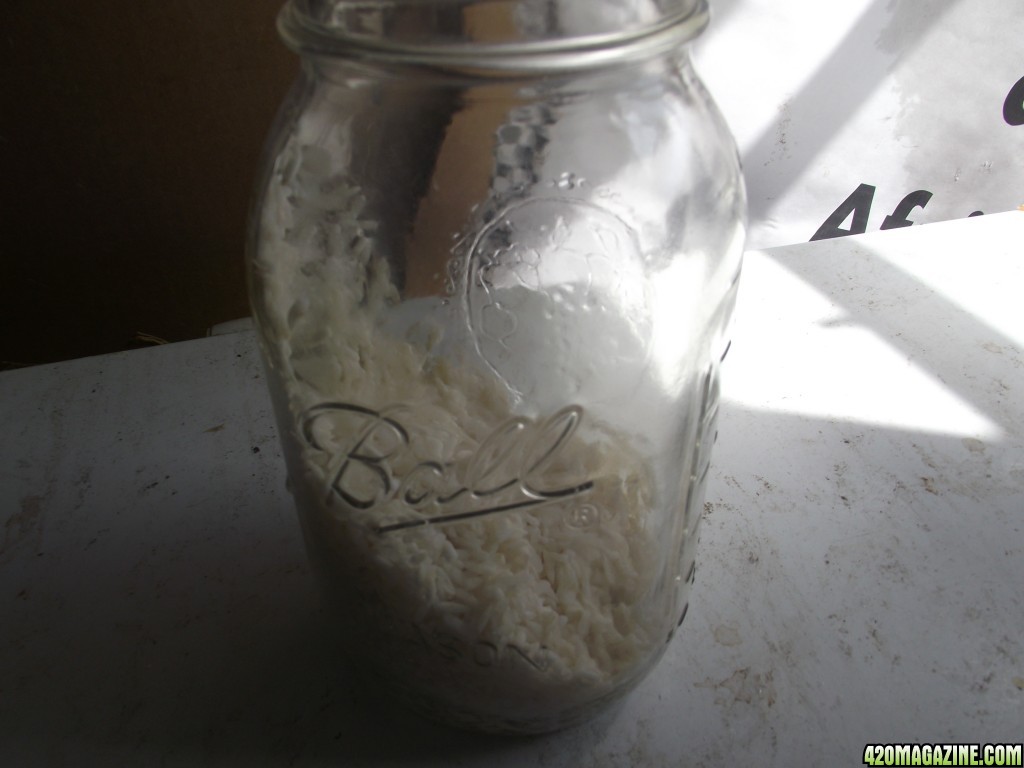
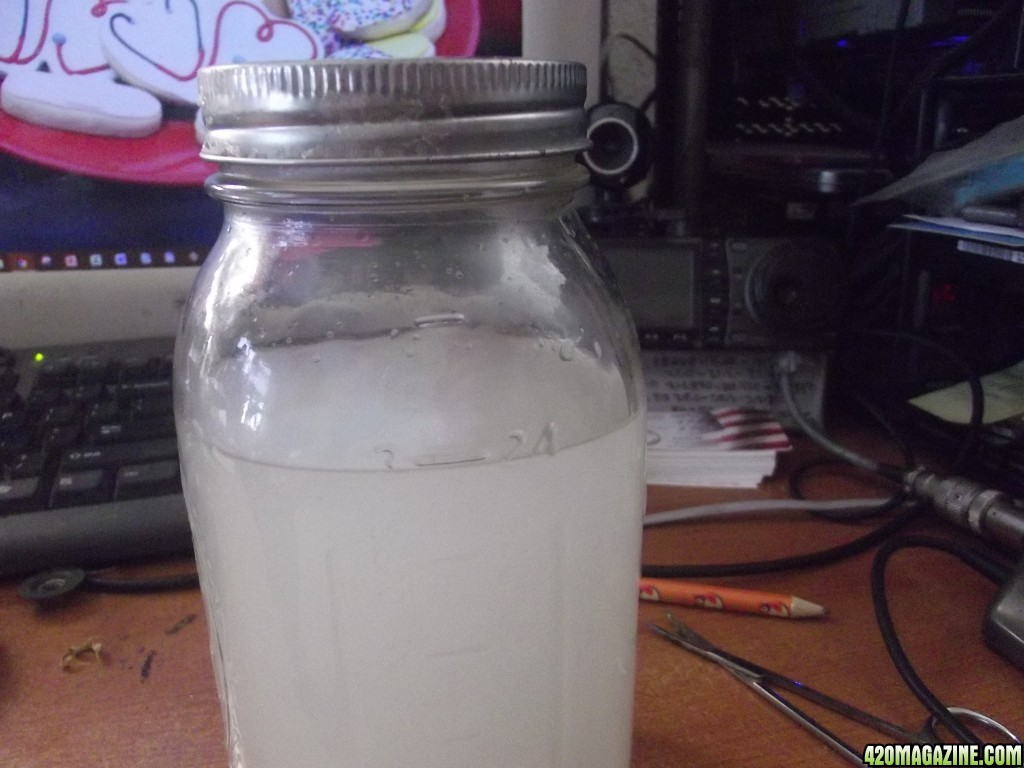
The first step is to create a high carbohydrate wash using any off the shelf white rice and pouring about a cup into a mason jar. Fill the jar with distilled water and lightly shake. Pour off the wash water into a separate container. Cook the rice for another project, for there is no waste in organic growing. This BIM gathering from the local forest using this cooked rice as an attractant will be covered later in another thread.
DSCF54873.JPG


DSCF54861.JPG

Now we will wait for layers to separate out, a top layer being floating debris, and the middle layer will be our microorganisms that we will pull out with a syringe. This will be put in a larger container, and 20 parts milk will be added. The milk will produce the Lactobacillus bacteria that we want, and will discourage other growth. I will document this process all the way, so you can see how I do it, with no lab equipment.

So now we wait.. 2-7 days for the first layers to appear. The jar has been loosely capped so as to allow pressure to escape, but to keep critters out. The next pictures should be of the layers that form.
 
DSCF54933.JPG


This picture is now 3 days into the experiment. Yesterday I thought I had caught movement in the jar in the corner of my eye... little specks of something going from the bottom to the layer of crud building on the top. Today it is now clear that I was not seeing things. If you stare at the jar for about a minute, it is now easy to catch a rapid movement of a particle or a bubble heading for the top. I am still not sure if I am seeing the 3 layers that will form, or if the bottom layer of sediment is going to eventually go away... we will learn together.
 
DSCF55012.JPG


Today is day 4 of the experiment and it appears that three layers have formed. Today is an overcast day and I am not seeing a lot of energy in the jar without sunlight falling on it, but yesterday there were big chunks of stuff heading up to the top and bubbles were forming. Overnight half of the bubbles have popped and some of the big chunks have fallen back down to the bottom.

My reading and my gut tells me that the bacillum that I am wanting are already in the middle layer and that I could drain this off now and move to the next step, but I am going to wait a few more days just to see what happens, just for the sake of the experiment.
 
This is very good showcase I use it myself + repz :smokin2::allgood:
 
check that cap on a regular basis. especially in the later steps. i have a batch of molasses/everything but the kitchen sink fermentation that locked up a lid this morning and i didn't have time to get it off. i'll be breaking out a punch and hammer when i get home lol. if it doesn't blow up. :laughtwo:

excellent experiment Em' :)

Thanks for reading and for the warning! Since you mentioned it my dear electrified gypsy, let's take the time right now to remind all of the readers of this thread:
it is incredibly important not to lock that lid down
, even now on step one. On step two if the lid is on tight, the jar will most likely blow up, making a huge stinky mess.

Using a Mason or Ball jar, if you just begin to screw the outer ring down, just to the point that it catches in the threads and you could lift the jar/lid/ring combination by the ring if you had to, there is about a 1/4 inch gap yet before it would be totally tightened down onto the seal ring that sits down on the rim of the jar. This loosely fitted ring keeps the lid in place, even if it burps a bit later on, but keeps it sealed most of the time, and mostly anaerobic as a result. Be warned however, as Gypsy said, sometimes a very active bubbling lid can tighten down on you... check regularly. This keeps the critters and air out, and the pressure can still release when it has to. Keep in mind that we are propagating a specific beneficial anaerobic bacteria in this process, the opposite of what we produce in an AACT.
 
DSCF55253.JPG


well, here is the jar today, after 7 days. It has been sitting under my veg lights for the last several days, and it seems that things are much like they were on day 4, except now there are longer strands of fungi growing in the middle layer. The top layer appears to be a curd of some kind, and the bottom layer is sediment. The middle layer however is just what we wanted, and now we are going to culture out the specific bacilli that we want.

Beware... this next step could make a mess. Do not do this among your pretty things.

This next step involves milk. It can be powdered milk, processed milk or better yet, raw milk straight from the cow. We are going to add a small amount of our middle layer to this milk, at a 10:1 ratio of milk to serum starter. Basically, I am going to take a gallon of milk and drink 1.6 cups of it. I am going to add back, 1.6 cups of serum starter. I am then going to split this between two gallon milk jugs, because there will be overflow if I do not.

Cover loosely. Cloth, mesh... do not cap. DO NOT SEAL. This will explode if you do.

You do want to keep this as anaerobic as possible however... if you have a one way valve you can use... use it. Other tricks to keep oxygen out of the mix is to sprinkle rice, wheat or barley bran on the top surface... it wont hurt the process at all.
This is going to get ugly. It is going to smell bad... at first. Put it in the garage. How do you know when it is done?

In about a week, curds will form on the top and a yellow liquid (lacto and whey) will form. This will be what we drain off and will be our pure lacto. It can be stored in the fridge, or it can be stabilized at room temperature by adding an equal weight of molasses.

I will provide pictures as I get them of the rest of this process and later we will talk a bit about uses for this stabilized lacto serum around the home and garden. We will also show how it can be used to turn raw fish into fish hydrolysate fertilizer, very much superior to the heat processed Fish Emulsion many of us now use.
 
I missed a step in my pictures, but I think I can describe it to you.

I took the middle layer in the mason jar using a meat injector syringe and added it 1:10 to a gallon of whole milk from the grocery store. I then poured out about a quarter of the gallon to account for any expansion, and I set it in my garage.

Twelve hours later after both of us worked hard to track down a foul odor, we realized that this milk needed to go all the way outside. It had developed very strange white spots all over in it, and it stunk to high heaven. We took it out in the backyard and put it in an old BBQ smoker just in case it exploded, even with the cap just loosely fitted onto the top.

That was Sunday, and today on Tuesday we can see that definite layers have formed. There is a hard curd at the top, something ugly at the bottom that no one wants to talk about, and in the middle, yellow liquid.

DSCF55384.JPG


I am going to let this go for a few more days, and then I will stop the process. The middle liquid will be poured/filtered off and added to an equal part of molasses. This will give the bacteria plenty to live on and will stabilize the serum for storage at room temperature, or it can be stored in this non sugared form in the fridge for several months. To use, the serum will be diluted 20:1 with pure water, and even more so to use as a foliar or odor killing spray.
 
Today it is day 6 since putting the bacteria in the milk. I have not seen much change over the last 3 days or so, there is just about the same amount of yellow liquid as there was then. I think at this temperature and these conditions, this process was done in 3 days.

DSCF55591.JPG


One change I will make next time is to use less of everything. The liquid produced from 1 quart of whole milk would have been sufficient for the vitamin water bottle amount of serum that I wanted to produce. After all, this stuff is going to be diluted 20:1 or more when it is used... If I had a farm, I would process a gallon of this stuff. My little bottle is going to last awhile in my tents.

So today we harvest our serum. It was poured through a screen (probably not necessary) and funneled into my water bottle to the point I marked because that corresponded to how much molasses I happened to have on hand today.

DSCF55601.JPG


An equal amount of molasses was added to the bottle, and it was well shaken.
Presto... room temperature stable Lactobacillus Serum. If I felt I needed to store more of this, it can be stored in the fridge without the molasses.

DSCF55611.JPG


What can we use Lactobacillus Serum for? I will be using it to break down organic materials for fertilizers, and it will be especially useful when making my homemade fish hydrolysate fertilizer.

Here are more uses for this stuff, copied from the web:

Lactobacillus bacteria used in Composting


One of the major workhorse beneficial indigenous micro-organism used in natural farming is lactobacillus. This particular beneficial microorganism is often used in composting for stopping foul odors associated with anaerobic decomposition. Lactic acid bacteria thrive and feed on the ammonia released in the decomposition normally associated with foul odors. So if you need to decompose or ferment wastes and stop foul odors, lactic acid bacteria is the specific bacteria to use. Its application in organic farming is enormous.


Lactobacillus used in Aquaculture


In aquaculture, one of the problem is related to water quality. Poor water quality stresses the fish which in turn stunts their growth and affects their health. This is very evident especially in high density and tank aquaculture. The ammonia produced through fish excretions pollute the water and stress the fish. Regular addition of lactobacillus beneficial microorganisms to the water, minimizes the ammonia problem, if not stopping it completely. It helps hasten or complete the denitrification by converting wastes into forms not harmful to fish.


Spraying a diluted solution of lactic acid bacteria serum on to the plant and soil helps plant growth and health. As it is applied to the soil or the leaves, these beneficial bacteria aid in the decomposition process, thus allowing more food to be available and assimilated by the plant.


Lactic acid bacteria is also known to produce enzymes and natural antibiotics aiding effective digestion and has antibacterial properties, including control of salmonella and e. coli. Farmers see an improvement in the general health of the plants and animals, better nutrient assimilation, feed conversion and certain toxins eliminations.
 
Lookin' pretty good there Fermenter Chick :)

I finally took a punch to mine the other day. Pressure is gone.. Still can't get the lid off though.. hmff

I'm using a slightly different approach with a wider spectrum of micro-organisms that includes a few Lactobacillus species. Probably generating a lot more CO2. That lid may never come off again. :laughtwo:

Great stuff Em'. Got me all excited and ready to go home and play lol. Chicken Guano first!

:high-five:
 
Hi Em, I am a hydro grower struggling to find a secondary source of calcium. I tried to use calcium carbonate mixed with water (epic fail), I then tried to extract the calcium from the carbonate with vinegar to make calcium acetate (another epic fail), but then @stoneotter linked me to this thread. Great read BTW, and I am an avid user of ACT made with Great White and a bunch of other stuff. Anyways, is there an application where this lacto-bacilus can produce a calcium that can be used in hydro, that also won't screw with my PH? Aside from majorly stressing out my whole crop, I also wasted about a hundred gallons of RO, so want to make sure I cover all my bases before committing to a new strategy. I realize you're (primarily?) a soil/organic grower, but I am trying to incorporate as much organic inputs into my grow as is feasible while still adhering to the hydro methodology of food delivery because I mix everything from salts and formulate my nutes from the ground up and am slowly inching my way towards higher brix and balanced leaf sap PH. It's a process that involves slowly adjusting various PPM of elements to work out all the various minor deficiencies I'm getting while also slowly incorporating various organic products in hopes of growing reliably healthy plants that will have higher nutrient density.
 
Hi Em, I am a hydro grower struggling to find a secondary source of calcium. I tried to use calcium carbonate mixed with water (epic fail), I then tried to extract the calcium from the carbonate with vinegar to make calcium acetate (another epic fail), but then @stoneotter linked me to this thread. Great read BTW, and I am an avid user of ACT made with Great White and a bunch of other stuff. Anyways, is there an application where this lacto-bacilus can produce a calcium that can be used in hydro, that also won't screw with my PH? Aside from majorly stressing out my whole crop, I also wasted about a hundred gallons of RO, so want to make sure I cover all my bases before committing to a new strategy. I realize you're (primarily?) a soil/organic grower, but I am trying to incorporate as much organic inputs into my grow as is feasible while still adhering to the hydro methodology of food delivery because I mix everything from salts and formulate my nutes from the ground up and am slowly inching my way towards higher brix and balanced leaf sap PH. It's a process that involves slowly adjusting various PPM of elements to work out all the various minor deficiencies I'm getting while also slowly incorporating various organic products in hopes of growing reliably healthy plants that will have higher nutrient density.
Been fairly deep into the calcium research myself and where my trail is currently at is Biomin complexed organic cal 1-0-0. They also make other forms of cal in smaller bottles, but haven’t made a buying decision yet. Spoke to their reps about viability for dwc and solubility in reservoirs and they gave me the thumbs up. Also, another great option (not sure on organic status) is Nectar for the Gods One Shot. Curious about other inputs as my plants are loving cal carbonate but it’s a PIA.
 
Been fairly deep into the calcium research myself and where my trail is currently at is Biomin complexed organic cal 1-0-0. They also make other forms of cal in smaller bottles, but haven’t made a buying decision yet. Spoke to their reps about viability for dwc and solubility in reservoirs and they gave me the thumbs up. Also, another great option (not sure on organic status) is Nectar for the Gods One Shot. Curious about other inputs as my plants are loving cal carbonate but it’s a PIA.

I have Biomin chelated cal with 15% cal and 5% organic N (amino). It is not soluble and available to the roots in my experience. I just mixed it into a foliar spray and only gave my first application 2 days ago. So if you're using it in DWC, first ensure that you have "enough" Ca supplied via Calcium Nitrate, then try to reach your targets after with the Biomin, but as it is listed on CustomHydro's PAGE, it is meant for foliar or soil amending. I had to endure some Cal defs a few months ago to learn that lesson. I personally don't want to risk another deficiency, so I bit the bullet and adopted the practice of foliar spraying. FWIW, after about 6 years of growing, I'm now learning how to foliar. It's new and intimidating, lol.
 
Hi Em, I am a hydro grower struggling to find a secondary source of calcium. I tried to use calcium carbonate mixed with water (epic fail), I then tried to extract the calcium from the carbonate with vinegar to make calcium acetate (another epic fail), but then @stoneotter linked me to this thread. Great read BTW, and I am an avid user of ACT made with Great White and a bunch of other stuff. Anyways, is there an application where this lacto-bacilus can produce a calcium that can be used in hydro, that also won't screw with my PH? Aside from majorly stressing out my whole crop, I also wasted about a hundred gallons of RO, so want to make sure I cover all my bases before committing to a new strategy. I realize you're (primarily?) a soil/organic grower, but I am trying to incorporate as much organic inputs into my grow as is feasible while still adhering to the hydro methodology of food delivery because I mix everything from salts and formulate my nutes from the ground up and am slowly inching my way towards higher brix and balanced leaf sap PH. It's a process that involves slowly adjusting various PPM of elements to work out all the various minor deficiencies I'm getting while also slowly incorporating various organic products in hopes of growing reliably healthy plants that will have higher nutrient density.
Have you seen my tutorial on making calcium carbonate from eggshells and organic vinegar? I think this fermentation will be the answer that you seek.
 
I have Biomin chelated cal with 15% cal and 5% organic N (amino). It is not soluble and available to the roots in my experience. I just mixed it into a foliar spray and only gave my first application 2 days ago. So if you're using it in DWC, first ensure that you have "enough" Ca supplied via Calcium Nitrate, then try to reach your targets after with the Biomin, but as it is listed on CustomHydro's PAGE, it is meant for foliar or soil amending. I had to endure some Cal defs a few months ago to learn that lesson. I personally don't want to risk another deficiency, so I bit the bullet and adopted the practice of foliar spraying. FWIW, after about 6 years of growing, I'm now learning how to foliar. It's new and intimidating, lol.
Yep, they’re all designed for foliar use from what I can tell. I just called the folks at biomin and described the use case, what I’ve been told (not always reality) is that the 1-0-0 pictured below will satisfy what I’m after. Problem is I can only find it in 5 gal buckets :straightface:

78A063AD-8322-4D0B-989C-100487659BE0.jpeg


@Emilya i have no doubts your recipe works and works well, my issue is a wife who will go nuts if I introduce yet another (what she considers) bad smell into our house. LOL that’s the reason for my search elsewhere, just as an fyi.
 
Have you seen my tutorial on making calcium carbonate from eggshells and organic vinegar? I think this fermentation will be the answer that you seek.

I've not read the thread, but is it where you mix egg shells with vinegar and convert that into calcium acetate? If yes, it is still a strong base.
 
Back
Top Bottom