DIY fabric grow pots Cannabags made from Eco Felt

CannaBags_fabric_grow_pots.jpg


This DIY will show you how to make your own Fabric Grow pots using ECO FELT. I call them "CannaBags" (credit to member Rainstacks for the name idea).:cheesygrinsmiley: Eco felt is made from recycled plastic bottles. This is a very sturdy grow pot and is washable! You will have much better aeration to your root system and good even water absorption and drainage.
The DIY is for an approximate 7 gallon grow pot. You can make them as large or smaller as you like by adjusting your measurements accordingly. Just be sure to cut the round bottom the same size and the opening.
I will not be instructing people how to sew here, I am taking for granted you already know the basics of sewing/cutting/measuring and how to use a sewing machine.
Here are the materials to start with, of course you need scissors, pins, measuring tape and a black marker is helpful:

materials.jpg


One length of Eco felt cut 9.5" x 26.5"
One 9" Eco felt circle. I used a styrofoam plastic plate which was 9" and cut about 1/2" away from the circle I drew on the fabric with a black marker.
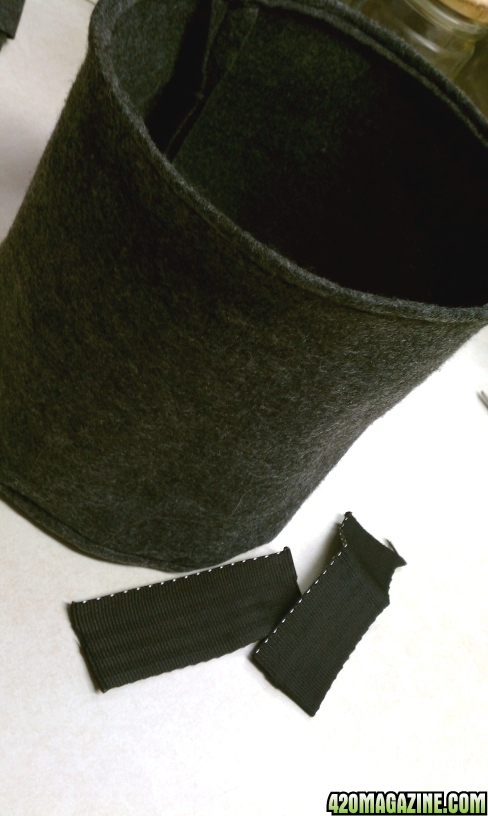
Two 5" lengths of strapping material. You can get this from old seatbelts, backpack bags or hunting straps. Look around, you'll see them used in all kinds of things. ;-)
Black nylon thread. Important to use Nylon as it won't deteriorate with moisture like polyester thread would.
Bias tape (black would be preferred, all I had was white) is optional. I used it on my top edge as you will see later just to give a little extra anti-stretch to the pot.

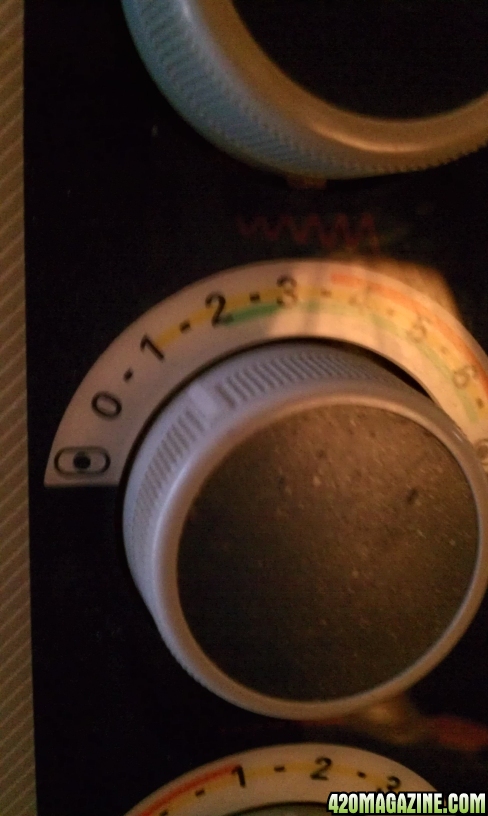
Set your stitch length at wider spacing than normal. I have my machine set at "1". That way the stitching won't be too tight and wind up cutting too much on the material later.
Machine_setting.jpg


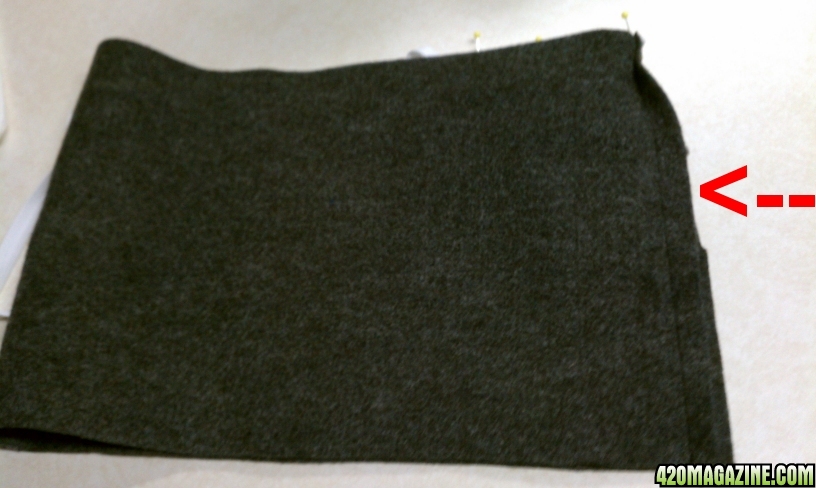
Now sew the edges together with 1/2" seam. 5/8" is usually the normal is sewing, but I wanted to come out even numbered on fitting pieces together. ;-)
Sew_side_seam.jpg


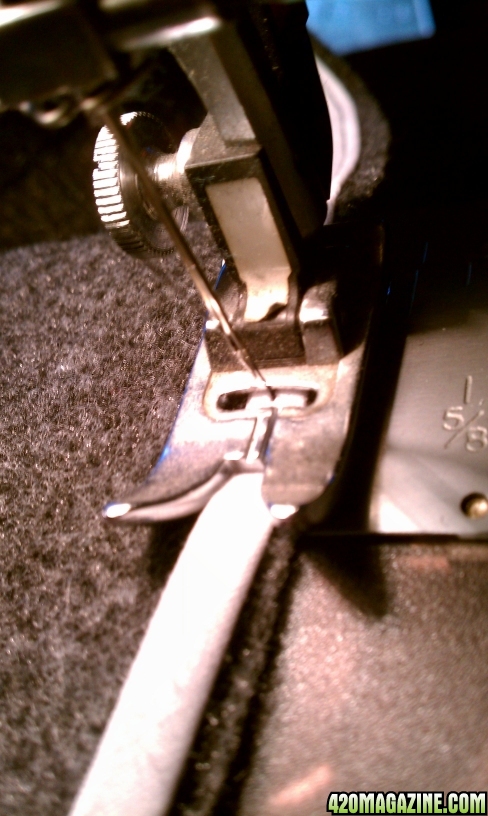
This step is optional, I wanted a good strong rim on the pot so it will last through many uses. I folded the bias tape in half and pinned it to the edge of the top about 1/4" down from the edge. Then sewed it in place.
When that is done, fold the top down over the bias tape about 1/2" and sew within about 1/4" of the edge so you are sewing onto the bias tape too. If you choose not to use the bias tape, just fold over about 1/2" and sew it 1/4" from the top. Make sure you are sewing the fold to the INSIDE of the pot.
Sew_bias_tape.jpg


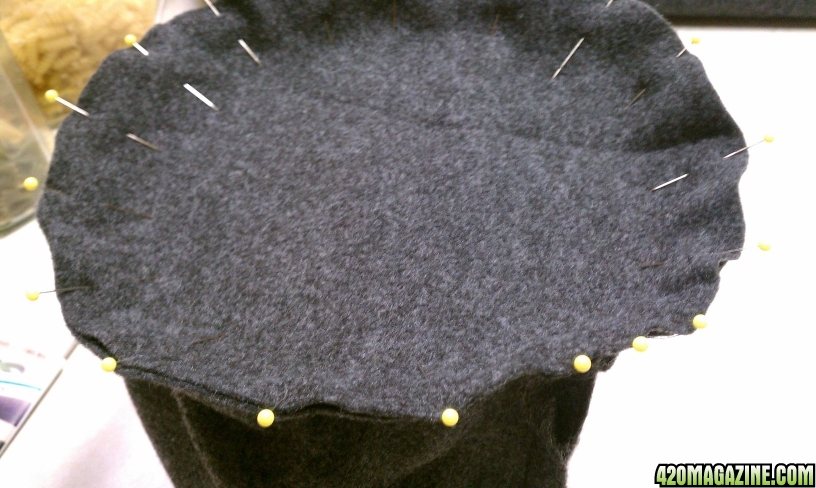
Now pin the bottom circle to the bottom of the pot. Make sure you have the seam outside when you do this and pin the circle inside the opening. You may have to work it a little to get it even so you won't have ripples. Sew it carefully making sure to turn your fabric with the circle and you will do fine.
Pin_bottom.jpg


Then sew it in place with about 1/2" seam.

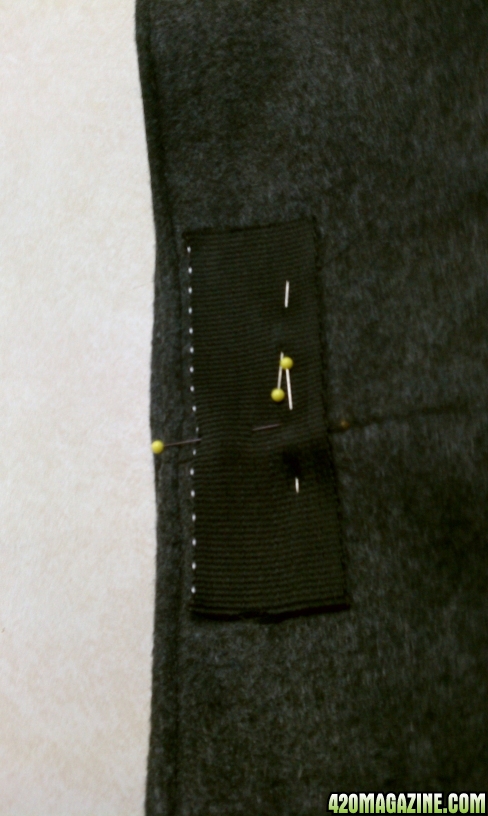
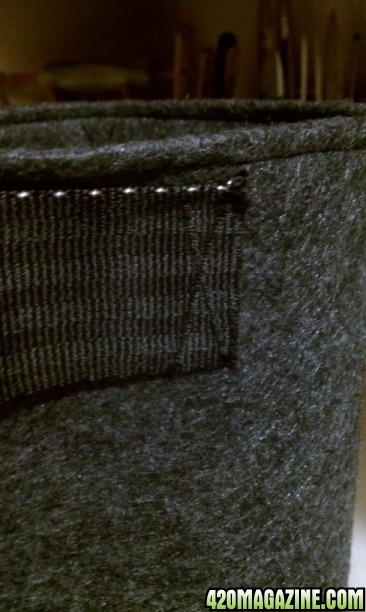
Now you are ready for the handles. Pin the handles in place on the seam side of the pot (outside) and then sew an "X" on each end of the handle. Then repeat the process with the remaining strap on the other side of the pot. These will make it good and strong for lifting.
Ready_for_handles.jpg

Pin_handle.jpg

Grow_Pot_handle.jpg


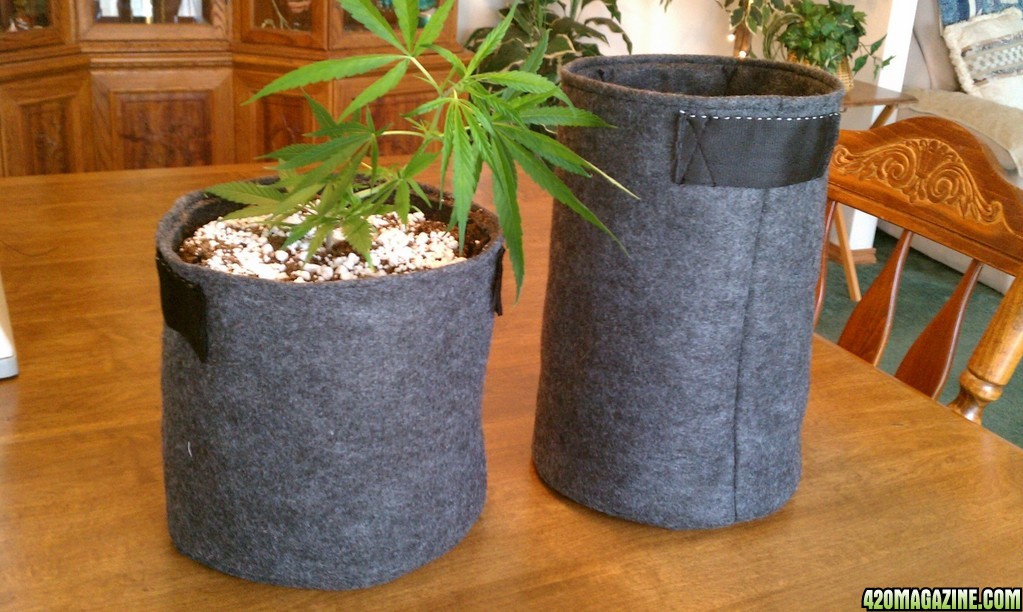
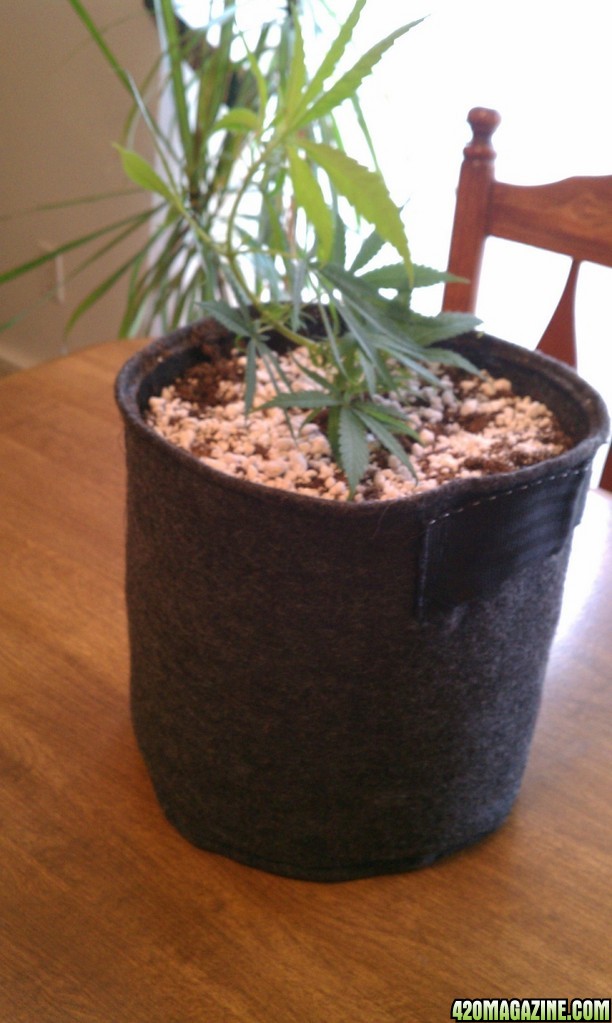
Your eco friendly Cannabag grow pot is now complete!
CannaBag_fabric_grow_pot.jpg


Questions or comments are welcome and please let me know if there is anything I need to add or correct. I did this in a bit of a rush today. Enjoy!
 
CannaBags_fabric_grow_pots.jpg


This DIY will show you how to make your own Fabric Grow pots using ECO FELT. I call them "CannaBags" (credit to member Rainstacks for the name idea).:cheesygrinsmiley: Eco felt is made from recycled plastic bottles. This is a very sturdy grow pot and is washable! You will have much better aeration to your root system and good even water absorption and drainage.
The DIY is for an approximate 7 gallon grow pot. You can make them as large or smaller as you like by adjusting your measurements accordingly. Just be sure to cut the round bottom the same size and the opening.
I will not be instructing people how to sew here, I am taking for granted you already know the basics of sewing/cutting/measuring and how to use a sewing machine.
Here are the materials to start with, of course you need scissors, pins, measuring tape and a black marker is helpful:

materials.jpg


One length of Eco felt cut 9.5" x 13.5"
One 9" Eco felt circle. I used a styrofoam plastic plate which was 9" and cut about 1/2" away from the circle I drew on the fabric with a black marker.
Two 5" lengths of strapping material. You can get this from old seatbelts, backpack bags or hunting straps. Look around, you'll see them used in all kinds of things. ;-)
Black nylon thread. Important to use Nylon as it won't deteriorate with moisture like polyester thread would.
Bias tape (black would be preferred, all I had was white) is optional. I used it on my top edge as you will see later just to give a little extra anti-stretch to the pot.

Set your stitch length at wider spacing than normal. I have my machine set at "1". That way the stitching won't be too tight and wind up cutting too much on the material later.
Machine_setting.jpg


Now sew the edges together with 1/2" seam. 5/8" is usually the normal is sewing, but I wanted to come out even numbered on fitting pieces together. ;-)
Sew_side_seam.jpg


This step is optional, I wanted a good strong rim on the pot so it will last through many uses. I folded the bias tape in half and pinned it to the edge of the top about 1/4" down from the edge. Then sewed it in place.
When that is done, fold the top down over the bias tape about 1/2" and sew within about 1/4" of the edge so you are sewing onto the bias tape too. If you choose not to use the bias tape, just fold over about 1/2" and sew it 1/4" from the top. Make sure you are sewing the fold to the INSIDE of the pot.
Sew_bias_tape.jpg


Now pin the bottom circle to the bottom of the pot. Make sure you have the seam outside when you do this and pin the circle inside the opening. You may have to work it a little to get it even so you won't have ripples. Sew it carefully making sure to turn your fabric with the circle and you will do fine.
Pin_bottom.jpg


Then sew it in place with about 1/2" seam.

Now you are ready for the handles. Pin the handles in place on the seam side of the pot (outside) and then sew an "X" on each end of the handle. This will make it good and strong.
Ready_for_handles.jpg

Pin_handle.jpg

Grow_Pot_handle.jpg


Your eco friendly Cannabag grow pot is now complete!
CannaBag_fabric_grow_pot.jpg


Questions or comments are welcome and please let me know if there is anything I need to add or correct. I did this in a bit of a rush today. Enjoy!

Sweet!! That's absolutely sharp and the DIY you made is very much appreciated; your membership in the community is greatly appreciated by at least me and probably by many more...thought you should "hear" that. Hats off and + reps sent.
 
As always Canna, totally impressed with your resourcefulness and ingenuity! Thanks for sharing!
 
Sweet!! That's absolutely sharp and the DIY you made is very much appreciated; your membership in the community is greatly appreciated by at least me and probably by many more...thought you should "hear" that. Hats off and + reps sent.
Thanks Jamthe3, don't go to making me blush now..ya hear? :cheesygrinsmiley:
I appreciate the community immensely, and If I can do something to give back.... well...yeah. :high-five:

As always Canna, totally impressed with your resourcefulness and ingenuity! Thanks for sharing!
Thanks TanR! Always good to see you around. :-) I might even make some really small ones for seedlings....just to have my grow areas color coordinated. :biglaugh: (and of course be good for the plants too)
 
This sounds great and I am sicking my wife on it as we speak. The only problem that I see is your measurements. Forgive me if I am mistaken. I measured my pots that were sold as 7 gallon . They were 12" tall and 43" around. So with the seam allowances I see the need for 13"x44". That and a 14" circle. Hancock fabric has acrylic felt on sale now for $2.99 a yard. That's 72" wide fabric. I need 8 of these. So 3 yards of felt will cost me $9.00. My wife has all the strapping we will need. The thread as well. If the bias tape is $11.00 then it will cost me $20.00 for 8, 7 gallon pots. The local hydro store has them for $6.60 ea. That would set me back $52.80 for the 8. Not a bad savings. Thanks for the inspiration.
 
This sounds great and I am sicking my wife on it as we speak. The only problem that I see is your measurements. Forgive me if I am mistaken. I measured my pots that were sold as 7 gallon . They were 12" tall and 43" around. So with the seam allowances I see the need for 13"x44". That and a 14" circle. Hancock fabric has acrylic felt on sale now for $2.99 a yard. That's 72" wide fabric. I need 8 of these. So 3 yards of felt will cost me $9.00. My wife has all the strapping we will need. The thread as well. If the bias tape is $11.00 then it will cost me $20.00 for 8, 7 gallon pots. The local hydro store has them for $6.60 ea. That would set me back $52.80 for the 8. Not a bad savings. Thanks for the inspiration.

Thanks MacEFL! I'm going to be checking those measurements in the next couple of days to be sure I have them exact. I hope your wife has fun making them as I did. The strapping material can be a bit different, not as wide. I'll be doing some of those up over the weekend and post the pics.
The bias tape price seems high to me. It is not a necessary item, I just did it for a little more oomph to the edge. :-)
Glad to inspire!
:circle-of-love:
 
I didn't look for the price on the tape. Just rounded up. My wife found 8 yards of black tape and 4 of purple. Actually, just had a bright! She has four colors of tape. I'll have her make 2 of each color. I grow 2 plants each of different strains and this would be a foolproof way of keeping track of them. No more losing the plastic tags. And she just said that she can machine embroider a roman numeral 1 and 2 to keep track of each plant as well as strain. Will probably make a set of 3 gal and a set of 7. Same color schemes. Hell, now my wife wants to advertise custom pots. Using HERB.IQ and making sets of pots it would be impossible to mix up strains or individual plants. I'm sure that I am not the only one to finish trans planting and found 2 tags on the bench. This way, put the plant with the purple 3 gallon into the purple 7 gallon. And numbered appropriately. I'll post a pic or 2 when they are finished.
 
LOL You two are having so much fun with this! If she really wants to get creative, she can buy some stick on felt pieces and cut the name of the strain out and stick em' to the pots....... I had actually thought of doing that myself. I love the different color tape ideas too!:circle-of-love:
 
OK, I just did some calculations and I think that my dimensions are off. Well, kind of. Using my pots and a online volume calculator I came up with just over 9 gallons. Using 13x12 I came up with just under 7. Maybe my pots are 9 gallon? They are tapered a little top to bottom but I didn't think that much. Any way, I guess it doesn't really matter how much they hold other than how much soil to buy. Once they are made I'll post pics and dimensions.
 
OK, I just did some calculations and I think that my dimensions are off. Well, kind of. Using my pots and a online volume calculator I came up with just over 9 gallons. Using 13x12 I came up with just under 7. Maybe my pots are 9 gallon? They are tapered a little top to bottom but I didn't think that much. Any way, I guess it doesn't really matter how much they hold other than how much soil to buy. Once they are made I'll post pics and dimensions.
Great MacEFL, the calculations on gallons of mine were estimated online too. I couldn't be sure exactly, but using an online calculator came to approximately 7 gallons. Like you said, it doesn't really matter that much and measurements can be adjusted according to the size you want, just be sure the bottom round fits right. Too big is okay, it can be cut or adjusted. :thumb:
 
Theyre cheap enuff to buy here

Yes, fairly cheap around here as well. But, For two sets It would cost me a hundred bucks or so. I can make the same 2 set's, the way I want, for less than $30.00. That's a couple bottles of supplements I wouldn't otherwise afford as easily.
 
OK, I just did some calculations and I think that my dimensions are off. Well, kind of. Using my pots and a online volume calculator I came up with just over 9 gallons. Using 13x12 I came up with just under 7. Maybe my pots are 9 gallon? They are tapered a little top to bottom but I didn't think that much. Any way, I guess it doesn't really matter how much they hold other than how much soil to buy. Once they are made I'll post pics and dimensions.
Just out of curiosity MacEFL, did you do your calculation based on US liquid gallons or US dry? Mine was estimated on US dry gallons. :-)
 
Just out of curiosity MacEFL, did you do your calculation based on US liquid gallons or US dry? Mine was estimated on US dry gallons. :-)

Not sure. I just used the first calculator I found online.

I looked at Geo Pots web site and they said that they use "bonded polyester thread that will withstand constant moisture and UV exposure". You spec'd nylon over poly. No offense bud but I'm going to go with the poly.

PS I just looked at a site called "the thread exchange" Here is a C/P on poly thread.

About Polyester Thread--Polyester thread looks, feels, and performs like nylon thread. But, there is one important difference - polyester thread has superior resistance to sunlight (UV), mildew, and abrasion, This makes polyester thread the first choice for sewing, binding or wrapping anything that is consistently used outdoors or in moist areas. For example, you can use either nylon or polyester thread for automobile upholstery. But if your car is a convertible that is frequently driven with the top down, then you should use polyester thread.
No offense taken, these things are good to know. I will probably change the instructions, if I can, to use polyester thread with the reasoning. Thanks for the information, it's always great to have another person completing a new project to give ideas from another perspective. I have some more in progress today with different style handles, the strapping material is not as wide. I'll post a pic when I'm finished. ;-)
Have fun!:circle-of-love:
 
Unfortunately it's too late to edit the first post, and ya know...I went to look at thread I used and it is indeed Polyester. I must have been thinking opposite when I typed that in for the DIY. :oops: :laughtwo:

Did you wife find different colors in the material? Our fabric shop only had the one color of gray available, it would be great to have color choices as you are doing.:thumb:
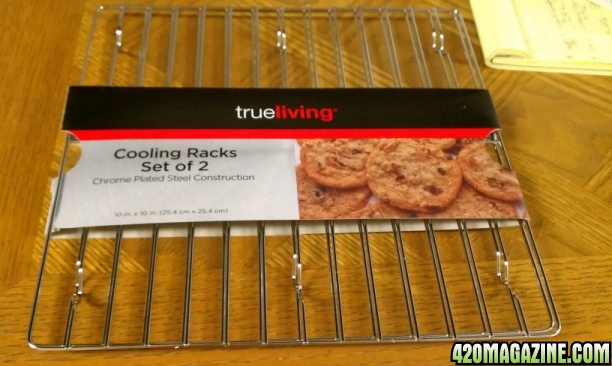
One of the questions that has come up on fabric pots is getting added air circulation under them, I bought some cheapy cooling racks at my local dollar store to set the pots on so the bottoms can get more air circulation and drainage just for added measure:
Racks1.jpg

Have fun!
 
Back
Top Bottom